Docs

Documentation versions (currently viewingVaadin 24)

Run a Project

You can run and debug your Vaadin application in Visual Studio Code as you would any other Java application. Open the main Application class. Then select either Run Java or Debug Java in the upper-right corner indicated by a red circle in this screenshot:

Run Java button in VS Code

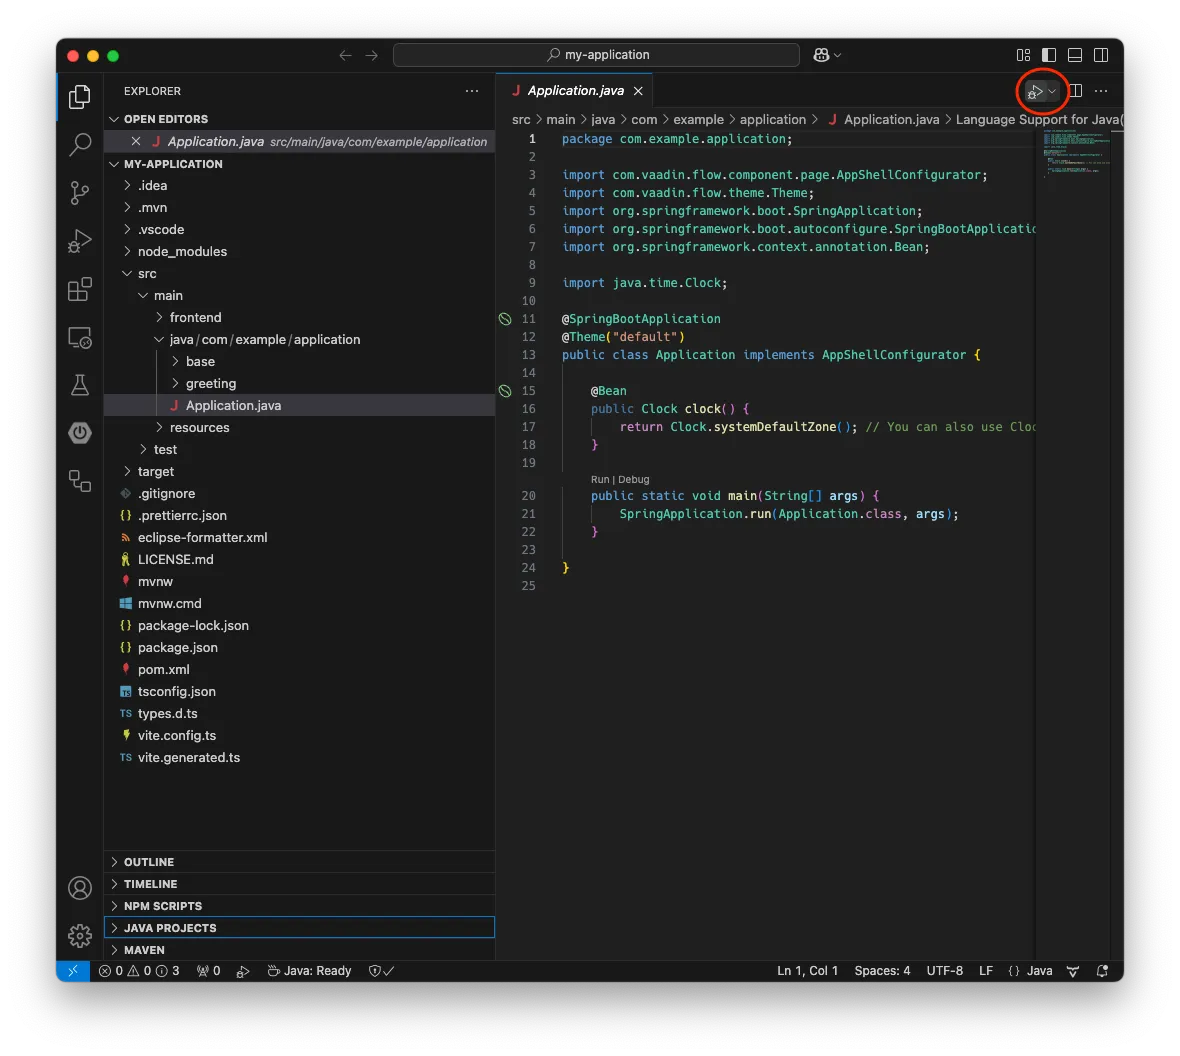
The application starts up and you’ll be able to access it at http://localhost:8080. Hot deploy of the frontend files is enabled automatically. However, to enable Java hotswap, you have to take some additional actions.

Enabling Hotswap Using Vaadin Copilot

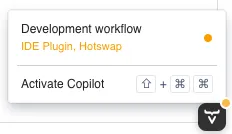
The easiest way of enabling hotswap is to use Vaadin Copilot. Start your application, open it in a browser and move your mouse pointer over the Copilot button at the bottom-right corner:

Vaadin Copilot menu visible in a browser
Important
The Copilot button is only available when the application is running in development mode. It is not available in production mode.

Now click Development workflow. Your browser should look something like this:

Vaadin Copilot development workflow dialog

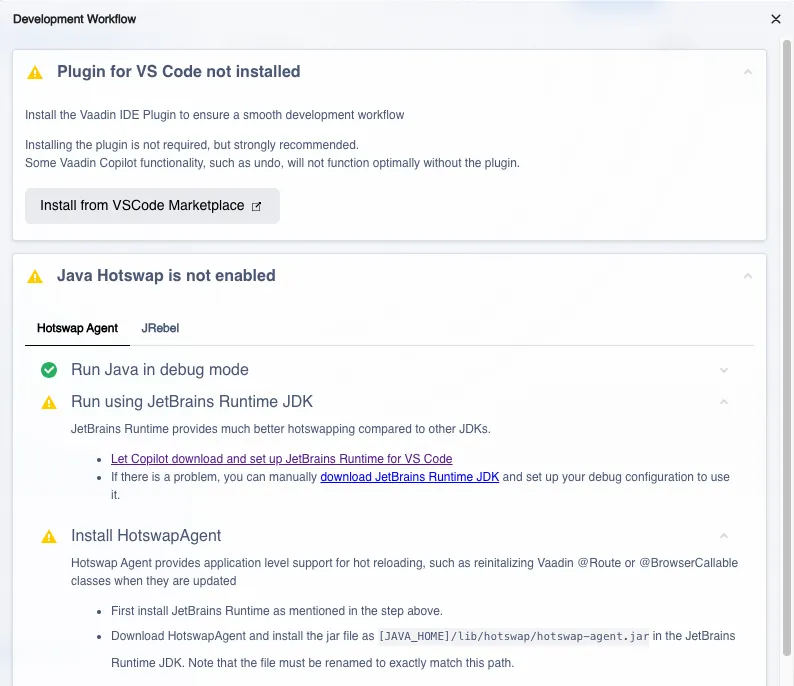
Copilot guides you through the steps needed to optimize your development workflow. This includes installing the Visual Studio Code extension and setting up hotswap.

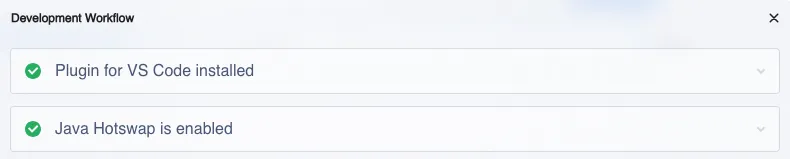
When you have completed all the steps, you can verify that everything is working. Start your application with hotswap enabled, and open it in a browser. Then select Copilot  Development workflow again. All the checkmarks should be green:

Vaadin Copilot verifying that Java Hotswap is enabled

Enabling Hotswap Manually

Enabling hotswap manually consists of three steps:

  1. Download and install JetBrains Runtime;

  2. Download HotswapAgent and install it into JetBrains Runtime; and

  3. Create a launch configuration for VS Code that runs the application with JetBrain Runtime and additional JVM parameters.

JetBrains Runtime

You can download the latest version from the JetBrains GitHub release page. Be sure to select the correct architecture. Use JetBrains Runtime to execute your application, not necessarily your IDE.

HotswapAgent

You can download HotswapAgent from the HotswapAgent GitHub release page. You’ll need version 1.4.2 or later.

Download the JAR file and place it inside the JetBrains Runtime installation directory as lib/hotswap/hotswap-agent.jar. You’ll need to create the hotswap folder, and rename the downloaded file to hotswap-agent.jar.

If you want to know more about the features of HotswapAgent, the documentation in the HotswapAgent webpage is a good resource.

Launch Configuration

Inside your Java project, create a new .vscode/launch.json file with the following contents:

{
    "version": "0.2.0",
    "configurations": [
        {
            "type": "java",
            "name": "Application",
            "request": "launch",
            "mainClass": "com.example.application.Application", 1
            "projectName": "my-application", 2
            "javaExec": "/path/to/jetbrains-runtime/bin/java", 3
            "vmArgs": "-XX:+AllowEnhancedClassRedefinition -XX:+ClassUnloading -XX:HotswapAgent=fatjar"
        }
    ]
}
  1. Replace with your main class.

  2. Replace with the name of your project.

  3. Replace with the path to your JetBrains Runtime installation.

With the launch configuration in place, you can now start the application from the Run and Debug tab in Visual Studio Code. Open the application in a browser and verify that everything is working through Copilot  Development Workflow.