Real-Time Chat & Commenting Components
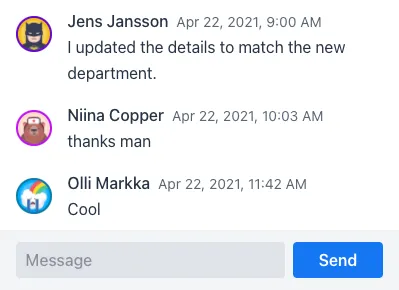
You can add a real-time chat to your application by using the CollaborationMessageList and CollaborationMessageInput components.

CollaborationMessageList & CollaborationMessageInputThese enhance the regular MessageList and MessageInput components by synchronizing the messages for all users connected to the same topic. The message list only renders the submitted messages, while the message input provides controls for submitting new messages. Here’s an example of how to set them:
Source code
MessageListDocumentation.java
|
Note
|
Example Classes
User and UserService are application-specific example classes. They’re not part of the Collaboration Kit API.
|
The CollaborationMessageList constructor takes two arguments: information about the end user associated with this session; and a topic identifier. The user information is used to render the user name and avatar in the messages submitted by the user. See the CollaborationAvatarGroup documentation for more details on how the avatars are rendered, or how to load images from a backend with the setImageHandler() method.
The topic identifier works the same as for other Collaboration Kit features. The data in Collaboration Kit is shared among those users who are connected to the same topic. With these components, the topic acts like a chat room.
In the example above, the topic identifier is hard-coded as "general". This means that every user in this view sees each other’s messages. You can dynamically change the topic with the setTopic() method when the user makes a selection in the UI.
CollaborationMessageInput takes the message list component as its constructor argument. It connects with the list to submit messages to its current topic. When the topic identifier for the list component is null, no messages are displayed: the connected message input is disabled.
After constructing the components, the last required step is to place them somewhere in your view. Here’s an example of placing the message list on top of the input in a layout with a defined size:
Source code
MessageListDocumentation.java
Persisting Messages
The topic data in Collaboration Kit is stored only in the application memory. This applies also to messages in a CollaborationMessageList. This means that all submitted messages are lost when restarting the server.
To solve this problem, you can provide a CollaborationMessagePersister to store the messages in a backend. This is described in the Message Manager documentation. This component uses the manager, internally.
You can set the message persister in the message list’s constructor like so:
Source code
MessageListDocumentation.java
Using Custom Input Components
Instead of using the provided CollaborationMessageInput component, you can configure your own component to submit messages. The component can be registered with CollaborationMessageList::setSubmitter().
The following example shows how to submit messages with the TextField and Button components:
Source code
MessageListDocumentation.java
The setSubmitter() method takes a callback. Collaboration Kit calls it when a new topic connection is established (i.e., the topic identifier is set to a non-null value).
This callback should be used to configure any listeners for submitting new messages to CollaborationMessageList through the provided ActivationContext. The callback should return another callback for clean-up when the topic connection is deactivated (i.e., topic identifier is changed). Notice how the submit button is enabled only when there’s an active topic connection.
|
Tip
|
Use
Messages can also be submitted programmatically to the list using a MessageManagerMessageManager instance with the same topic identifier. This is described in the Message Manager documentation.
|
Customizing Messages
CollaborationMessageList enables changing the properties of MessageListItem items after they’re generated. You can do that by providing a MessageConfigurator.
The following example shows how to use a message configurator to add a custom style to the current user’s messages:
Source code
MessageListDocumentation.java
See the Message List Styling documentation for details on how to style individual messages.
The message configurator can also be used to change the text content of messages. For example, it could censor certain words in messages, as is shown in the following example:
Source code
MessageListDocumentation.java
D91C0FE2-4BAC-4987-8763-956C5ABD9C2A