Deploying an Application with Control Center
- Control Center Starter Dependency
- Build Docker Image
- Deploy with Control Center
- Accessing Application
- Next Steps
Control Center makes it easy for you to deploy Vaadin applications to a Kubernetes cluster, providing the necessary resources and connecting to services such as identity providers. This page explains the steps to prepare and deploy a Vaadin application using Control Center.
Before starting the deployment, prepare the application by adding the Control Center Starter dependency. Then build a Docker image for the application. You’ll have to deploy the application via the Control Center UI.
Control Center Starter Dependency
To ensure your application integrates with Control Center, add the control-center-starter dependency to your Maven project. This dependency enables Control Center to manage and monitor your Vaadin application.
Add the following to your pom.xml file:
Source code
XML
<dependency>
    <groupId>com.vaadin</groupId>
    <artifactId>control-center-starter</artifactId>
</dependency>
It’s unnecessary to specify the version of this dependency if you’re using the Vaadin BOM (Bill of Materials) since it manages versions for all Vaadin dependencies.
Once the dependency is added, build your application for production by running the following command:
Source code
shell
mvn -Pproduction packageThis generates the production-ready .jar file that’ll be used in the next step to create a Docker image.
Build Docker Image
To deploy the application to a Kubernetes cluster, you’ll need to create a Docker image. Begin by creating a Dockerfile in the root of your project with the following content:
Source code
docker
FROM eclipse-temurin:21-jre
COPY target/*.jar app.jar
EXPOSE 8080
ENTRYPOINT ["java", "-jar", "/app.jar"]
Next, build the Docker image with the following command:
Source code
shell
docker build -t my-app:dev .The my-app:dev tag is important because it’s used later when deploying the application in Control Center.
|
Tip
|
It’s common to use the application version to tag a release build (e.g., my-app:1.0). It’s also common to use the tag latest, representing the most recent release. Using this tag forces Kubernetes always to pull the image from the registry, which requires the image to be there.
|
Publish to Container Registry
If you’re deploying to a remote Kubernetes cluster, you need to push the Docker image to a container registry. This allows the Kubernetes cluster to pull the image from the registry when deploying the application. To do this, make sure you have a Docker account, and that the image is tagged with a proper namespace (e.g., company/my-app:dev).
Source code
Terminal
docker push company/my-app:devLocal Development
If you’re using a local Kubernetes cluster for development, you may need to perform an additional step to allow an unpublished image to be accessible there. This is not necessary when using Kubernetes on Docker Desktop, as it can pull the image from the local Docker daemon.
Source code
Terminal
minikube image load my-app:devTerminal
Terminal
Terminal
Terminal
Terminal
Deploy with Control Center
Once the Docker image is ready, the next step is to deploy the application using Control Center.
Navigate to the Applications section in Control Center, then click on the New button in the top-right corner of the Application Discovery pane.
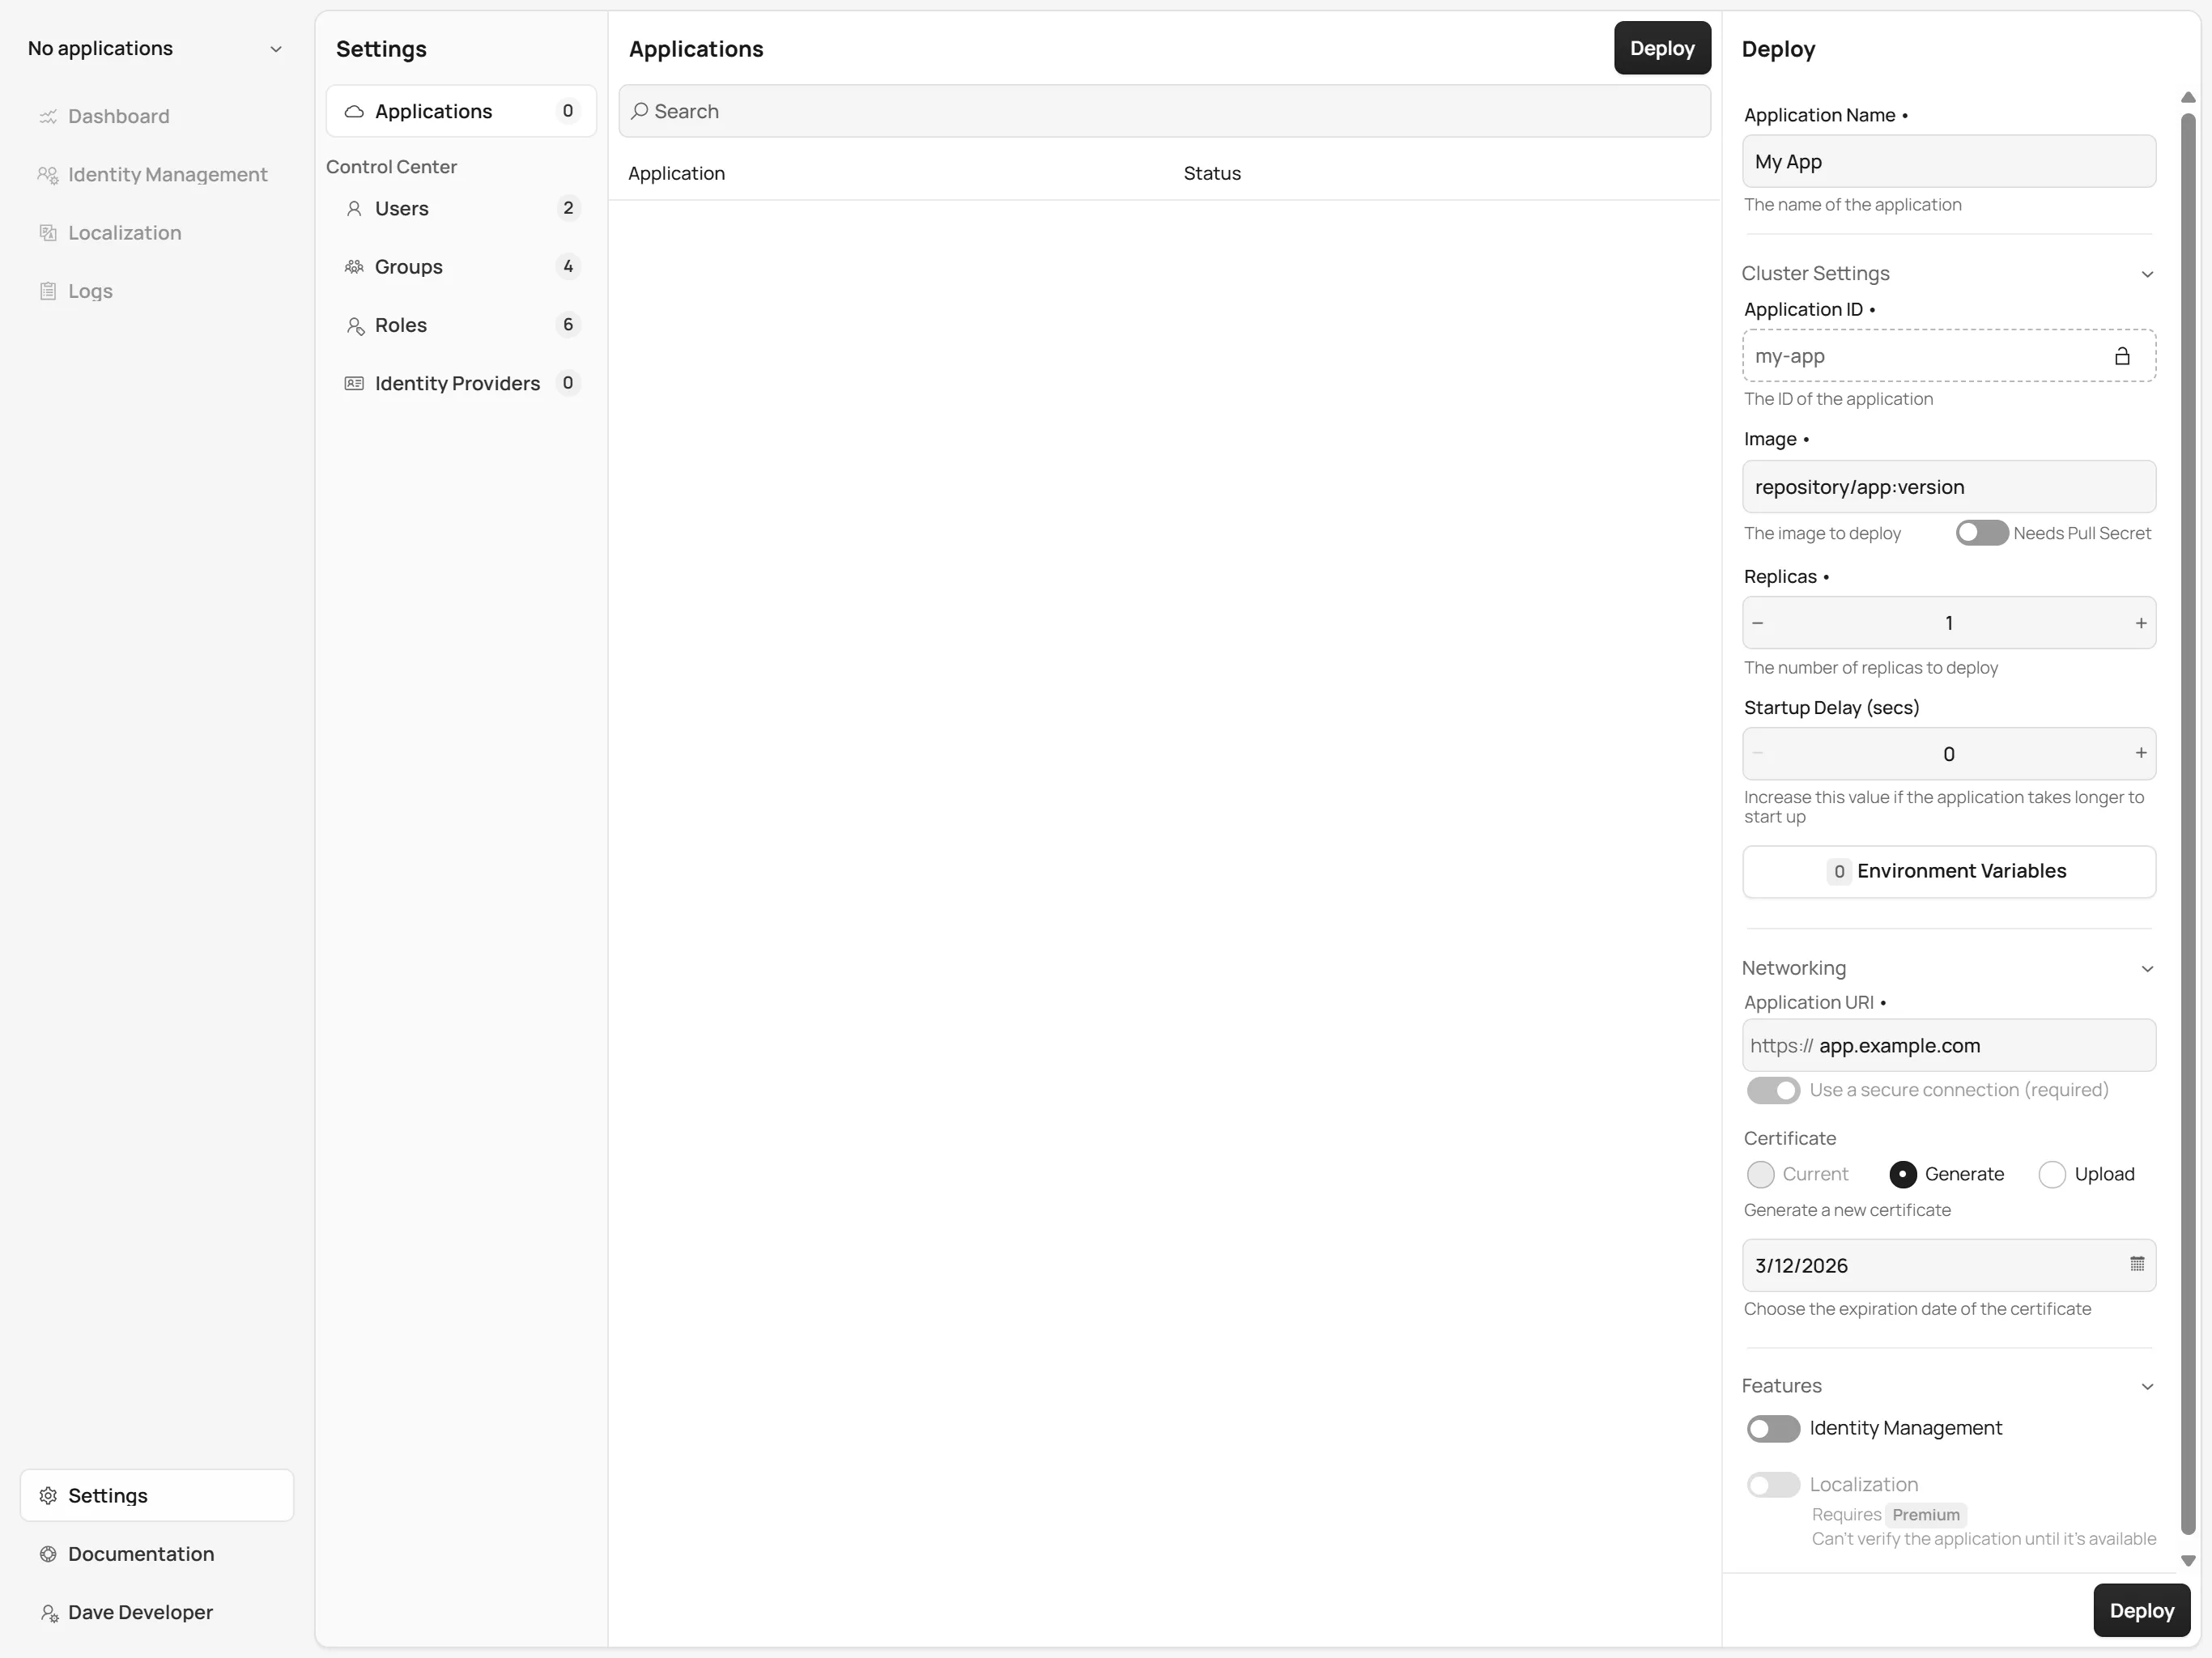
In the Deploy panel on the right-hand side (as shown in the screenshot below), fill in the following fields:
-
Application Name: Give your application a meaningful name (e.g.,
My App). -
Image: Enter the name of the Docker image, including the repository name and version tag (e.g.,
repository/app:version). If your repository is private, you can also provide a secret name containing the credentials to access it by enabling the Needs Pull Secret option. -
Replicas: Specify the number of instances to run. The default is
1. -
Startup Delay (secs): Set the delay in seconds before the startup probe initiates. This is useful if your application requires some time to start up.
-
Environment Variables: Add any environment variables required by your application.
-
Hostname: Set the external URL to access your application (e.g.,
https://app.example.com). For more information on how to choose a proper hostname, refer to the Hostname Guidelines. -
Certificate: Choose the certificate to use for the application. Use the Generate option to generate a new certificate, and the Upload option to use an existing certificate file.
-
Features: Enable additional features if required.
|
Note
|
Control Center utilizes cert-manager to generate and sign certificates for |
Once all fields are completed, click Deploy.
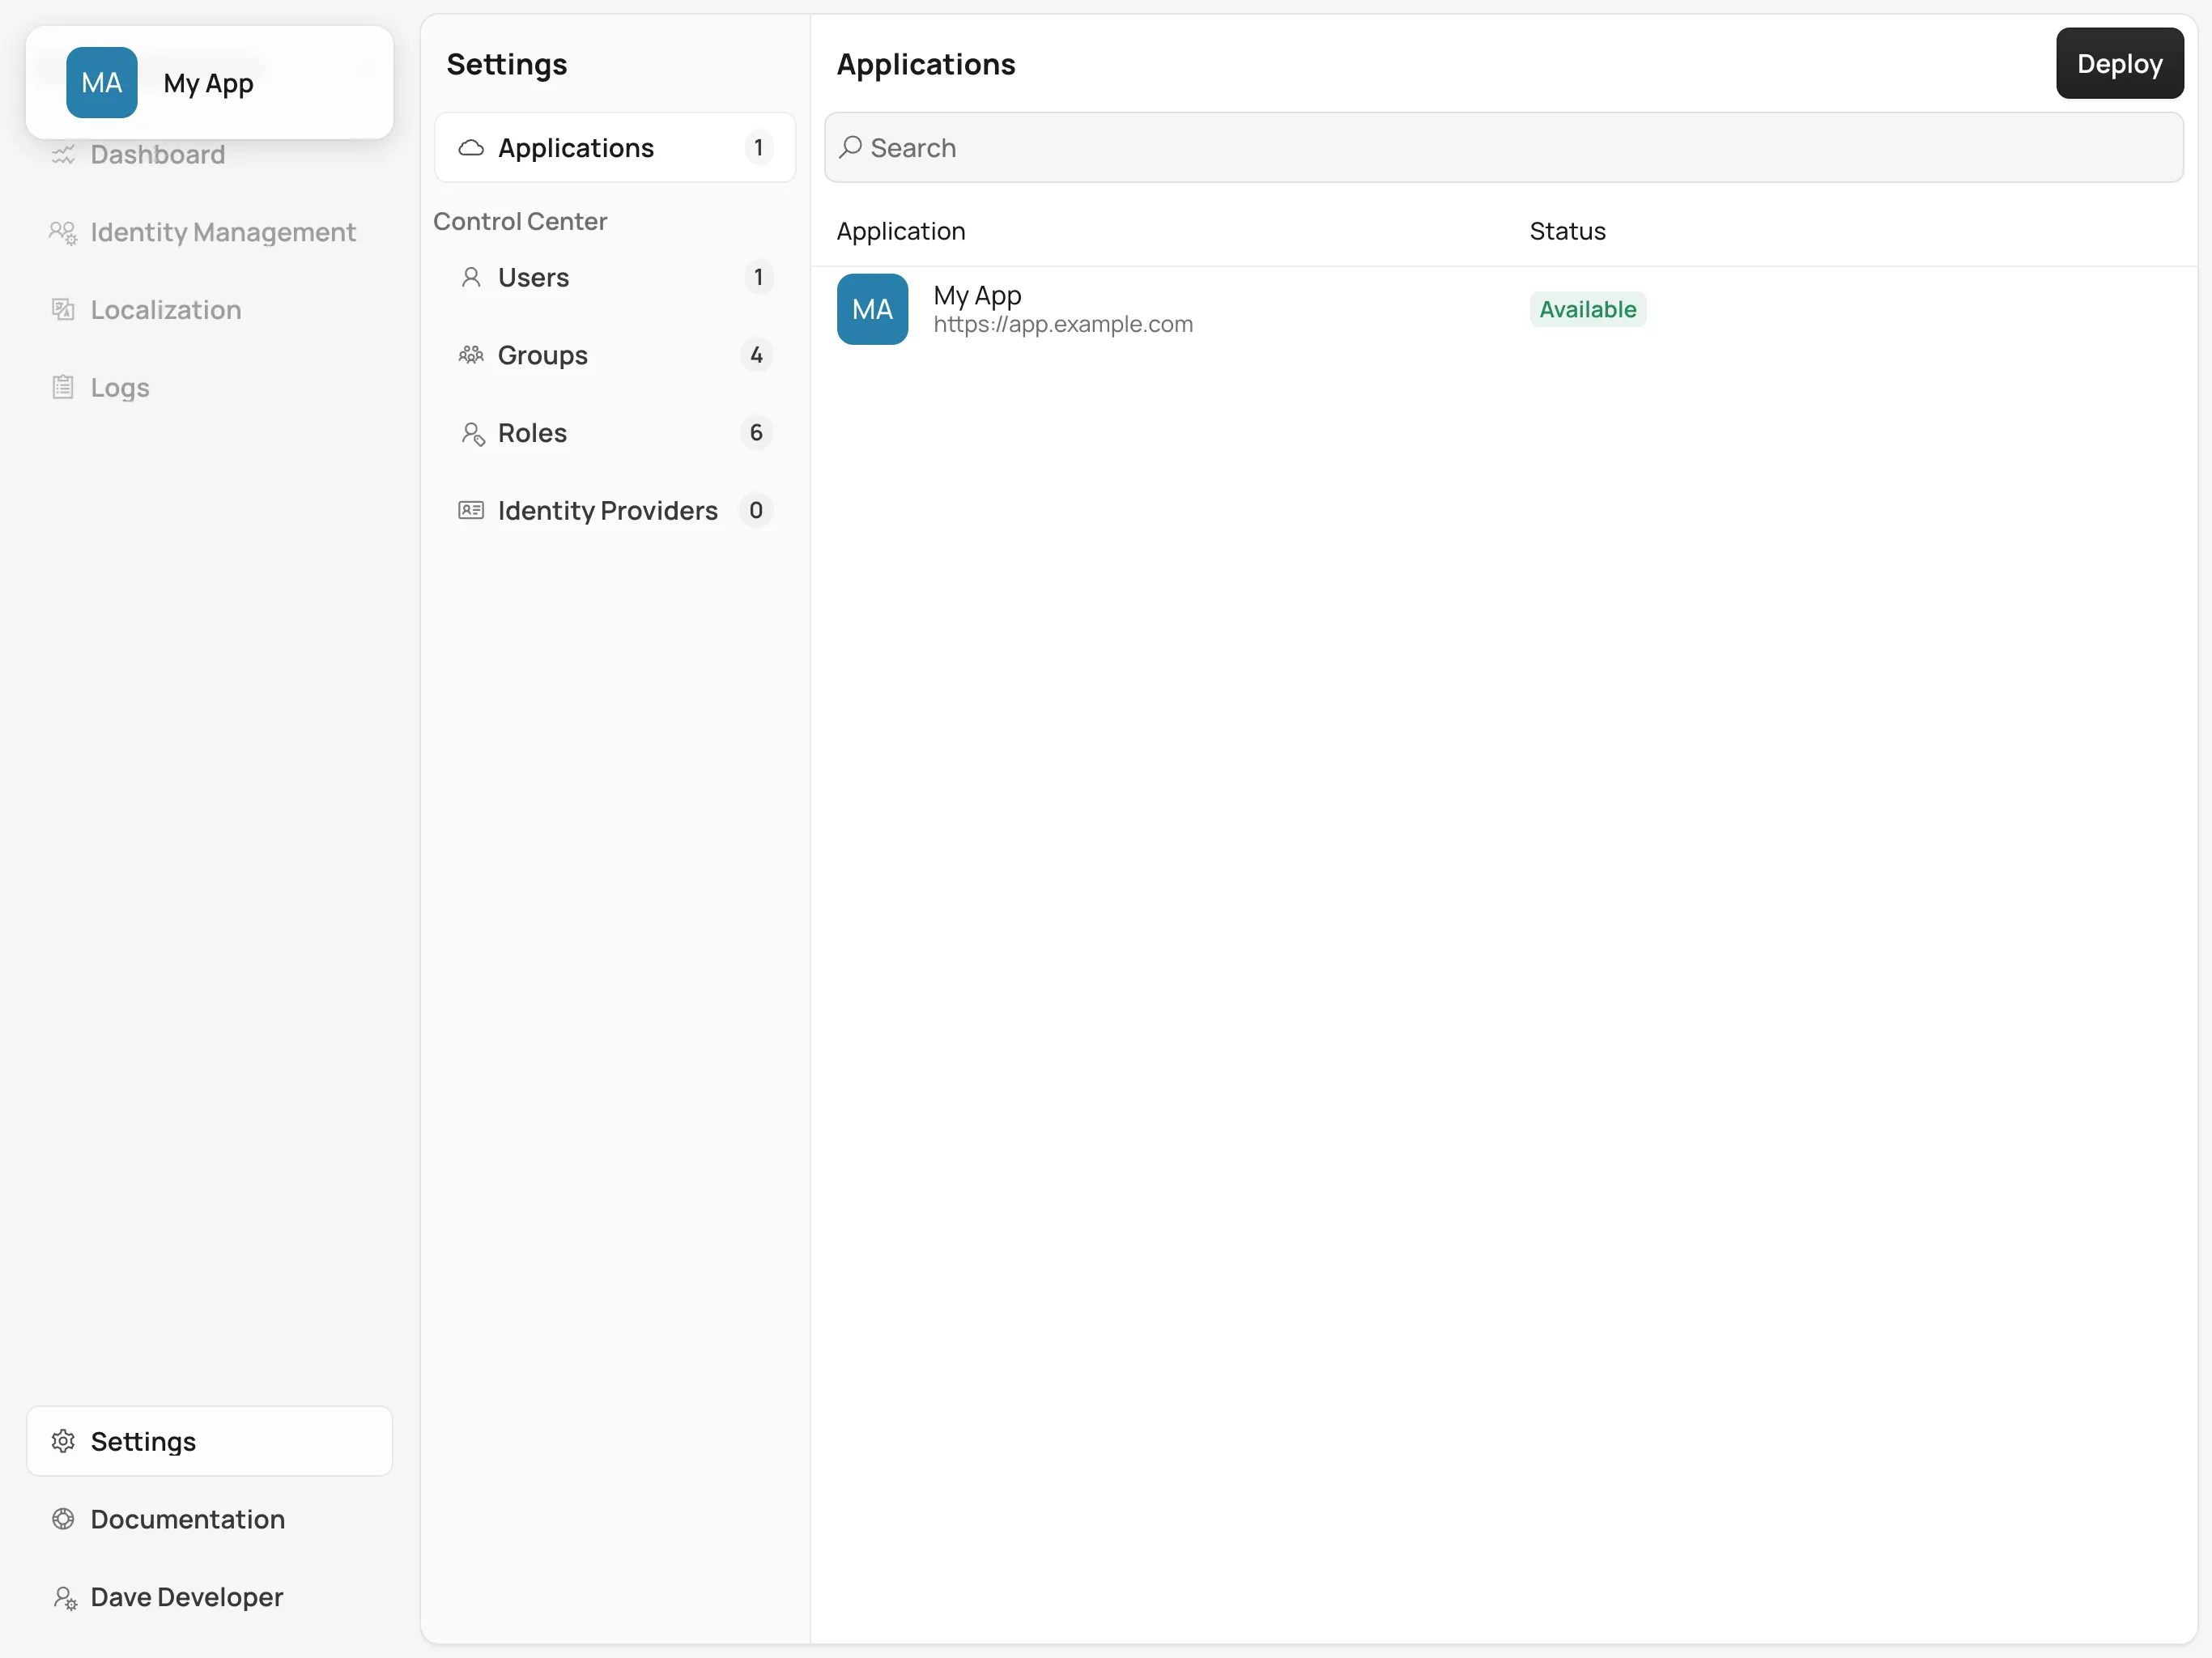
Control Center now deploys your application to the Kubernetes cluster, creates the necessary resources, and handles configurations such as load balancing and service discovery.
Pulling Images as an Authenticated User
When you want to deploy an application using a Docker image from a repository requiring authentication, you can provide the name of a Kubernetes secret of type docker-registry containing the authentication credentials.
You can then type the name of this secret in the Image Pull Secret field shown by enabling the Needs Pull Secret option in the "Deploy Application" screen.
To create such a secret in a namespace called control-center, with the name my-docker-credentials, to login to the official docker repository, run:
Source code
shell
kubectl -n control-center create secret docker-registry my-docker-credentials \
--docker-server='https://docker.io' \
--docker-username=example@vaadin.com \
--docker-password=example_password \
--docker-email=example@vaadin.com
When you need to change credentials, delete the secret and create a new one:
Source code
shell
kubectl -n control-center delete secret my-docker-credentials|
Note
| Docker announced back in February 21st, 2025 that starting from April 1st of the same year, unauthenticated users would be limited to 10 pulls per hour. The pull rate for free authenticated users is 100 pulls per hour. Paid authenticated users have unlimited pulls per hour. |
Environment Variables
Environment variables and their values can be set to applications deployed with Control Center. These variables can be managed by clicking the Environment Variables button. This opens a dialog to add, edit, or remove environment variables. Some environment variables are considered essential and cannot be modified or removed. Making any changes to environment variables triggers a re-deploy to make the new values available.
Accessing Application
Once the deployment is complete, your application can be accessed using the hostname you specified during deployment. For example, if you deployed to a cloud environment you’d use something like, https://app.example.com. If you’re working in a local environment, you’d use http://app.local, instead.
You can now interact with the application in the browser, and it’s fully connected to the services and resources provisioned by Control Center.
Next Steps
After successfully deploying your application, you can manage it through the Control Center dashboard. Use the Application Selector to choose your application from the available applications.
Once selected, you can explore the following management options:
-
Identity Management: Create users, configure groups and roles, and integration with identity providers.
-
Localization: Upload and manage translations for different languages, enabling a localized experience for your users.
Explore the Control Center’s features to further customize and optimize your application in the cluster.