Configuring Collaboration Kit for Production
- Free Universal License File
- Commercial License File
- File Storage Location
- License File
- Docker Container Data Directory
- Notifications for Updating Licenses
- User Quota
|
Note
|
Collaboration Kit is Now Free
Collaboration Kit features are free for all users without a license. Licensing and user quota configuration isn’t required.
|
Enabling production mode for a Vaadin application isn’t difficult: it’s described in Deploying to Production. However, if your application uses Collaboration Kit, it requires some extra steps to prepare it for production.
Before releasing your Vaadin application into production, you’ll need to do a few things:
-
Get a license file with an ample user quota;
-
Configure where Collaboration Kit files are stored;
-
Store the license file in the right location; and
-
Implement a
LicenseEventHandlerto be notified when the license needs to be updated.
These steps are described in the following sections.
Free Universal License File
All Vaadin applications receive a free quota with a universal license file. If you don’t have a commercial Vaadin subscription (i.e., Pro, Prime, or Enterprise), you can download the universal license file.
The license file is called, ce-license.json. It tells Collaboration Kit that you’re entitled to receive a monthly free quota (see pricing for details).
To increase your monthly user quota, though, upgrade to a commercial license.
Commercial License File
If you need to use Collaboration Kit’s powered features for more users than the free quota allows, request a commercial license. However, you’ll need to have a Vaadin commercial subscription (i.e., Pro, Prime, or Enterprise) to request this license.
Each Vaadin subscription offers a bundled quota of users per month. See the official feature page to learn more about the bundled quotas.
To get a commercial license, contact Vaadin. You can request and purchase a quota larger than provided by the standard commercial Vaadin subscription.
The commercial license file is called, ce-license.json. It defines how many unique users per month can use collaborative features, as well as when the license expires.
File Storage Location
After you receive your license file, follow the instructions in this section to configure the file storage location.
You’ll need to configure which directory should be used by Collaboration Kit to store files. You’d do this by setting the vaadin.ce.dataDir property. This directory is used by Collaboration Kit to store the usage data to track users each month. You should also put your ce-license.json file in the same directory for Collaboration Kit to find it.
You can configure the directory path by either configuring the data directory in project files, or by providing it in a parameter on the server startup. If both are present, the server startup parameter is used.
Data Directory in Project Files
Storing the file path in the project files is a good idea if you always deploy your application in the same environment — and the folder doesn’t change.
Spring Applications
If you have a Spring application, you can provide a bean of type CollaborationEngineConfiguration from your main Spring class by annotating a method with the @Bean annotation and returning a configuration instance with the data directory path set using the setDataDir method.
Source code
SpringBeanProvider.java
Other Applications
If you have a non-Spring application, you can implement a VaadinServiceInitListener where you create a CollaborationEngineConfiguration instance. You can set it using the CollaborationEngine.configure() method.
Source code
com.company.myapp.MyVaadinInitListener.java
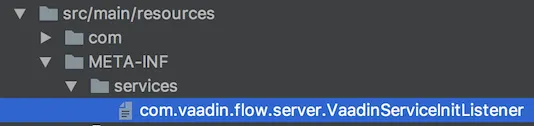
com.company.myapp.MyVaadinInitListener.javaNext, you need to register the listener via Java Service Provider Interface (SPI) loading facility. You’d do this by providing a file, com.vaadin.flow.server.VaadinServiceInitListener in the src/main/resources/META-INF/services/ directory, with a fully qualified class name to your listener as content (e.g., com.company.myapp.MyVaadinInitListener).
Source code
src/main/resources/META-INF/services/com.vaadin.flow.server.VaadinServiceInitListener
src/main/resources/META-INF/services/com.vaadin.flow.server.VaadinServiceInitListenercom.company.myapp.MyVaadinInitListenerData Directory on Startup
Another way to provide the license file storage location is to pass the data directory as a parameter on server startup. This method assumes that you already have a production-ready build available, and that you want to run the package on the server. Read Deploying to Production to learn more about building your application for production.
Spring Boot Applications
You can set the data directory with the vaadin.ce.dataDir system property for Java. For example, you might enter the following from the command-line:
Source code
terminal
java -Dvaadin.ce.dataDir=/Users/steve/.vaadin/collaboration-engine -jar my-app-1.0-SNAPSHOT.jarThe system property should be before the -jar parameter.
Other Servlet Containers
You can pass the data directory parameter as a context parameter to the servlet container. Refer to your servlet container’s documentation on how to do this.
You’ll need to set the vaadin.ce.dataDir context parameter. The value should be the directory path. For example, you can pass the context parameter to Jetty as follows:
Source code
terminal
mvn jetty:run -Dvaadin.ce.dataDir=/Users/steve/vaadin/collaboration-engine/The directory should be both readable and writable by the user running the Vaadin application. See Configuration Properties for more information.
License File
After getting the license file, create the data directory on the server and put the file in it. For example, if you configured the folder to be /Users/steve/vaadin/collaboration-engine/, you should place the license file so that the application can read it as /Users/steve/vaadin/collaboration-engine/ce-license.json.
The application doesn’t require an internet connection to Vaadin servers to verify the license. Instead, Collaboration Kit uses the file to confirm that you have a proper license.
Docker Container Data Directory
It’s recommended that you provide the data directory to a Docker container on runtime by either using a volume, or a bind mount. It’s not recommended to copy the license file into the container image since the data directory for it is erased every time you deploy a new version of your application.
If you’re deploying to a cloud provider, you may not have access to the host file system to be able to make use of bind mounts. Consult your cloud provider’s documentation for instructions on how to set up and provide a volume to your application.
While a volume is preferred, if you have access to the host’s file system — or want to test the Docker image, locally — you can do so with a bind mount. Follow these steps to do so:
-
Set up a data directory on the host’s file system (e.g.,
/Users/steve/.vaadin/collaboration-engine). -
Copy the
ce-license.jsonfile into that folder. -
Pick a suitable folder within your Docker image where the container mounts the host folder (e.g.,
/usr/app/ce). -
Configure your
Dockerfileto start the server with thevaadin.ce.dataDirparameter pointing to the internal folder, like this:Source code
terminal
java -Dvaadin.ce.dataDir=/usr/app/ce -jar /usr/app/app.jar -
Build the Docker image in the project directory like so:
Source code
terminal
docker build --tag my-app . -
Start the Docker container with the
-vparameter, mapping the host folder to the image folder:Source code
terminal
docker run --name=myapp -dp 8080:8080 -v /Users/steve/.vaadin/collaboration-engine:/usr/app/ce myappWhen using volumes, you would replace the absolute path to the directory with the name of the volume like this:
Source code
terminal
docker run --name=myapp -dp 8080:8080 -v myapp-volume:/usr/app/ce myapp
Notifications for Updating Licenses
The licensing model may cause collaborative features to be disabled for some of your application’s users. This happens sometimes if the user base exceeds the quota for the month, or if the license is about to expire. To avoid or resolve this, get a new license.
To be notified when to update the license, implement a license event handler for Collaboration Kit. It can be triggered by any of the following license events, a maximum of once each, during the license’s lifecycle:
-
First time the user quota is exceeded and the grace period begins (see Exceeding Quota);
-
When the grace period ends;
-
Thirty days before the license expires; and
-
When the license expires.
If you update the license when the first or third events occur, the other events shouldn’t happen.
One way to handle an event is to send a message to an application monitoring system — if you have one running. Another option is to send an email to the relevant people. They might be those who maintain the deployment, or are at least responsible of the Collaboration Kit license.
You’ll need to ensure that your application notices events when they happen and reacts to them. The listener can be configured when creating the CollaborationEngineConfiguration, as described earlier in Data Directory in Project Files.
Source code
MyVaadinInitListener.java
In the above example, the license event handler logs the event messages using the SLF4J logging API, and sends an email. When it’s time to update the license, the message is logged as a warning. If the license isn’t updated in time, the message is logged as an error. The default event messages provide information as to what happened, how it affects the application, and what’s the recommended action to take.
Below is an example implementation of the sendEmail() method. It requires the javax.mail.mail package as a dependency.
Source code
MyVaadinInitListener.java
|
Note
|
Exception Thrown
Collaboration Kit throws an exception in production mode if a configuration hasn’t been defined. The purpose is to make sure that your application handles the events, and to avoid a situation in which the license expires unintentionally.
|
User Quota
Your license includes a quota for how many unique users are supported within a month (e.g., a limit of 500 users). Collaboration Kit counts how many users use its features during each calendar month. The user count starts over on the first day of each month.
User Definition
When you use any Collaboration Kit features, you have to provide a UserInfo object with a unique identifier.
Source code
ProductionDocumentation.java
Collaboration Kit records the identifier of each user that accesses collaborative features during the month, and increments the quota for the current month. Each user is counted only once per month.
Exceeding Quota
When you first exceed the limit, nothing changes from the user’s perspective. However, Collaboration Kit starts a thirty-day grace period, during which the quota is increased by ten times. The grace period gives you time to react to exceeding the limit without impacting your application. For example, if you have a license with a 500 user quota, your effective quota becomes 5,000 users during the grace period. After thirty days, your effective quota returns to 500. You won’t be given another grace period until the next billing period.
If the number of users in a month exceeds ten times the quota during the grace period, or if it exceeds the licensed quota after the grace period ends, the collaborative features are disabled for the users in excess of the base quota. Your application continues to work, but CollaborationAvatarGroup shows each user only their avatar, and forms built with CollaborationBinder won’t show edits made by other users. The users who are registered within the allowed quota, however, continue to have collaborative features available to them throughout the month.
For example, imagine a situation in which you have a quota of 500 users and you’ve already exhausted your grace period. Imagine further that 520 users have used collaborative features during the given month. The first 500 users can continue to collaborate throughout the month. However, although the next 20 users can use the application, it’ll function for them as if Collaboration Kit isn’t in use. They’ll see only themselves individually and only their edits. When the calendar month changes, though, counting starts over. Then the first 500 users of that month get full access for the whole month.
Grace Period
As mentioned, the engine enters a grace period when you have a higher demand than permitted by your license. It’s recommended that you get a new license with a higher quota to have collaborative features available for all of your users before the grace period ends. Contact Vaadin to get a new license file with a higher quota.
You can change your quota at any time. When you replace a license file with a new quota, Collaboration Kit resets the grace period. If you exceed your new quota after that, you’ll receive a new thirty-day grace period.
Check for User Access
You can determine whether a user has access by passing a callback to the requestAccess() method in the CollaborationEngine instance. The callback gets an AccessResponse instance as a parameter. You can call its AccessResponse::hasAccess() method to determine the user’s access. And you can use the status to adapt the UI according to whether the user is allowed collaborative features.
You can do this like so:
Source code
ProductionDocumentation.java
|
Tip
|
Cache Results
To avoid calling this method multiple times per user, cache the results during the login process (e.g., in the session).
|
Limit Collaborative Features
Collaboration Kit counts for the quota only those users whose UserInfo objects are passed to collaborative features. That means that you can limit usage to a subset of your users. You can do this in two ways.
First, you can only use Collaboration Kit in views that you’ve restricted with user access. For example, if you only use collaborative features in the admin views, only those users who access the admin views are counted.
Second, you can check the details of the user before initializing the collaboration features. For example, by checking the role or privileges of the user, you can decide in code if the users should have collaborative features enabled.
Below is an example of how to enable collaboration by checking user permissions:
Source code
ProductionDocumentation.java
CD8CDE22-2BF8-43CB-949D-C395BF6CE29B