Add a Router Layout
- Copy-Paste into Your Project
- What is a Router Layout?
- Creating a Router Layout
- Automatic Layouts
- Explicit Layouts
- Nested Layouts
- Route Prefixes
This guide teaches you how to create a router layout in Vaadin, apply it to views automatically and explicitly, and use route prefixes for structured navigation.
Copy-Paste into Your Project
If you want to quickly try out a router layout, you can copy-paste the following two classes into your Vaadin project:
Source code
MainLayout.java
Source code
HomeView.java
For more detailed instructions on how to use router layouts, continue reading below.
What is a Router Layout?
Most business applications have interface elements that remain visible across different views, such as a navigation menu, header, or footer. Instead of duplicating these elements on every view, you can use a router layout.
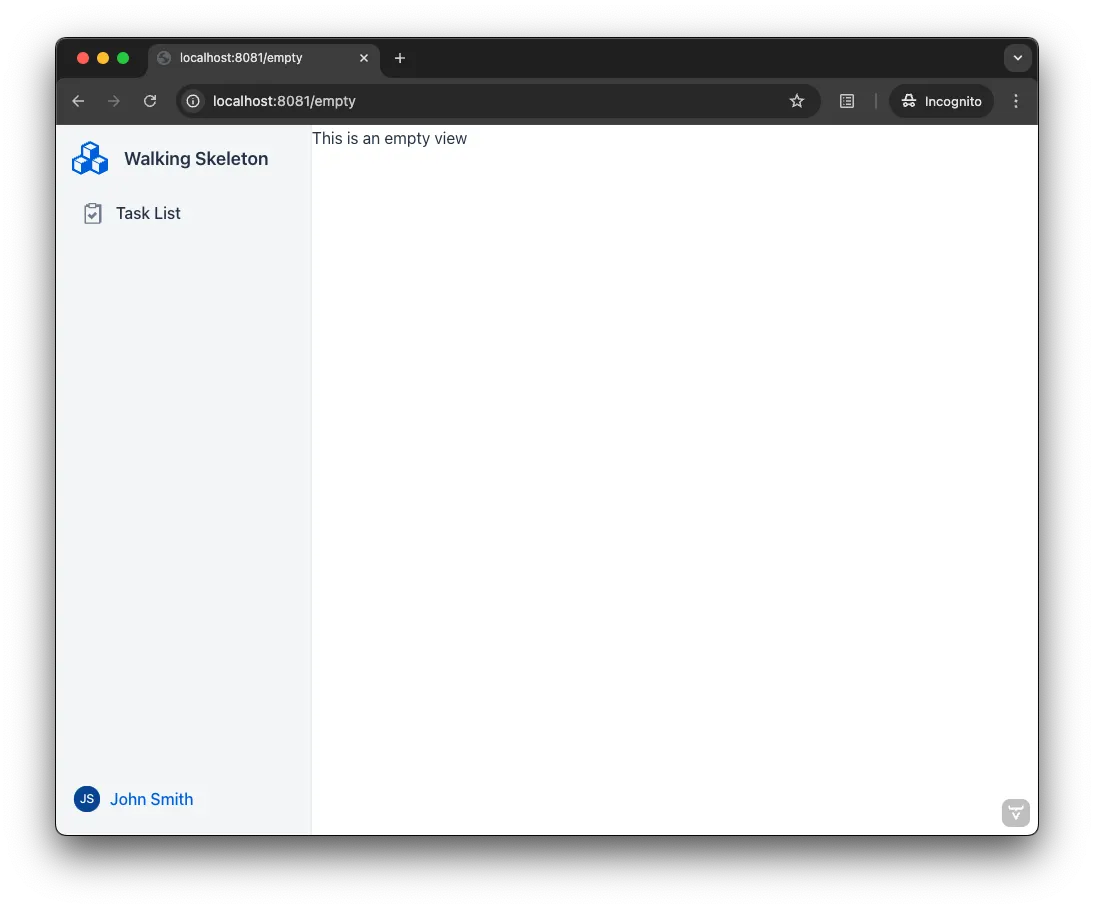
A router layout ensures that the router renders views inside a predefined layout, reducing redundancy. The screenshot below illustrates an empty view rendered within a router layout. The layout includes a sidebar with the application name, a navigation menu, and a user menu. Views are displayed in the white area on the right:
Creating a Router Layout
Router layouts are UI components that implement the RouterLayout interface, which provides two key methods:
-
showRouterLayoutContent(HasElement)— shows the given view in the router layout. -
removeRouterLayoutContent(HasElement)— removes the given view in the router layout.
When you navigate to a view, the router first determines which layout to use — if any. If you’re navigating from one view to another inside the same router layout, the existing router layout instance is reused. Otherwise, a new instance is created. The router then calls showRouterLayoutContent(), passing in the new view instance.
|
Tip
|
The router layout becomes the parent of the view in the component hierarchy. You can use Component.getParent() method to access the layout from the view after the view has been added to the layout.
|
Automatic Layouts
To create an automatic layout, add the @Layout annotation to a router layout. This layout is automatically applied to all views unless explicitly disabled.
The following example applies MainLayout to all views:
Source code
Java
@Layout
public class MainLayout extends AppLayout { 1
    ...
}-
AppLayoutis a built-in router layout. See its documentation page for more details.
|
Important
|
Security Annotations Required
When view access control is enabled, a For most applications, Source codeJavaSee Protect Views for more details on securing views and layouts. |
Opting Out
Sometimes, you may want to exclude specific views from the automatic layout. For example, displaying a login view within an application layout might not be appropriate.
To prevent a view from using the automatic layout, set the autoLayout attribute of the @Route annotation to false:
Source code
Java
@Route(value = "login", autoLayout = false)
public class LoginView extends Main {
    ...
}|
Note
|
@RouteAlias also has the autoLayout attribute. You can disable or enable the automatic layout for a single view depending on the route used to access it.
|
Scoping to a Path
You can restrict an automatic layout to views with routes that start with a specific path.
The following example applies AdminLayout only to views with routes starting with /admin:
Source code
Java
@Layout("/admin")
public class AdminLayout extends AppLayout {
    ...
}
If a route matches multiple layouts, the layout with the longest matching path takes precedence. For example, given a main layout scoped to / (default) and an admin layout scoped to /admin, the layouts apply as follows:
-
/→ rendered inside the main layout -
/customers→ rendered inside the main layout -
/admin/users→ rendered inside the admin layout -
/admin/groups→ rendered inside the admin layout
Defining multiple layouts with the exact same path results in an exception.
|
Note
|
The path specified in @Layout need a leading slash (/), unlike the path in @Route.
|
Explicit Layouts
You can declare a view to use a specific router layout using the layout attribute of the @Route annotation:
Source code
Java
@Route(layout = MyLayout.class)
public class DefinedLayoutView extends Main {
    ...
}
Declaring a layout explicitly also disables the automatic layout for the view.
|
Note
|
@RouteAlias also has the layout attribute. You can render the same view in different layouts depending on the route used to access it.
|
Nested Layouts
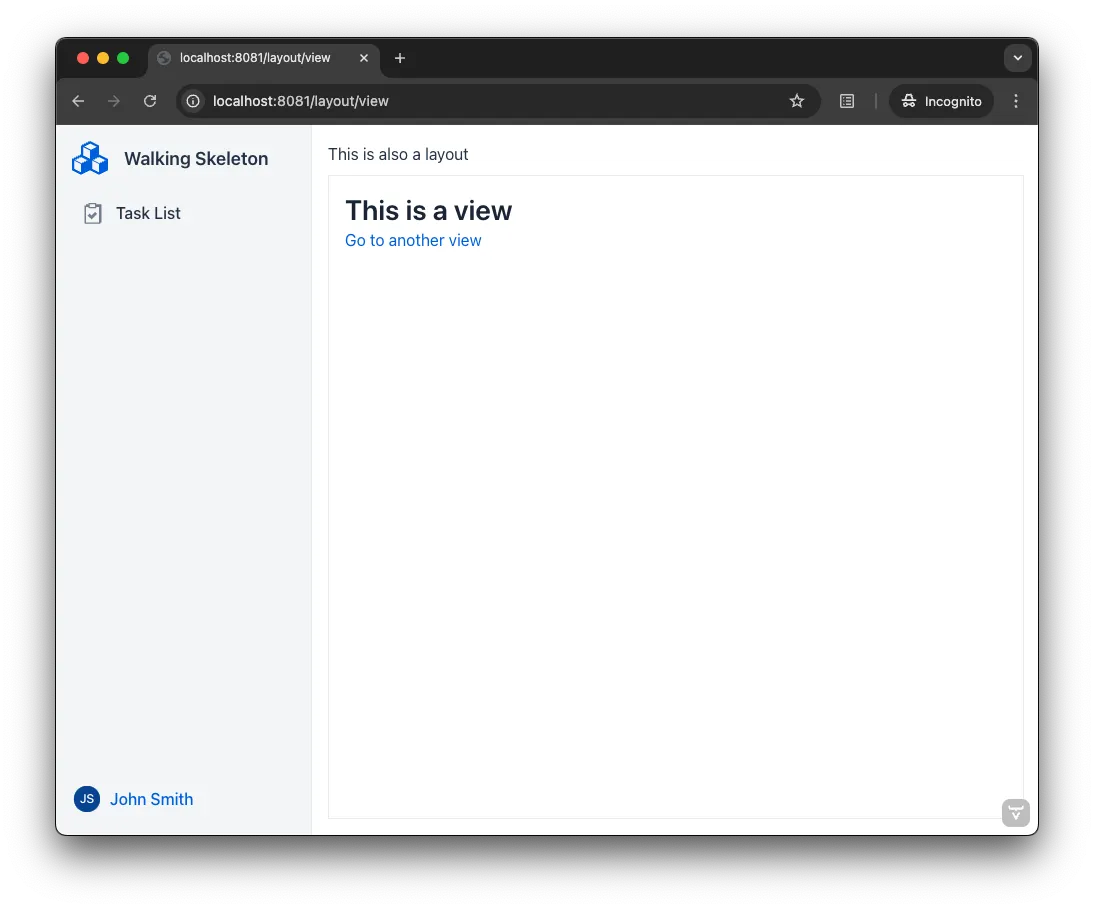
Layouts can be nested within other layouts, for example when creating master-detail user interfaces. The following screenshot demonstrates a view inside a router layout, which itself is inside another router layout:
To render a router layout inside another router layout, use the @ParentLayout annotation:
Source code
Java
@ParentLayout(MainLayout.class)
public class NestedLayout extends Div implements RouterLayout {
    ...
}
Parent layouts are always explicit. That is, automatic layouts never apply to other layouts.
Route Prefixes
By default, router layouts do not affect the routes of the views that they are applied to. You can change this with the @RoutePrefix annotation, which adds a prefix to all its routes.
In the following example, MyView receives the some prefix from its router layout, resulting in some/path being its actual path:
Source code
Java
@Route(value = "path", layout = MyLayout.class)
public class MyView extends Main {
    ...
}

@RoutePrefix("some")
public class MyLayout extends Div implements RouterLayout {
    ...
}
Opting Out
A view can opt out from a route prefix by setting the absolute attribute of @Route to true.
In the following example, the path of MyView is path, ignoring the prefix coming from MyLayout:
Source code
Java
@Route(value = "path", layout = MyLayout.class, absolute = true)
public class MyView extends Main {
    ...
}

@RoutePrefix("some")
public class MyLayout extends Div implements RouterLayout {
    ...
}
Nested router layouts can also opt out from route prefixes.
In the following example, the path of MyView is in fact nested/path, as opposed to some/nested/path:
Source code
Java
@Route(value = "path", layout = MyNestedLayout.class)
public class MyView extends Main {
    ...
}

@RoutePrefix(value = "nested", absolute = true)
@ParentLayout(MyLayout.class)
public class MyNestedLayout extends Div implements RouterLayout {
    ...
}

@RoutePrefix("some")
public class MyLayout extends Div implements RouterLayout {
    ...
}|
Note
|
@RouteAlias also has the absolute attribute.
|