Navigating between Views in Vaadin
- Defining View Routes
- Creating the Parent Layout
- Creating a Dashboard View
- Add the Dashboard View to the Main Layout Sidebar
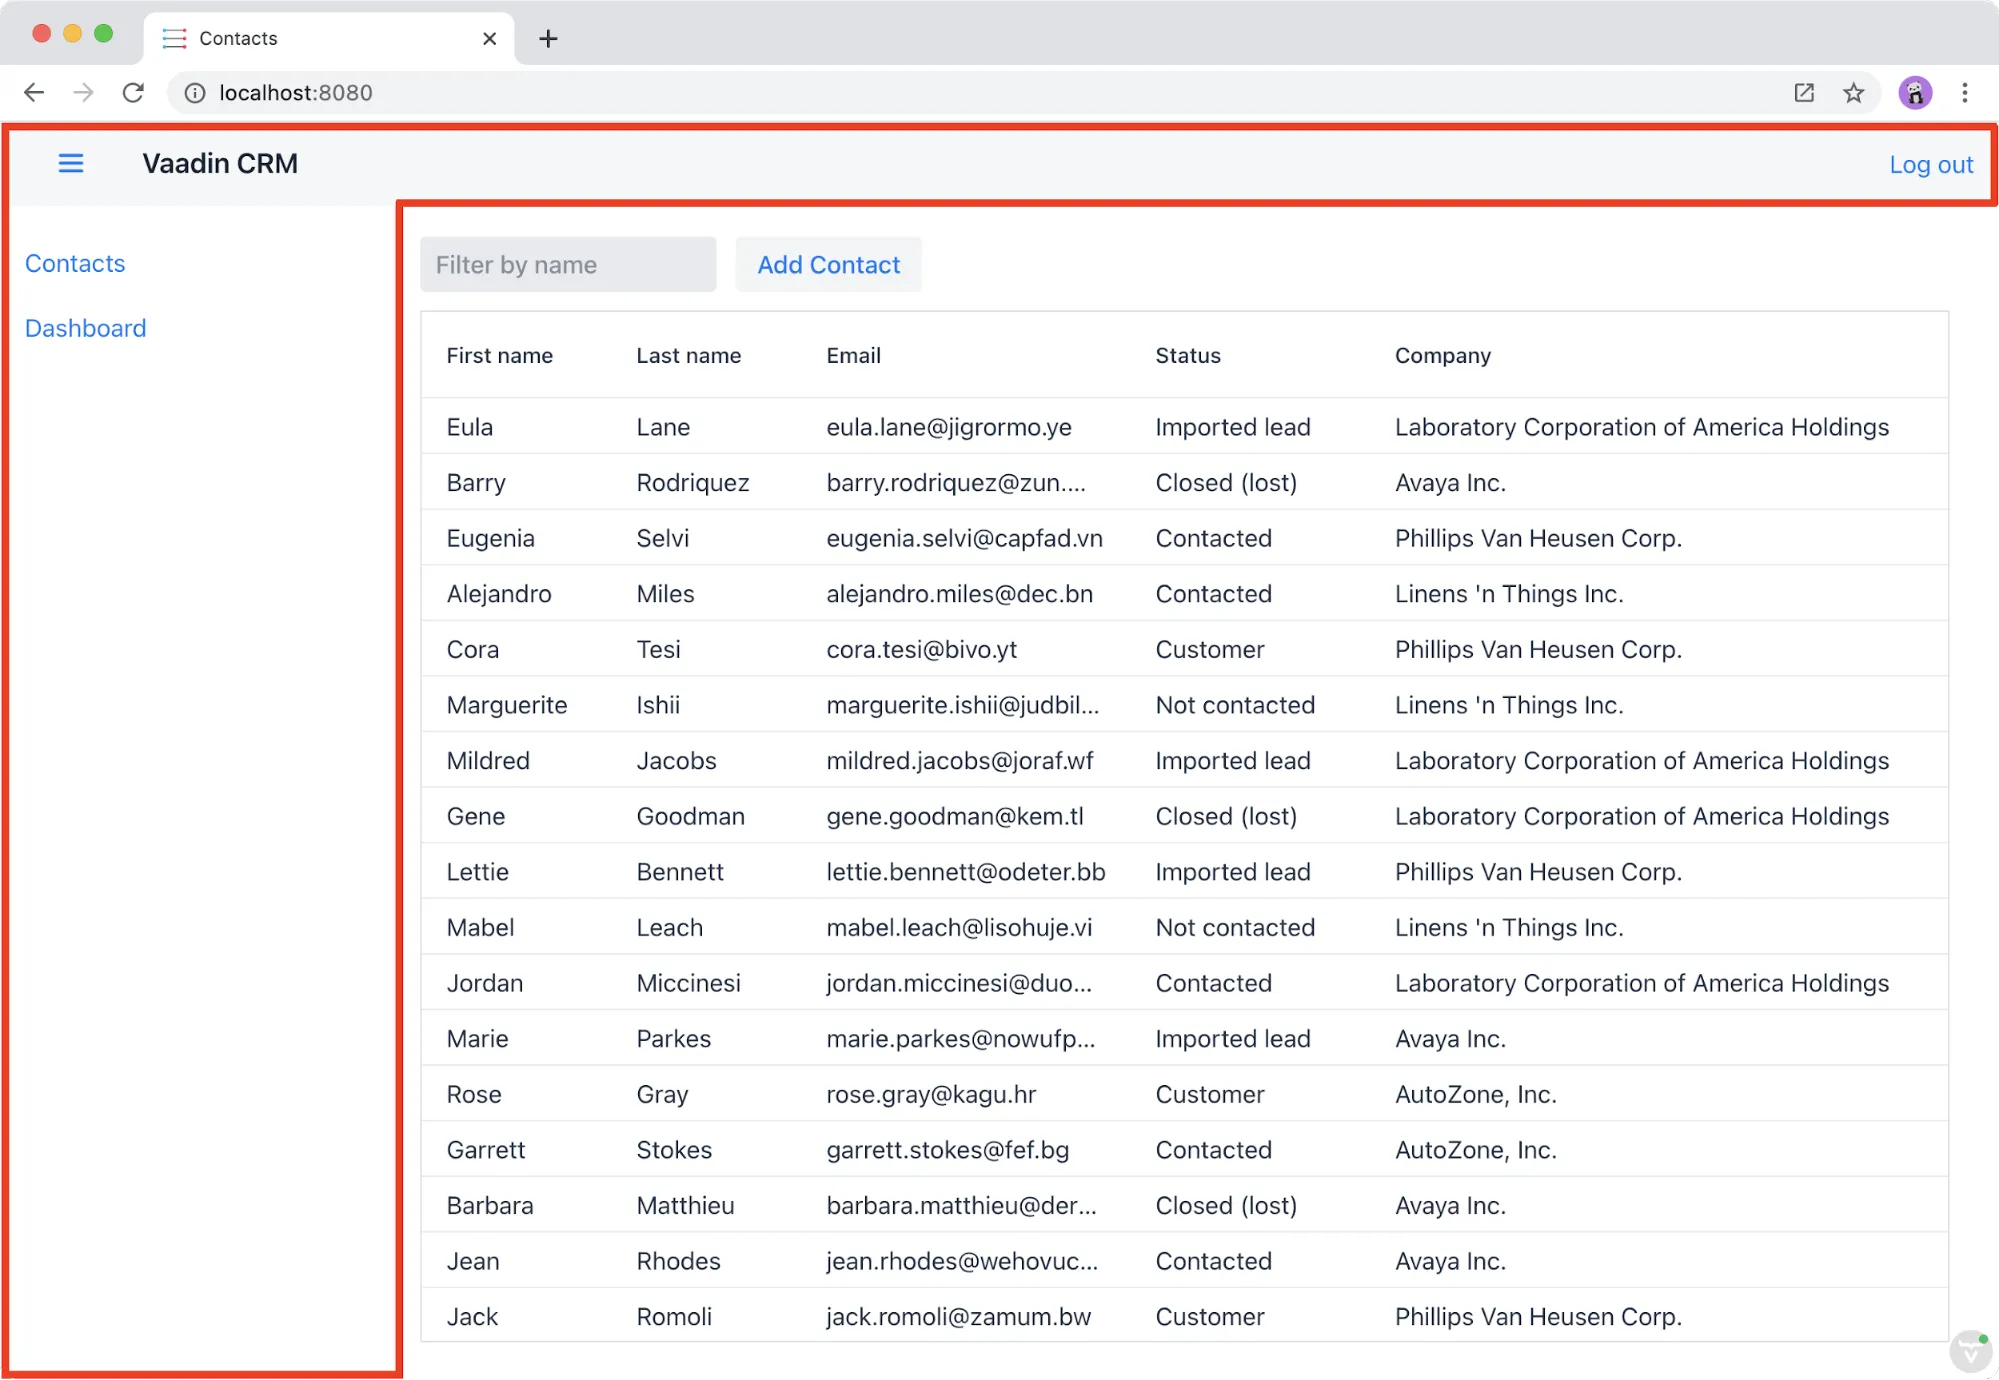
So far in this tutorial series, you’ve built a Customer Relationship Management (CRM) application for listing and editing contacts. In this chapter, you add a dashboard view to the application. You also add a responsive application layout, with a header and a navigation sidebar that can be toggled on small screens.
Defining View Routes
You can make any Vaadin component a navigation target by adding an @Route("<path>") annotation.
Routes can be nested by defining the parent layout in the annotation: @Route(value = "list", layout=MainLayout.class).
Creating the Parent Layout
The application should have:
-
a shared parent layout with two child views:
MainLayout: App Layout with header and navigation:-
ListView: the default view, mapped to"". -
DashboardView: mapped to"dashboard".
-
-
a responsive application layout and navigation links.
Begin by creating a new Java class named MainLayout in the views package with the following content.
This is the shared parent layout of both views in the application.
Source code
MainLayout.java
MainLayout.javapackage com.example.application.views;
import com.example.application.views.list.ListView;
import com.vaadin.flow.component.applayout.AppLayout;
import com.vaadin.flow.component.applayout.DrawerToggle;
import com.vaadin.flow.component.html.H1;
import com.vaadin.flow.component.orderedlayout.FlexComponent;
import com.vaadin.flow.component.orderedlayout.HorizontalLayout;
import com.vaadin.flow.component.orderedlayout.VerticalLayout;
import com.vaadin.flow.router.HighlightConditions;
import com.vaadin.flow.router.RouterLink;
import com.vaadin.flow.server.PWA;
public class MainLayout extends AppLayout { 1
public MainLayout() {
createHeader();
createDrawer();
}
private void createHeader() {
H1 logo = new H1("Vaadin CRM");
logo.addClassNames("text-l", "m-m");
HorizontalLayout header = new HorizontalLayout(
new DrawerToggle(), 2
logo
);
header.setDefaultVerticalComponentAlignment(FlexComponent.Alignment.CENTER); 3
header.setWidth("100%");
header.addClassNames("py-0", "px-m");
addToNavbar(header); 4
}
private void createDrawer() {
RouterLink listLink = new RouterLink("List", ListView.class); 5
listLink.setHighlightCondition(HighlightConditions.sameLocation()); 6
addToDrawer(new VerticalLayout( 7
listLink
));
}
}-
AppLayoutis a Vaadin layout with a header and a responsive drawer. -
DrawerToggleis a menu button that toggles the visibility of the sidebar. -
Centers the components in the
headeralong the vertical axis. -
Adds the
headerlayout to the application layout’s nav bar, the section at the top of the screen. -
Creates a
RouterLinkwith the text "List" andListView.classas the destination view. -
Sets
setHighlightCondition(HighlightConditions.sameLocation())to avoid highlighting the link for partial route matches. (Technically, every route starts with an empty route, so without this, it would always show up as active, even though the user isn’t on the view.) -
Wraps the link in a
VerticalLayoutand adds it to theAppLayoutdrawer.
Add the following CSS to frontend/themes/flowcrmtutorial/styles.css to highlight the selected link.
Source code
styles.css
styles.cssa[highlight] {
font-weight: bold;
text-decoration: underline;
}Lastly, in ListView, update the @Route mapping to use the new MainLayout.
Source code
ListView.java
ListView.java@Route(value="", layout = MainLayout.class) 1
@PageTitle("Contacts | Vaadin CRM")
public class ListView extends VerticalLayout {
...
}-
ListViewstill matches the empty path, but now usesMainLayoutas its parent.
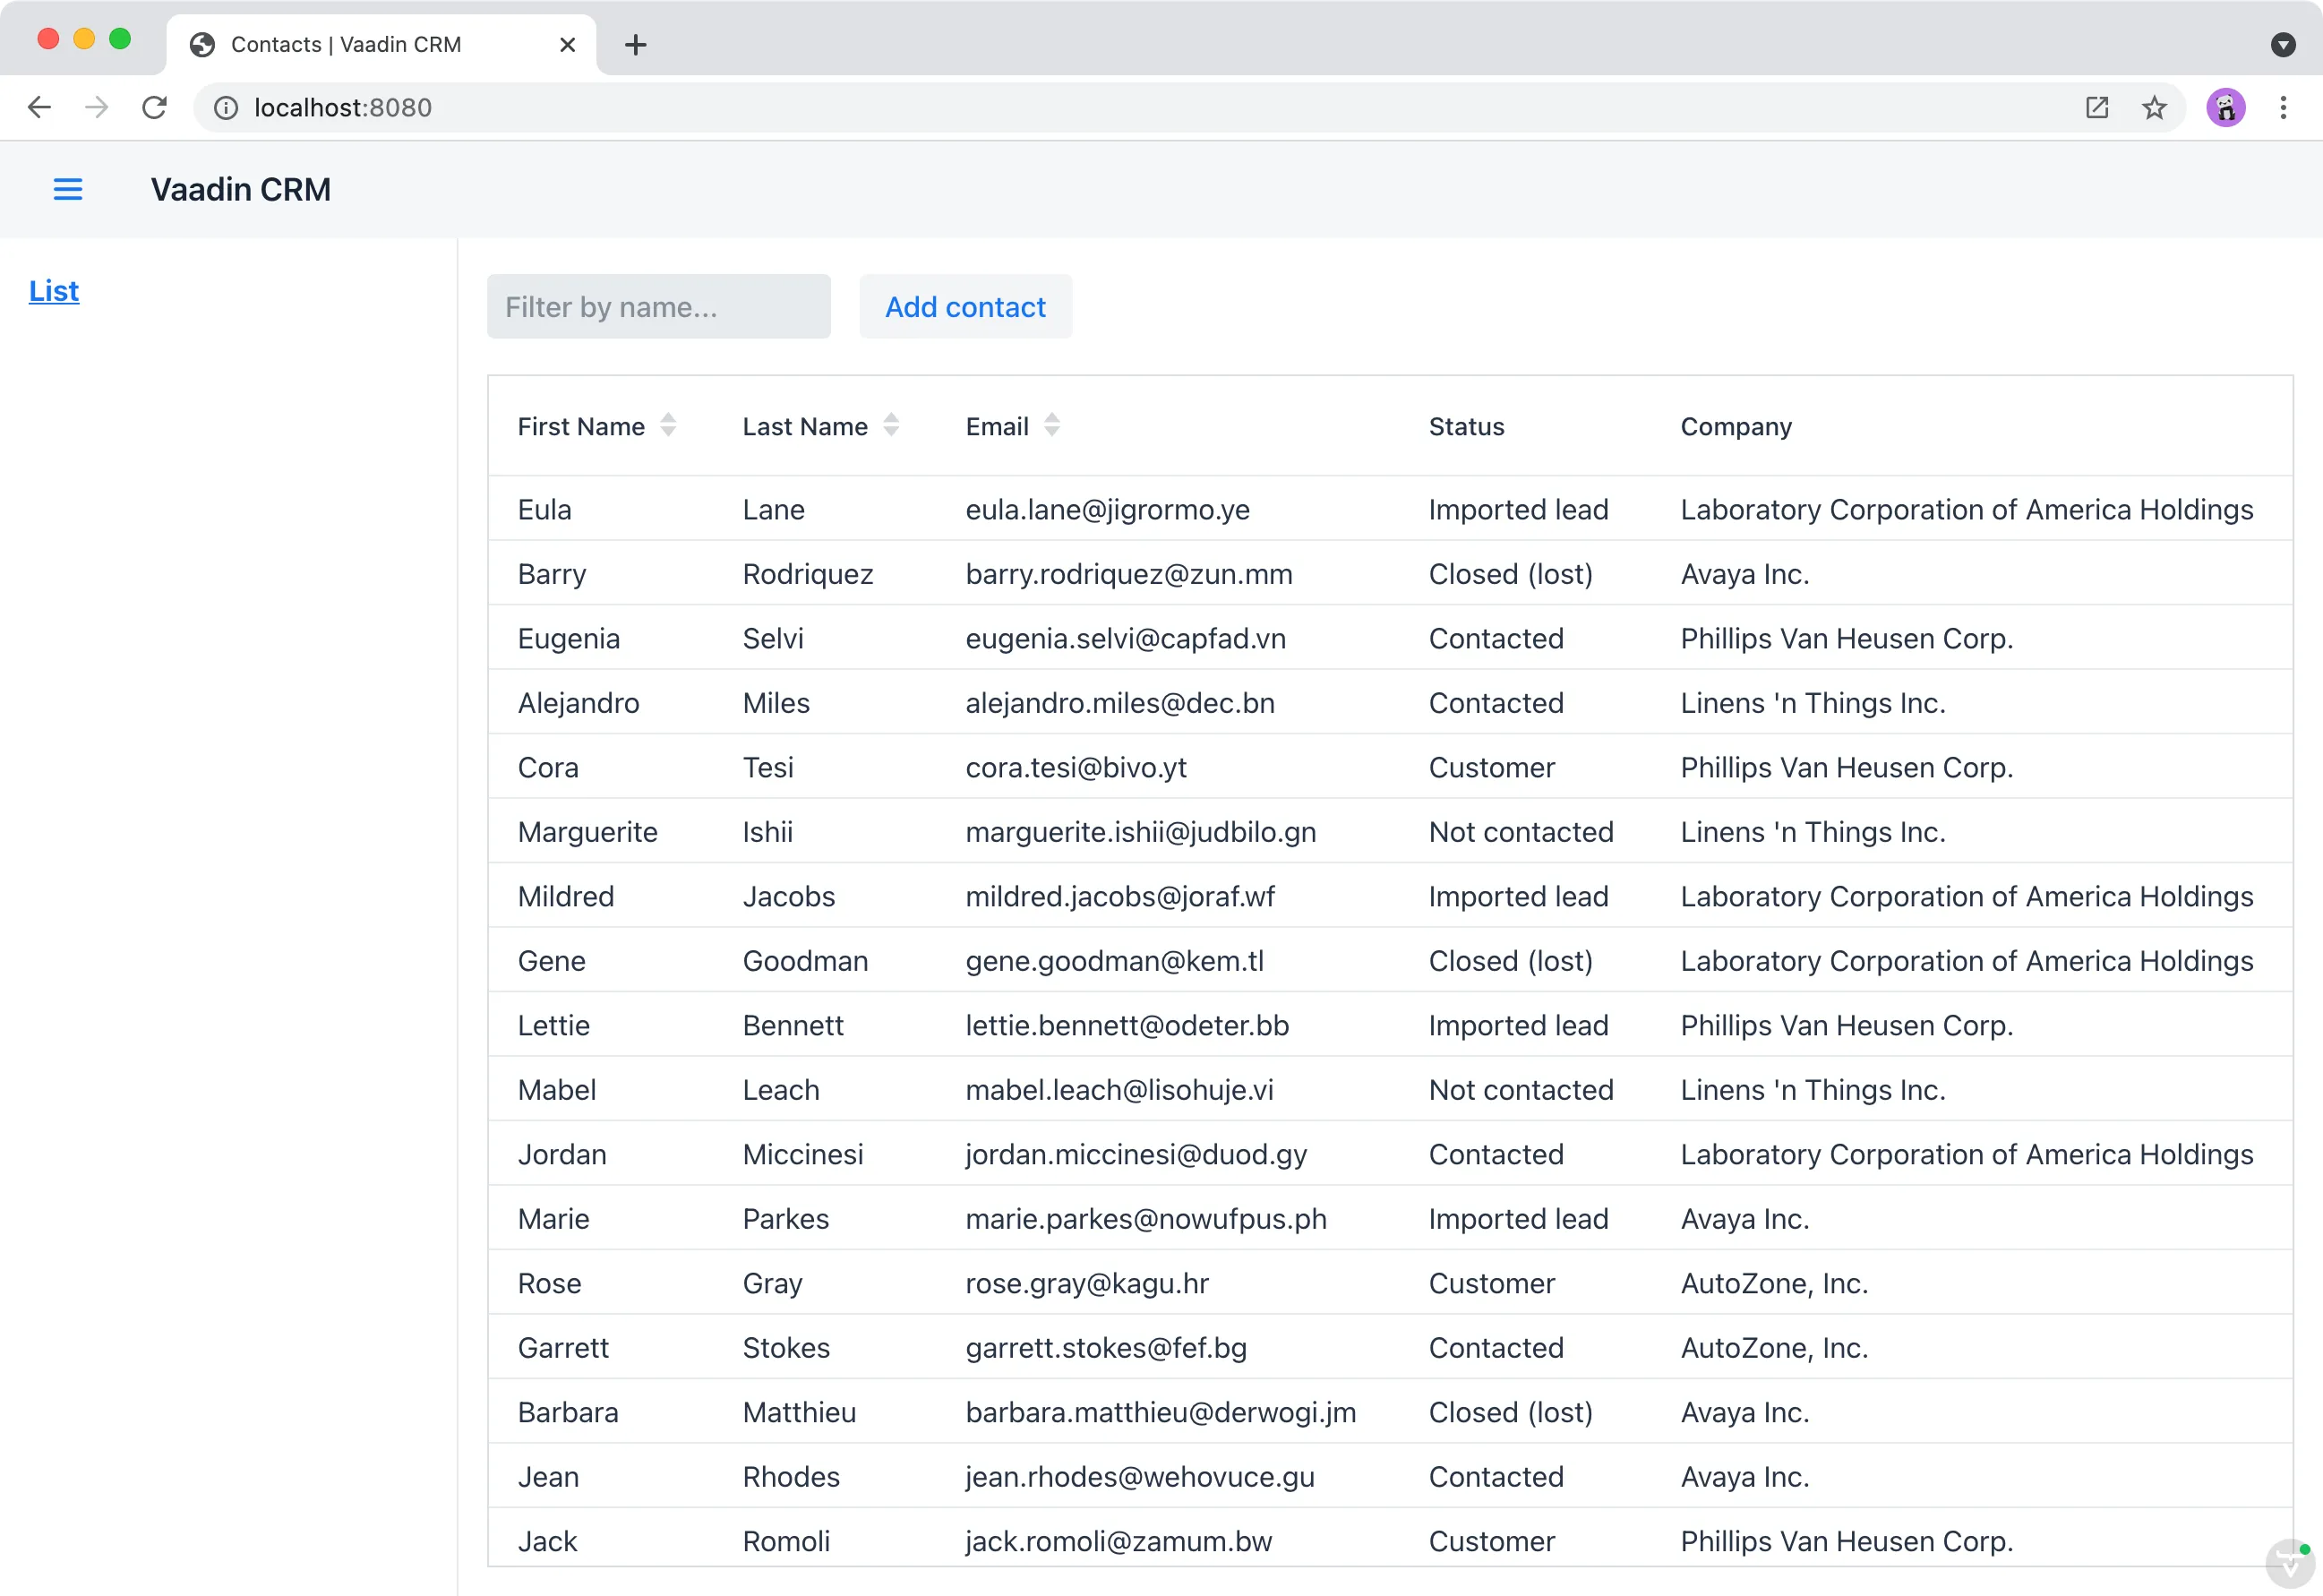
Run the application. You should now see a header and a sidebar on the list view.
Creating a Dashboard View
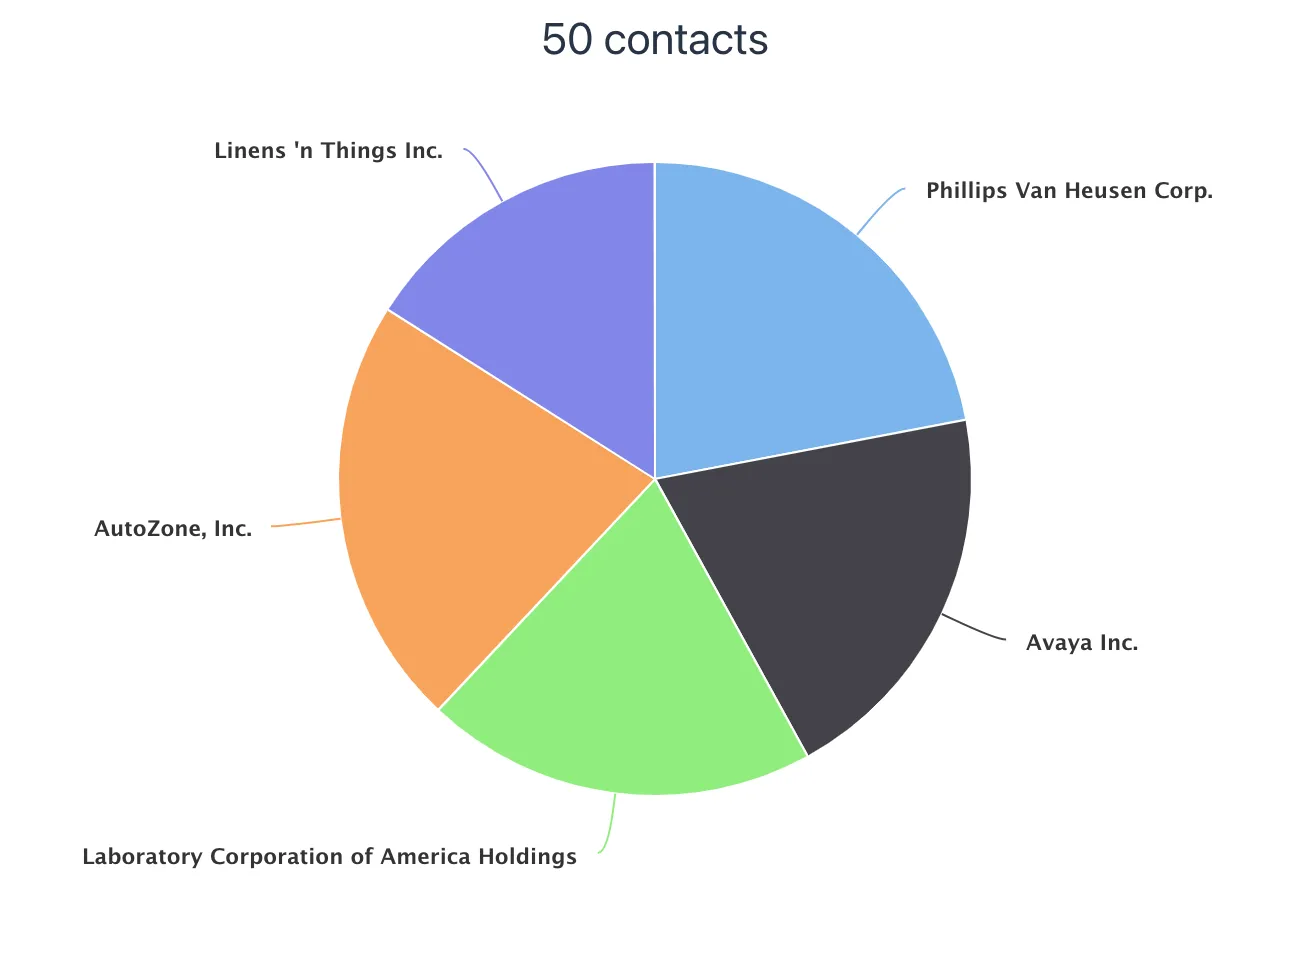
Next, create a new dashboard view. This view shows stats: the number of contacts in the system and a pie chart of the number of contacts per company.
Create a new Java class named DashboardView in the views package with the following content:
Source code
DashboardView.java
DashboardView.javapackage com.example.application.views;
import com.example.application.data.service.CrmService;
import com.vaadin.flow.component.Component;
import com.vaadin.flow.component.charts.Chart;
import com.vaadin.flow.component.charts.model.ChartType;
import com.vaadin.flow.component.charts.model.DataSeries;
import com.vaadin.flow.component.charts.model.DataSeriesItem;
import com.vaadin.flow.component.html.Span;
import com.vaadin.flow.component.orderedlayout.VerticalLayout;
import com.vaadin.flow.router.PageTitle;
import com.vaadin.flow.router.Route;
@Route(value = "dashboard", layout = MainLayout.class) 1
@PageTitle("Dashboard | Vaadin CRM")
public class DashboardView extends VerticalLayout {
private final CrmService service;
public DashboardView(CrmService service) { 2
this.service = service;
addClassName("dashboard-view");
setDefaultHorizontalComponentAlignment(Alignment.CENTER); 3
add(getContactStats(), getCompaniesChart());
}
private Component getContactStats() {
Span stats = new Span(service.countContacts() + " contacts"); 4
stats.addClassNames("text-xl", "mt-m");
return stats;
}
private Chart getCompaniesChart() {
Chart chart = new Chart(ChartType.PIE);
DataSeries dataSeries = new DataSeries();
service.findAllCompanies().forEach(company ->
dataSeries.add(new DataSeriesItem(company.getName(), company.getEmployeeCount()))); 5
chart.getConfiguration().setSeries(dataSeries);
return chart;
}
}-
DashboardViewis mapped to the"dashboard"path and usesMainLayoutas a parent layout. -
Takes
CrmServiceas a constructor parameter and saves it as a field. -
Centers the contents of the layout.
-
Calls the service to get the number of contacts.
-
Calls the service to get all companies, then creates a
DataSeriesItemfor each, containing the company name and employee count.
|
Note
|
Vaadin Charts is a Commercial Component Set
Vaadin Charts is a collection of data visualization components that’s a part of the Vaadin Pro subscription. Vaadin Charts comes with a free trial that you can activate in the browser. All Vaadin Pro tools and components are free for students through the GitHub Student Developer Pack. |
Open Company.java and add the following field and getter to get the employee count without having to fetch all the entities.
Source code
Company.java
Company.java@Formula("(select count(c.id) from Contact c where c.company_id = id)") 1
private int employeeCount;
public int getEmployeeCount(){
return employeeCount;
}-
The Formula gets the count of employees without needing to fetch all the employees.
Add the Dashboard View to the Main Layout Sidebar
Add a navigation link to DashboardView in the MainLayout drawer:
Source code
MainLayout.java
MainLayout.javaprivate void createDrawer() {
RouterLink listLink = new RouterLink("List", ListView.class);
listLink.setHighlightCondition(HighlightConditions.sameLocation());
addToDrawer(new VerticalLayout(
listLink,
new RouterLink("Dashboard", DashboardView.class)
));
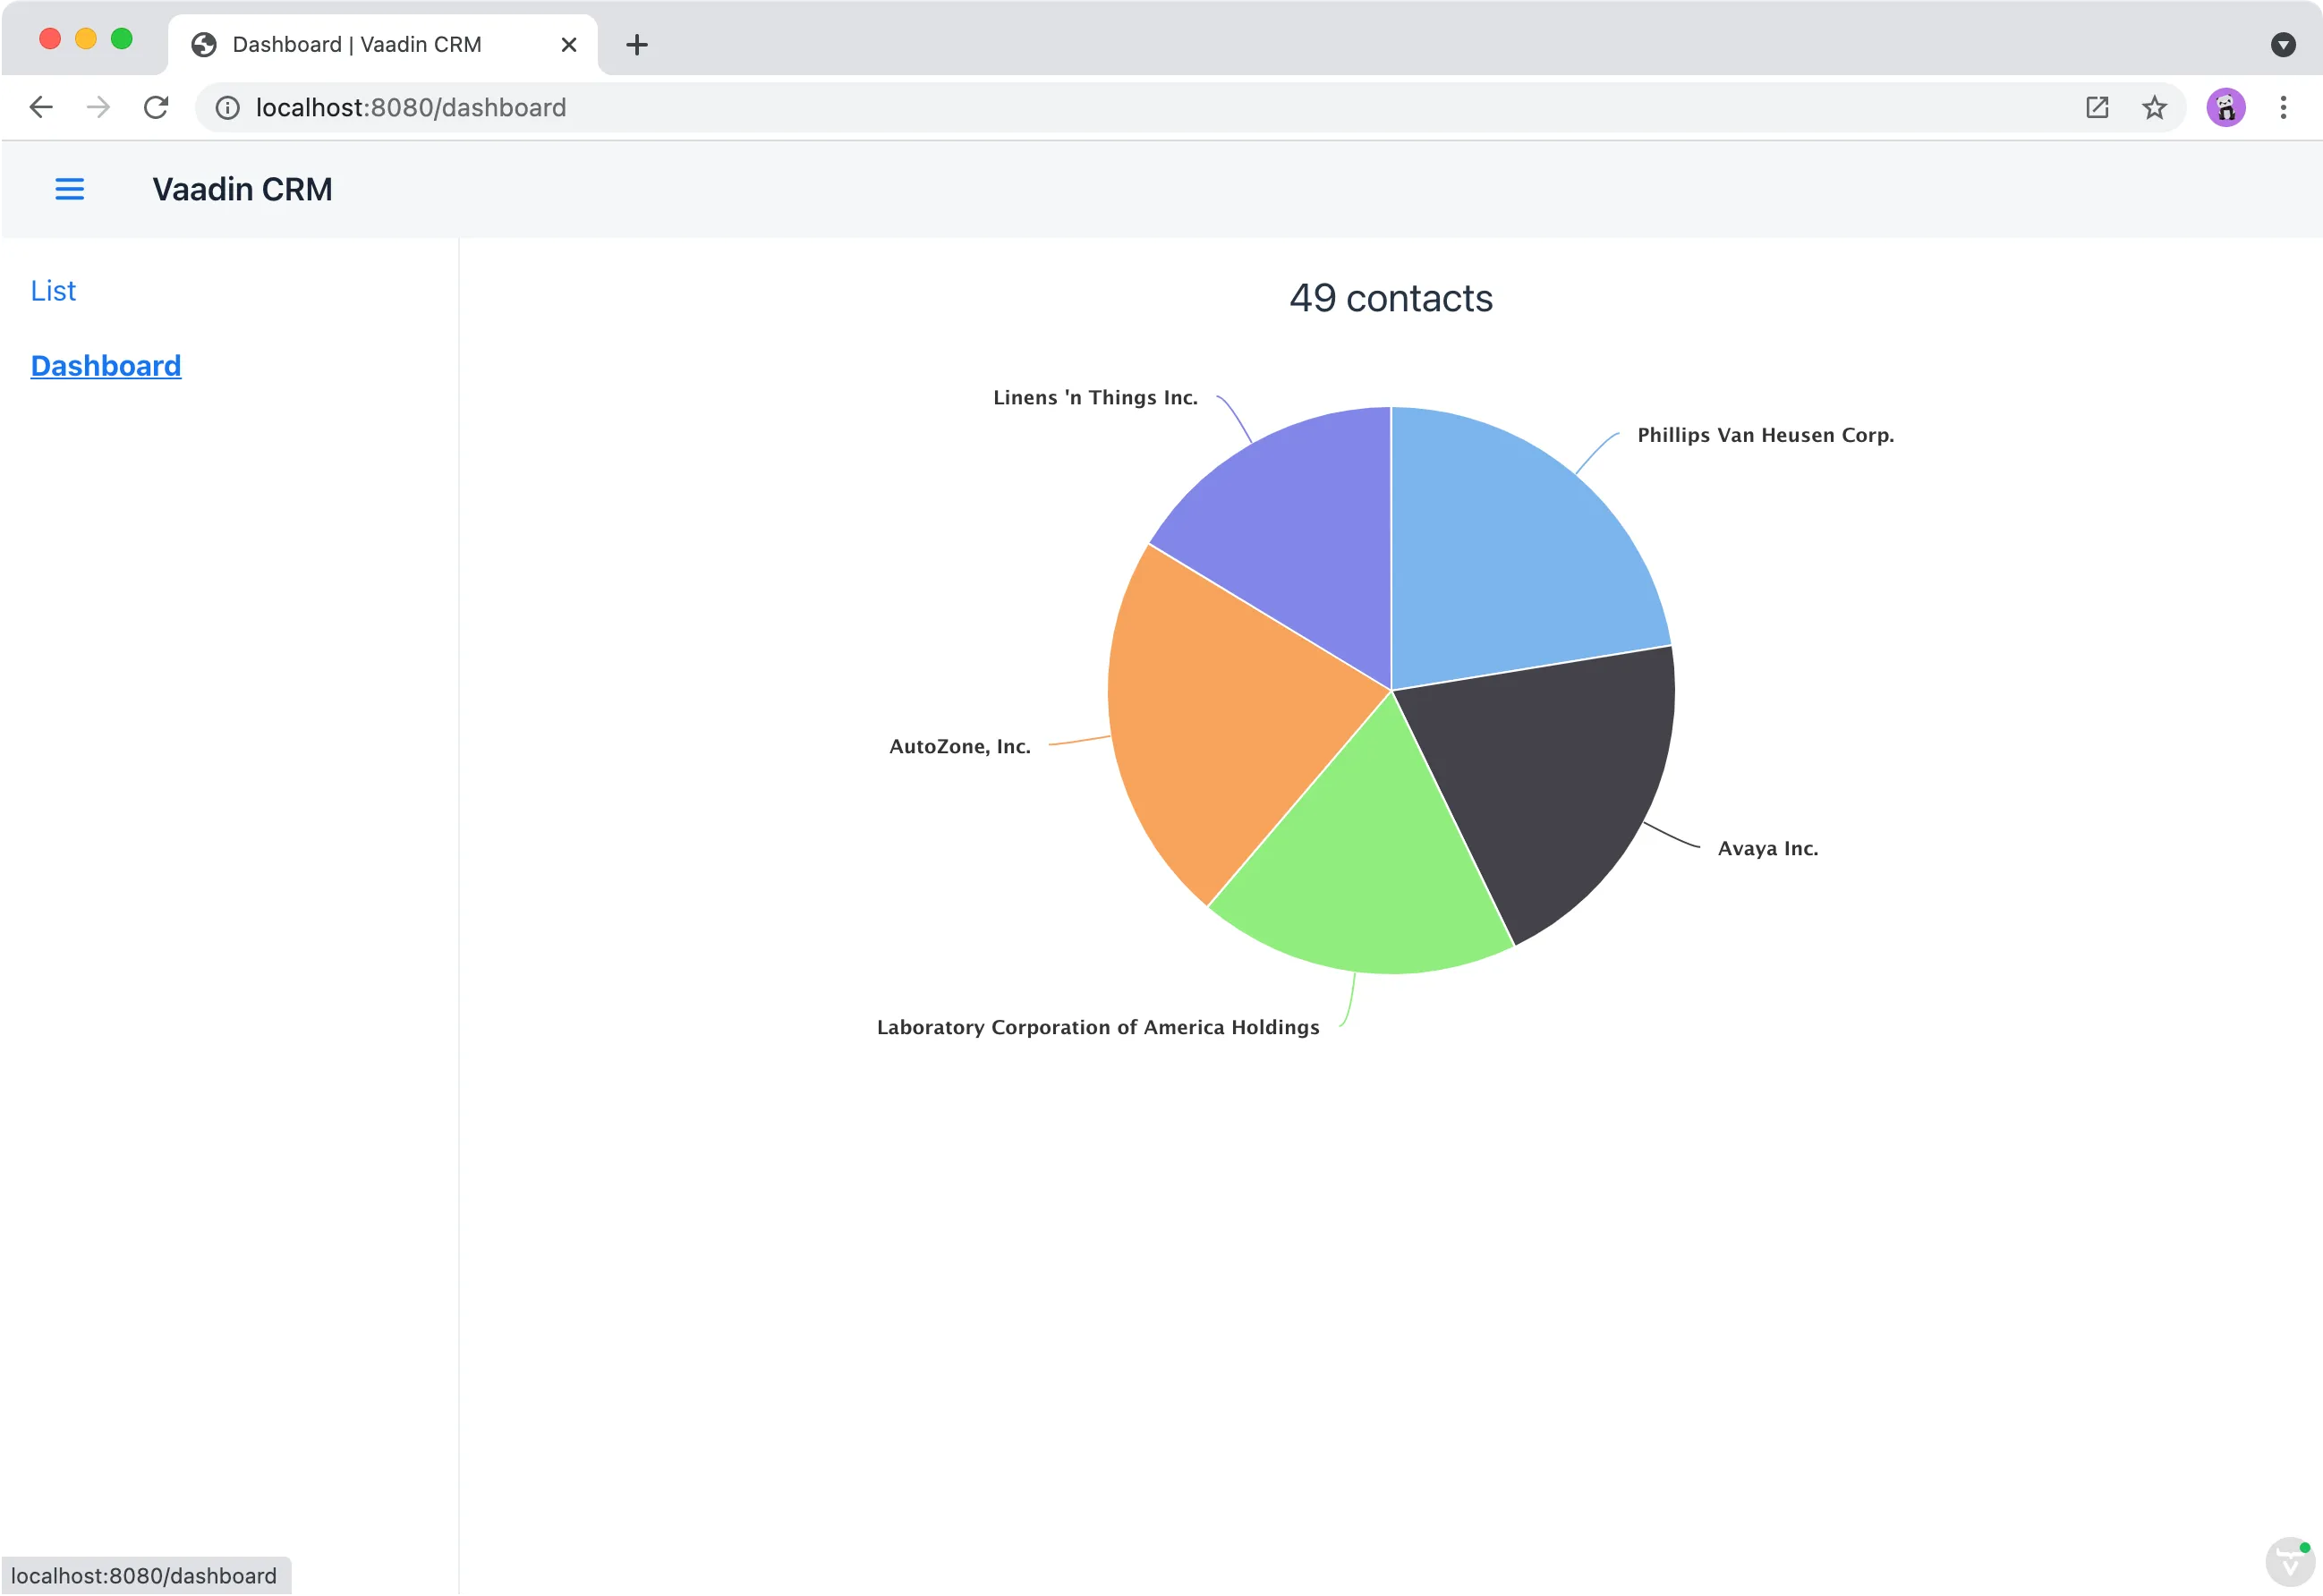
}Build and run the application. You should now be able to navigate to the dashboard view and see stats on your CRM contacts. If you want to, go ahead and add or remove contacts in the list view to see that the dashboard reflects your changes.
In the next chapter, you secure the application by adding a log-in screen.

Source code
render-banner.ts
render-banner.ts
52AFFD31-EA40-4AEF-B60F-E3BB6E5A8379