Getting Started with AppSec Kit
AppSec Kit is an excellent tool for monitoring application dependencies for vulnerabilities. It lets you see details of what’s discovered. And you can record and store your analysis to share with other developers.
Add AppSec Kit Dependency
To start, you’ll need to add AppSec Kit as a dependency to your application. To add it to a Maven project, you might include something like this in your pom.xml file:
Source code
pom.xml
<dependency>
    <groupId>com.vaadin</groupId>
    <artifactId>appsec-kit-starter</artifactId>
    <version>2.0.0</version>
</dependency>
See the AppSec Kit releases page for the latest version, or for a different version of the dependency.
Generating SBOM Files
To be able to monitor the application dependencies, AppSec Kit needs the Software Bill of Materials (SBOM) files generated from Maven and npm dependencies. These files contain information about the dependencies and their transitives.
Maven Dependencies
To generate the SBOM file from Maven dependencies, you’ll need to add the CycloneDX Maven Plugin to the plugins in your pom.xml file like so:
Source code
pom.xml
<plugin>
    <groupId>org.cyclonedx</groupId>
    <artifactId>cyclonedx-maven-plugin</artifactId>
    <version>2.7.7</version>
    <executions>
        <execution>
            <phase>generate-resources</phase>
            <goals>
                <goal>makeAggregateBom</goal>
            </goals>
        </execution>
    </executions>
    <configuration>
        <projectType>library</projectType>
        <schemaVersion>1.4</schemaVersion>
        <includeBomSerialNumber>true</includeBomSerialNumber>
        <includeCompileScope>true</includeCompileScope>
        <includeProvidedScope>true</includeProvidedScope>
        <includeRuntimeScope>true</includeRuntimeScope>
        <includeSystemScope>true</includeSystemScope>
        <includeTestScope>false</includeTestScope>
        <includeLicenseText>false</includeLicenseText>
        <outputReactorProjects>true</outputReactorProjects>
        <outputFormat>json</outputFormat>
        <outputName>bom</outputName>
        <outputDirectory>${project.build.outputDirectory}/resources</outputDirectory>
        <verbose>false</verbose>
    </configuration>
</plugin>
Before starting the application, make sure to run the maven install. Then the SBOM file, bom.json should be generated in the /resources sub-directory in the project’s output directory. The plugin is configured to do this.
npm Dependencies
To generate the SBOM file from npm dependencies defined in the package.json file, you’ll need to run the @cyclonedx/cyclonedx-npm plugin with npx like so:
Source code
shell
npx --package @cyclonedx/cyclonedx-npm --call exitThe @cyclonedx/cyclonedx-npm plugin requires node >= 14 and npm >= 6 versions, also, the package-lock.json file and the node_modules folder should be present in order to successfully run.
To add it to the plugins, you would use the exec-maven-plugin in your pom.xml file like this:
Source code
pom.xml
<plugin>
    <groupId>org.codehaus.mojo</groupId>
    <artifactId>exec-maven-plugin</artifactId>
    <version>1.3.2</version>
    <executions>
        <execution>
            <id>cyclonedx-npm</id>
            <goals>
                <goal>exec</goal>
            </goals>
            <phase>generate-resources</phase>
            <configuration>
                <executable>npx</executable>
                <arguments>
                    <argument>@cyclonedx/cyclonedx-npm</argument>
                    <argument>--output-file</argument>
                    <argument>${project.build.outputDirectory}/resources/bom-npm.json</argument>
                    <argument>--output-format</argument>
                    <argument>JSON</argument>
                </arguments>
            </configuration>
        </execution>
    </executions>
</plugin>
Before starting the application, make sure to run the npm install and mvn install. Then the SBOM file, bom-npm.json should be generated in the /resources sub-directory in the project’s output directory. The plugin is configured to do this. AppSec Kit scans this SBOM file for vulnerabilities, if it’s available.
External APIs
AppSec Kit calls external APIs to get vulnerabilities and vulnerability analysis for Vaadin dependencies. Since these calls are required for a normal operation, they need to be accessible.
Source code
text
OSV (Open Source Vulnerability) API:
https://api.osv.dev/v1/querybatch
https://api.osv.dev/v1/vulns/

GitHub API:
https://api.github.com/repos/vaadin/flow/releases

Vaadin vulnerability analysis:
https://raw.githubusercontent.com/vaadin/vulnerability-analysis/main/analysis.json
Start the Application
AppSec Kit isn’t enabled in production mode. You’ll need to start your application in development mode — which is the default starting mode for applications. You don’t need to enable this, explicitly.
Notification Dialog
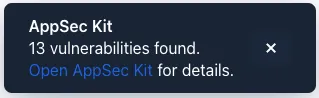
After the application has started, AppSec Kit analyzes the dependencies, collects new vulnerabilities, and displays a notification dialog. A vulnerability is considered as new if a developer analysis has not yet been added to it. Therefore, vulnerabilities with developer analysis aren’t counted in the found vulnerabilities number (see screenshot). You’ll see a link labeled Open AppSec Kit that you can click on to open the UI in a new tab.
You can also navigate to the UI using the vaadin-appsec-kit route. For example, on your localhost enter something like this in your browser: http://localhost:8080/vaadin-appsec-kit.
AppSec Kit automatically activates server push if neither push nor polling is active for a UI where AppSec Kit is used. This way you’ll be notified when new vulnerabilities are found. You can disable this functionality by overriding the default AppSec Kit configuration.
AppSec Kit UI
The AppSec Kit UI has views for seeing vulnerabilities and dependencies of which you should be aware. This section describes those views, which can be found under the two main tabs of the UI.
Vulnerabilities Tab
When you open the UI, you’ll see the Vulnerabilities tab (see screenshot). Any collected vulnerabilities are listed there. They’re shown in a grid view, with columns to help identify each vulnerability, and the ecosystem and dependency in which each has been found. It also includes the severity calculated from the CVSS vector string, a CVSS score and some analyses.
You can filter the vulnerabilities by using the Ecosystem, Dependency, Vaadin analysis, Developer analysis, Severity, and Common Vulnerability Scoring System (i.e., CVSS) score filters. You’d choose these filters from the pull-down menus near the top to apply any of the filters. Click on the Clear button next to the filters to reset them.
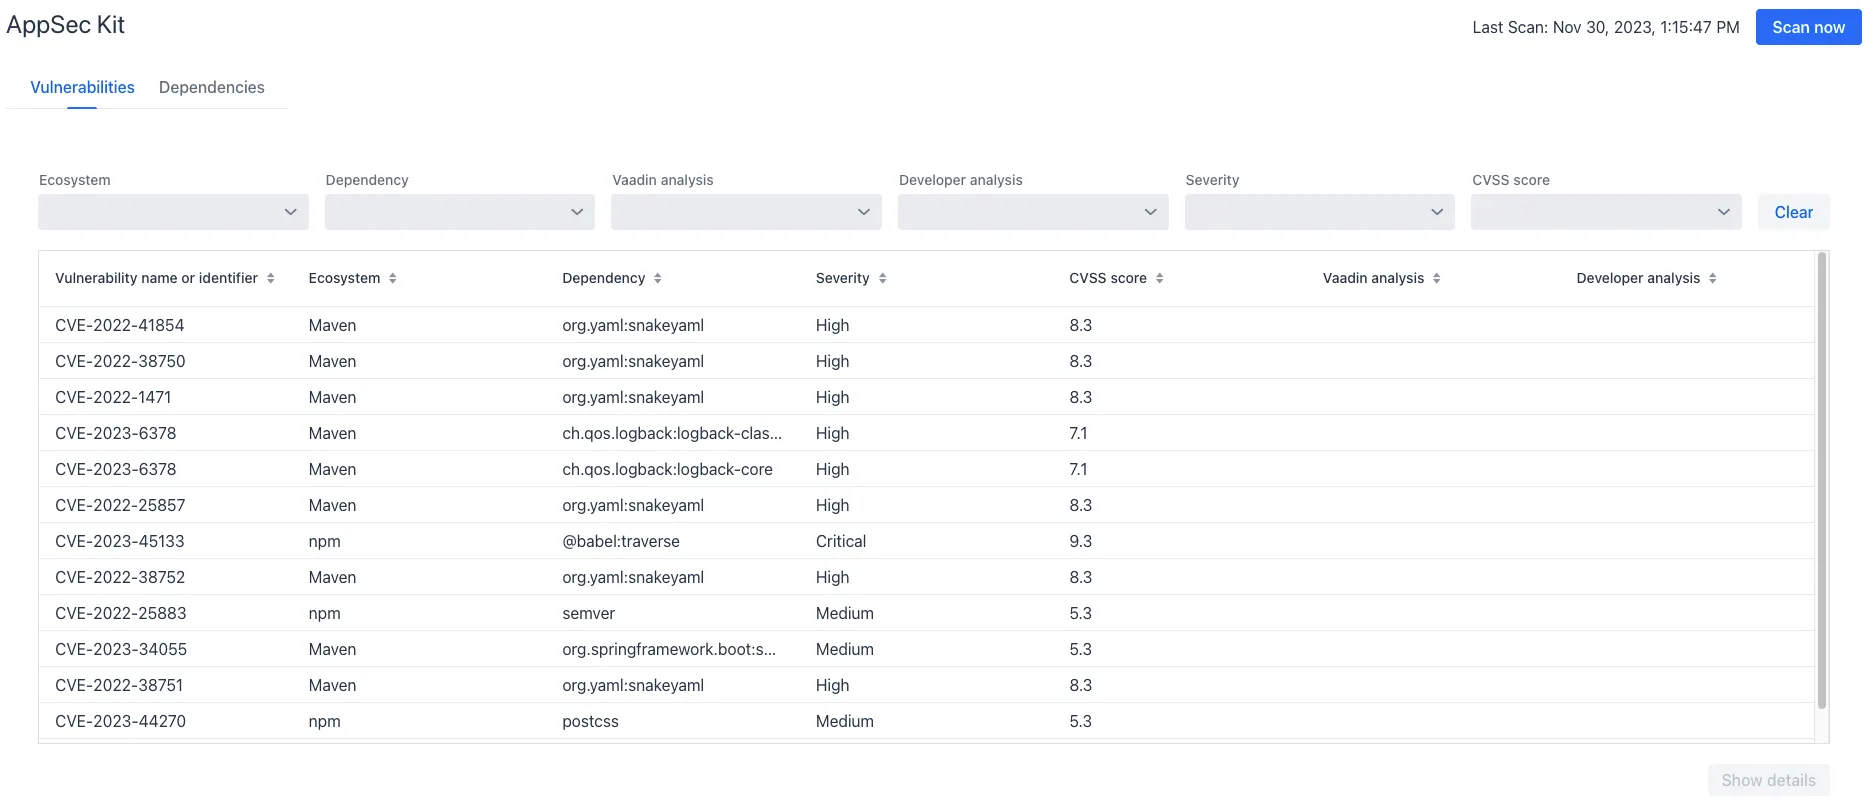
To run a new scan, click the Scan now button at the top right corner. After it’s finished, the Last Scan date and time is updated — located also at the top right.
If you want to see more details about a particular vulnerability, select the row containing it, and then click the Show details button. Or you can double-click on the row. The Vulnerability Details View is then opened — which is described next.
Vulnerability Details
When you open a listed vulnerability, you can see a more detailed description of it (see screenshot here). You’ll also find links to other pages to explain the vulnerability and offer some general suggestions to resolve it.
If the Vaadin Security Team is reviewing the vulnerability, it’ll be noted at the top. This includes Vaadin’s specific assessment and related recommendations.
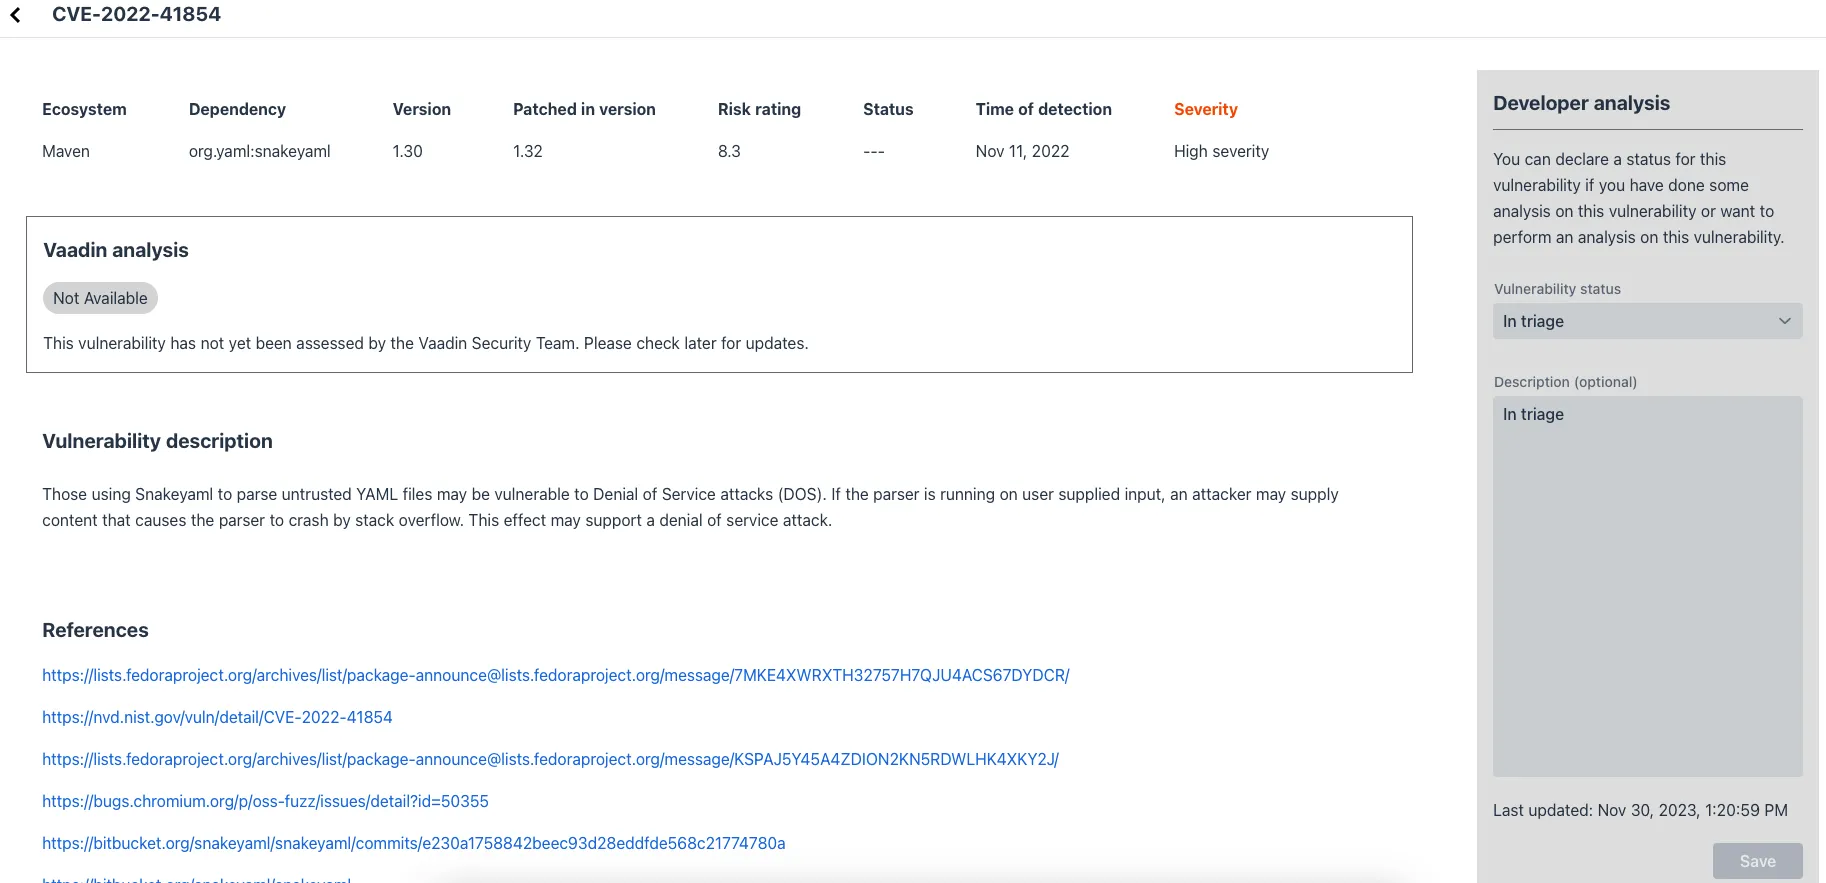
On the right side of the Details View, there’s a Developer analysis panel. There you can set the Vulnerability status and add your own description and other information you’ve uncovered. Preserve what you enter by clicking the Save button. Your analysis is made available to other developers if you commit it to the version control system.
Dependencies Tab
To see your application dependencies, click on the Dependencies tab at the top left of the UI. There you’ll find a list of dependencies shown in a grid view (see screenshot here).
They’re listed in columns to help identify each dependency, ecosystem and group to which it belongs, and the version. It also lists the Is development, which marks if an npm dependency is a development dependency — for Maven dependencies this is always false. And it lists the count of vulnerabilities, the highest severity, and the highest CVSS score.
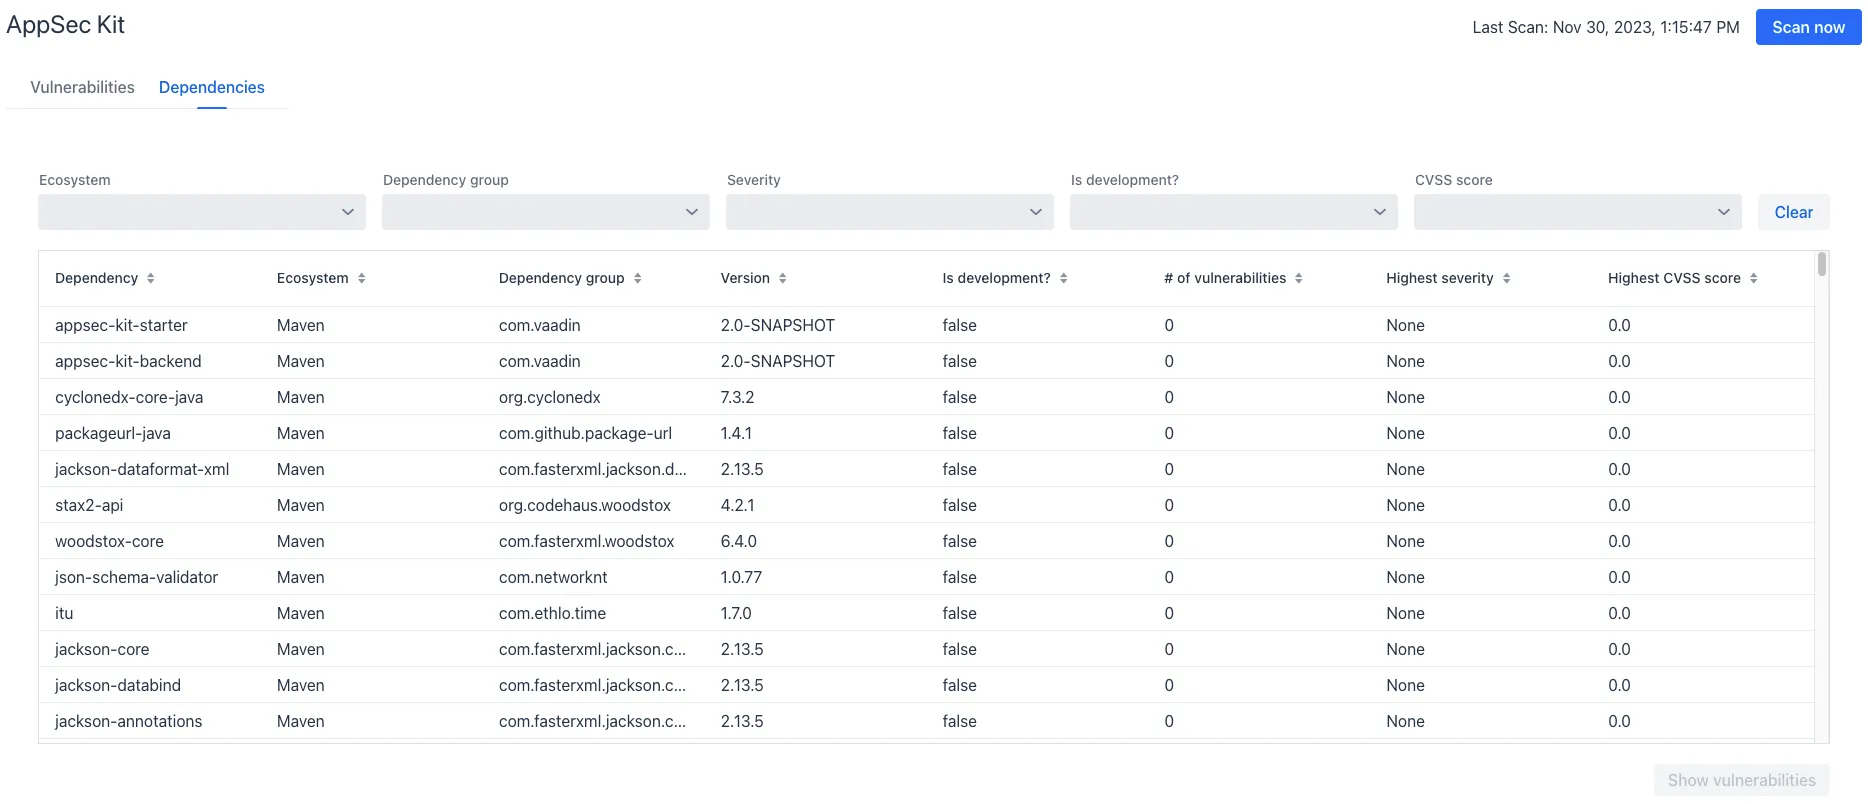
You can filter the list of dependencies based on the Ecosystem, Dependency group, Is development, Security, and the CVSS score. Choose these filters from the pull-down menus near the top to apply them. Click on the Clear button to reset them.
If you want to see the vulnerabilities of a particular dependency, select the row containing it, and then click the Show vulnerabilities button. Or you can double-click on a row. The Vulnerabilities Tab is then opened with the vulnerabilities for that dependency.