Handling Long-Running Tasks
- The Problem with Long-Running Tasks
- Handling Long-Running Tasks Asynchronously
- Showing Progress to the User
- Canceling a Long Running Task
Often, server-side tasks can take a long time to complete. For example, a task that requires fetching a large amount of data from the database can take a long time to finish. In such cases, a poorly designed application can freeze the UI and prevent the user from interacting with the application.
This guide shows you how to handle long-running tasks in Vaadin applications in a way that:
-
Allows the user to continue interacting with the application while the task is running, possibly allowing the user to cancel the task.
-
Allows the user to see the progress of the task.
The examples used here are based on Spring Boot, but a similar approach can be used with other technologies.
The Problem with Long-Running Tasks
To illustrate how a poorly designed handling of long-running tasks can affect users, consider the following back-end service that simulates a long-running task.
Source code
BackendService.java
@Service
public class BackendService {

    public String longRunningTask() {
        try {
            // Simulate a long running task
            Thread.sleep(6000);
        } catch (InterruptedException e) {
            e.printStackTrace();
        }
        return "Some result";
    }

}
Consider also that the BackendService.longRunningTask() method is being called from the following Vaadin UI:
Source code
MainView.java
@Route("")
public class MainView extends VerticalLayout {

    public MainView(BackendService backendService) {
        Button startButton = new Button("Start long-running task", clickEvent -> {
            String result = backendService.longRunningTask();
            Notification.show(result);
        });

        Button isBlockedButton = new Button("Is UI blocked?", clickEvent -> {
            Notification.show("UI isn't blocked!");
        });

        add(startButton, isBlockedButton);
    }

}
In this example, if the user clicks the "Start long-running task" button, the application freezes the UI and prevent the user from interacting with the other parts of the application (for example, with the isBlockedButton).
This happens because Vaadin is waiting for the long-running task to finish before it sends the response back to the user, at which point the user can continue interacting with the application.
Handling Long-Running Tasks Asynchronously
The recommended way to handle long-running tasks is to use an asynchronous approach. This means that the long-running task is executed in a separate thread, and the UI isn’t blocked while the task is running.
An asynchronous model can be achieved in several ways.
But in the context of a Spring Boot application, one way is to use the @Async annotation.
The @Async annotation is used to mark a method as an asynchronous task.
From the Vaadin UI side, a response to the user request is immediately sent back to the browser, and thus the user can continue interacting with the application right away without being blocked by the long-running task.
When the asynchronous task is finished, Vaadin uses Server Push to let the user know that the task is completed.
The following example shows how the BackendService.longRunningTask() method can be adjusted to run asynchronously in a separate thread.
Source code
BackendService.java
@Service
public class BackendService {

    @Async 1
    public ListenableFuture<String> longRunningTask() { 2
        try {
            // Simulate a long running task
            Thread.sleep(6000);
        } catch (InterruptedException e) {
            e.printStackTrace();
        }
        return AsyncResult.forValue("Some result"); 3
    }

}-
@Asyncannotation to mark the method for asynchronous execution. -
The method now returns a
ListenableFutureobject. -
The method’s return value is a
ListenableFutureobject that contains the result of the asynchronous task.
Now the BackendService.longRunningTask() method is annotated with the @Async annotation, and the long-running task is executed in a separate thread.
The BackendService.longRunningTask() method now returns a ListenableFuture<String> instead of a String (returning a ListenableFuture or a CompletableFuture is a requirement for any asynchronous service).
The ListenableFuture is a special type of Future that allows the caller to register a callback to be notified when the task is completed.
With these changes in place, you can change the UI to allow the user to start the long-running task and still be able to interact with the application.
Vaadin can then use the ListenableFuture and the UI.access() method of Server Push to notify the user when the task is completed.
This is how MainView.java could look now:
Source code
MainView.java
@Route("")
public class MainView extends VerticalLayout {

    public MainView(BackendService backendService) {
        Button startButton = new Button("Start long-running task", clickEvent -> {
            UI ui = clickEvent.getSource().getUI().orElseThrow(); 1
            ListenableFuture<String> future = backendService.longRunningTask();
            future.addCallback(
                    successResult -> updateUi(ui, "Task finished: " + successResult), 2
                    failureException -> updateUi(ui, "Task failed: " + failureException.getMessage()) 3
            );
        });

        Button isBlockedButton = new Button("Is UI blocked?", clickEvent -> {
            Notification.show("UI isn't blocked!");
        });

        add(startButton, isBlockedButton);
    }

    private void updateUi(UI ui, String result) { 4
        ui.access(() -> {
            Notification.show(result);
        });
    }

}-
Save the current UI in a local variable, so that you can use it later to update the UI through the
UI.access()method. -
The callback is called when the task is completed successfully.
-
The callback is called if the task failed.
-
The
UI.access()method is used to update the UI in a thread-safe manner through server-side push.
You’re still not done.
For the above example to work as intended, you need two extra annotations for the @Async annotation and the UI.access() method to work.
-
For the
@Asyncannotation, you need to add the@EnableAsyncannotation to the application. -
For the
UI.access()method, you need to add the@Pushannotation to the class implementing theAppShellConfiguratorinterface.
You can make both changes in the same class as illustrated in the following Application class (which both extends SpringBootServletInitializer and implements AppShellConfigurator):
Source code
Application.java
@SpringBootApplication
@Push
@EnableAsync
public class Application extends SpringBootServletInitializer implements AppShellConfigurator {

    public static void main(String[] args) {
        SpringApplication.run(Application.class, args);
    }

}
Showing Progress to the User
With the Vaadin component Progress Bar, you can provide an indicator that a long-running action is currently in progress.
The following adjusts the above MainView example to show a progress bar when the user clicks the "Start long-running task" button.
Source code
MainView.java
@Route("")
public class MainView extends VerticalLayout {

    private ProgressBar progressBar = new ProgressBar(); 1

    public MainView(BackendService backendService) {
        progressBar.setWidth("15em");
        progressBar.setIndeterminate(true);
        progressBar.setVisible(false); 2

        Button startButton = new Button("Start long-running task", clickEvent -> {
            UI ui = clickEvent.getSource().getUI().orElseThrow();
            ListenableFuture<String> future = backendService.longRunningTask();

            progressBar.setVisible(true); 3

            future.addCallback(
                    successResult -> updateUi(ui, "Task finished: " + successResult),
                    failureException -> updateUi(ui, "Task failed: " + failureException.getMessage())
            );
        });

        Button isBlockedButton = new Button("Is UI blocked?", clickEvent -> {
            Notification.show("UI isn't blocked!");
        });

        add(startButton, progressBar, isBlockedButton);
    }

    private void updateUi(UI ui, String result) {
        ui.access(() -> {
            Notification.show(result);
            progressBar.setVisible(false); 4
        });
    }

}-
First, create a
ProgressBarobject. -
After configuring the
ProgressBar, hide it by default. -
Show the
ProgressBarwhen the task is started. -
When the long-running task is completed or errors out, hide the
ProgressBaragain.
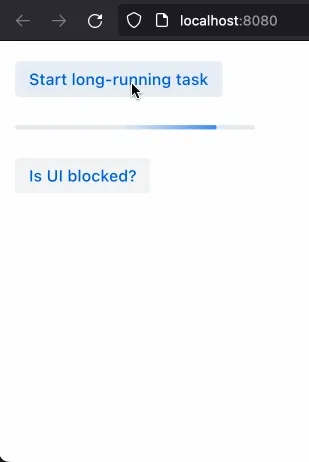
Here is the animation of the MainView showing the progress bar.

Canceling a Long Running Task
For your task to be cancellable, the following conditions must be met:
-
Your
@Asyncmethod must return aFuture. -
The running task must be cancellable.
The modified MainView class below shows how to add a Button to cancel the long-running task.
Source code
MainView.java
@Route("")
public class MainView extends VerticalLayout {

    private ProgressBar progressBar = new ProgressBar();
    private Button cancelButton = new Button("Cancel task execution");

    public MainView(BackendService backendService) {
        progressBar.setWidth("15em");
        progressBar.setIndeterminate(true);

        progressBar.setVisible(false);
        cancelButton.setVisible(false); 1

        Button startButton = new Button("Start long-running task", clickEvent -> {
            UI ui = clickEvent.getSource().getUI().orElseThrow();
            ListenableFuture<String> future = backendService.longRunningTask();

            progressBar.setVisible(true);
            cancelButton.setVisible(true); 2
            cancelButton.addClickListener(e -> future.cancel(true)); 3

            future.addCallback(
                    successResult -> updateUi(ui, "Task finished: " + successResult),
                    failureException -> updateUi(ui, "Task failed: " + failureException.getMessage())
            );
        });

        Button isBlockedButton = new Button("Is UI blocked?", clickEvent -> {
            Notification.show("UI isn't blocked!");
        });

        add(startButton, new HorizontalLayout(progressBar, cancelButton), isBlockedButton);
    }

    private void updateUi(UI ui, String result) {
        ui.access(() -> {
            Notification.show(result);
            progressBar.setVisible(false);
            cancelButton.setVisible(false); 4
        });
    }

}-
Like the
ProgressBar, hide the CancelButtonby default. -
Show the Cancel
Buttonwhen the task is started. -
The
Futurerepresenting the long-running task is canceled when the CancelButtonis clicked. -
When the task is completed or canceled, hide the cancel
Button.
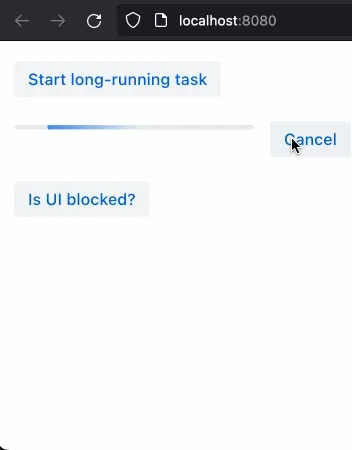
Here is the animation of the MainView with a Cancel Button.

C15BD166-7C06-4C9E-8686-6FCDCDF31CE1