Vaadin Flow Quick Start
Vaadin Flow enables you to quickly build web applications in pure Java, without writing any HTML or JavaScript.
In this guide, you learn how to build a small but fully functional ToDo application using Vaadin Flow.
What You Need
-
About 5 minutes
-
JDK 11 or higher (For example, Eclipse Temurin JDK).
Step 1: Download a Vaadin Project
Unpack the downloaded ZIP file into a folder on your computer, and import the project into the IDE of your choice.
Step 2: Add Your Code
Open src/main/java/com/example/application/views/main/MainView.java.
Replace the code in MainView.java with the following code:
Source code
MainView.java
MainView.javapackage com.example.application.views.main;
import com.vaadin.flow.component.Key;
import com.vaadin.flow.component.button.Button;
import com.vaadin.flow.component.checkbox.Checkbox;
import com.vaadin.flow.component.html.H1;
import com.vaadin.flow.component.orderedlayout.HorizontalLayout;
import com.vaadin.flow.component.orderedlayout.VerticalLayout;
import com.vaadin.flow.component.textfield.TextField;
import com.vaadin.flow.router.Route;
@Route("") 1
public class MainView extends VerticalLayout { 2
public MainView() {
VerticalLayout todosList = new VerticalLayout(); 3
TextField taskField = new TextField(); 4
Button addButton = new Button("Add"); 5
addButton.addClickListener(click -> { 6
Checkbox checkbox = new Checkbox(taskField.getValue());
todosList.add(checkbox);
});
addButton.addClickShortcut(Key.ENTER); 7
add( 8
new H1("Vaadin Todo"),
todosList,
new HorizontalLayout(
taskField,
addButton
)
);
}
}-
The
@Routeannotation makes the view accessible to the end user, in this case using the empty `` route. -
As the
MainViewclass extendsVerticalLayout, components added to it are ordered vertically. -
todosListis a vertical layout that displays a list of the tasks along with checkboxes. -
taskFieldis a text input field to enter the description of new tasks. -
addButtonis a button for adding a new task. -
In the listener for the button click, first create a new checkbox with the value from the
taskFieldas its label. Then add the checkbox to thetodosList. -
Add a shortcut for the
addButtoncomponent when the key is pressed. -
Call
add()on theVerticalLayoutto display the components vertically. Notice thattaskFieldandaddButtonare in aHorizontalLayout, which puts them next to each other.
Step 3: Run the Application
To run the project in your IDE, launch Application.java, which is located under src/main/java/org/vaadin/example.
Alternatively, you can run the project from the command line by typing mvnw (on Windows) or ./mvnw (on macOS or Linux).
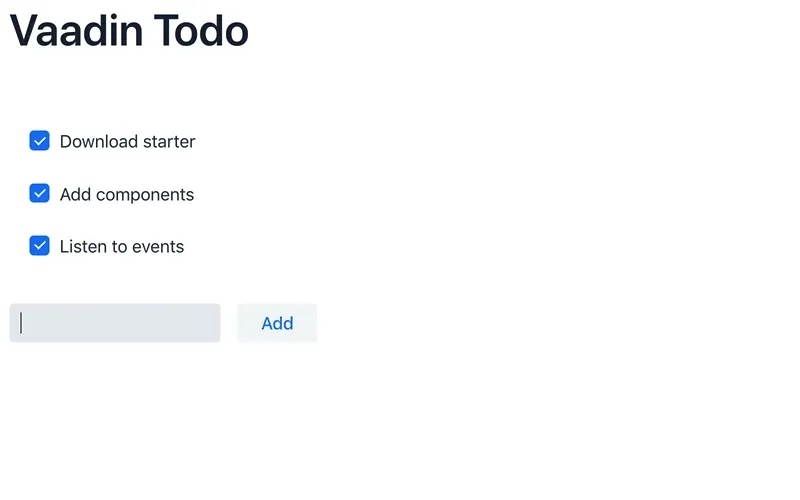
Then, in your browser, open localhost:8080.
You should see the following:
Go Further
Now you have a taste of how Vaadin Flow empowers you to quickly build web applications in pure Java, without writing any HTML or JavaScript.
Download a custom project starter to get started on your own application.
Continue exploring Vaadin Flow in the documentation, tutorials, and video courses:
The source code of the ToDo project is available on GitHub.
4762E8FE-6BAA-405E-8C48-E62042C55239