Application Discovery
Control Center is meant to be a central management solution for Vaadin applications deployed in a Kubernetes cluster. If you want to manage a Vaadin application with Control Center, use the Discovery view to add the application to Control Center. Before an application can be managed properly by Control Center, some preparations are needed.
Prepare an Application for Discovery
First, you must add the control-center-starter dependency to your Vaadin application like so:
<dependency>
    <groupId>com.vaadin</groupId>
    <artifactId>control-center-starter</artifactId>
    <version>1.0.0</version>
</dependency>
Then build a Docker image of your application with an appropriate Dockerfile file.
FROM eclipse-temurin:21-jre
COPY target/*.jar app.jar
EXPOSE 8080
ENTRYPOINT ["java", "-jar", "/app.jar"]docker build -t vaadin/example:0.1.1 .|
Note
|
Potential Side-Effects
Control Center sets the SPRING_APPLICATION_NAME environment variable with the name chosen in the deployment dialog and that might override any application name set in the application’s properties.
|
Deploy & Adopt a Vaadin Application
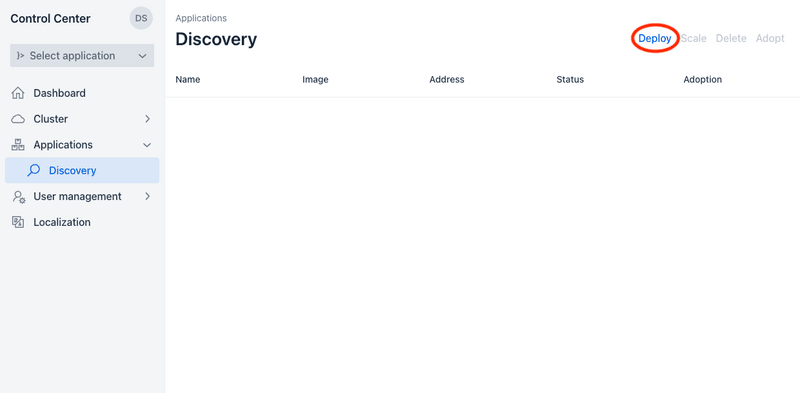
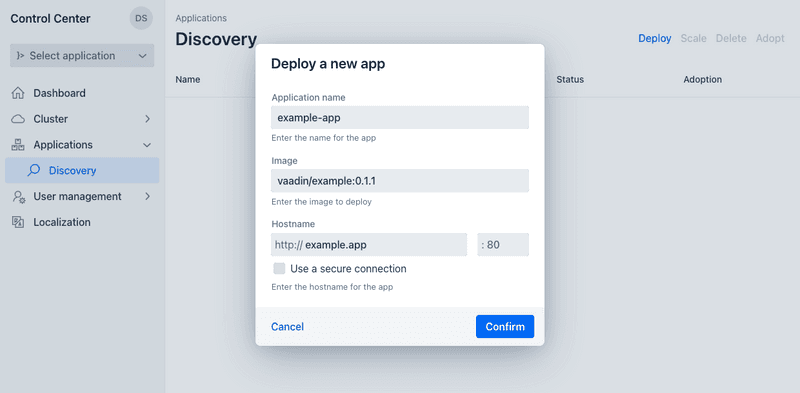
Once you have a docker image of your application ready, the next step is to deploy your application using Control Center. In the Application Discovery view, click on "Deploy". This opens the application deployment dialog.

Fill in the text fields with the data for the application: In the "Application name" field, use the same name as the one in the bootstrap.yml file. In the "Image" field, remember to use the correct tag (e.g., 0.1.1). In the "Hostname" field, enter a hostname that is resolvable by the browser (e.g., the Keycloak hostname).
The "Use a secure connection" choice is optional. It determines whether a self-signed certificate is to be created for the application.
|
Note
|
If the version in the image tag is latest, Control Center pulls the image from the public registry.
|
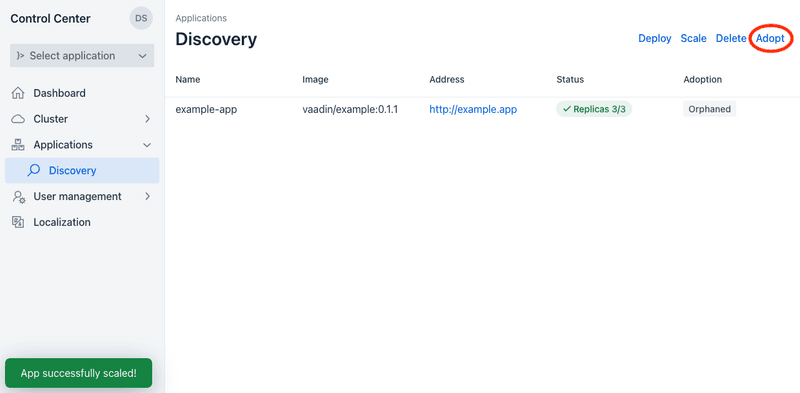
Once you click "Confirm", Control Center creates a deployment using your application’s docker image and makes it available at the specified hostname as soon as possible (see screenshot here).

You can adopt the application at any moment so that it’s available in the application selection drop-down. This allows you to select the application for management in other parts of Control Center, like user management. To adopt an orphaned application, select it and click "Adopt" in the top right corner.

When you no longer wish to have Control Center manage an application, select it and click "Delete". Don’t worry, it doesn’t delete the image from your system.
Scale an Application
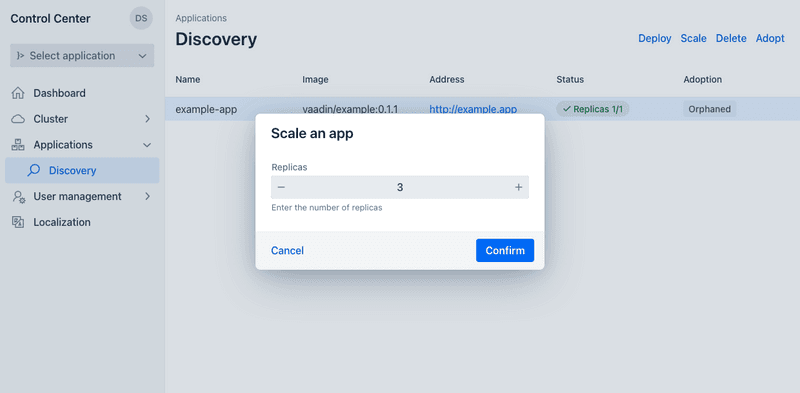
Once an application has been deployed, it’s easy to scale it up or down. Select the application to scale and click on "Scale". This opens the scale application dialog. Enter the number of replicas you wish your cluster to have and click "Confirm". Your application then is automatically scaled to the desired number of replicas.
