Getting started on NetBeans
*This page is for old NetBeans version. Take a look at
Your First Project with Vaadin in NetBeans IDE 6.7
Eclipse users have access to the Vaadin Eclipse plugin which is probably the easiest way to get started with the Vaadin framework. But if you preferNetBeans IDE, this is the article for you. And don’t worry, it’s almost as easy to get started with NetBeans also.
This tutorial assumes you have downloaded and installed a bundle of NetBeans that includes the Apache Tomcat server (the "Java Web & EE" support) and you have the latest Vaadin JAR package at hand.
Creating the Project
Launch your NetBeans IDE and perform the following steps to create a new web project.
-
Select
File → New Projectto open the New Project dialog window. -
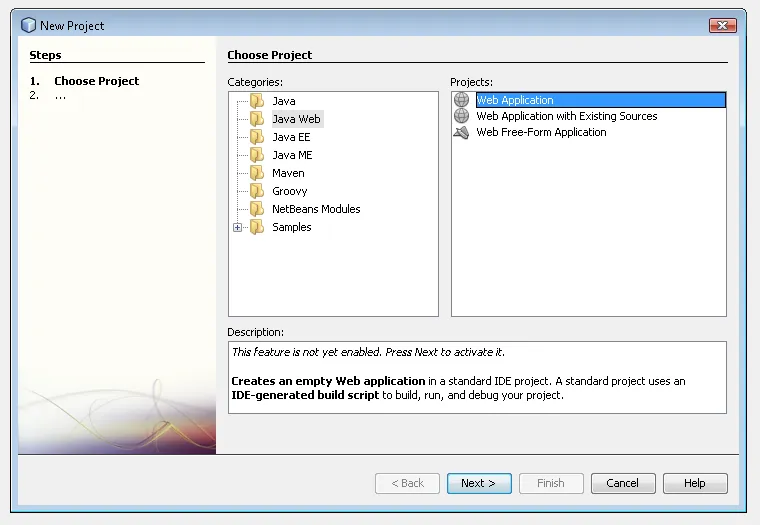
Select
Java Webfrom the categories andWeb Applicationfrom the project selection and clickNextto proceed. -
Type in a name and location for your project (I use
HelloVaadinas the name and my default project folder) and clickNext. -
Select the
Apache Tomcat 6.0.18server and type in preferred context path or use the default (the project name). The context path will define the URL of your application (for examplehttp://localhost:8084/HelloVaadin). ClickFinishto create the project. -
You can close and ignore the index.jsp, which is opened to the editor by default after the project has been created.
Importing Vaadin Libraries
Next you need to import the Vaadin library JAR package to the project you just created.
-
Right-click the
Librariesnode on your project and selectAdd JAR/Folder…. -
Locate your copy of the Vaadin JAR file in the opening file dialog and click
Open. -
Now you should see the JAR file under the Libraries node.
Writing the Code
Next we create the application class for our simple example application.
-
Select
New → Java Classon your project to open the New Java Class dialog. -
Type in your a name and package for your class (I use a class name of
HelloVaadinand a packagecom.vaadin.netbeans.tutorial). -
Select
Finishto create the Java class.
This class will be the main application class of our Vaadin
application.Therefore it must extend the abstract
com.vaadin.Application class and implement the init() method.
Type in or copy-paste the following code to the newly created file:
Source code
Java
package com.vaadin.netbeans.tutorial;

import com.vaadin.Application;
import com.vaadin.ui.*;

public class HelloVaadin extends Application {
  @Override
  public void init() {
    Window mainWindow = new Window("HelloVaadin");
    Label label = new Label("Hello Vaadin user");
    mainWindow.addComponent(label);
    setMainWindow(mainWindow);
  }
}
Defining Deployment Descriptor
To run your application you must define a deployment descriptor for it.
Open Web Pages → WEB-INF → web.xml file on your project. By
default the file is opened in a graphical editor but you can select the
XML tab to edit the XML file directly. Type in or copy-paste the
following to the contents of the file.
Source code
XML
<?xml version="1.0" encoding="UTF-8"?>
<web-app version="2.5"
   xmlns="http://java.sun.com/xml/ns/javaee"
   xmlns:xsi="http://www.w3.org/2001/XMLSchema-instance"
   xsi:schemaLocation="http://java.sun.com/xml/ns/javaee http://java.sun.com/xml/ns/javaee/web-app_2_5.xsd">
  <display-name>HelloVaadin</display-name>
  <context-param>
    <param-name>productionMode</param-name>
    <param-value>false</param-value>
    <description>Vaadin production mode</description>
  </context-param>

  <servlet>
    <servlet-name>HelloVaadin</servlet-name>
    <servlet-class>com.vaadin.terminal.gwt.server.ApplicationServlet</servlet-class>
    <init-param>
      <param-name>application</param-name>
      <param-value>com.vaadin.netbeans.tutorial.HelloVaadin</param-value>
      <description>Vaadin application class to start</description>
    </init-param>
  </servlet>

  <servlet-mapping>
    <servlet-name>HelloVaadin</servlet-name>
    <url-pattern>/*</url-pattern>
  </servlet-mapping>
</web-app>
Running Your Application
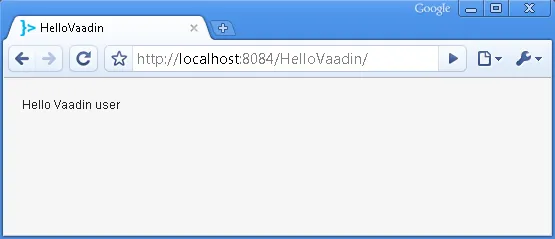
Now we can run (or debug) the application by simply selecting Run →
Run Main Project (or Run → Debug Main Project).This starts the
Apache Tomcat server and opens up your application in your default
browser.
What Next?
Now that you have your environment setup, you probably want to explore more of the features of the Vaadin framework. I would suggest that you head to the Vaadin tutorial. Have fun with Vaadin!