I b - Getting started with Vaadin Spring without Spring Boot
Note: this tutorial applies to Vaadin Spring 1.0.0 and later
During this tutorial we will create a new Vaadin project, add Spring and Vaadin Spring as dependencies, create a simple Spring UI and deploy the application to a server.
Note that this tutorial is for using Vaadin Spring without Spring Boot. Using Spring Boot is the recommended approach for getting started quickly when creating a new project. For more information about setting up a project both with and without Spring Boot - see https://vaadin.github.io/spring-tutorial/[the Vaadin Spring Boot tutorial].
Creating a Vaadin project
If you’ve created Vaadin projects before, there’s nothing new here. File→New→Project… then select Maven Project. This will take you to the project creation wizard. You can also create the project using Vaadin Plug-in for Eclipse if you prefer.
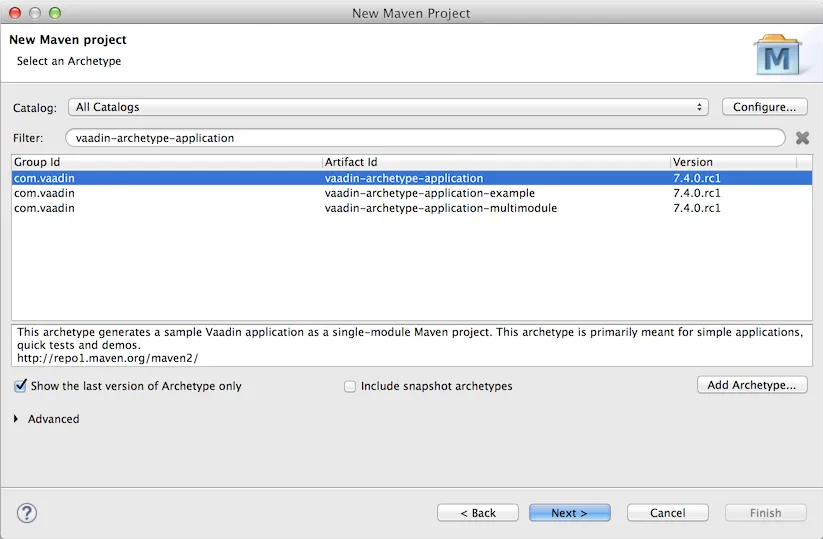
then select the Vaadin archetype
(com.vaadin:vaadin-archetype-application:<newest Vaadin version>).
Set your group and artefact ids and your package to your liking. (I used
com.vaadin, spring.tutorial and com.vaadin.spring.tutorial respectively)
Adding Vaadin Spring as a dependency
Open pom.xml and add
Source code
XML
<dependency>
    <groupId>com.vaadin</groupId>
    <artifactId>vaadin-spring</artifactId>
    <version>1.0.0</version>
</dependency>
in the dependencies. Also replace the dependency "vaadin-client" with "vaadin-client-compiled" and remove the scope line for it as we are using a pre-compiled widgetset. If your project does not use the Vaadin add-on Maven repository yet, add it to the POM:
Source code
XML
<repositories>
    <repository>
        <id>vaadin-addons</id>
        <url>https://maven.vaadin.com/vaadin-addons</url>
    </repository>
</repositories>
Then save and update project.
Creating the UI
The project wizard created a UI for us that we’ll use as a starting point for building our application. There are some unnecessary things we’ll take out and some things we’ll need to add. Start of by deleting the AppWidgetSet.gwt.xml, as we won’t need a custom widgetset in these tutorials. We’ll also have to make a few changes to the UI to make it work with Vaadin Spring.
Here’s the UI’s original source:
Source code
Java
@Theme("mytheme")
@SuppressWarnings("serial")
public class MyVaadinUI extends UI {

  @WebServlet(value = "/*", asyncSupported = true)
  @VaadinServletConfiguration(productionMode = false, ui = MyVaadinUI.class, widgetset = "com.vaadin.spring.tutorial.AppWidgetSet")
  public static class Servlet extends VaadinServlet {
  }

  @Override
  protected void init(VaadinRequest request) {
    final VerticalLayout layout = new VerticalLayout();
    layout.setMargin(true);
    setContent(layout);

    Button button = new Button("Click Me");
    button.addClickListener(new Button.ClickListener() {
      public void buttonClick(ClickEvent event) {
        layout.addComponent(new Label("Thank you for clicking"));
      }
    });
    layout.addComponent(button);
  }
}
To allow Vaadin Spring to use the UI you’ll need to add the following annotation to the UI:
Source code
Java
@SpringUIThe servlet configuration needs to be updated to initialize a Spring
application context, and the servlet should inherit from
SpringVaadinServlet. In this tutorial, a ContextLoaderListener is used
to initialize Spring.
Finally, as we do not need a custom theme in the application, the theme annotation is updated to use "valo" and the custom theme in the project can be deleted.
The resulting UI should be something like this:
Source code
Java
package com.vaadin.spring.tutorial;

import javax.servlet.annotation.WebListener;
import javax.servlet.annotation.WebServlet;

import org.springframework.context.annotation.Configuration;
import org.springframework.web.context.ContextLoaderListener;

import com.vaadin.annotations.Theme;
import com.vaadin.server.VaadinRequest;
import com.vaadin.spring.annotation.EnableVaadin;
import com.vaadin.spring.annotation.SpringUI;
import com.vaadin.spring.server.SpringVaadinServlet;
import com.vaadin.ui.Button;
import com.vaadin.ui.Button.ClickEvent;
import com.vaadin.ui.Label;
import com.vaadin.ui.UI;
import com.vaadin.ui.VerticalLayout;

@Theme("valo")
@SpringUI
@SuppressWarnings("serial")
public class MyVaadinUI extends UI {

  @WebServlet(value = "/*", asyncSupported = true)
  public static class Servlet extends SpringVaadinServlet {
  }

  @WebListener
  public static class MyContextLoaderListener extends ContextLoaderListener {
  }

  @Configuration
  @EnableVaadin
  public static class MyConfiguration {
  }

  @Override
  protected void init(VaadinRequest request) {
    final VerticalLayout layout = new VerticalLayout();
    layout.setMargin(true);
    setContent(layout);

    Button button = new Button("Click Me");
    button.addClickListener(new Button.ClickListener() {
      public void buttonClick(ClickEvent event) {
        layout.addComponent(new Label("Thank you for clicking"));
      }
    });
    layout.addComponent(button);
  }
}
With the @SpringUI annotation the Vaadin Spring plugin will know to
inject the UI rather than directly instantiating it. With injected beans
we can use all of the usual Spring features such as autowiring. More on
that in later tutorials.
In addition to these changes, when not using Spring Boot, create the following Spring context file at src/main/webapp/WEB-INF/applicationContext.xml :
Source code
XML
<?xml version="1.0" encoding="UTF-8"?>
<beans xmlns="http://www.springframework.org/schema/beans"
  xmlns:xsi="http://www.w3.org/2001/XMLSchema-instance" xmlns:context="http://www.springframework.org/schema/context"
  xsi:schemaLocation="http://www.springframework.org/schema/beans
      http://www.springframework.org/schema/beans/spring-beans.xsd
      http://www.springframework.org/schema/context
      http://www.springframework.org/schema/context/spring-context-4.1.xsd">

  <bean class="com.vaadin.spring.tutorial.MyVaadinUI.MyConfiguration" />
  <context:component-scan base-package="com.vaadin.spring.tutorial" />
</beans>
A full description of alternative approaches to configuring Spring is outside the context of this tutorial and you should consult Spring documentation for them, but a brief introduction to them is given in this tutorial.
Deployment
Once the UI is done we’ll deploy it to our server by Run→Run as→Run on Server. Select your server runtime (Tomcat in our case) and click Finish.
Eclipse should automatically open an embedded browser directed at your development server.
Congratulations! You’ve deployed your first Spring application.