Creating secure Vaadin applications using JEE6
- Introduction
- Getting the Example Source Code
- Securing the Domain Layer
- Securing the Enterprise Layer
- Securing the Web Layer
- Securing the Transport Layer
- Configuring GlassFish
- Adding Auditing
- Summary
by Petter Holmström
Introduction
In this article, we are going to look at how the security features of JEE6 and GlassFish 3 can be used to create a secure Vaadin application. You should be familiar with the security features of JEE6. If not, skim through Part VII of the The Java EE 6 Tutorial, Volume I before continuing.
Architecture
The example system we are going to discuss has the following architecture:
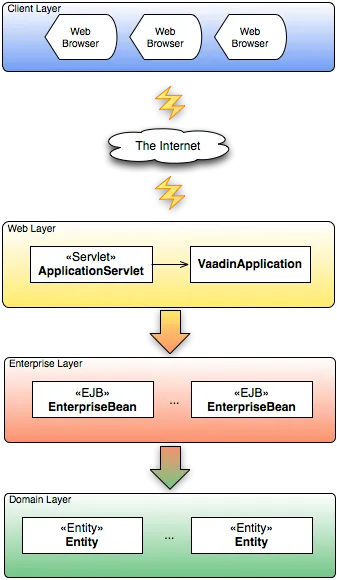
It is a typical JEE web application consisting of several layers. At the top, there is the client layer, i.e. the users' web browsers. Then comes the Internet (or any other network for that matter) through which the data travels between the client layer and the application server. On the server side, there are the web (or presentation) layer that contains the user interface - in this case our Vaadin application - and the enterprise (or application) layer that contains all our business logic in the form of Enterprise Java Beans (EJB). Finally, the domain layer contains the system data in the form of persistent entity objects stored in some relational database - in this case JavaDB - by some Object Relational Mapping (ORM) solution - in this case EclipseLink 2.0.
In this article, we are going to secure all the layers, with the exception of the client layer. This means that once the data has reached the client it may be stored unencrypted in the browser’s memory or downloaded to a disk, but that is a risk we are willing to take in this case ;-).
Getting the Example Source Code
This article is based around an example application that maintains employee records. Please note that the example system bears little resemblance to a similar real-world system in order to keep it simple and easy to understand.
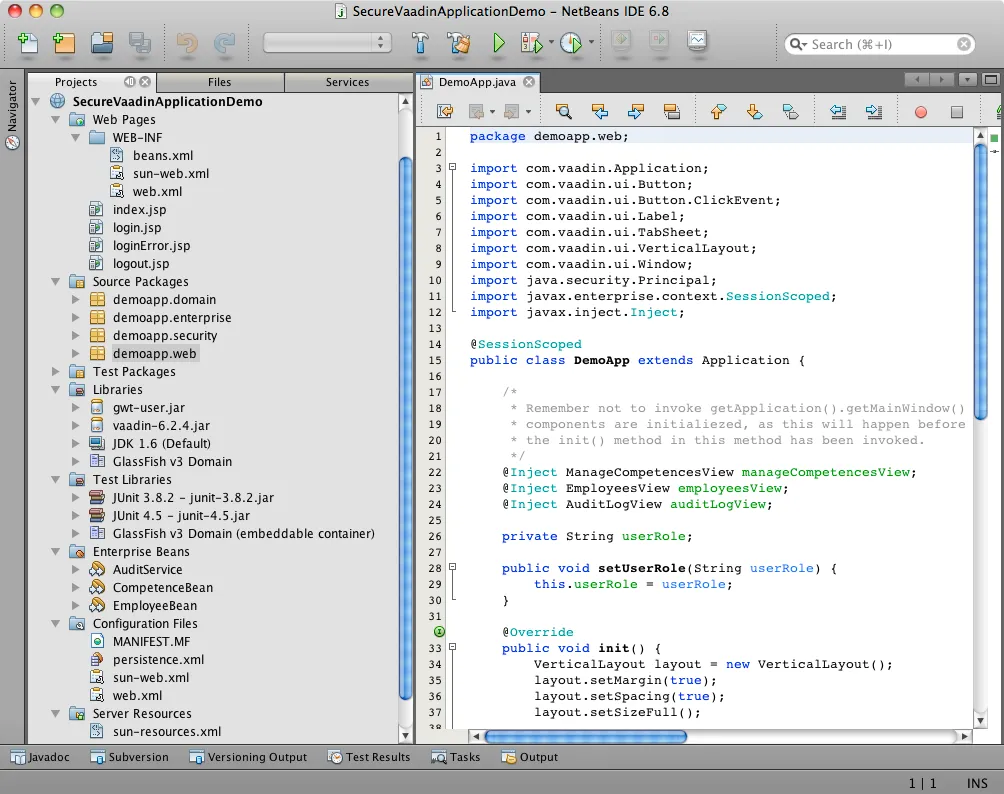
The source code can be downloaded here and it has been packaged as a NetBeans project. If you do not have NetBeans, go to the NetBeans web site and download the latest version (6.8 at the time of writing). Remember to select the version that includes GlassFish v3.
Once NetBeans and GlassFish are installed, you can unzip the source code archive and open it in NetBeans. The opened project should look something like this:
However, before you can try out the application, you have to create a new JavaDB for the test data. This can be done from the Services tab inside NetBeans:
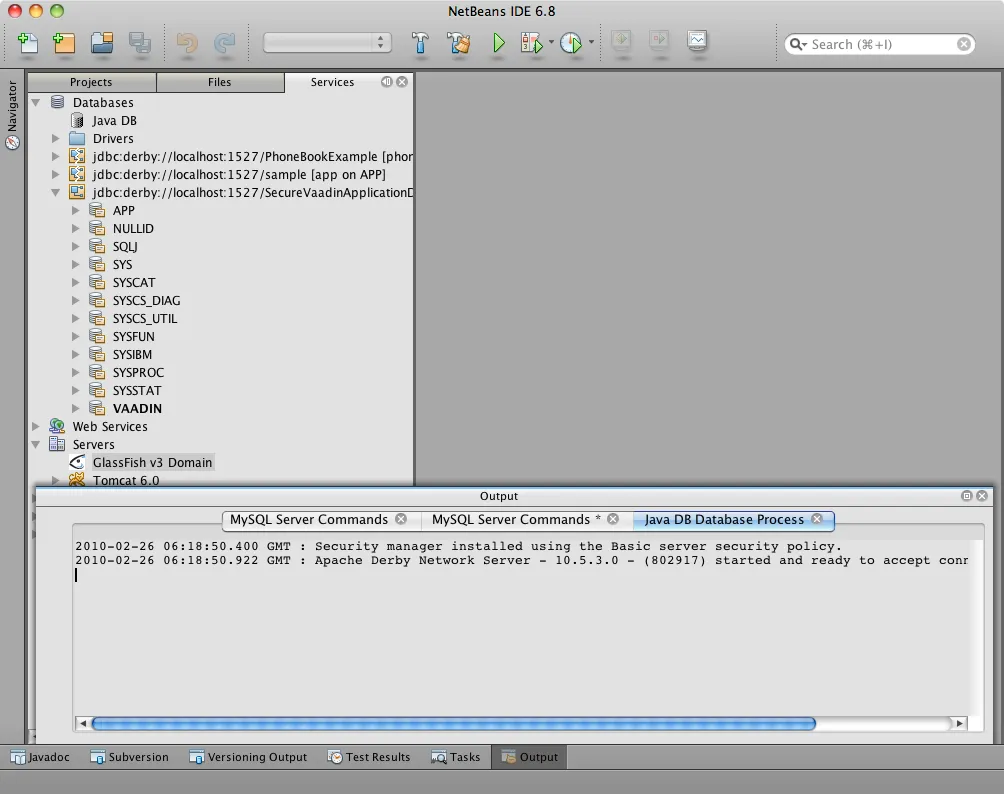
When this is done, you should update the setup/sun-resources.xml file accordingly, so that the correct username/password is used to connect to the database and the correct JNDI-resources are registered when the application is deployed.
Securing the Domain Layer
In this section we are not going to cover data encryption or Access Control Lists (ACL), so if that is what you need, you unfortunately have to look elsewhere for the time being. Instead, we are going to point out some things that need to be taken into account when designing the domain model.
In a simple application where all users have read access to all data and some users have write access, the domain model can be designed basically in any way possible. However, if there are groups of users that should be given read access to only some parts of the data, things get a little more complicated.
In the case of the example system written for this article, the system contains information that is not intended for everyone such as salaries, competences or individual career development plans (not included in the example code). The system will be used by different types of users (roles):
-
A payroll assistant will need read access to the employees' salaries in order to be able to calculate the paychecks. Write access should be prohibited.
-
A project manager will need read access to the employees' competences in order to be able to select the right people to his or her team. However, he or she has nothing to do with how much each employee is getting paid.
-
A director will need full access to the system in order to add new employees, change salaries, etc.
To keep our lives simple, we should design the domain model in such a way that if a part of an object graph is readable by a certain role, then the entire graph should also be readable by the role:
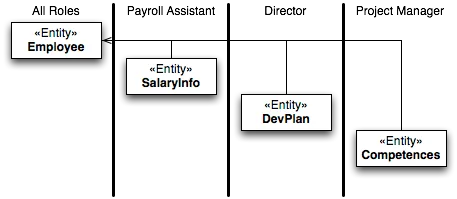
Here, all roles have read access to the Employee domain class. Please
note that no associations point out from this class. Therefore, if we
get an instance of Employee, we cannot accidentally (or intentionally)
access restricted information by traversing through the object graph.
If we take a look at the SalaryInfo domain class, we note that it has
a unidirectional association to the Employee class. Thus, if we get an
instance of SalaryInfo, we can also access all the information in the
corresponding Employee. However, this is perfectly valid as the
Payroll Assistant role has read access to both domain classes.
Now it is time to move on to the enterprise layer, where the security constraints will actually be enforced.
Securing the Enterprise Layer
Securing the enterprise layer is actually the easiest part, as this is no different from securing EJBs in an ordinary JEE application. In this example, role-based security is sufficient so we can use annotations to secure the EJBs:
Source code
Java
@Stateless
@TransactionManagement
public class EmployeeBean {
  // Implementations omitted

  @PersistenceContext
  private EntityManager entityManager;

  @RolesAllowed(UserRoles.ROLE_DIRECTOR)
  @TransactionAttribute(TransactionAttributeType.REQUIRED)
  public void insertEmployee(Employee employee) {
    ...
  }

  @RolesAllowed(UserRoles.ROLE_DIRECTOR)
  @TransactionAttribute(TransactionAttributeType.REQUIRED)
  public Employee updateEmployee(Employee employee) {
    ...
  }

  @RolesAllowed(UserRoles.ROLE_DIRECTOR)
  @TransactionAttribute(TransactionAttributeType.REQUIRED)
  public void deleteEmployee(Employee employee) {
    ...
  }

  @RolesAllowed({UserRoles.ROLE_DIRECTOR,
      UserRoles.ROLE_PAYROLL_ASSISTANT,
      UserRoles.ROLE_PROJECT_MANAGER})
  public Employee getEmployeeByPersonNumber(String personNumber) {
    ...
  }

  @RolesAllowed({UserRoles.ROLE_DIRECTOR, UserRoles.ROLE_PAYROLL_ASSISTANT})
  public SalaryInfo getSalaryInfo(Employee employee) {
    ...
  }


  @RolesAllowed({UserRoles.ROLE_DIRECTOR})
  @TransactionAttribute(TransactionAttributeType.REQUIRED)
  public SalaryInfo saveSalaryInfo(SalaryInfo salaryInfo) {
    ...
  }

  @RolesAllowed({UserRoles.ROLE_DIRECTOR, UserRoles.ROLE_PROJECT_MANAGER})
  public EmployeeCompetences getCompetences(Employee employee) {
    ...
  }

  @RolesAllowed({UserRoles.ROLE_DIRECTOR, UserRoles.ROLE_PROJECT_MANAGER})
  @TransactionAttribute(TransactionAttributeType.REQUIRED)
  public EmployeeCompetences saveCompetences(EmployeeCompetences competences) {
    ...
  }
}
The UserRoles class is a helper class that defines constants for all
the role names:
Source code
Java
public class UserRoles {
  public static final String ROLE_DIRECTOR = "DIRECTOR";
  public static final String ROLE_PAYROLL_ASSISTANT = "PAYROLL_ASSISTANT";
  public static final String ROLE_PROJECT_MANAGER = "PROJECT_MANAGER";
}
This is actually all there is to it - the container will take care of the rest. Note, that there are separate lookup methods for basic employee information and salary information, and that the methods require different roles. This is how the security constraints discussed in the previous section are enforced in practice.
Securing the Web Layer
As all of the application’s data and logic should now be protected inside the enterprise layer, securing the web layer really comes down to two basic tasks: handling user authentication and disabling the restricted parts of your user interface. In the example application, the user interface has not been restricted in order to make it possible to test the security of the enterprise layer, e.g. what happens when a restriction actions is attempted.
As the Vaadin application runs entirely on the server, this can be done inside the application in the same manner as in a Swing desktop application. However, an (arguably) better approach is to rely on standard JEE web layer security.
To keep things simple, a Vaadin application should be designed in such a way that when the application starts, the user is already authenticated and when the user logs out, the application is closed. In this way, the JEE container handles the authentication and it is even possible to move from e.g. form-based authentication to certificate-based authentication without having to change a single line of code inside the Vaadin application.
The Vaadin Application Servlet
Here is the code for the application servlet:
Source code
Java
@WebServlet(urlPatterns={"/ui/*", "/VAADIN/*"})
public class DemoAppServlet extends AbstractApplicationServlet {

  @Inject Instance<DemoApp> application;

  @Override
  protected Class<? extends Application> getApplicationClass() throws
          ClassNotFoundException {
    return DemoApp.class;
  }

  @Override
  protected Application getNewApplication(HttpServletRequest request) throws
          ServletException {
    DemoApp app = application.get();
    Principal principal = request.getUserPrincipal();
    if (principal == null) {
      throw new ServletException("Access denied");
    }

    // In this example, a user can be in one role only
    if (request.isUserInRole(UserRoles.ROLE_DIRECTOR)) {
      app.setUserRole(UserRoles.ROLE_DIRECTOR);
    } else if (request.isUserInRole(UserRoles.ROLE_PAYROLL_ASSISTANT)) {
      app.setUserRole(UserRoles.ROLE_PAYROLL_ASSISTANT);
    } else if (request.isUserInRole(UserRoles.ROLE_PROJECT_MANAGER)) {
      app.setUserRole(UserRoles.ROLE_PROJECT_MANAGER);
    } else {
      throw new ServletException("Access denied");
    }

    app.setUser(principal);
    app.setLogoutURL(request.getContextPath() + "/logout.jsp");
    return app;
  }
}
Please note the URL patterns that this servlet handles. The URL for the Vaadin application will be $CONTEXT_PATH/ui. However, the servlet also has to handle requests to $CONTEXT_PATH/VAADIN/*, as the widgetsets and themes will not load otherwise.
Next, in the getNewApplication(..) method, the user principal is
fetched from the request and passed to the Vaadin application using the
setUser(..) method (this is not a requirement, but is useful if the
Vaadin application needs to know the identity of the current user). If
the application will act differently depending on the user’s roles,
these have to be passed in as well - in this case using a custom setter
defined in the DemoApp class. Finally, the logout URL is set to point
to a custom JSP which we will look at in a moment.
The Deployment Descriptor
To make sure the user is authenticated when the Vaadin application is
started, all requests to the Vaadin application should require
authentication. In this example we are going to use form-based
authentication using ordinary JSPs for the login, logout and error
screens, but we could just as well use some other form of authentication
such as certificates. In order to achieve this, we add the following to
the web.xml deployment descriptor:
Source code
XML
<web-app>
  ...
  <security-constraint>
    <display-name>SecureApplicationConstraint</display-name>
    <web-resource-collection>
      <web-resource-name>Vaadin application</web-resource-name>
      <description>The entire Vaadin application is protected</description>
      <url-pattern>/ui/*</url-pattern>
    </web-resource-collection>
    <auth-constraint>
      <description>Only valid users are allowed</description>
      <role-name>DIRECTOR</role-name>
      <role-name>PAYROLL_ASSISTANT</role-name>
      <role-name>PROJECT_MANAGER</role-name>
    </auth-constraint>
  </security-constraint>
  <login-config>
    <auth-method>FORM</auth-method>
    <realm-name>file</realm-name>
    <form-login-config>
      <form-login-page>/login.jsp</form-login-page>
      <form-error-page>/loginError.jsp</form-error-page>
    </form-login-config>
  </login-config>
  <security-role>
    <description/>
    <role-name>DIRECTOR</role-name>
  </security-role>
  <security-role>
    <description/>
    <role-name>PAYROLL_ASSISTANT</role-name>
  </security-role>
  <security-role>
    <description/>
    <role-name>PROJECT_MANAGER</role-name>
  </security-role>
  ...
</web-app>
Basically, this file tells the container that this web application:
-
uses the roles DIRECTOR, PAYROLL_ASSISTANT and PROJECT_MANAGER,
-
requires the user to be in any of these roles when accessing the Vaadin application,
-
requires users to be in the file realm (a built-in realm manageable from the GlassFish administration console), and
-
uses form-based authentication with a JSP for displaying the login form and another for displaying login errors.
For more information about configuring security for JEE web applications, please see the JEE6 documentation.
The JSPs
Now we are going to write the JSPs that will be used for logging users in and out. These files are well covered in the JEE6 documentation, so we are just going to list them here without further commenting. First up is login.jsp:
Source code
HTML
<%@page contentType="text/html" pageEncoding="UTF-8"%>
<html xmlns="http://www.w3.org/1999/xhtml" xml:lang="en">
  <head>
    <meta http-equiv="Content-Type" content="text/html; charset=UTF-8"/>
    <title>Secure Vaadin Application Demo Login</title>
  </head>
  <body>
    <h1>Please login</h1>
    <form method="post" action="j_security_check">
      <p>
        Username: <input type="text" name="j_username"/>
      </p>
      <p>
        Password: <input type="password" name="j_password"/>
      </p>
      <p>
        <input type="submit" value="Login"/>
      </p>
    </form>
  </body>
</html>
Then we move on to loginError.jsp:
Source code
HTML
<%@page contentType="text/html" pageEncoding="UTF-8"%>
<html xmlns="http://www.w3.org/1999/xhtml" xml:lang="en">
  <head>
    <meta http-equiv="Content-Type" content="text/html; charset=UTF-8"/>
    <title>Secure Vaadin Application Demo Login Failure</title>
  </head>
  <body>
    <h1>Login Failed!</h1>
    <p>
      Please <a href="login.jsp">try again</a>.
    </p>
  </body>
</html>
Coming up next is logout.jsp:
Source code
HTML
<%@page contentType="text/html" pageEncoding="UTF-8"%>
<html xmlns="http://www.w3.org/1999/xhtml" xml:lang="en">
  <head>
    <meta http-equiv="Content-Type" content="text/html; charset=UTF-8"/>
    <title>Secure Vaadin Application Demo</title>
  </head>
  <body>
    <h1>You have been logged out</h1>
    <p>
      <a href="login.jsp">Log in</a> again.
    </p>
  </body>
</html>
<%
  session.invalidate();
%>
Please note that this file contains a single line of code at the end that invalidates the session, effectively logging the user out.
Finally, an index.jsp file is needed in order to make sure that any requests to the context path are redirected to the Vaadin application:
Source code
HTML
<%
  response.sendRedirect("ui/");
%>
There! Now the login and logout mechanisms are in place.
Securing the Transport Layer
Even though both the web layer and the enterprise layer are now secured, the data still has to travel across the Internet to reach the client layer and, as we know, the Internet is full of people with questionable intentions. Therefore, we need to make sure that the data reaches its destination undisclosed and unmodified. In other words, we need SSL.
Provided that the application server has been properly configured to use SSL (GlassFish v3 should be out of the box, though with a self-signed certificate), it is very easy to force a web application to use SSL. We just have to add the following security constraint to the web.xml file:
Source code
XML
<security-constraint>
  <display-name>SecureChannelConstraint</display-name>
  <web-resource-collection>
    <web-resource-name>Entire site</web-resource-name>
    <description/>
    <url-pattern>/*</url-pattern>
  </web-resource-collection>
  <user-data-constraint>
    <description>Require encrypted channel</description>
    <transport-guarantee>CONFIDENTIAL</transport-guarantee>
  </user-data-constraint>
</security-constraint>
This will force all requests to the application to go over an encrypted SSL link.
Configuring GlassFish
As we are going to let GlassFish handle the user database, we have to do some additional configuration before the application can be deployed. Users created using the GlassFish administration console are assigned to groups, which in turn can be mapped to application roles. It is possible to configure GlassFish to automatically map a group name to a role with the same name, but in this case we are going to define the mapping manually by adding the following definitions to the sun-web.xml file:
Source code
XML
<security-role-mapping>
  <role-name>DIRECTOR</role-name>
  <group-name>Directors</group-name>
</security-role-mapping>
<security-role-mapping>
  <role-name>PAYROLL_ASSISTANT</role-name>
  <group-name>Payroll Assistants</group-name>
</security-role-mapping>
<security-role-mapping>
  <role-name>PROJECT_MANAGER</role-name>
  <group-name>Project Managers</group-name>
</security-role-mapping>
These definitions tell GlassFish that all users that belong to the
Directors group should hold the DIRECTOR role, etc.
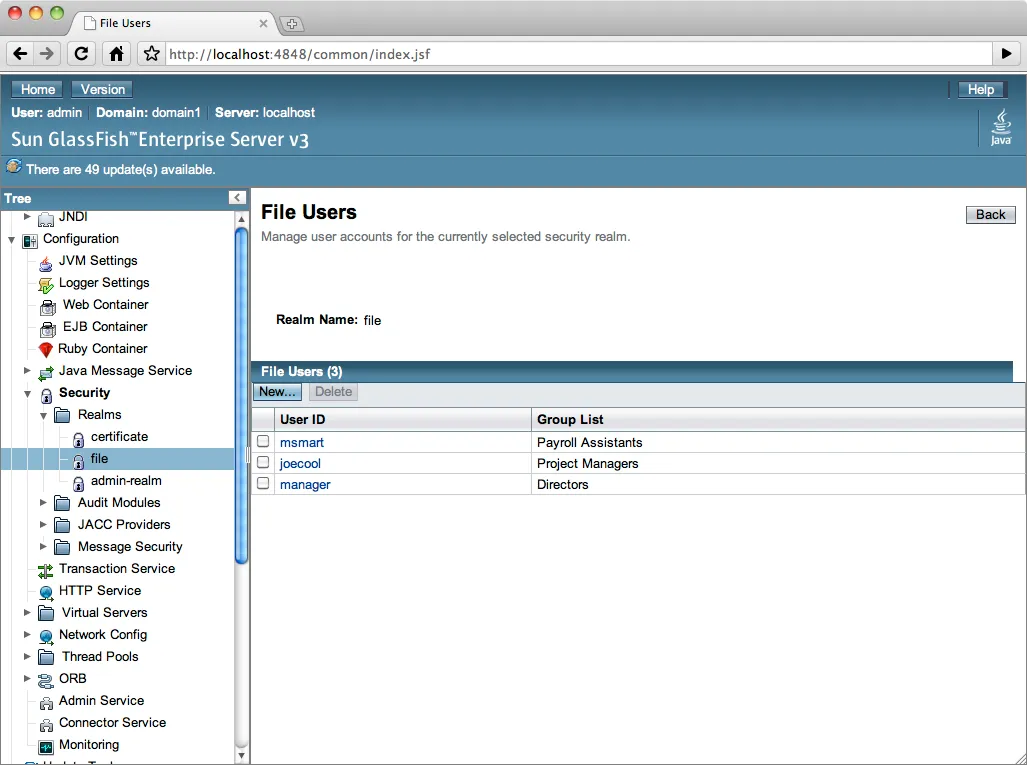
The application is now secured. However, in order to try it out we need to add some users to the file realm using the GlassFish Administration Console:

Now, we can deploy the application, login with different users and explore what happens.
Adding Auditing
Although the application is now protected from unauthorized users, it has not yet been protected from illegal use by authorized users. As the application deals with sensitive personal information, it should be possible to see what the users have done with the data while using the system.
GlassFish has an auditing system that, when turned on, automatically records access decisions (such as successful or failed logins). However, in this case we need some more fine-grained auditing. One way of accomplishing this is to use CDI and interceptors (go here for more information).
We begin by defining the annotation that will be used to annotate the methods that are to be subject to auditing:
Source code
Java
@InterceptorBinding
@Target({ElementType.METHOD, ElementType.TYPE})
@Retention(RetentionPolicy.RUNTIME)
public @interface AuditLog {
}
Next, we implement the actual interceptor:
Source code
Java
@AuditLog
@Interceptor
public class AuditLogInterceptor {
  @Resource
  SessionContext sessionContext;

  @EJB
  AuditService auditService;

  @AroundInvoke
  public Object recordAuditLogEntry(InvocationContext ctx) throws Exception {
    Object result = ctx.proceed();
    StringBuilder sb = new StringBuilder();
    sb.append(ctx.getMethod().getName());
    sb.append("(");
    for (Object p : ctx.getParameters()) {
      sb.append(p);
      sb.append(",");
    }
    sb.append(")");
    String userName = sessionContext.getCallerPrincipal().getName();
    auditService.recordEntry(userName, sb.toString());
    return result;
  }
}
Before we can use the interceptor, we have to activate it by adding the following to the beans.xml file:
Source code
XML
<interceptors>
  <class>demoapp.security.AuditLogInterceptor</class>
</interceptors>
Finally, we annotate the enterprise methods that should be subject to auditing:
Source code
Java
@Stateless
@TransactionManagement
public class EmployeeBean {
  ...

  @RolesAllowed(UserRoles.ROLE_DIRECTOR)
  @TransactionAttribute(TransactionAttributeType.REQUIRED)
  @AuditLog
  public void insertEmployee(Employee employee) {
    ...
  }

  @RolesAllowed(UserRoles.ROLE_DIRECTOR)
  @TransactionAttribute(TransactionAttributeType.REQUIRED)
  @AuditLog
  public Employee updateEmployee(Employee employee) {
    ...
  }
  ...
}
There! Now, every time a method annotated with @AuditLog is
successfully invoked, it will be recorded together with a timestamp and
the name of the user who invoked it.
Summary
In this article, we have discussed how a typical Vaadin/JEE6 application can be secured. We have secured the enterprise layer using annotations, secured the web and channel layers by declaring security constraints in the deployment descriptor and shown how Vaadin can be used together with form-based authentication. Finally, we have looked at a way of implementing auditing using interceptors.