Vaadin CDI Add-on
- CDI Overview
- Installing Vaadin CDI Add-on
- Preparing Application for CDI
- Injecting a UI with @CDIUI
- Scopes
- Deploying CDI UIs and Servlets
- View Navigation
- CDI Events
Vaadin CDI add-on makes it easier to use contexts and dependency injection (CDI) in Vaadin applications. CDI is a Java EE feature especially targeted for web applications, which have well-defined contextual scopes, such as sessions, views, requests, and so forth. The lifecycle of objects, such as beans, can be managed by binding their lifecycles to such contexts. Vaadin CDI enables these features with two additional kinds of Vaadin-specific contextual scopes: UIs and navigation views.
To learn more about Vaadin CDI, the Vaadin CDI Tutorial gives a hands-on introduction. The source code of the CDI Tutorial demo is available for browsing or cloning at https://github.com/vaadin/cdi-tutorial.
CDI Overview
Contexts and dependency injection, defined in the JSR-299 standard, is a Java EE feature that, through a set of services, helps in improving application architecture by decoupling the management of service object lifecycles from client objects using them. The lifecycle of objects stored in a CDI container is defined by a context. The managed objects or beans are accessed using dependency injection.
CDI builds on the Java concept of beans, but with somewhat different definition and requirements.
Regarding general CDI topics, such as use of qualifiers, interceptors, decorators, event notifications, and other CDI features, we refer you to CDI documentation.
-
Introduction to CDI. Pete Muir and Mark Struberg, JAXenter.
Dependency Injection
Dependency injection is a way to pass dependencies (service objects) to dependent objects (clients) by injecting them in member variables or initializer parameters, instead of managing the lifecycle in the clients or passing them explicitly as parameters. In CDI, injection of a service object to a client is specified by the @Inject annotation.
For example, if we have a UI view that depends on user data, we could inject the data in the client as follows:
Source code
Java
public class MainView extends CustomComponent implements View {
    @Inject
    User user;

    ...
    @Override
    public void enter(ViewChangeEvent event) {
        greeting.setValue("Hello, " + user.getName());
    }
}
In addition to injecting managed beans with the annotation, you can query for them from the bean manager.
Contexts and Scopes
Contexts in CDI are services that manage the lifecycle of objects and handle their injection. Generally speaking, a context is a situation in which an instance is used with a unique identity. Such objects are essentially "singletons" in the context. While conventional singletons are application-wide, objects managed by a CDI container can be "singletons" in a more narrow scope: a user session, a particular UI instance associated with the session, a view within the UI, or even just a single request. Such a context defines the lifecycle of the object: its creation, use, and finally its destruction.
As a very typical example in a web application, you would have a user data object associated with a user session.
Source code
Java
@SessionScoped
public class User {
    private String name;

    public void setName(String name) {this.name = name;}
    public String getName() {return name;}
}
Now, when you need to refer to the user, you can use CDI injection to inject the session-scoped "singleton" to a member variable or a constructor parameter.
Source code
Java
public class MainView extends CustomComponent implements View {
    @Inject
    User user;

    ...

    @Override
    public void enter(ViewChangeEvent event) {
        greeting.setValue("Hello, " + user.getName());
    }
}
Installing Vaadin CDI Add-on
Vaadin CDI requires a Java EE 7 compatible servlet container, such as Glassfish or Apache TomEE Web Profile, as mentioned for the reference toolchain in "Setting up the Development Environment".
To install the Vaadin CDI add-on, either define it as an Ivy or Maven dependency or download it from the Vaadin Directory add-on page at <<,vaadin.com/directory#addon/vaadin-cdi>>. See "Using Vaadin Add-ons" for general instructions for installing and using Vaadin add-ons.
The Ivy dependency is as follows:
Source code
    <dependency org="com.vaadin" name="vaadin-cdi"
                rev="latest.release"/>
The Maven dependency is as follows:
Source code
    <dependency>
        <groupId>com.vaadin</groupId>
        <artifactId>vaadin-cdi</artifactId>
        <version>[replaceable]LATEST</version>
    </dependency>
    <dependency>
        <groupId>javax.enterprise</groupId>
        <artifactId>cdi-api</artifactId>
        <version>[replaceable]1.2</version>
    </dependency>
Preparing Application for CDI
A Vaadin application that uses CDI must have a file named beans.xml in the WEB-INF directory. The file can be completely empty (it has content only in certain limited situations), but it must be present.
The application should not have a servlet extending VaadinServlet, as Vaadin servlet has its own VaadinCDIServlet that is deployed automatically. If you need multiple servlets or need to customize the Vaadin CDI servlet, see Deploying CDI UIs and Servlets.
Injecting a UI with @CDIUI
Vaadin CDI offers an easier way to instantiate UIs and to define the URL mapping for them than the usual ways described in "Deploying an Application". To define a UI class that should be instantiated for a given URL, you simply need to annotate the class with @CDIUI. It takes an optional URL path as parameter.
Source code
Java
@CDIUI("myniceui")
@Theme("valo")
public class MyNiceUI extends UI {
    ...
Giving empty UI path maps the UI to the root of the application context.
Source code
Java
@CDIUI("")If the optional UI path is not given, the path is determined automatically from the class name by removing a possible "-UI" suffix in the class name, making it lower-case, and for capitalized letters, a hyphen is added. For example, a UI with class name MyNiceUI would have path my-nice. The URL consists of the server address, application context, and the UI path. For example, when running a Vaadin application in a development workstation, you would have URL such as http://localhost:8080/myproject/my-nice.
UI path mappings are reported in the server log during deployment.
See Deploying CDI UIs and Servlets for how to handle servlet URL mapping of CDI UIs when working with multiple servlets in the same web application.
Scopes
As in programming languages, where a variable name refers to a unique object within the scope of the variable, a CDI scope is a context in which an object has unique identity. In CDI, objects to be injected are identified by their type and any qualifiers they may have. The scope can be defined as an annotation to the service class as follows:
Source code
Java
@SessionScoped
public class User {
    ...
CDI defines a number of scopes. Note that the standard CDI scopes are defined under the javax.enterprise.context package and Vaadin CDI scopes under com.vaadin.cdi, while JSF scopes are defined in javax.faces.bean.
UI Scope
UI-scoped beans are uniquely identified within a UI instance, that is, a browser window or tab.
Vaadin CDI provides two annotations for the UI scope, differing in how they enable proxies, as explained later.
- @UIScoped(com.vaadin.cdi)
-
Injection with this annotation will create a direct reference to the bean rather than a proxy. There are some limitations when not using proxies. Circular references (injecting A to B and B to A) will not work, and neither do CDI interceptors and decorators.
- @NormalUIScoped(com.vaadin.cdi)
-
As @UIScoped, but injecting a managed bean having this annotation injects a proxy for the bean instead of a direct reference. This is the normal behaviour with CDI, as many CDI features utilize the proxy.
Defining a CDI view (annotated with @CDIView as described later) as @UIScoped makes the view retain the same instance when the user navigates away and back to the view.
View Scopes
The lifecycle of a view-scoped bean starts when the user navigates to a view referring to the object and ends when the user navigates out of the view (or when the UI is closed or expires).
Vaadin CDI provides two annotations for the view scope, differing in how they enable proxies, as explained later.
- @ViewScoped(com.vaadin.cdi)
-
Injection with this annotation will create a direct reference to the bean rather than a proxy. There are some limitations when not using proxies. Circular references (injecting A to B and B to A) will not work, and neither do CDI interceptors and decorators.
- @NormalViewScoped(com.vaadin.cdi)
-
As @NormalScoped, except that injecting with this annotation will create a proxy for the contextual instance rather than provide the contextual instance itself. See the explanation of proxies below.
Standard CDI Scopes
- @ApplicationScoped
-
Application-scoped beans are shared by all servlets in the web application, and are essentially equal to singletons.//TODO This is just a guess - is it true? Note that referencing application-scoped beans is not thread-safe and access must be synchronized.
- @SessionScoped
-
The lifecycle and visibility of session-scoped beans is bound to a HTTP or user session, which in Vaadin applications is associated with the VaadinSession (see "User Session"). This is a very typical scope to store user data, as is done in many examples in this section, or database connections. The lifecycle of session-scoped beans starts when a user opens the page for a UI in the browser, and ends when the session expires after the last UI in the session is closed.
Proxies vs Direct References
CDI uses proxy objects to enable many of the CDI features, by hooking into message-passing from client to service beans. Under the hood, a proxy is an instance of an automatically generated class that extends the proxied bean type, so communicating through a proxy occurs transparently, as it has the same polymorphic type as the actual bean. Whether proxying is enabled or not is defined in the scope: CDI scopes are either normal scopes, which can be proxied, or pseudoscopes, which use direct references to injected beans.
The proxying mechanism creates some requirements for injecting objects in normal scope:
-
The objects may not be primitive types or arrays
-
The bean class must not be final
-
The bean class must not have final methods
Beans annotated with @UIScoped or @ViewScoped use a pseudoscope, and are therefore injected with direct references to the bean instances, while @NormalUIScoped and @NormalViewScoped beans will use a proxy for communicating with the beans.
When using proxies, be aware that it is not guaranteed that the hashCode() or equals() will match when comparing a proxy to its underlying instance. It is imperative to be aware of this when, for example, adding proxies to a Collection.
You should avoid using normal scopes with Vaadin components, as proxies may not work correctly within the Vaadin framework. If Vaadin CDI plugin detects such use, it displays a warning such as the following:
Source code
INFO: The following Vaadin components are injected
into normal scoped contexts:
   @NormalUIScoped       org.example.User
This approach uses proxy objects and has not been
extensively tested with the framework. Please report
any unexpected behavior. Switching to a pseudo-scoped
context may also resolve potential issues.
Deploying CDI UIs and Servlets
Vaadin CDI hooks into Vaadin framework by using a special VaadinCDIServlet. As described earlier, you do not need to map an URL path to a UI, as it is handled by Vaadin CDI. However, in the following, we go through some cases where you need to customize the servlet or use CDI with non-CDI servlets and UIs in a web application.
Defining Servlet Root with @URLMapping
CDI UIs are managed by a CDI servlet ( VaadinCDIServlet), which is by default mapped to the root of the application context. For example, if the name of a CDI UI is " my-cdi" and application context is /myproject, the UI would by default have URL " /myproject/my-cdi". If you do not want to have the servlet mapped to context root, you can use the @URLMapping annotation to map all CDI UIs to a sub-path. The annotation must be given to only one CDI UI, usually the one with the default ("") path.
For example, if we have a root UI and another:
Source code
Java
@CDIUI("") // At CDI servlet root
@URLMapping("mycdiuis") // Define CDI Servlet root
public class MyCDIRootUI extends UI {...}

@CDIUI("another")
public class AnotherUI extends UI {...}
These two UIs would have URLs /myproject/mycdiuis and /myproject/mycdiuis/another, respectively.
You can also map the CDI servlet to another URL in servlet definition in web.xml, as described the following.
Mixing With Other Servlets
The VaadinCDIServlet is normally used as the default servlet, but if you have other servlets in the application, such as for non-CDI UIs, you need to define the CDI servlet explicitly in the web.xml. You can map the servlet to any URL path, but perhaps typically, you define it as the default servlet as follows, and map the other servlets to other URL paths:
Source code
<web-app>
…
<servlet>
<servlet-name>Default</servlet-name>
<servlet-class>
com.vaadin.cdi.internal.VaadinCDIServlet
</servlet-class>
</servlet>
<servlet-mapping>
<servlet-name>Default</servlet-name>
<url-pattern>[replaceable]/mycdiuis/</url-pattern>
</servlet-mapping>
<servlet-mapping>
<servlet-name>Default</servlet-name>
<url-pattern>/VAADIN/</url-pattern>
</servlet-mapping>
</web-app>With such a setting, paths to CDI UIs would have base path /myapp/mycdiuis, to which the (optional) UI path would be appended. The /VAADIN/* only needs to be mapped to the servlet if there are no other Vaadin servlets.
Custom Servlets
When customizing the Vaadin servlet, as outlined in "Vaadin Servlet, Portlet, and Service", you simply need to extend com.vaadin.cdi.internal.VaadinCDIServlet instead of com.vaadin.servlet.VaadinServlet.
The custom servlet must not have @WebServlet annotation or @VaadinServletConfiguration, as you would normally with a Vaadin servlet, as described in "Deploying an Application".
View Navigation
Vaadin CDI extends the navigation framework in Vaadin, described in "Navigating in an Application". It manages CDI views with a special view provider and enables view scoping.
Preparing the UI
You can define navigation for any single-component container, as described in "Setting Up for Navigation", but typically you set up navigation for the entire UI content. To use Vaadin CDI views, you need to inject a CDIViewProvider in the UI and add it as a provider for the navigator.
Source code
Java
@CDIUI("mycdiui")
public class MyCDIUI extends UI {
    @Inject
    CDIViewProvider viewProvider;

    @Override
    protected void init(VaadinRequest request) {
        Navigator navigator = new Navigator(this, this);
        navigator.addProvider(viewProvider);

        // Navigate to start view
        navigator.navigateTo("");
    }
}
The View
A view managed by Vaadin CDI only needs to have the @CDIView annotation.
Source code
Java
@CDIView("main")
public class MainView extends CustomComponent implements View {
    ...
The annotation can have the following optional paramers:
- value (optional)
-
Specifies the view name by which it can be accessed programmatically and by the URI fragment.
Source code
Java
@CDIView("main")If other optional parameters are given, the value must be given by the named value parameter.
If the view name is not given, it is derived from the class name by removing a possible "View" suffix, making it lower case, and using a dash ("-") to separate words originally denoted by capital letters. Thereby, a view class such as MyFunnyView would have name " my-funny".
You can navigate to a state with a URI fragment such as #!myview/someparameter or programmatically with:
Source code
Java
getUI().getNavigator().navigateTo("myview/someparameter");The enter() method of the view gets the URI fragment as parameter as is and can interpret it in any application-defined way.
Note that in this mode, matching a navigation state to a view is done by the prefix of the fragment! Thereby, no other views may start with the name of the view as prefix. For example, if the view name is " main", you must not have a view named " maintenance".
- uis
-
If the application has multiple UIs that use CDIViewProvider, you can use this parameter to specify which UIs can show the view.
Source code
Java
@CDIView(value="myview", uis={MyCDIUI.class})If the list contains UI.class, the view is available to all UIs.
Source code
Java
@CDIView(value="myview", uis={UI.class})
In the following, we have a login view that accesses a session-scoped user object. Here, we use a constant to define the view name, so that we can use the constant when navigating to it.
Source code
Java
@CDIView(LoginView.VIEWNAME)
public class LoginView extends CustomComponent
                       implements View {
    public final static String VIEWNAME = "";

    // Here we inject to the constructor and actually do
    // not store the injected object to use it later
    @Inject
    public LoginView(User user) {
        VerticalLayout layout = new VerticalLayout();

        // An input field for editing injected data
        BeanItem<User> item = new BeanItem<User>(user);
        TextField username = new TextField("User name",
                item.getItemProperty("name"));
        username.setNullRepresentation("");
        layout.addComponent(username);

        // Login button (authentication omitted) / Java 8
        layout.addComponent(new Button("Login", e ->
            getUI().getNavigator().
                navigateTo(MainView.VIEWNAME)));

        setCompositionRoot(layout);
    }

    @Override
    public void enter(ViewChangeEvent event) {}
}
You could now navigate to the view from any other view in the UI with:
Source code
Java
getUI().getNavigator().navigateTo(LoginView.VIEWNAME);CDI Events
CDI events can be used for many purposes in Vaadin applications, such as passing messages between different parts of a view, between views, between UIs, or between users. Some cases require special consideration, such as when communicating between UIs and how injected components should be scoped.
Observing Events
Let us consider a case where changes in one part of the UI (or view) require updating other parts of the UI. This is typical in master-detail views, for updating the master view after editing details, or when handling input from a sub-window. While you can handle such a situation with a custom call-back listener, CDI event mechanism simplifies the task.
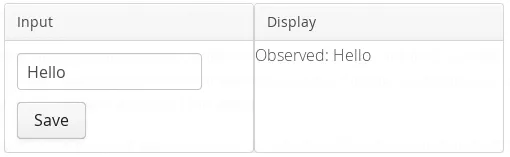
Let us consider the following simple UI containing two panels. The input panel will send events, which are received by other parts of the UI, in this case a display panel. The panels need to be injected to enable CDI event passing in them.
Source code
Java
@CDIUI("cdievents")
@Theme("valo")
public class CDIEventUI extends UI {
    @Inject
    InputPanel inputPanel;

    @Inject
    DisplayPanel displayPanel;

    @Override
    protected void init(VaadinRequest request) {
        Layout content =
            new HorizontalLayout(inputPanel, displayPanel);
        setContent(content);
    }
}
Now, let us look closer at the sending panel. To send messages, it needs to inject a javax.enterprise.event.Event object. As we are injecting the event to a component class, we need to specify the full package name to avoid confusion with Vaadin Component.Event.
Source code
Java
class InputPanel extends Panel {
    @Inject
    private javax.enterprise.event.Event<MyEvent> event;

    public InputPanel() {
        super("Input");

        TextField editor = new TextField();
        Button save = new Button("Save", e -> // Java 8
            event.fire(new MyEvent(editor.getValue())));

        setContent(new VerticalLayout(editor, save));
    }
}
Firing an event is done with the fire() method on the injected event object. In our example, the event is as follows:
Source code
Java
public class MyEvent implements Serializable {
    private String text;

    public MyEvent(String text) {
        this.text = text;
    }

    public String getName() {
        return text;
    }
}
The event is received by any method (in an injected object) marked by @Observes annotation for the event parameter to observe the event type.
Source code
Java
@UIScoped
class DisplayPanel extends Panel {
    Label display = new Label("-nothing to display-");

    public DisplayPanel() {
        super("Display");
        setContent(display);
    }

    void myEventObserver(@Observes MyEvent event) {
        display.setValue("Observed: " + event.getName());
    }
}
Such a component that observes events from other components must be scoped to the UI or view, as otherwise it will be request-scoped and a new instance is created for receiving each event.
The UI with interaction is shown in Observing CDI Events.
Any injection qualifiers defined for the event object in the sender are matched in the observers, which feature we will use later to avoid receiving unwanted events.
Communicating Between UIs
CDI events are not propagated to inactive contexts, and only the context of the currently processed UI is active. Further, as explained in "Accessing UI from Another Thread", other Vaadin UIs may not be accessed without proper synchronization, as their requests are processed concurrently in different server threads. Therefore, you need to pass the events through an application-scoped messaging service and synchronize the access to other UIs by using the access() method.
In "Broadcasting to Other Users" we looked into how to pass messages to all other UIs using a broadcasting service. In that example, we used static variables and methods to store references and to access the service. With CDI, we can let the context manage its lifecycle, access it by injection, and pass messages by CDI events. By scoping the messaging service to application, we essentially make it a singleton.
Source code
Java
@ApplicationScoped
public class CDIBroadcaster implements Serializable {
As we can not let CDI deliver the messages, the messaging service needs to keep book of the messaging clients (UIs) waiting to receive messages.
Source code
Java
    private Collection<UI> uis = new HashSet<UI>();

    public synchronized void register(UI listener) {
        uis.add(listener);
    }

    public synchronized void unregister(UI listener) {
        uis.remove(listener);
    }
The main logic of the messaging service is to observe messages and fire them in the recipient UIs. As we are broadcasting to all UIs here, we again use an executor service to execute the code. To lock on the session when accessing the UIs, we use the access() method.
Source code
Java
    // Inject event to be fired
    @Inject
    private javax.enterprise.event.Event<BroadcastMessage>
            messageEvent;

    ExecutorService executorService =
        Executors.newSingleThreadExecutor();

    // Observe messages (only from clients)
    @SuppressWarnings("unused")
    private synchronized void observeMessage(
            @Observes @OriginalSender
            final BroadcastMessage message) {
        for (final UI listener: uis)
            executorService.execute(() ->
                listener.access(()->
                    messageEvent.fire(message)));
    }
}
Here we use a @OriginalSender qualifier to receive events only from a client (original sender), not from the messaging service itself, which would cause an infinite event loop. The qualifier is defined as follows:
Source code
Java
@Qualifier
@Retention(RUNTIME)
@Target({PARAMETER, FIELD})
public @interface OriginalSender {}
The message type is a simple POJO as follows:
Source code
Java
public class BroadcastMessage {
    private String text;
    private Object sender; // For checking if sent by self

    ... constructor, getters, and setters ...
}
Let us take a look at the UI class, which manages both the messaging service and the client components. The UI just needs to register itself in the messaging service and build the UI, including the UI components doing messaging. We could, of course, do that also at view level.
Source code
Java
@CDIUI("cdichat")
@Push
public class CDIChatUI extends UI {
    @Inject
    CDIBroadcaster broadcaster;

    @Inject
    ChatBox chatbox;

    @Override
    protected void init(VaadinRequest request) {
        setContent(chatbox);

        // Register to receive broadcasts
        broadcaster.register(this);
    }

    // Must also unregister when the UI expires or is closed
    @Override
    public void detach() {
        broadcaster.unregister(this);
        super.detach();
    }
}
Now for an actual messaging client, we look at the chat box component. Most of the UI code is omitted from the example. As noted earlier, the component receiving events must be scoped to the UI, to avoid creation of invalid instances.
Source code
Java
@UIScoped
class ChatBox extends CustomComponent {
    VerticalLayout messages = new VerticalLayout();

    public ChatBox(CDIChatUI cdiChatUI) {
        ... build the composite ...

        TextField input = new TextField();

        Button send = new Button("Send", e -> { // Java 8
            // Broadcast the input
            broadcast(input.getValue());
            addMessage(input.getValue()); // Add to self
        });
        ...
    }

    @Inject
    @OriginalSender
    private javax.enterprise.event.Event<BroadcastMessage>
        messageEvent;

    // Sends a message
    private void broadcast(String msg) {
        messageEvent.fire(new BroadcastMessage(msg, this));
    }

    // Receives messages
    @SuppressWarnings("unused")
    private void observeMessage(
            @Observes BroadcastMessage event) {
        if (event.getSender() != this)
            addMessage(event.getText());
    }

    private void addMessage(String msg) {
        messages.addComponent(new Label(msg));
    }
}
Note that the client object is completely unaware of the fact that the messages are delivered through a messaging service; we have successfully decoupled the messaging logic required by Vaadin UIs from the component. Only the requirement for using the event qualifier remains (notice that its use is not checked at compile time).