Combining Templates with Binder
- Creating the Template Component
- Creating and Linking the Binder
- Declaring Methods to Get and Set User Objects
- Using the UserForm Component
- Creating the Main View
- Initializing the MainView Component
- Implementing Save, Cancel and Delete Listeners
- Viewing the Final Result
Binder is a server-side construct, so you can’t use it in a client-side template.
However, it’s possible to create a form using the Template API and to connect the component to a Binder. The process is similar to using binders with declared components.
This section demonstrates how to create a fully functional template-binder view.
Creating the Template Component
The first step is to create the TypeScript LitElement template and its mapped Java class.
Example: Creating the user-form TypeScript LitElement template.
Source code
JavaScript
import { html, LitElement } from 'lit';
import '@vaadin/checkbox';
import '@vaadin/form-layout';
import '@vaadin/text-area';
import '@vaadin/text-field';
import './form-buttons-bar.js'

class UserForm extends LitElement {
  render() {
    return html`
      <vaadin-form-layout id="form">
        <vaadin-text-field id="email" label="Email (login)" colspan="2"></vaadin-text-field>
        <vaadin-text-field id="first-name" label="First Name"></vaadin-text-field>
        <vaadin-text-field id="last-name" label="Last Name"></vaadin-text-field>
        <vaadin-text-area id="comments" label="Comments"></vaadin-text-area>
      </vaadin-form-layout>
      <form-buttons-bar id="action-buttons"></form-buttons-bar>
    `;
  }
}

customElements.define('user-form', UserForm);Example: Creating the mapped UserForm Java template class.
Source code
Java
@Tag("user-form")
@JsModule("./src/user-form.ts")
public class UserForm extends LitTemplate {

  @Id("email")
  private TextField email;

  @Id("first-name")
  private TextField firstName;

  @Id("last-name")
  private TextField lastName;

  @Id("comments")
  private TextArea comment;

  @Id("action-buttons")
  private FormButtonsBar actionButtons;

  ...
}
Creating and Linking the Binder
Next, create and link the binder.
Start by declaring the binder as a class variable in the UserForm class.
Example: Declaring the binder in the UserForm class.
Source code
Java
private Binder<User> binder;Next, create the initBinder() method, which initializes the binder and links it to the fields in the form.
Example: Creating the initBinder() method and linking it to the form fields.
Source code
Java
private void initBinder() {
    binder = new Binder<>();

    // email
    binder.forField(email).withValidator(
            new EmailValidator("This doesn't look like a valid email address")
    ).bind(User::getEmail, User::setEmail);

    // firstName
    binder.forField(firstName).withValidator(firstName -> firstName.length() > 1,
            "The first name must contains at least 2 characters").asRequired()
            .bind(User::getFirstName, User::setFirstName);

    // lastName
    binder.forField(lastName).asRequired("Last name can't be empty")
            .bind(User::getLastName, User::setLastName);

    // comment
    binder.forField(comment).bind(User::getComment, User::setComment);
}
See Binding Data to Forms for more.
You can now call the initBinder() method inside the constructor of the class.
Example: Calling initBinder() in the UserForm class.
Source code
Java
public UserForm() {
    initBinder();
}
Declaring Methods to Get and Set User Objects
Now that the binding process is complete, you can declare methods to get and set user objects in the form.
Example: Declaring methods to set, remove and get User beans in the UserForm class.
Source code
Java
/**
 * Connects the bean to the binder.
 *
 * @param user bean
 */
public void setBean(User user) {
    binder.setBean(user);
}

/**
 * Clears the form and disconnects any bean.
 */
public void removeBean() {
    binder.removeBean();
}

/**
 * Gets the binder of the UserForm
 *
 * @return binder it binds the fields of an object to the fields shown
 */
public Optional<User> getBean() {
    return Optional.ofNullable(binder.getBean());
}-
An unbuffered binding is used.
|
Note
|
|
See Loading From and Saving To Business Objects for more.
Using the UserForm Component
The UserForm component is now ready for use in other parts of your code.
Creating the Main View
First, you create the MainView LitElement template component.
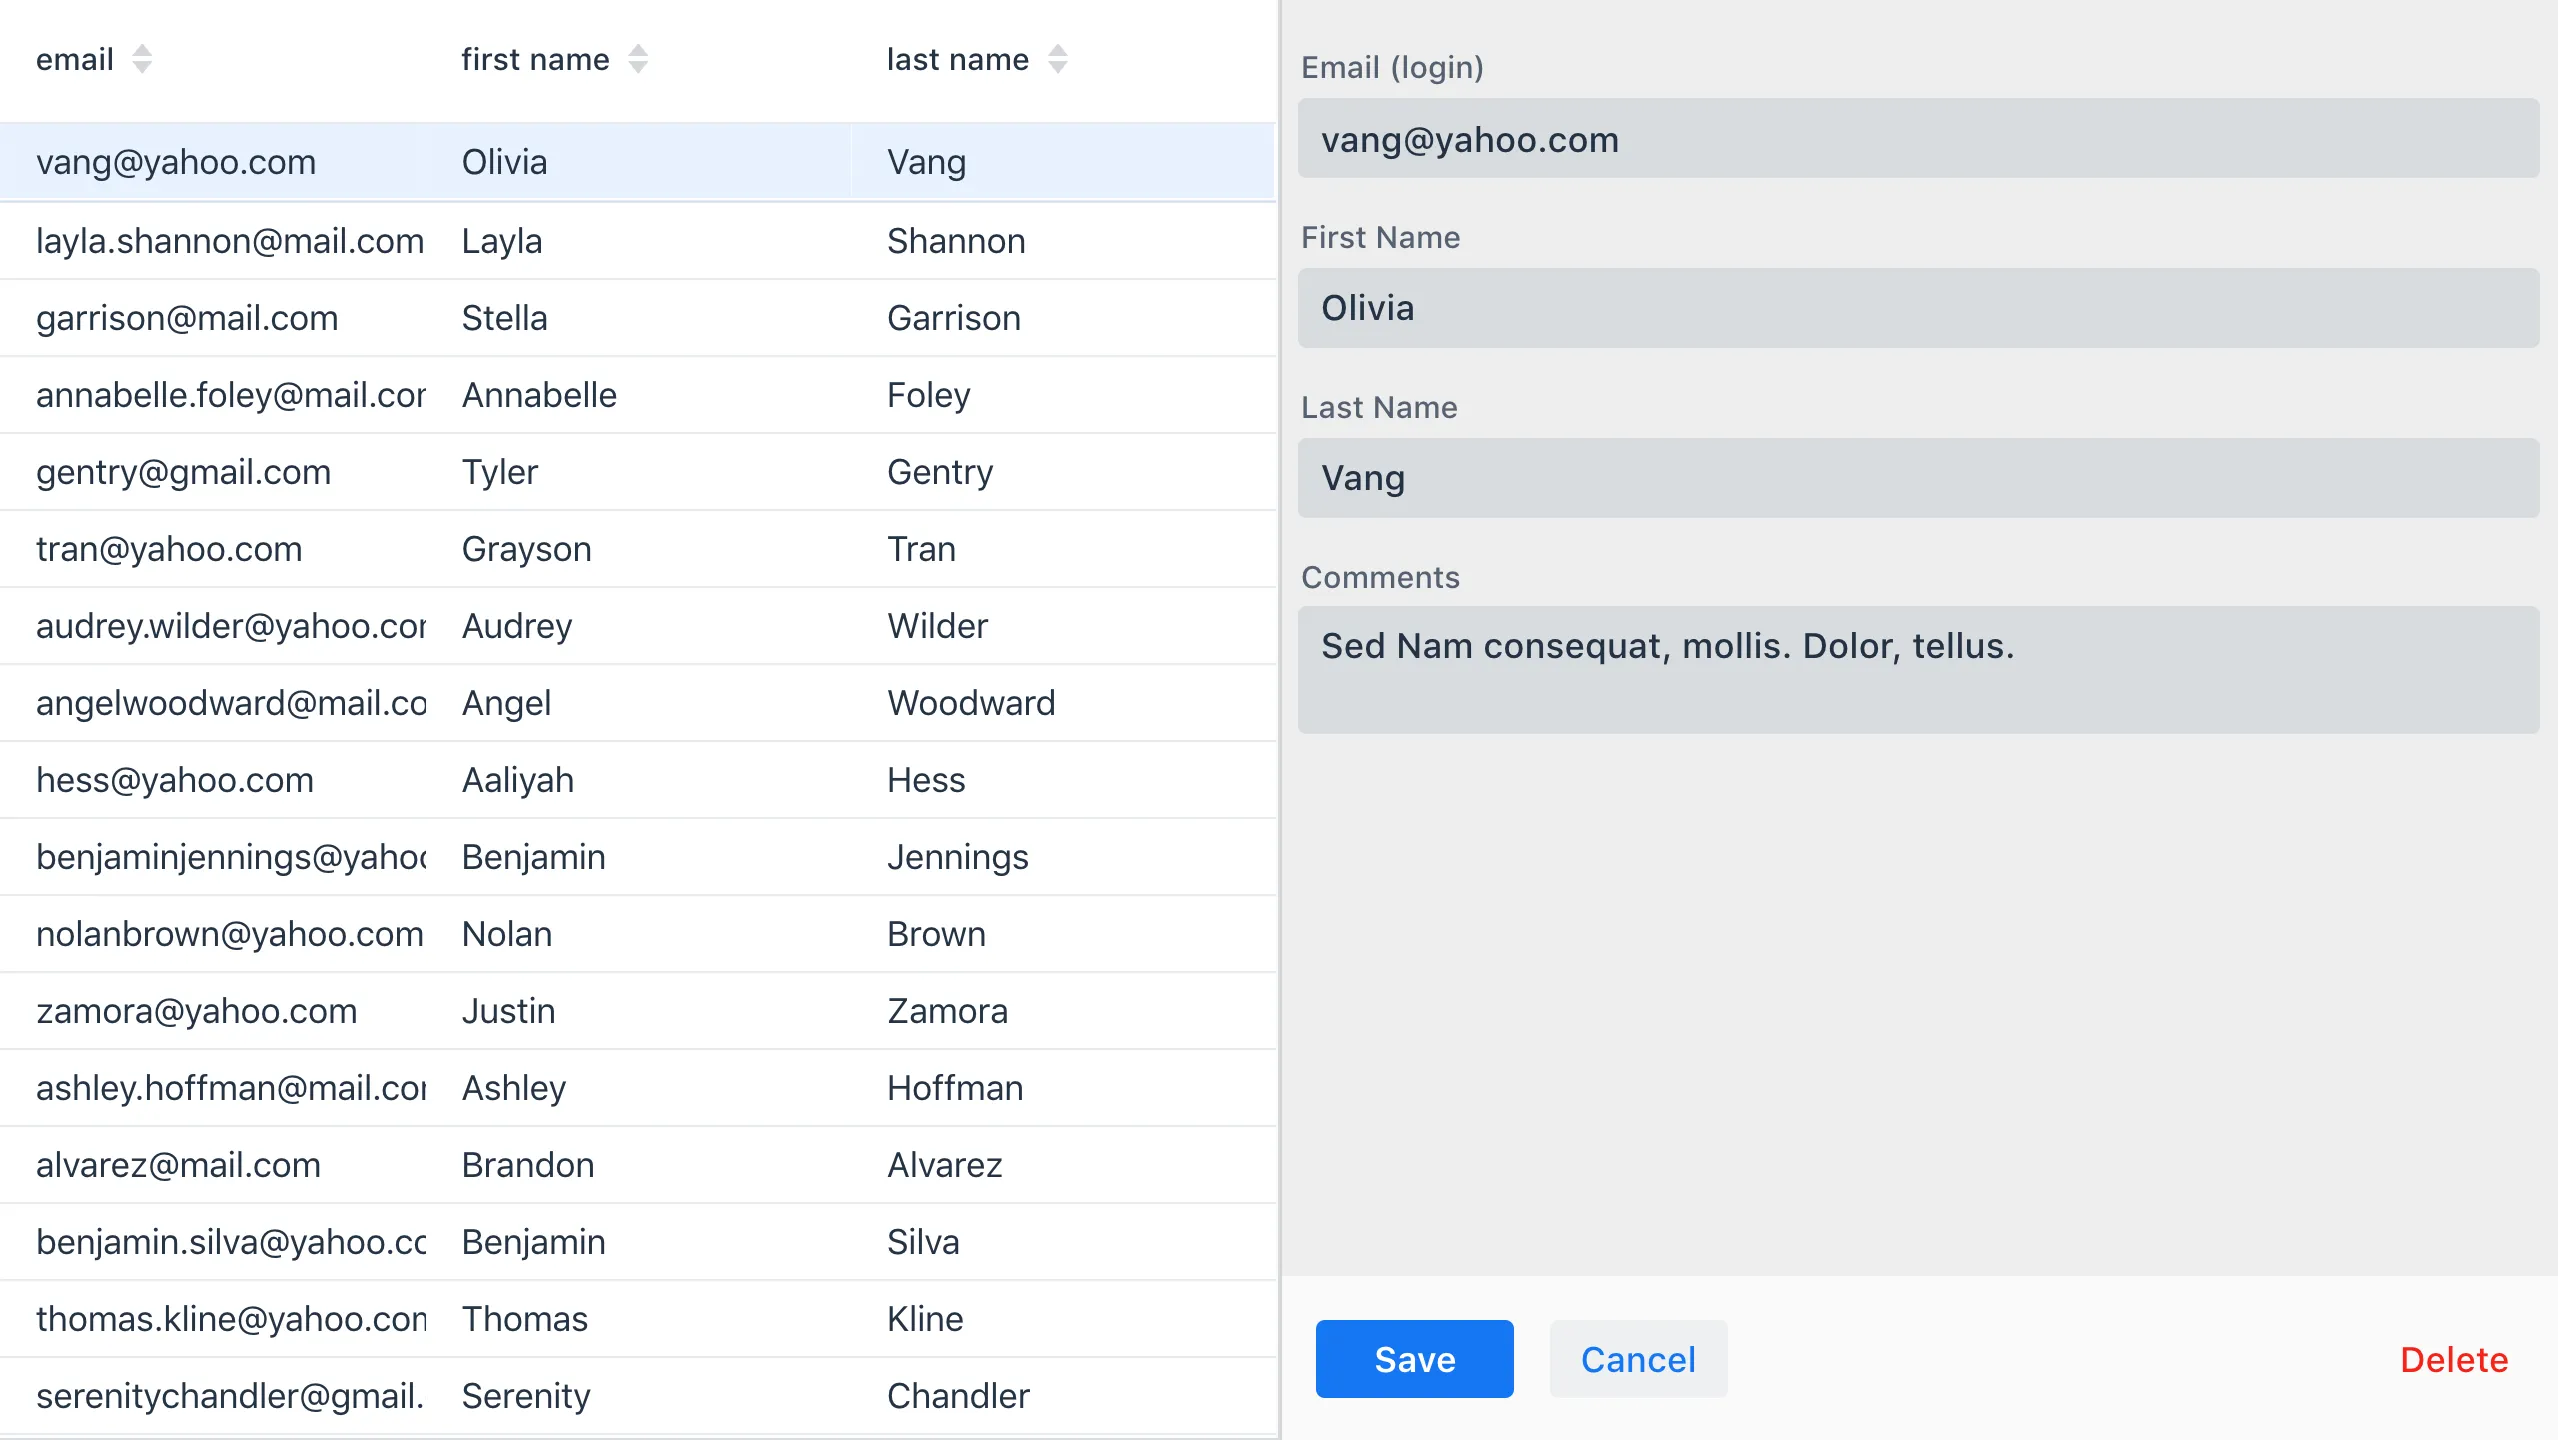
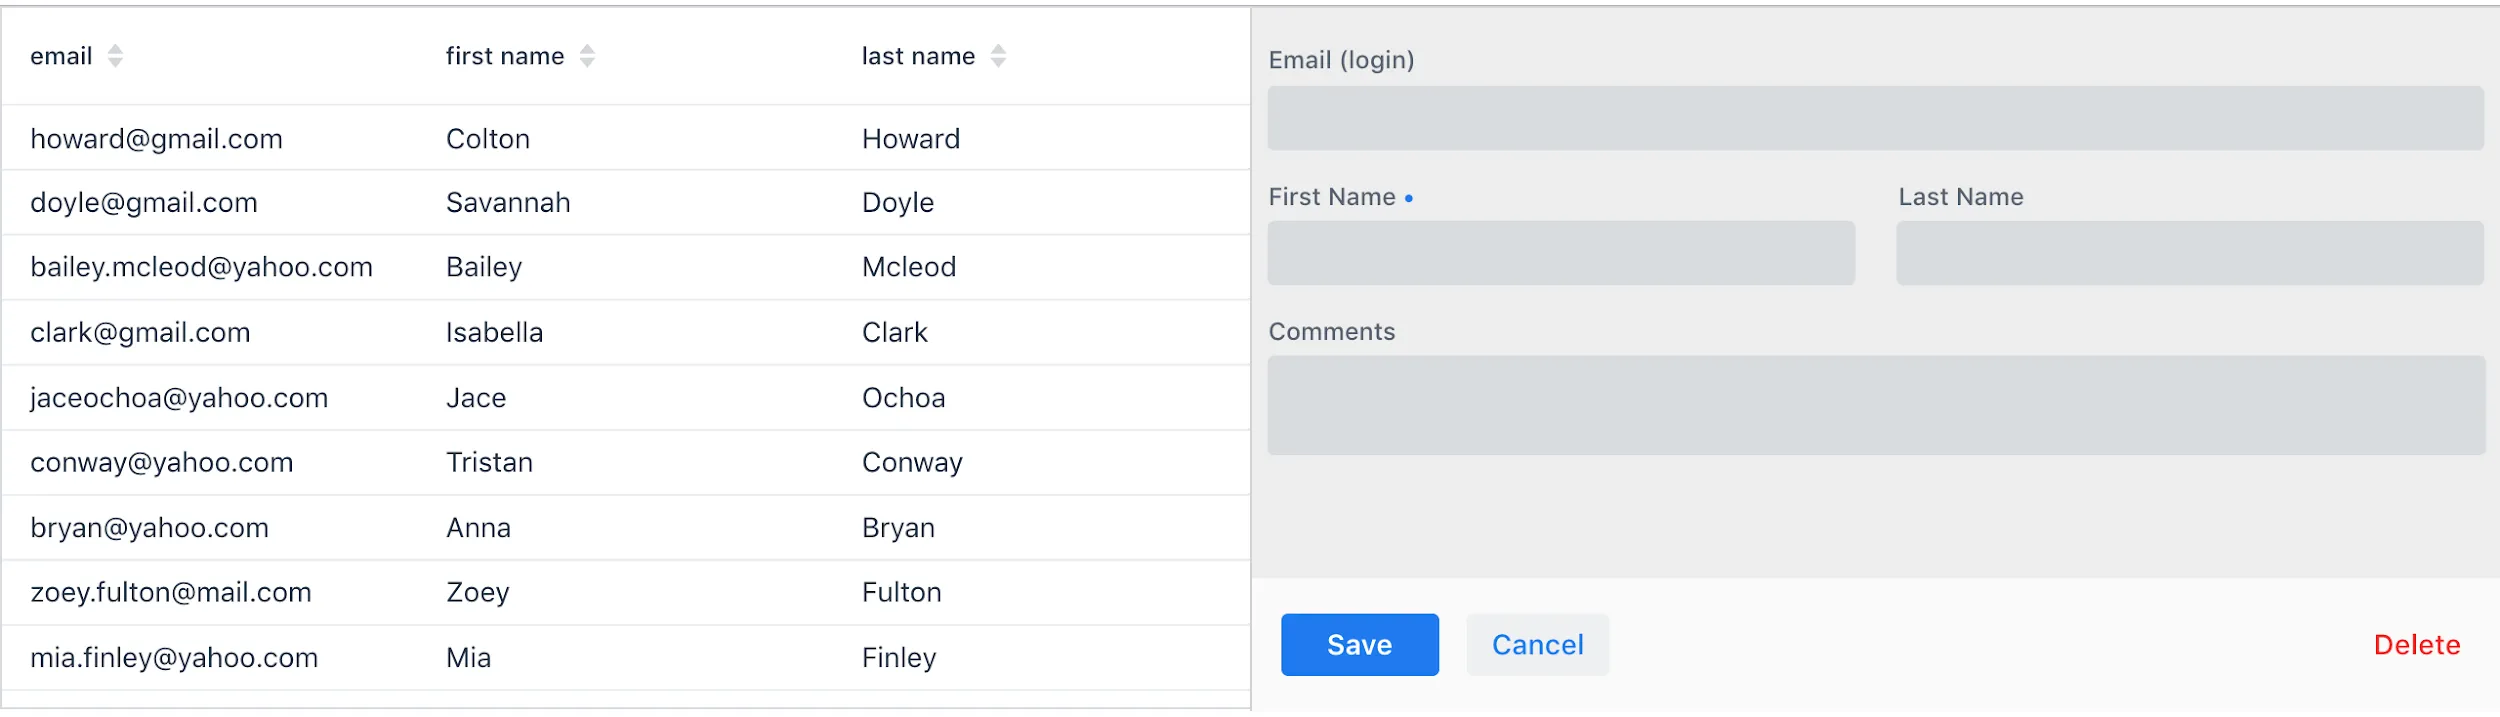
This component displays a grid of users and the new UserForm component.
For the data grid, you use the Vaadin Grid component.
Here is the result.
Example: Creating the main-view TypeScript LitElement template.
Source code
JavaScript
import { html, LitElement } from 'lit';
import '@vaadin/grid';
import './user-form.js';

class MainView extends LitElement {
  render() {
    return html`
      <div id="main-container">
        <vaadin-grid id="users-grid"></vaadin-grid>
        <user-form id="user-form"></user-form>
      </div>
    `;
  }
}

customElements.define('main-view', MainView);Example: Creating the mapped MainView Java template class.
Source code
Java
@Tag("main-view")
@JsModule("./src/main-view.ts")
@Route("")
public class MainView extends LitTemplate {

    @Id("user-form")
    private UserForm userForm;

    @Id("users-grid")
    private UsersGrid usersGrid;
}
Initializing the MainView Component
Next, configure the components and binder, and initialize their listeners in the MainView class.
Example: Initializing the MainView component and its component’s listeners.
Source code
MainView.class
/**
 * Initializes the Main view and the listeners of its components.
 */
public MainView() {

    // selection listener on the rows of the grid.
    usersGrid.addSelectionListener(selectionEvent -> {
        Optional<User> optionalUser = usersGrid.getSelectedItems().stream().findAny();

        if (optionalUser.isPresent()) {
            userForm.setBean(optionalUser.get());
            setEditionEnabled(true);
        } else {
            userForm.removeBean();
            setEditionEnabled(false);
        }
    });

    initFormListeners();
}
Implementing Save, Cancel and Delete Listeners
The final step is to implement listeners for the Save, Cancel and Delete buttons in the initFormListener().
Example: Implementing the save listener in the MainView class.
Source code
Java
formButtonsBar.addSaveListener(saveEvent -> {
    // it checks that all validators defined in the form pass without error.
    if (!userForm.getBinder().validate().isOk()) {
        return;
    }

    Optional<User> optionalUser = userForm.getBean();

    if (optionalUser.isPresent()) {
        User user = optionalUser.get();

        user = UsersRepository.save(user);

        usersGrid.refresh(user);
        userForm.setBean(user); // update the data in the form
    }
});-
The code first checks the state of the bean.
-
If correct, it generates a user object from the
userForm. -
The user is then saved by calling a method of the repository.
-
The item in the grid is refreshed to show the changes.
|
Note
|
For buffered binding, you would need to call binder.writeBean().
|
|
Note
|
|
Example: Implementing the cancel listener in the MainView class.
Source code
MainView.initFormListeners
formButtonsBar.addCancelListener(cancelEvent -> {
    usersGrid.deselectAll();
});-
All the elements of the grid are deselected and the form is emptied.
-
Deselection of a row triggers an event that removes the bean. See the
usersGrid.addSelectionListener()implementation in the previous section.
Example: Implementing the delete listener in the MainView class.
Source code
Java
formButtonsBar.addDeleteListener(deleteEvent -> {
    Optional<User> optionalUser = usersGrid.getSelectedItems().stream().findAny();

    if (optionalUser.isPresent()) {
        UsersRepository.delete(optionalUser.get());
        usersGrid.deselectAll();
        usersGrid.refreshAll();
    }
});-
The user is selected from the grid, removed by calling
UsersRepository.delete(), and the user (bean) is removed from theUserForm. -
When a user (bean) is removed, the fields of the
UserFormare cleared.