Starting a Project
- Importing a Maven Project into IntelliJ IDEA
- Running Maven Goals
- Running a Spring Boot Project
- Redeploying During Development
- Run on Server
In this article, we go through creating or importing a new Vaadin project in IntelliJ IDEA, and running it.
With IntelliJ IDEA, you can create a project:
-
Externally, using an application wizard or a Maven archetype, and then importing it to the IDE.
-
Creating from a Maven archetype in the IDE itself.
Maven is a project management tool that goes beyond dependency management. See Learning Maven Concepts for more.
Importing a Maven Project into IntelliJ IDEA
There are several ways to import a Maven project in IntelliJ IDEA.
The most common approach is to open the pom.xml file directly.
-
In the Welcome to IntelliJ IDEA screen, click Open.
The welcome window is only shown when you close all projects in IntelliJ IDEA. If you don’t want to close your currently opened projects, you can select in the menu instead.
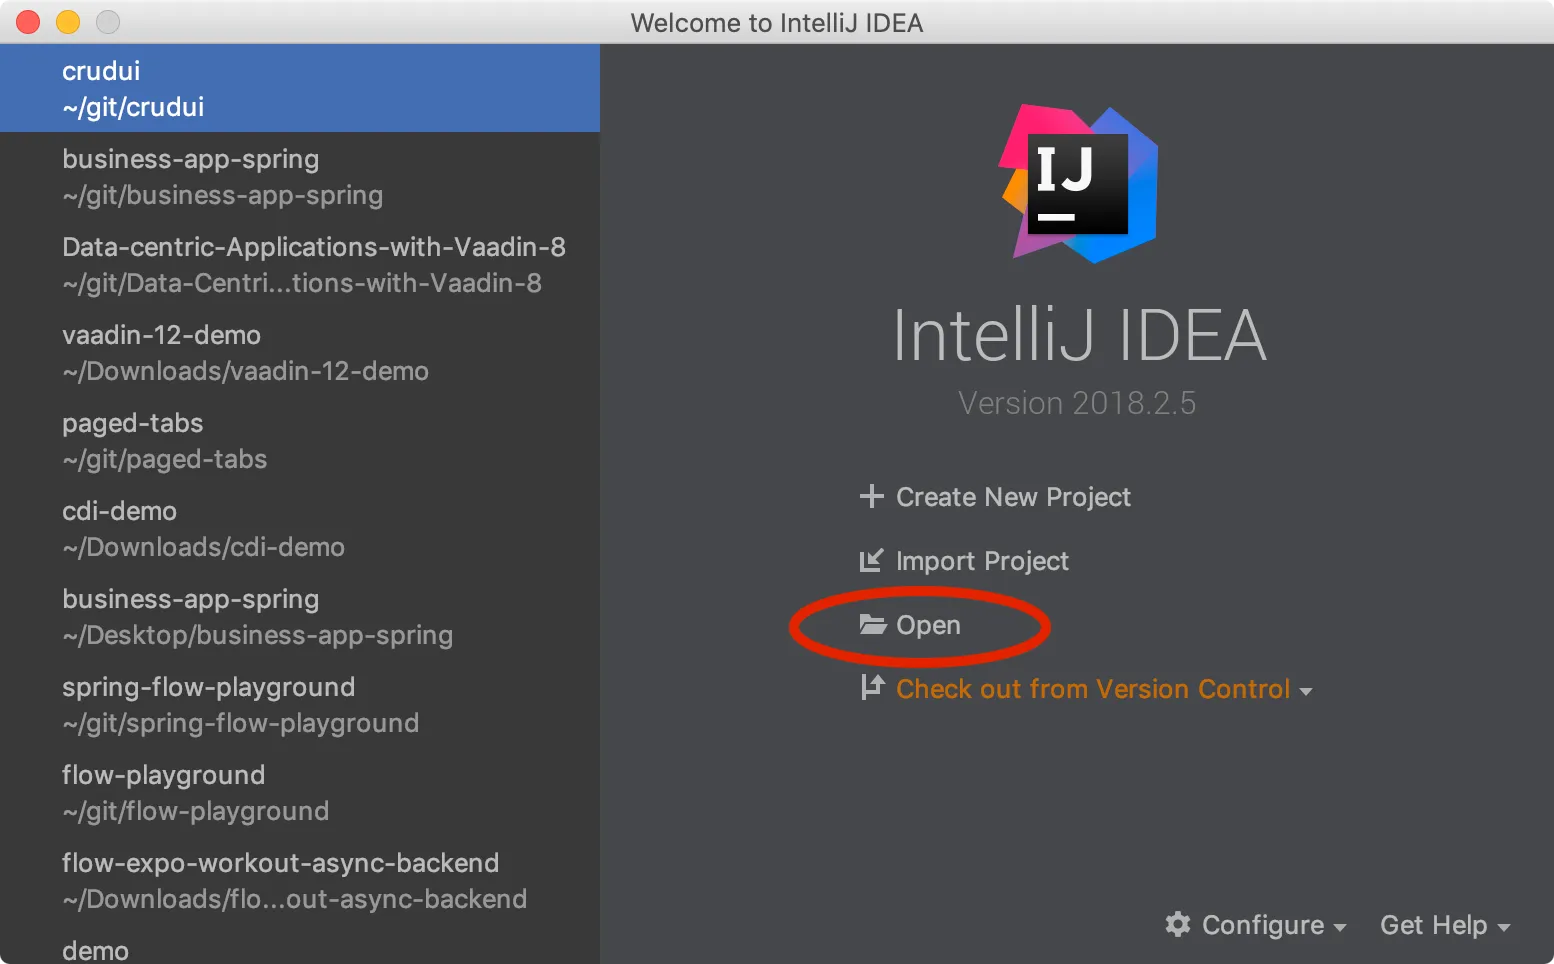
Note that Import Project gives you more options to tweak the import process. However, this is out of the scope of this article.
-
Find the extracted folder, and select the
pom.xmlfile.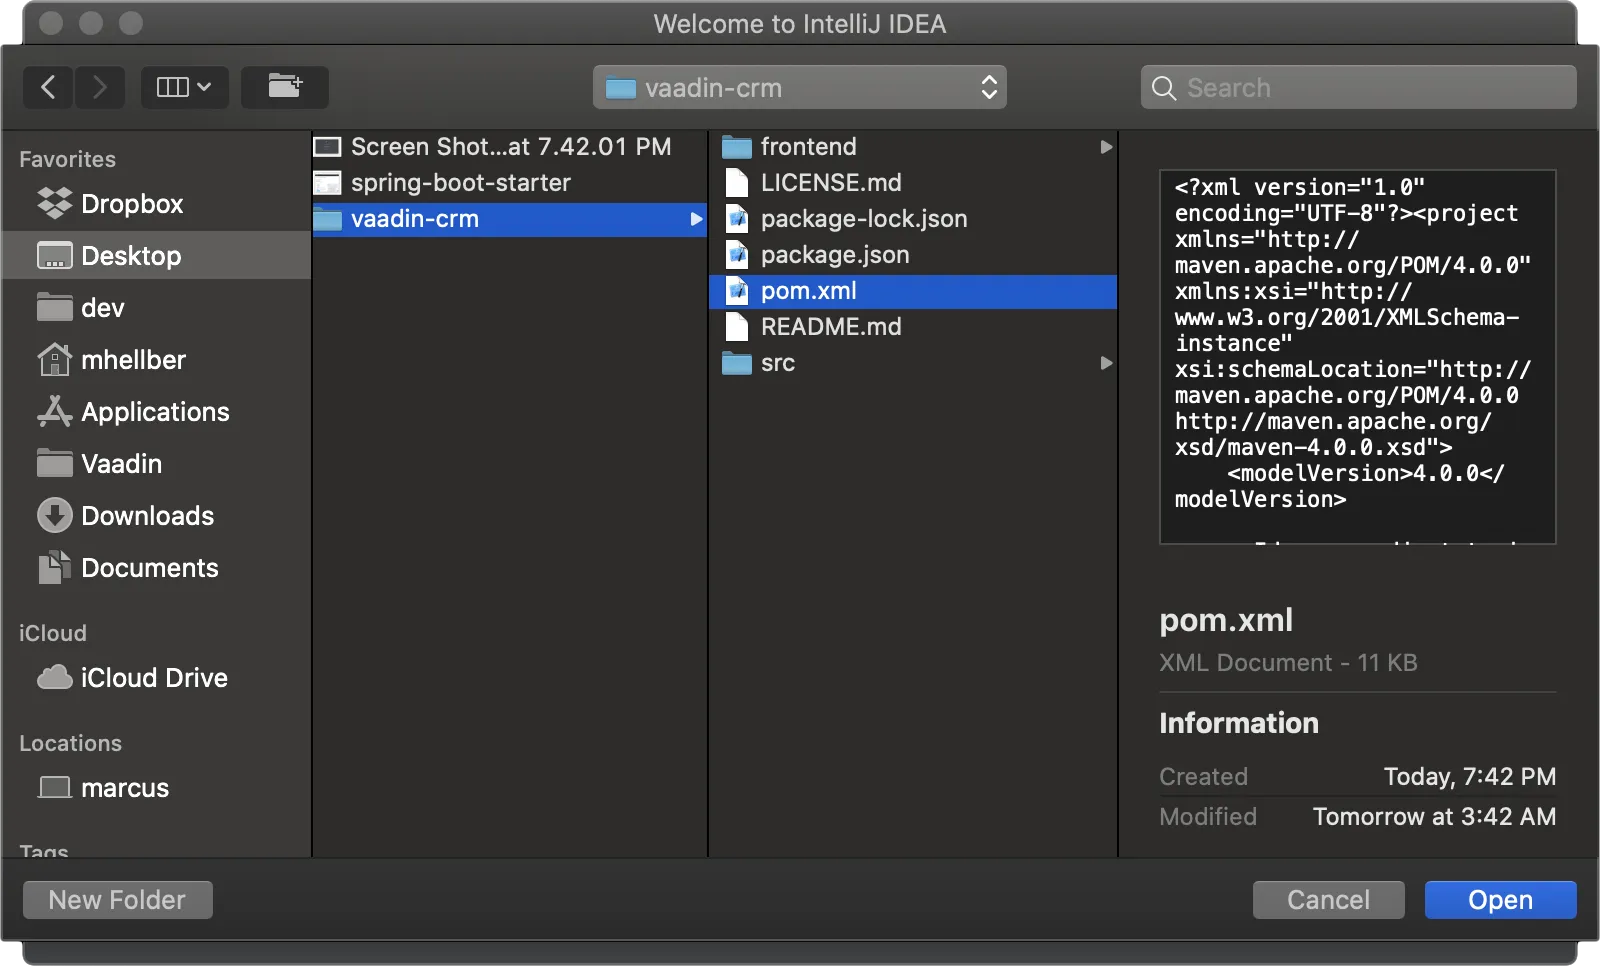
-
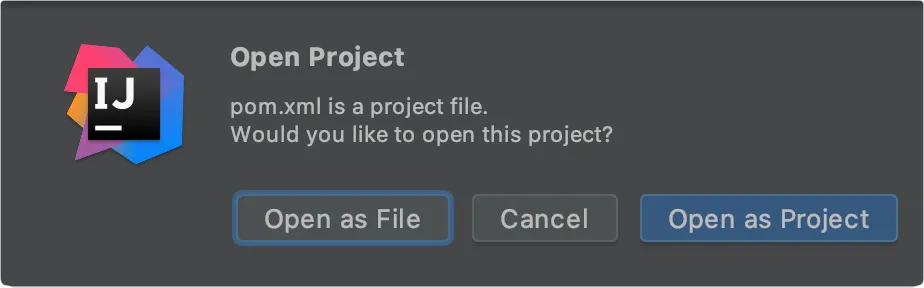
Select Open as Project. This imports a project based on the POM file.
-
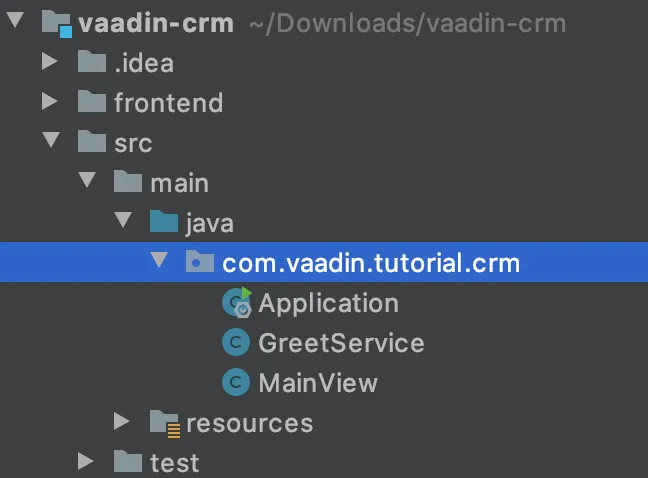
IntelliJ imports the project and downloads all necessary dependencies. This can take several minutes, depending on your internet connection speed.
When the import is complete, your project structure will be similar to the following:
-
Java source files are in the
src/main/javafolder. -
Test files are in the
src/testfolder (we’ll refer to these later).
Running Maven Goals
You can use Maven to compile and run a Vaadin application.
IntelliJ IDEA has an excellent integration with Maven.
You can run common commands such as mvn install without having to leave the IDE.
You can run the application in a development server with Maven goals such as jetty:run (plain Java), tomee:run (Java EE and CDI), or spring-boot:run (Spring Boot).
Notice that with Spring Boot, you can simply run the application class, as described in Running a Spring Boot Project.
-
Open the Maven view by clicking the vertical tab on the right side of the IntelliJ IDEA window:
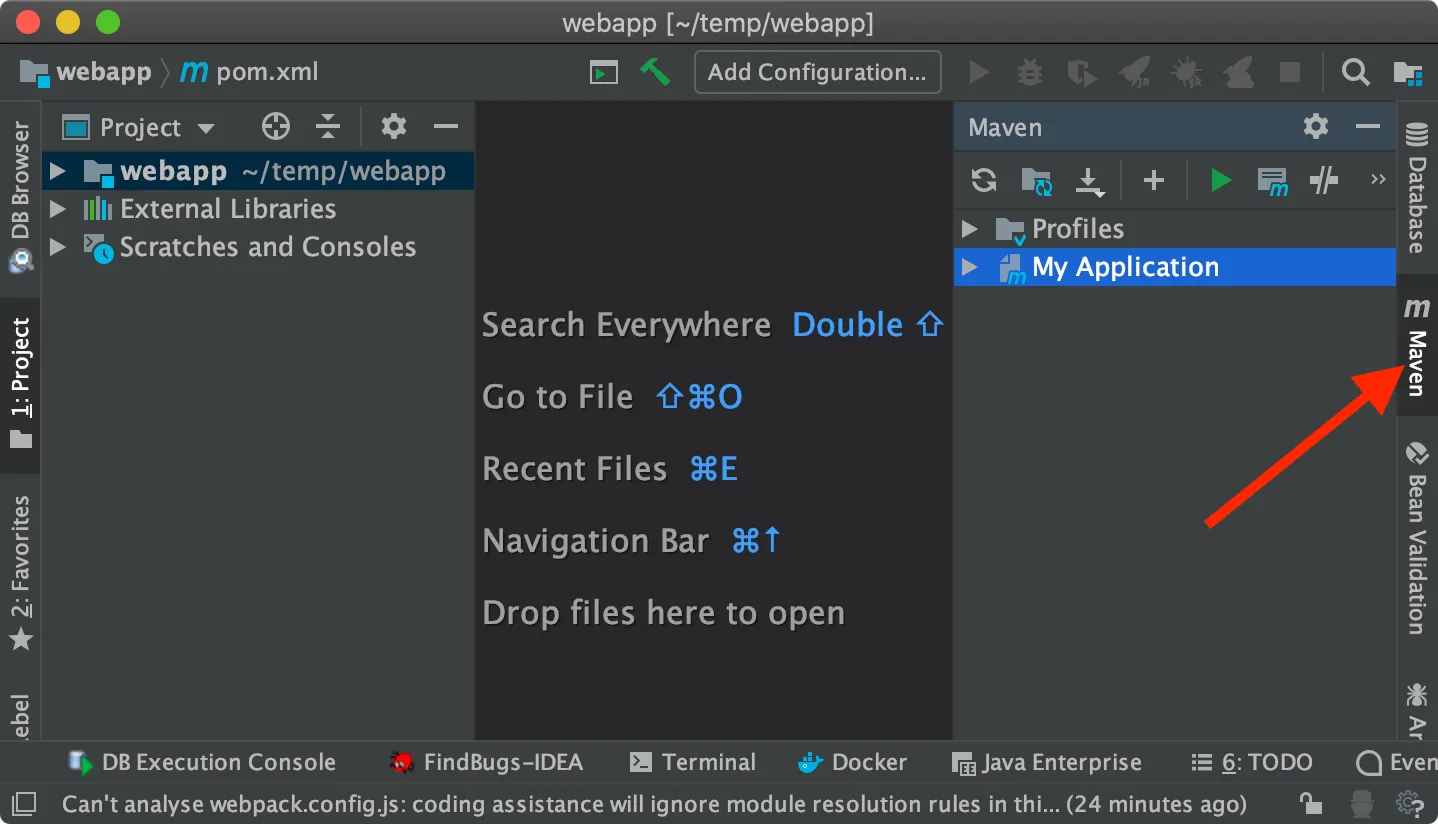
This view shows all the available Maven projects and their build phases and build goals.
-
Let us say you want to run
mvn install. To do that, expand the project tree in the Maven view to show the corresponding lifecycle phase.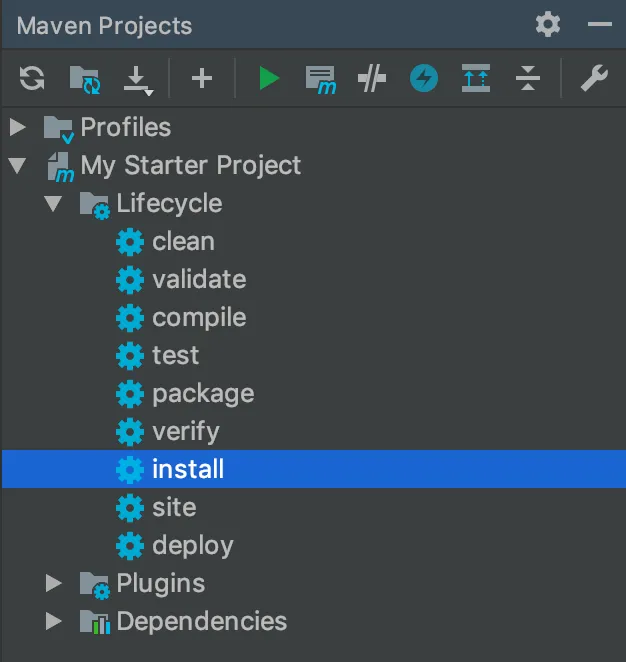
-
Double-click install.
You will see how IntelliJ idea executes the install build phase.
First, it executes all the previous phases in the Maven’s default lifecycle.
Finally at the install phase, it downloads dependencies and copies the generated artifacts into your local Maven repository, among other things.
You can use a similar approach to run any Maven goal.
For example, you can double-click the jetty:run goal in the Plugins sub-tree to deploy and run the web application implemented in the project you imported.
Similarly, if you are using Spring Boot, you can double-click spring-boot:run to run the application.
To learn more about the topics covered here:
-
The key concepts in Maven, see Learning Maven Concepts.
Creating a Running Configuration
Since using a goal to run the application could be a frequent task during the development, you may want to create a running configuration for it.
A running configuration is a shortcut to run a specific task from within the IDE.
In the following, we create a running configuration for the jetty:run Maven goal to make it simpler to run the web application.
-
Open the Maven view.
-
Right-click the
jetty:run,tomee:run, orspring-boot:runitem under the appropriate folder.Technology Stack Embedded Server Goal to Run Spring Boot
–
spring-boot:runCDI / Java EE
Apache TomEE
tomee:runPlain Java
Jetty
jetty:run -
Select Create 'webapp [jetty:run]' (or
tomee:runorspring-boot:run):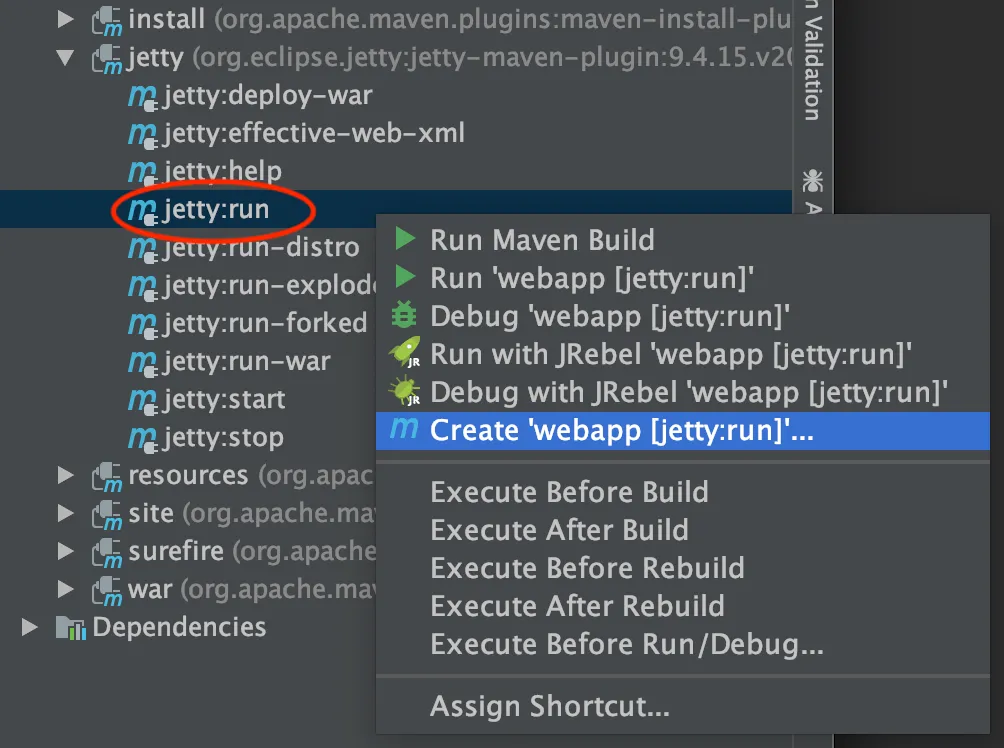
-
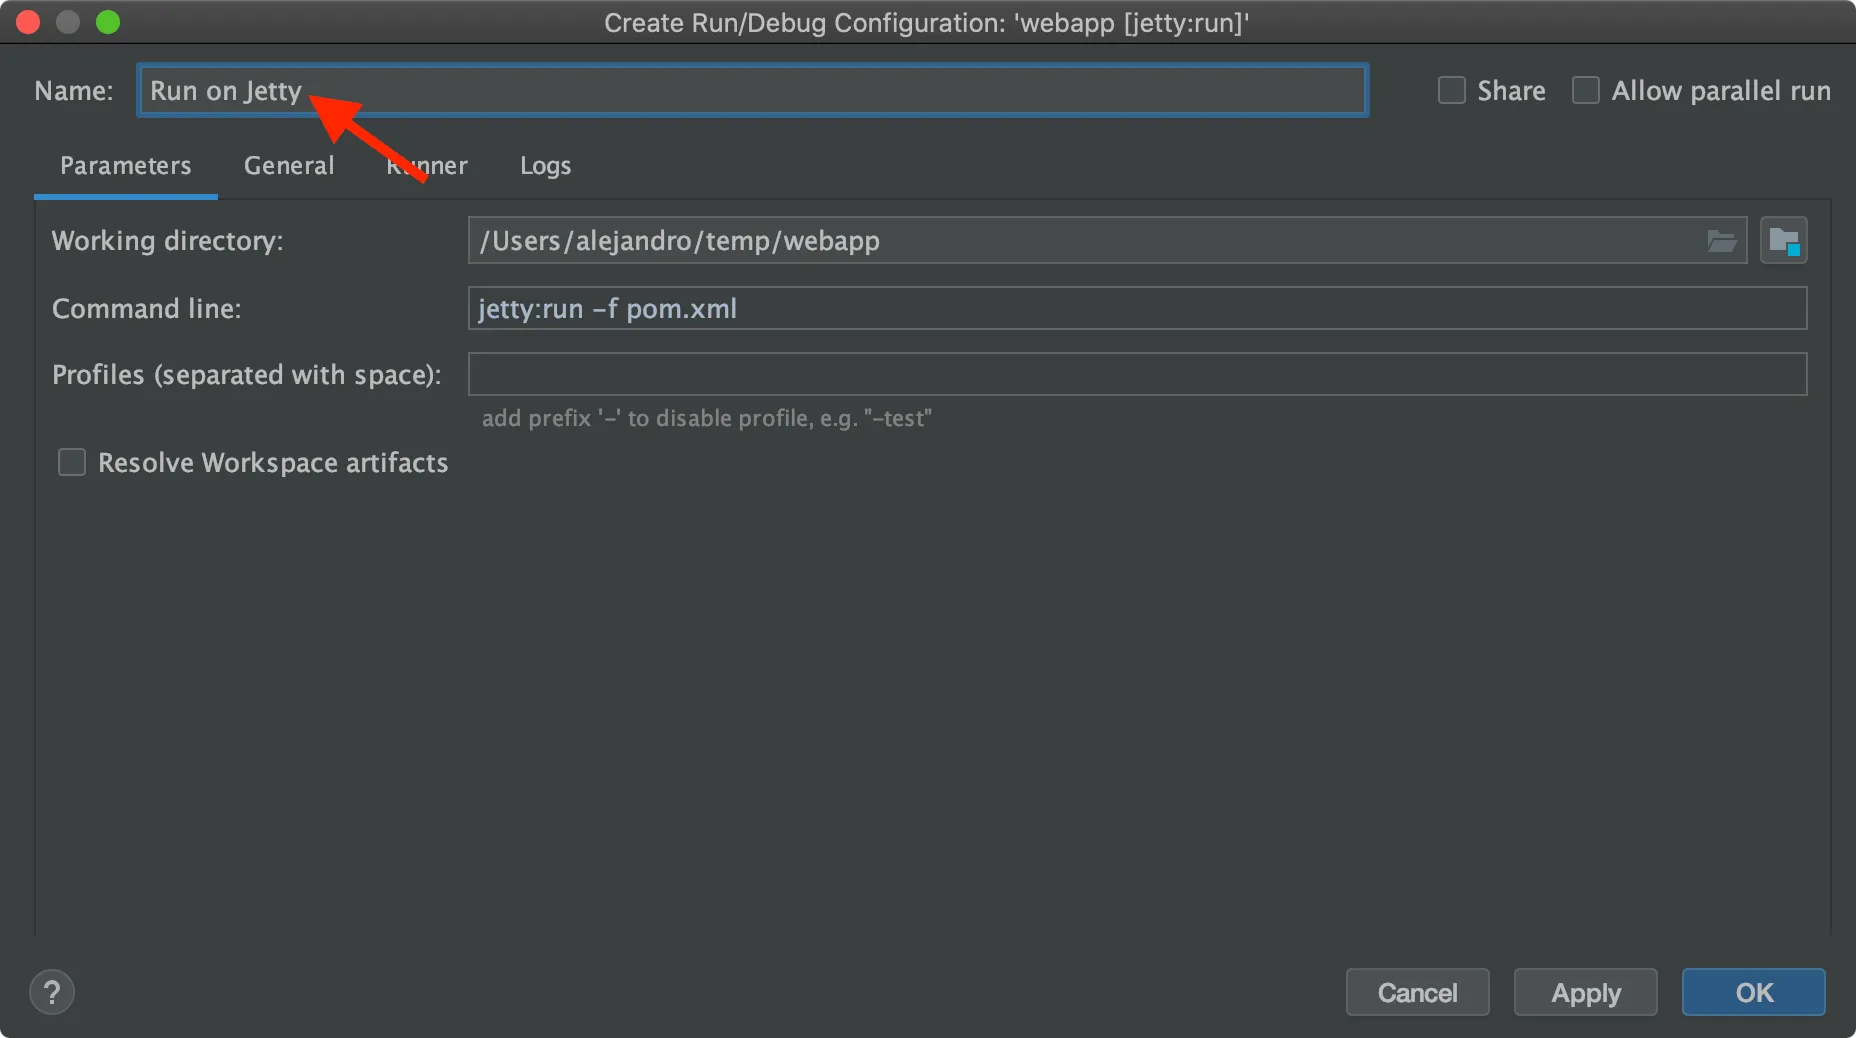
For simplicity, change the name of the configuration to Run on Jetty (or TomEE or Spring Boot)
-
Click :
You should see the new option on the top right corner of IntelliJ IDEA:
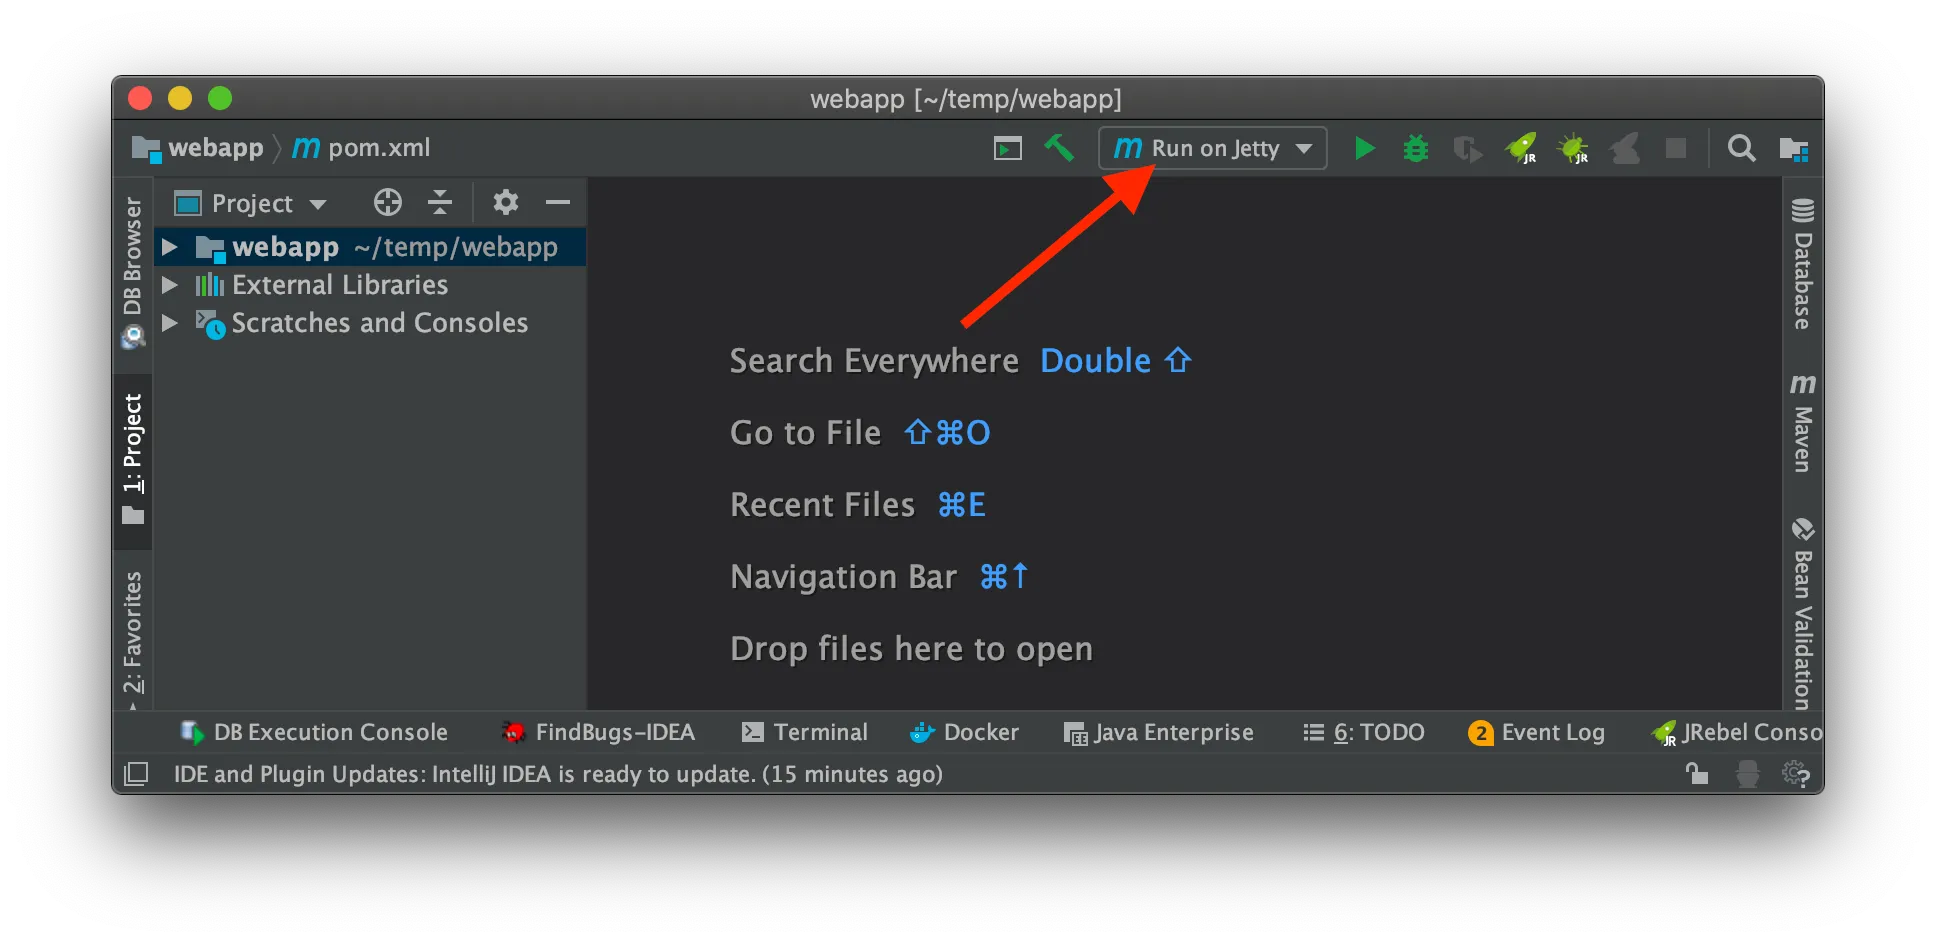
Now you can deploy and run the web application by clicking the run (or the debug) icon in the toolbar:
Running a Spring Boot Project
If you are developing a Spring Boot project, Spring Boot makes it easier to run a Java web application, because it takes care of starting and configuring the server.
|
Note
|
You can also run the application with the spring-boot:run Maven goal as described in Running Maven Goals.
|
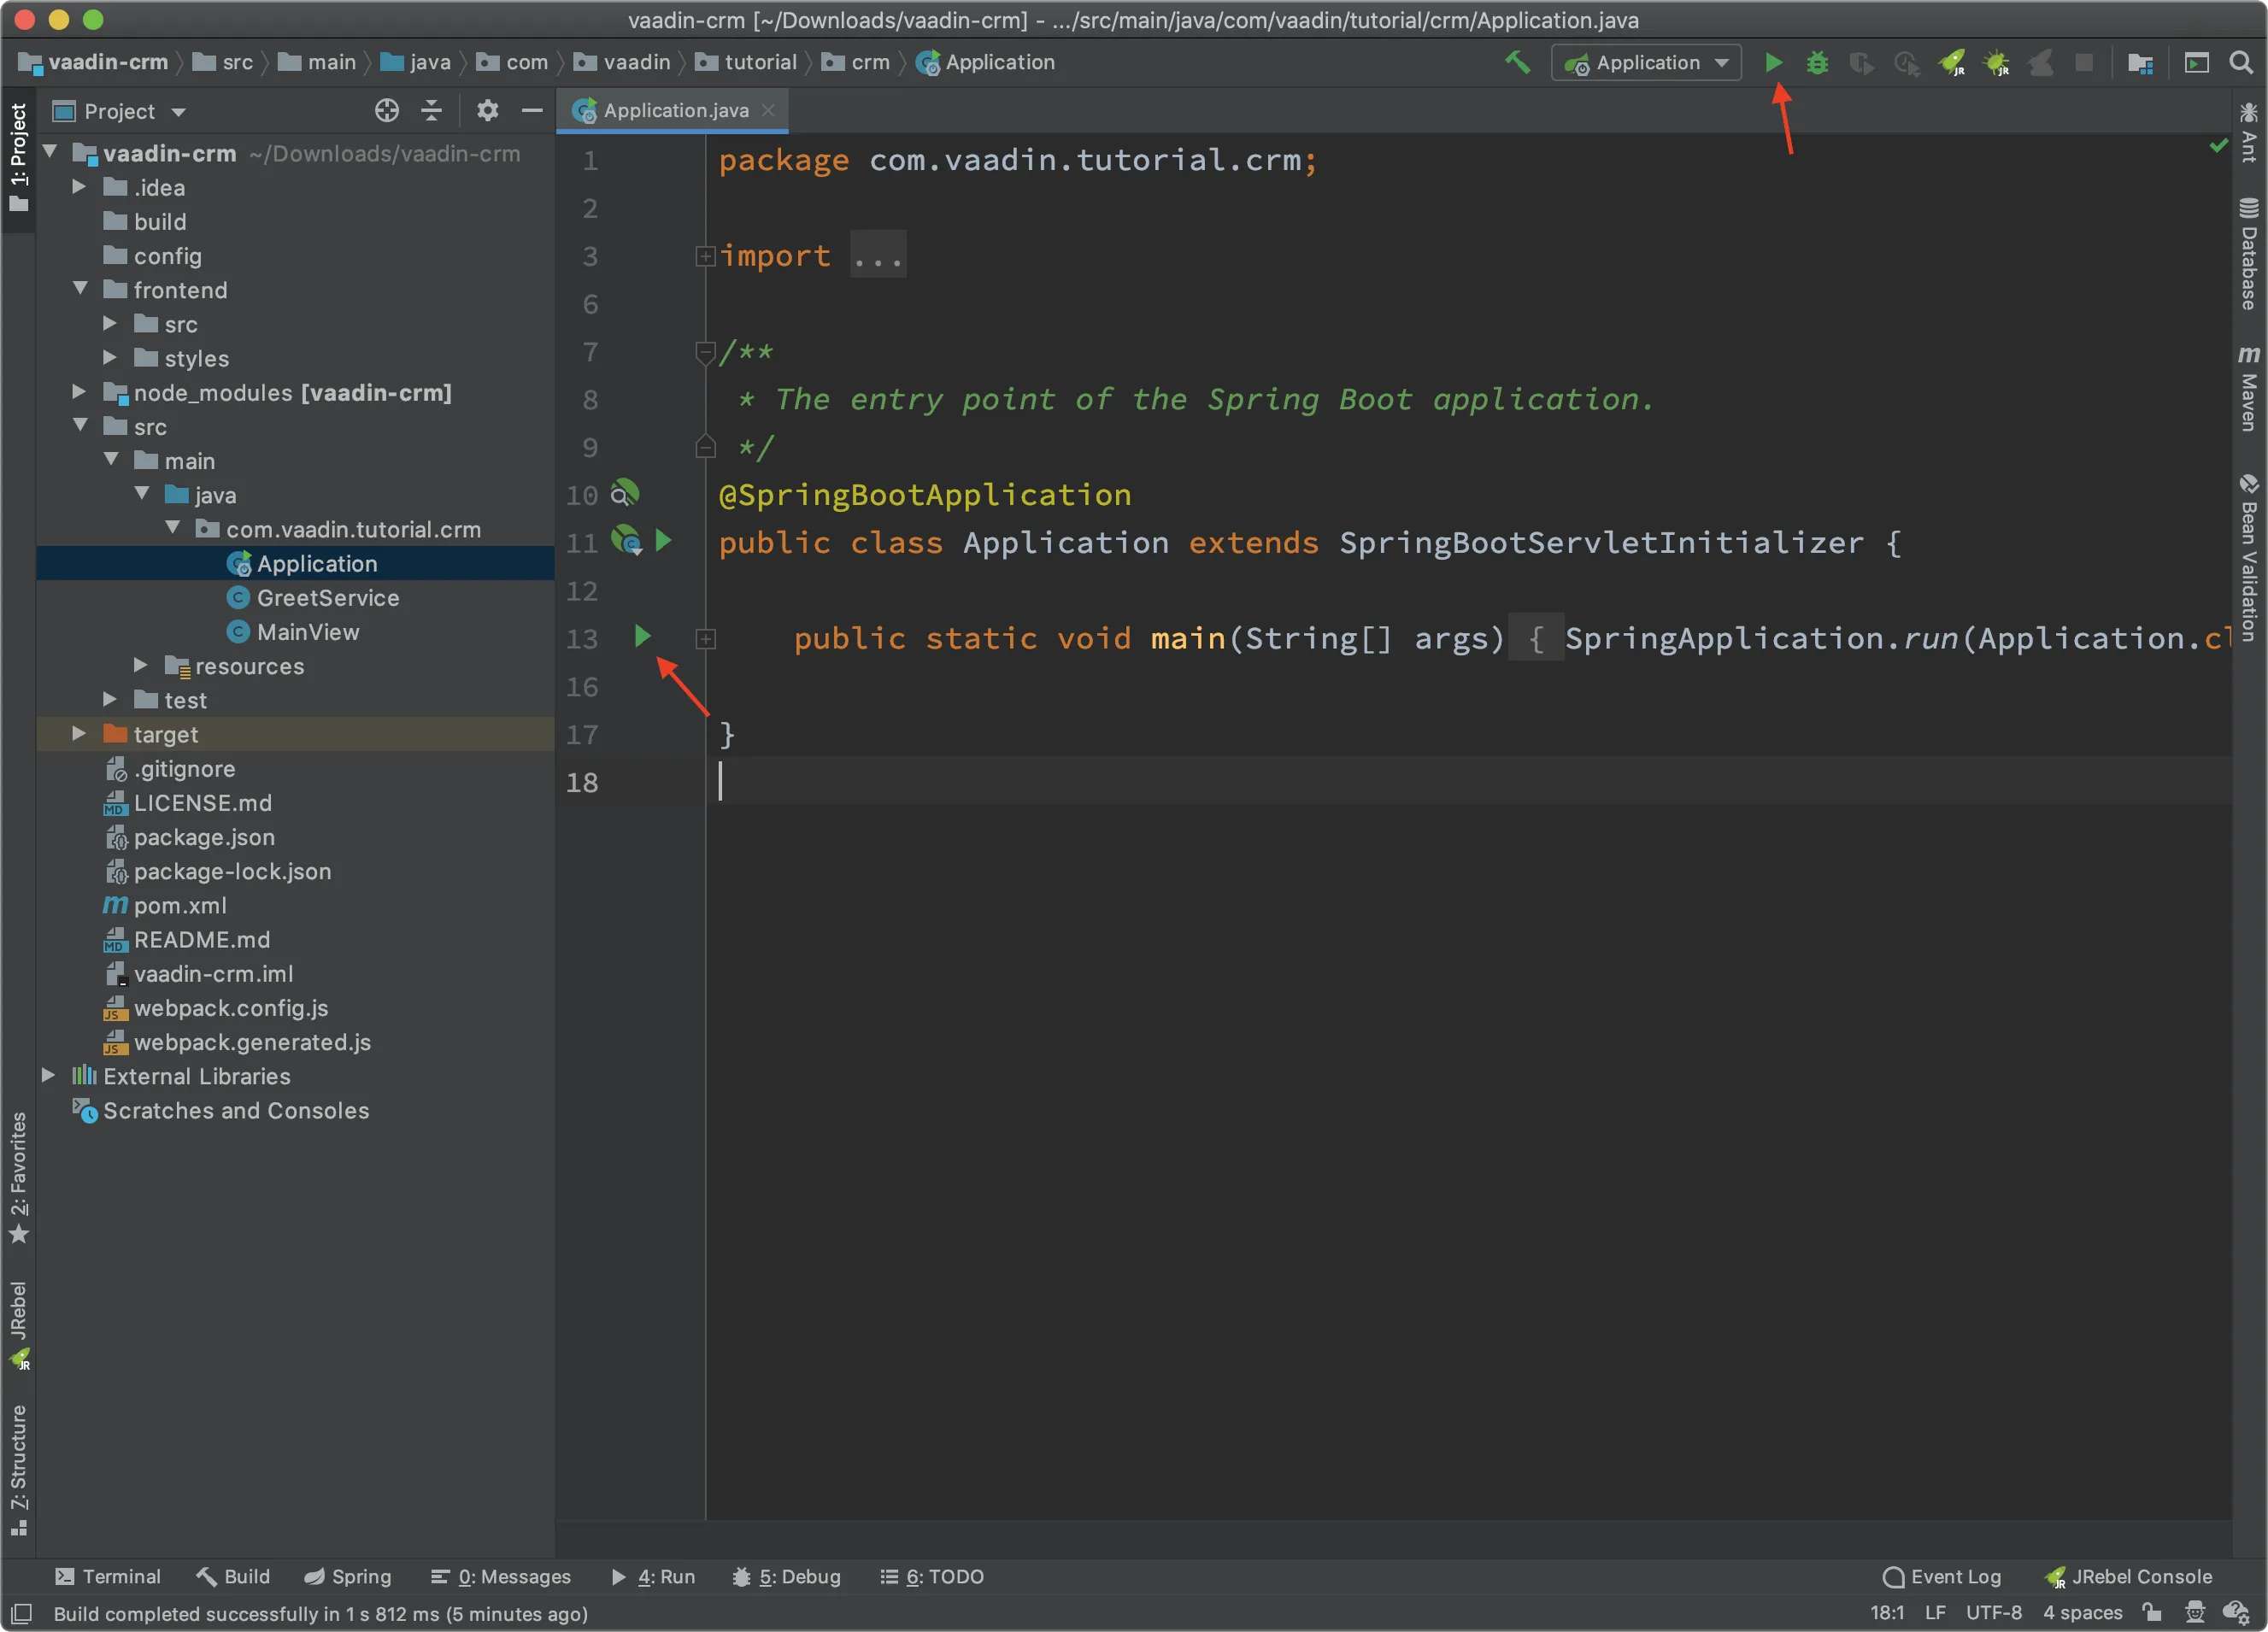
To run your application, all you need to do is to run the Application class that contains the main method that starts Spring Boot.
IntelliJ automatically detects that you have a class with a main() method and displays it in the run configurations dropdown.
To start your application:
-
Click the play button next to the run configurations dropdown.
-
Alternatively, open
Application.javaand click the play button next to the code line containing the main method.
The first time you start a Vaadin application, it downloads front-end dependencies and builds a JavaScript bundle. This can take several minutes, depending on your computer and internet speed.
You will know that your application has started when you see the following output in the console:
Source code
Tomcat started on port(s): 8080 (http) with context path ''
Started Application in 80.189 seconds (JVM running for 83.42)
You should now be able to open the web application at http://localhost:8080.
Redeploying During Development
If you edit and save any of the source files, they will be compiled automatically, but you can only see the changes by restarting the server. In the Run panel, click the Rerun icon, or press Ctrl+5 in the editor. You can then refresh the page to use the updated version.
You can also enable Live Reload to have the page refreshed automatically.
Run on Server
You can run and debug your Vaadin application in IntelliJ IDEA Ultimate Edition on the server of your choice (such as Tomcat). You just need to enable the corresponding application server plugin as explained on Jetbrains' documents here.
First of all, you should create a Run/Debug Configuration for the server you want.
See IntelliJ IDEA – Run / debug web application on Tomcat for detailed instructions.
The Jetbrains' documents on this topic may also be helpful.
Note that run on server is not available in IntelliJ IDEA Community Edition.
Then, you should make sure that the prepare-frontend goal of vaadin-maven-plugin is called before the build.
So, you need to have the plugin added to your pom.xml, for example as follows:
Source code
XML
<build>
    <plugins>
        <plugin>
            <groupId>com.vaadin</groupId>
            <artifactId>vaadin-maven-plugin</artifactId>
            <version>${vaadin.version}</version>
            <executions>
                <execution>
                    <goals>
                        <goal>prepare-frontend</goal>
                    </goals>
                </execution>
            </executions>
        </plugin>
    </plugins>
</build>
The prepare-frontend goal is automatically called when you run your application with a Maven plugin, such as with mvn jetty:run.
When you want to run your application on a server that you installed separately, IntelliJ builds the war file and does not use Maven to build it.
So, we should tell IntelliJ to run prepare-frontend before building the war.
In the following, we explain two ways to do that.
Add prepare-frontend to Run/Debug Configuration
You need to do the following steps:
-
In the Run/Debug Configuration dialog, go to .
-
Press Add (+) button and select Run Maven Goal.
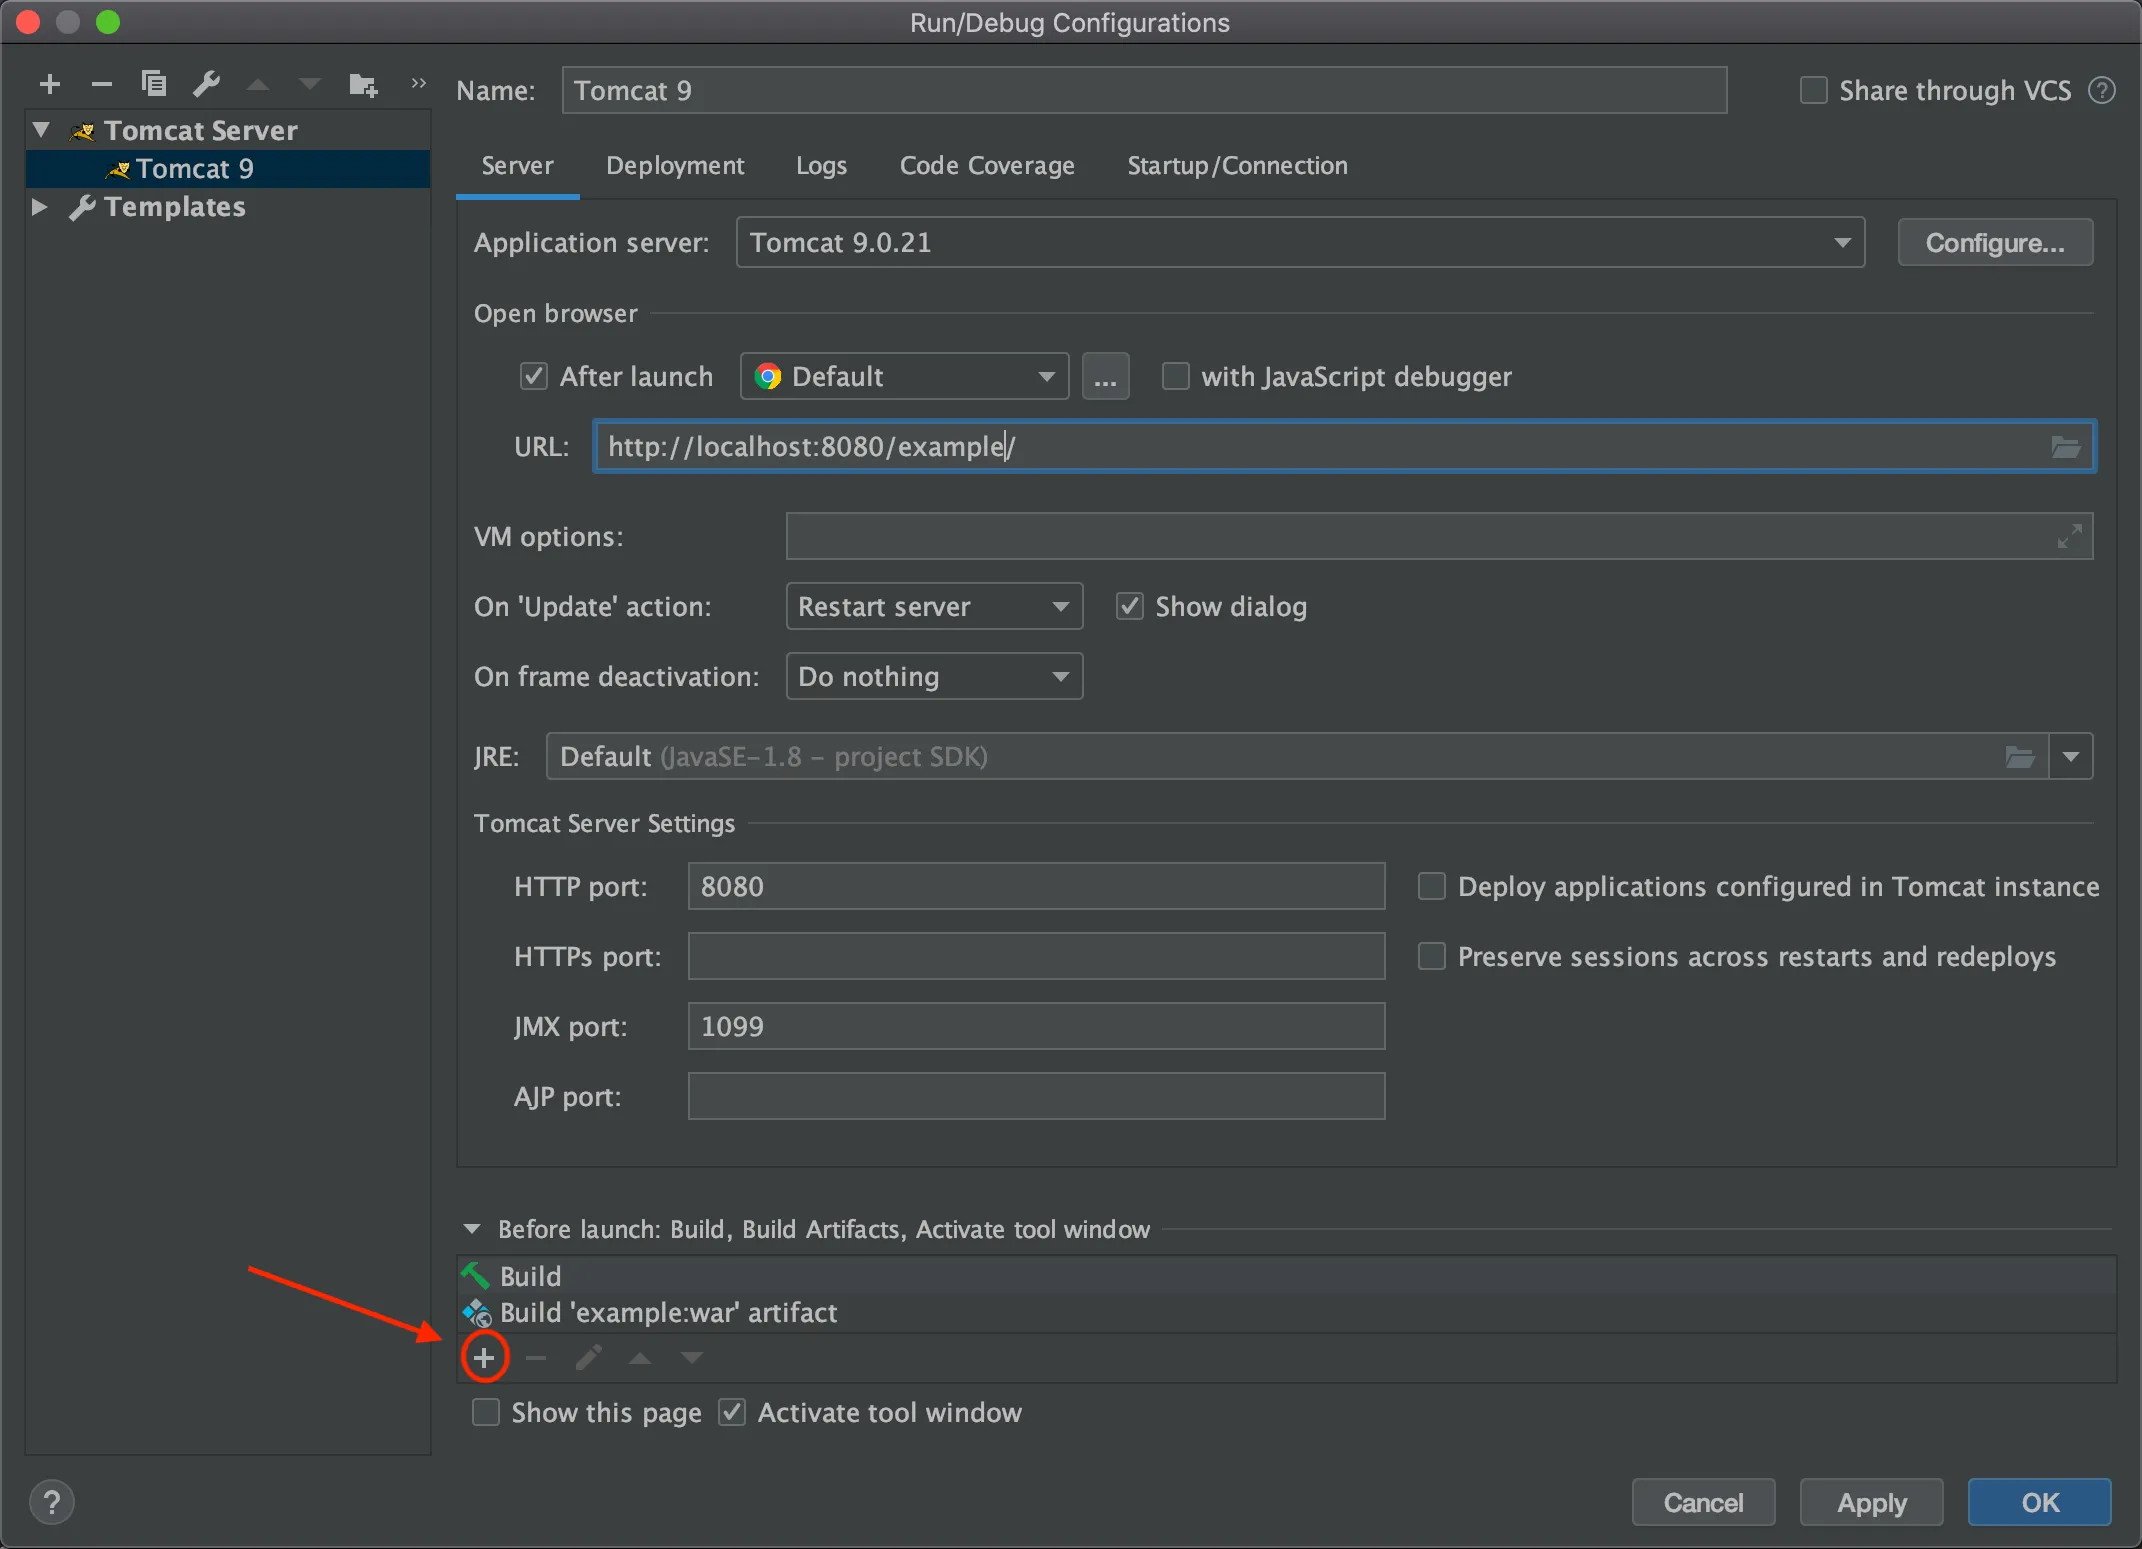
-
In the opened dialog enter
vaadin:prepare-frontendas the Command line and click OK. -
Move the new item to the top of Before launch list by clicking ▲ as many times as needed.

-
Click OK.
Now, you can run/debug your application.
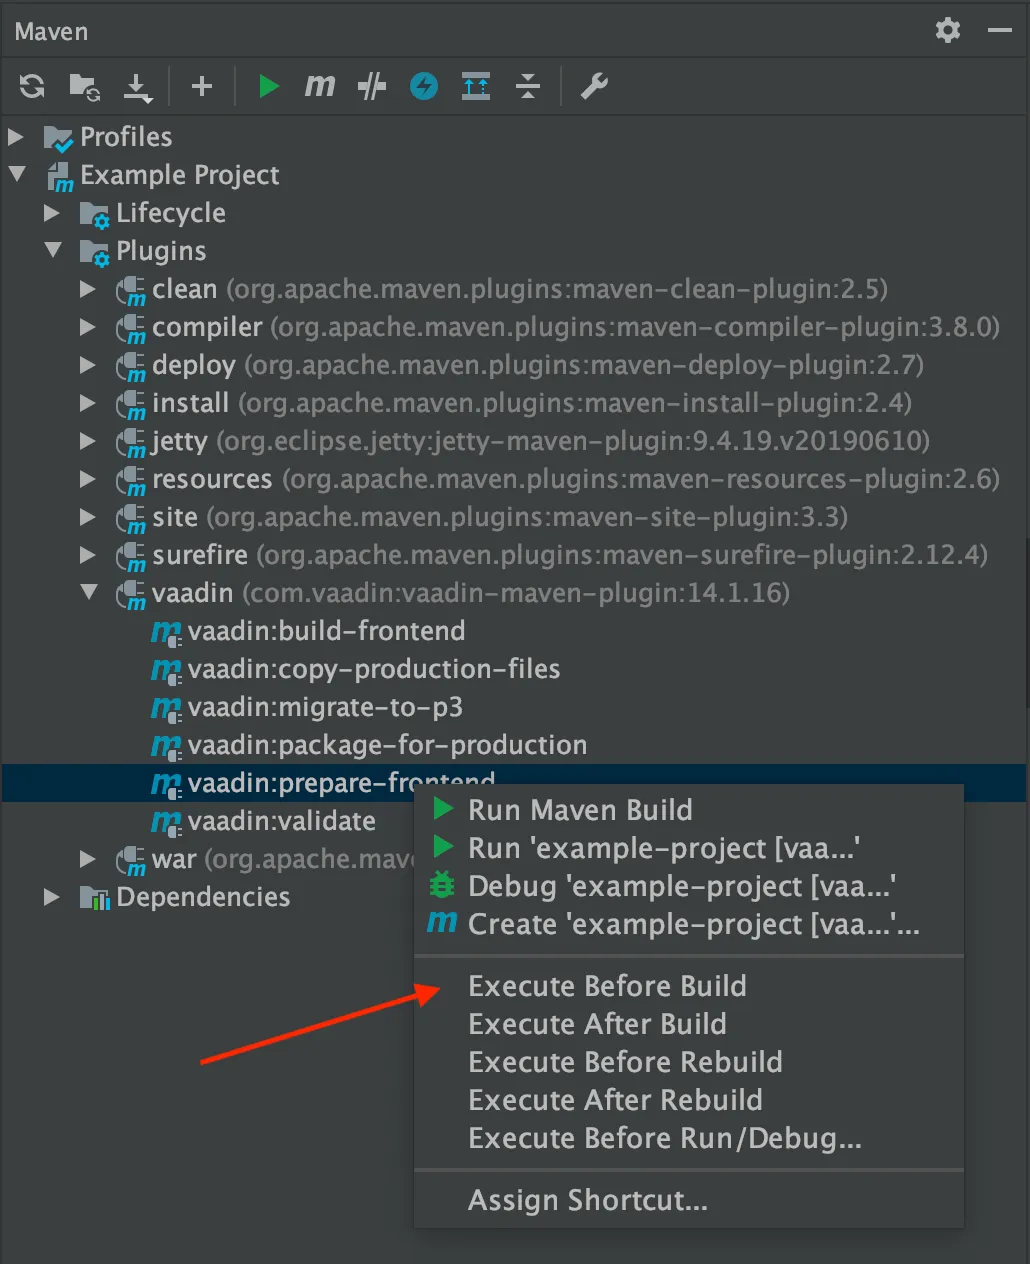
Execute prepare-frontend Before Build
You can make IntelliJ to run prepare-frontend before each build.
To do so open Maven window with .
Then, open vaadin under the Plugins section, right-click on prepare-frontend, and select Execute Before Build.
|
Note
| Some application servers, like Weblogic, cache jar files of applications in temp folders. When you are upgrading the Vaadin version of your application, you may have to clear those folder to make sure that the new jar files are picked up and no conflict occurs. |
8603A8D7-5D4F-4808-8FD5-92105D7D56ED