Going to production with Spring & Beanstalk
- Getting an Amazon Elastic Beanstalk account
- Creating Instances in EB and Deploying the App.
- Configuring Vaadin for Production
- Preparing a Production WAR
- Creating an EB Web Application
- Creating a Database for Production
- Uploading your .war file
- Post Production
- Resources
In the following we’ll take a look at how to deploy the Spring version to AWS Elastic Beanstalk (EB).
Beanstalk is part of Amazon Web Services (AWS) and hides a lot of the complexity with provisioning, load balancing, scaling etc., since you do not have to deal with each of these individually. However, since it’s part of AWS, you can still take full control of the individual services, if you have specific needs, or as your application grows.
Getting an Amazon Elastic Beanstalk account
In order to use Amazon Elastic Beanstalk, you need to have an AWS account. Head over to https://aws.amazon.com/elasticbeanstalk to read more about the service and create an account.
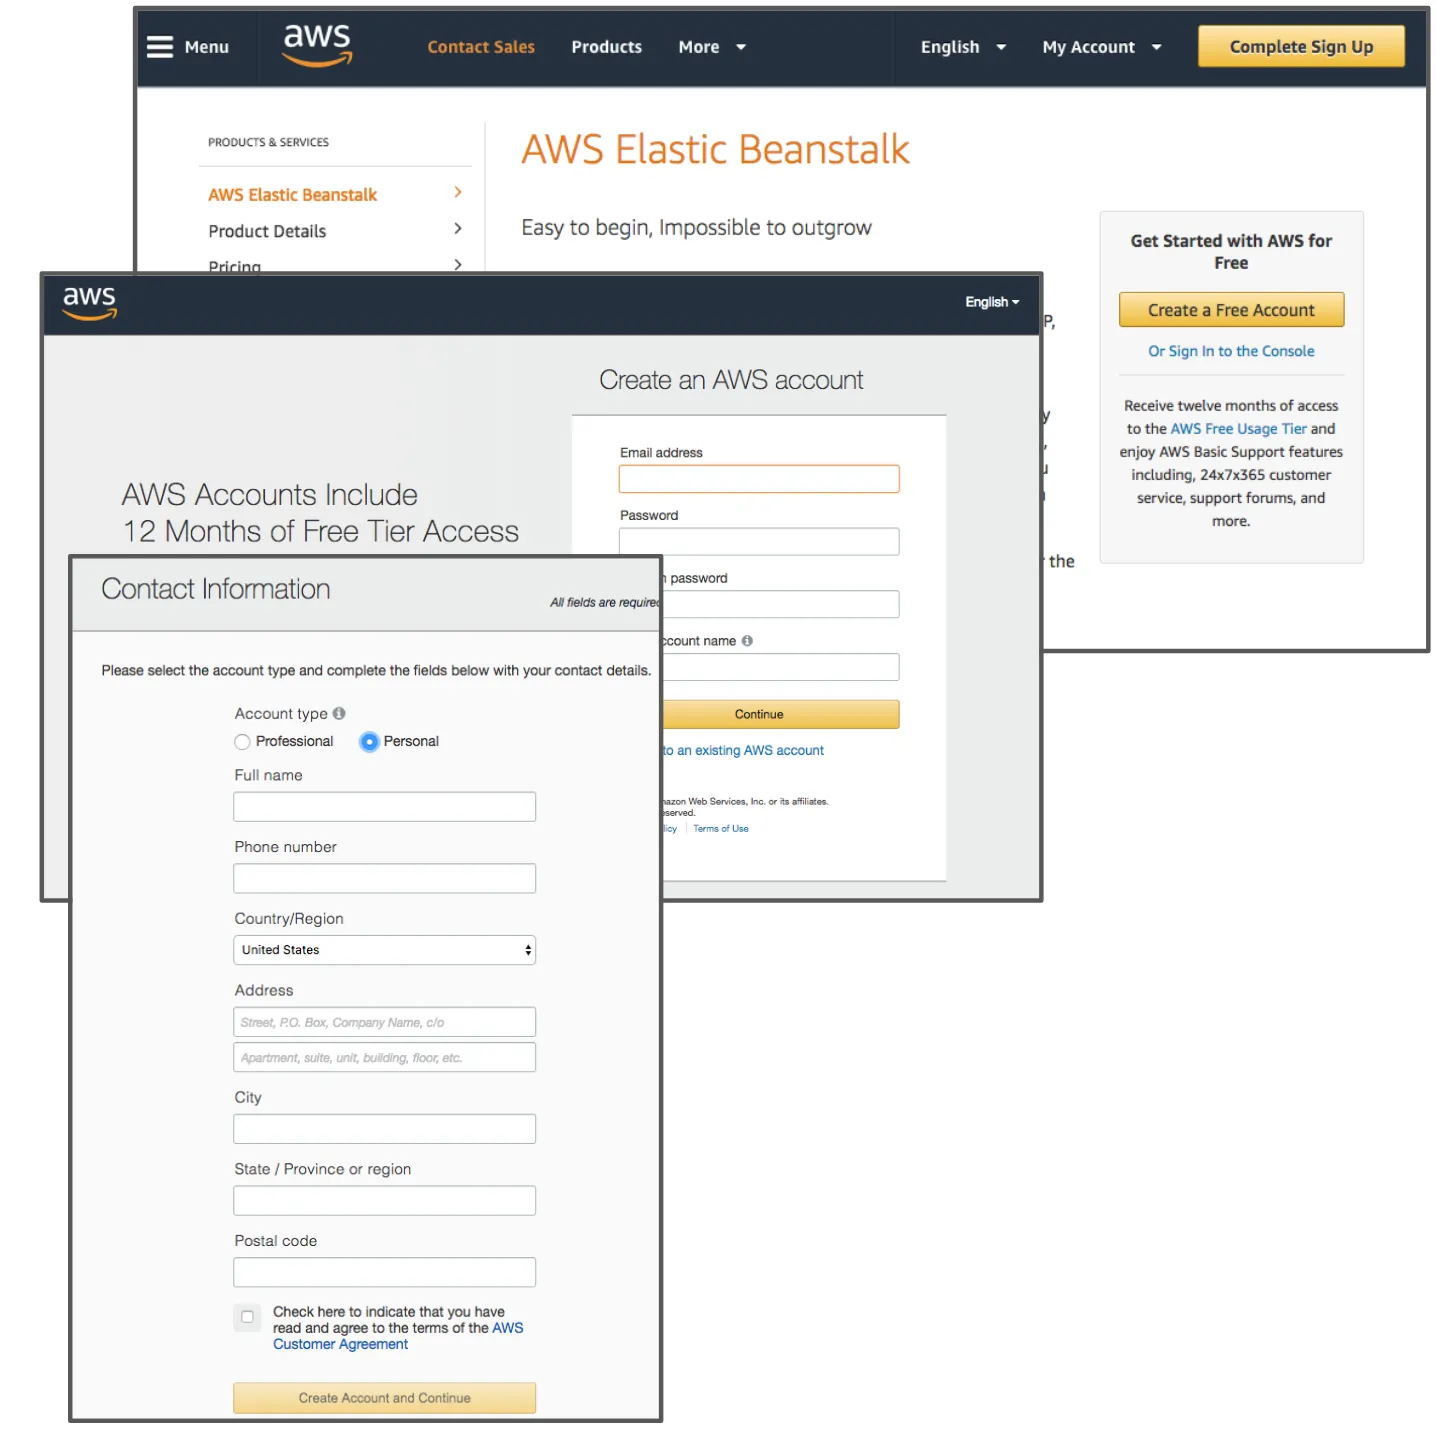
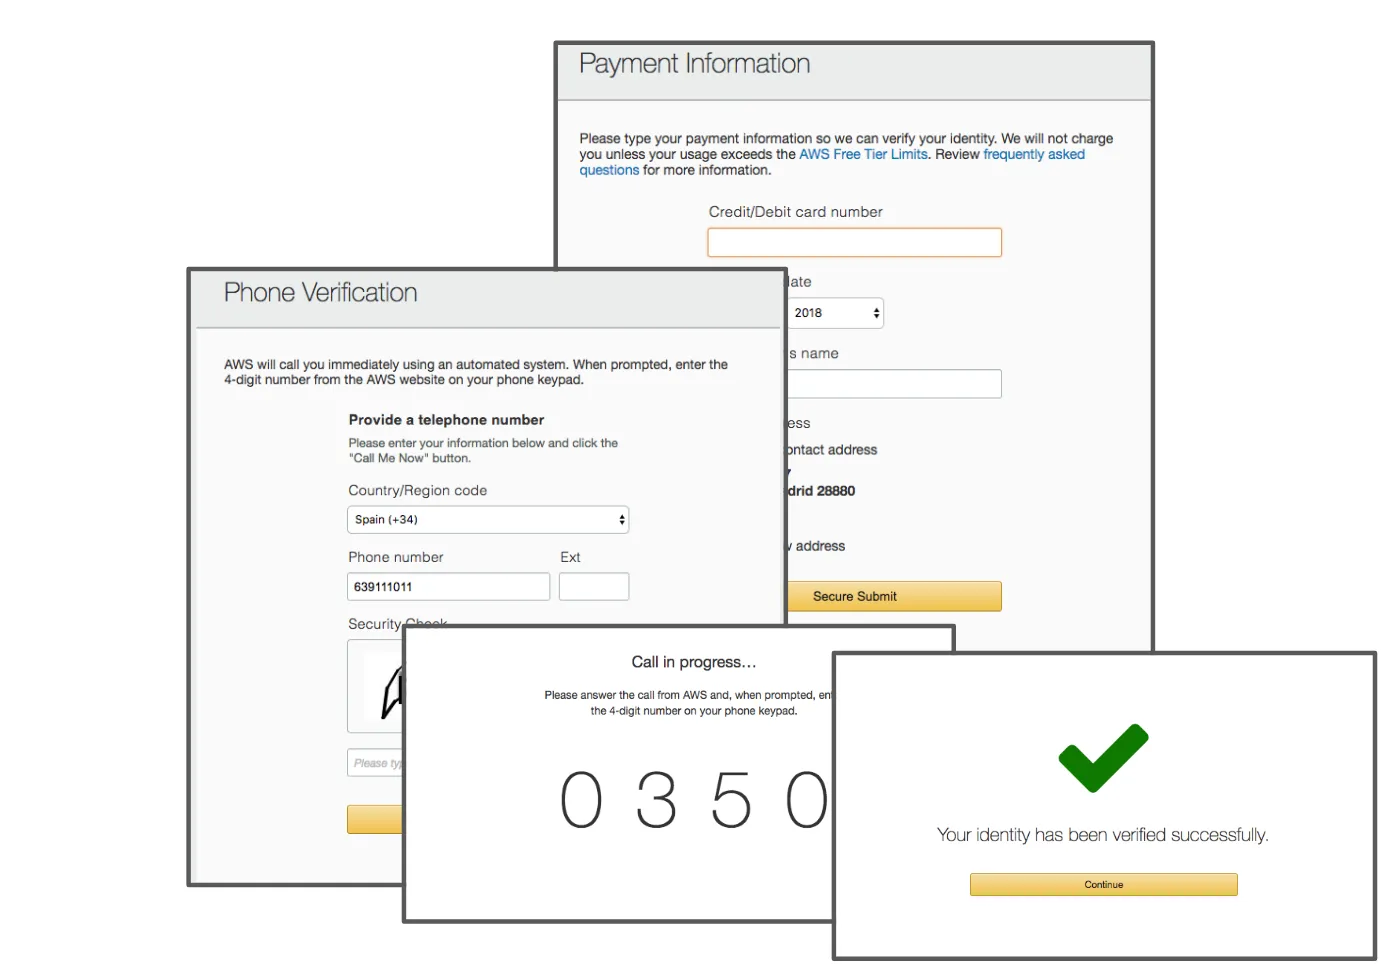
Although you will be asked to provide credit-card details before making use of AWS services, you can select a free tier that allows you to try the service for free during one year.
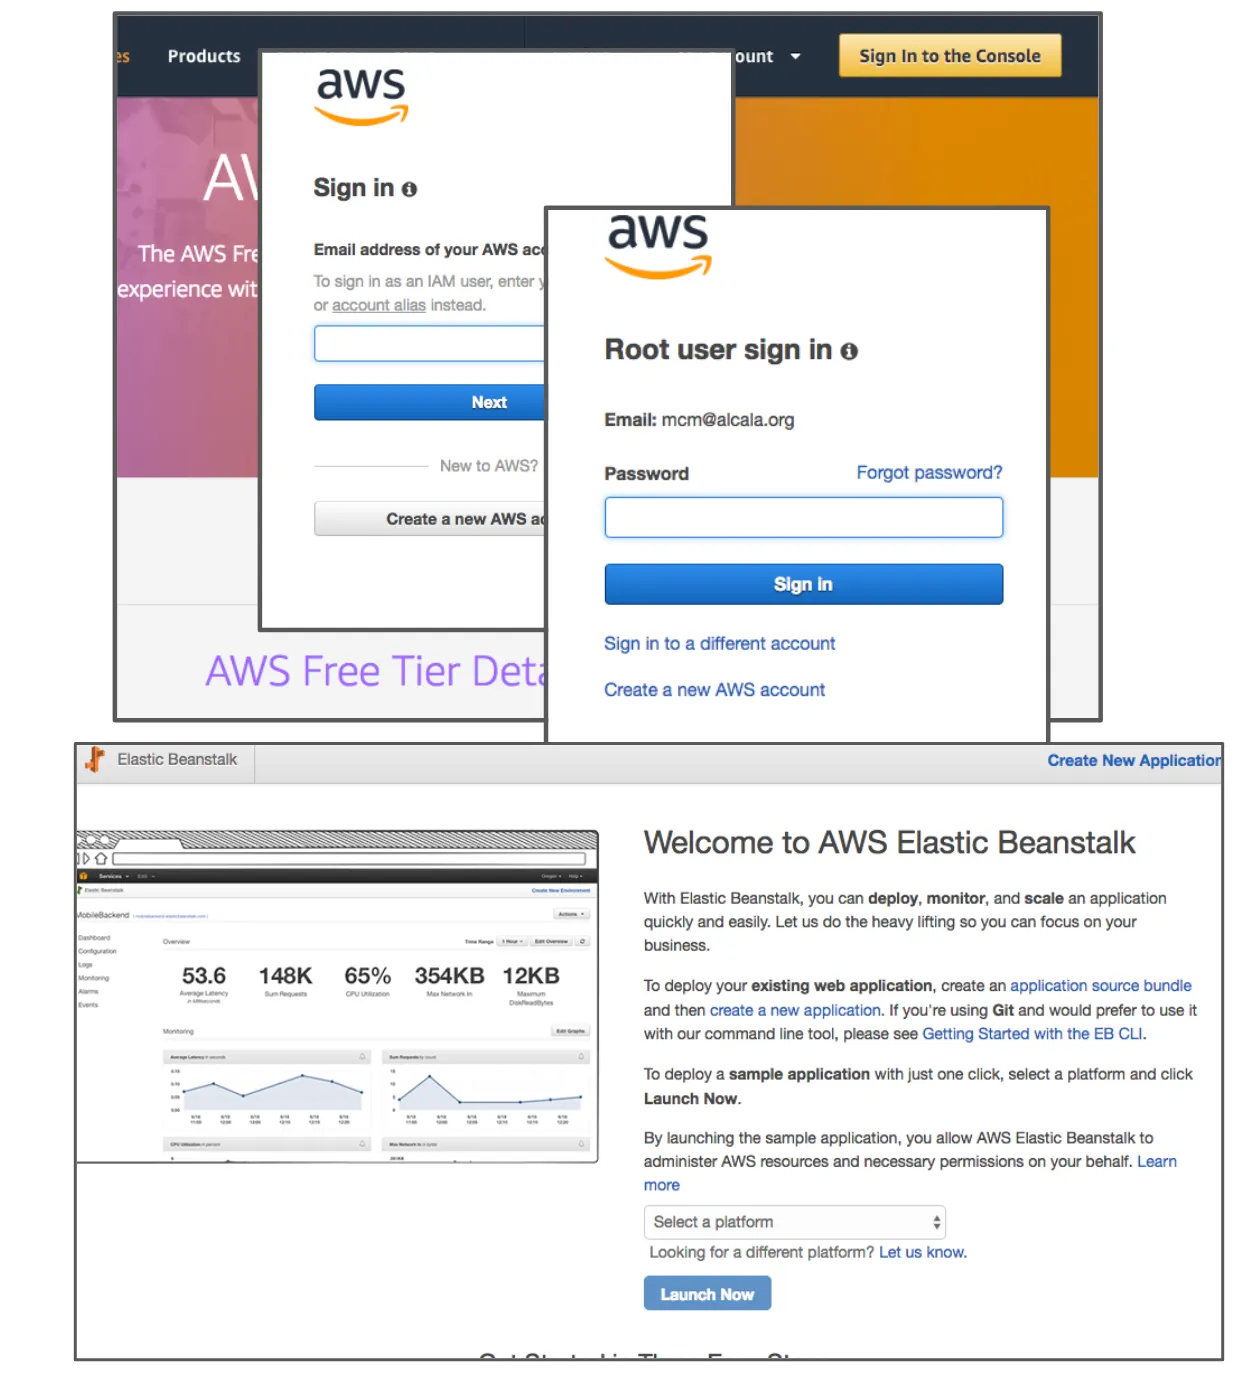
Finally, you can push the button "Sign in to the Console" to start working with AWS.
Creating Instances in EB and Deploying the App.
In this page, we’ll do the following steps
-
Configure the application for production
-
Build a production WAR
-
Create an EB application instance
-
Create a stand-alone production database in EB
-
Uploading the WAR file
-
Enabling the production database
Configuring Vaadin for Production
You might want to use a real database, instead of the default in-memory provided. Thus, need to add the appropriate JDBC driver as a dependency in pom.xml, e.g. for MySQL:
Source code
<dependency>
  <groupId>mysql</groupId>
  <artifactId>mysql-connector-java</artifactId>
</dependency>
Changing the database is covered in more detail in changing the database.
When running in EB, in application.properties we can use environment variables instead of hardcoded strings to configure our database connection:
Source code
spring.jpa.hibernate.ddl-auto=update
spring.datasource.url=jdbc:mysql://${RDS_HOSTNAME}:${RDS_PORT}/${RDS_DB_NAME}
spring.datasource.username=${RDS_USERNAME}
spring.datasource.password=${RDS_PASSWORD}
Preparing a Production WAR
Run mvn clean package -Pproduction to build and package your application into a .war file ready for production (it will be placed in the target folder).
Creating an EB Web Application
To create a new Elastic Beanstalk application, either click "Build a web app" in the AWS main page, known as the "console". (You can also find Elastic Beanstalk in the menu and "Create New Application" - the steps will be similar, but not identical.)
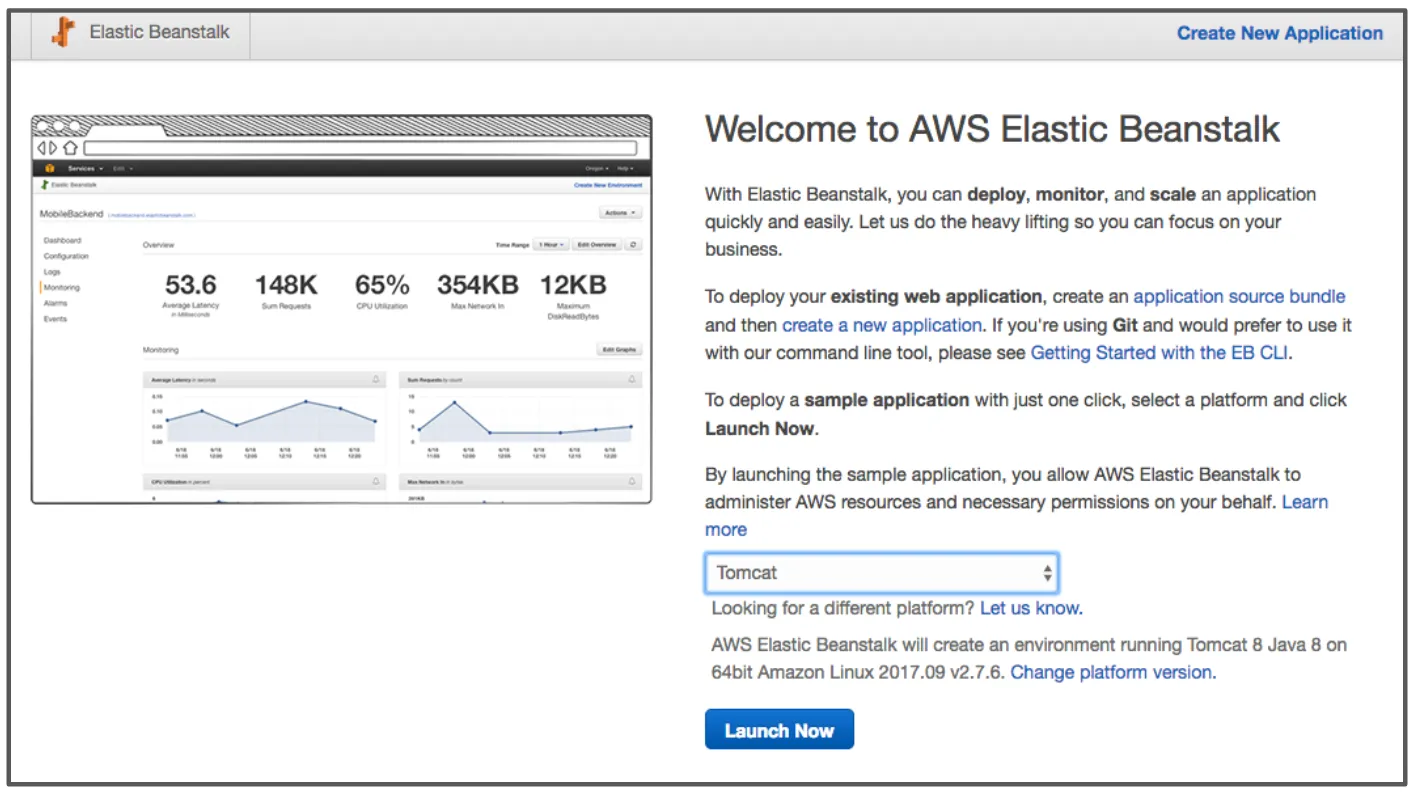
Next choose a name for your application, select "tomcat", and click on "Launch Now" and you will be brought to your instance dashboard.
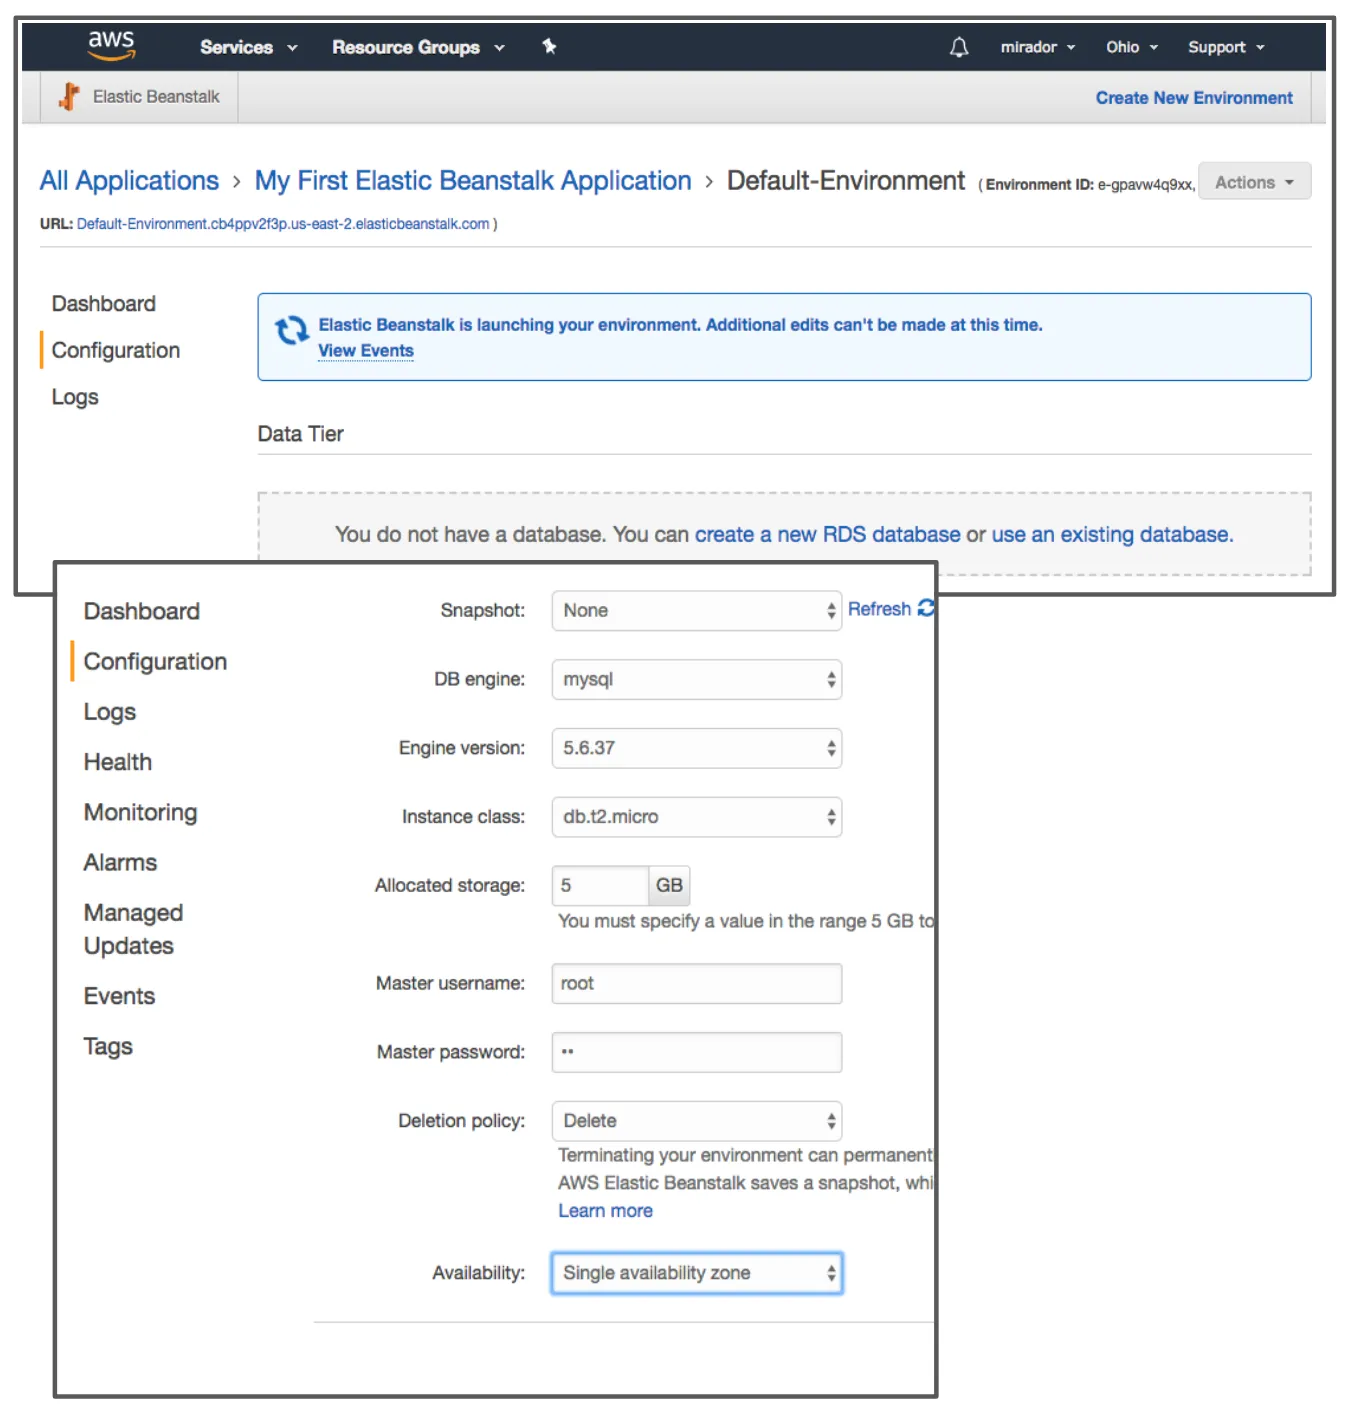
Creating a Database for Production
From the "Configuration" screen we can configure a database in the "Data Tier" section. We’ll "create a new RDS database", choose MySQL, set a master username and password, select "delete" policy, and click on "Apply". This operation can take a while to complete.
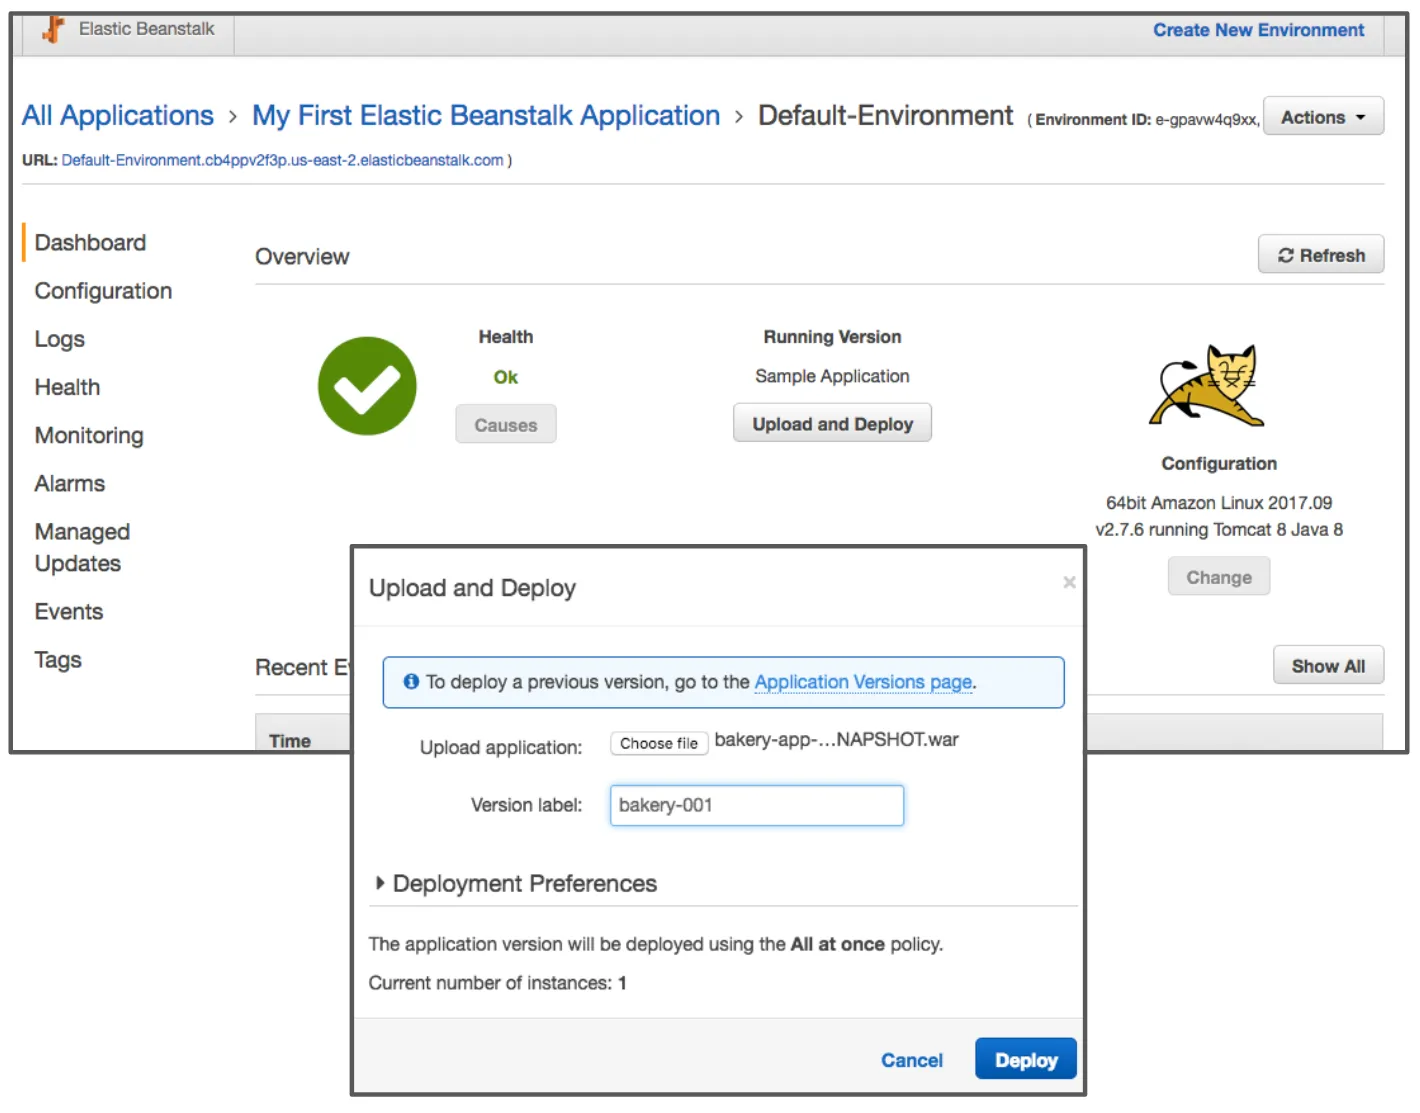
Uploading your .war file
When processes for creating and running instances finish, you can upload your application file by clicking on the "Upload and Deploy" button. Choose your .war file from the file-system, give a version to your app, and click on the "Deploy" button.
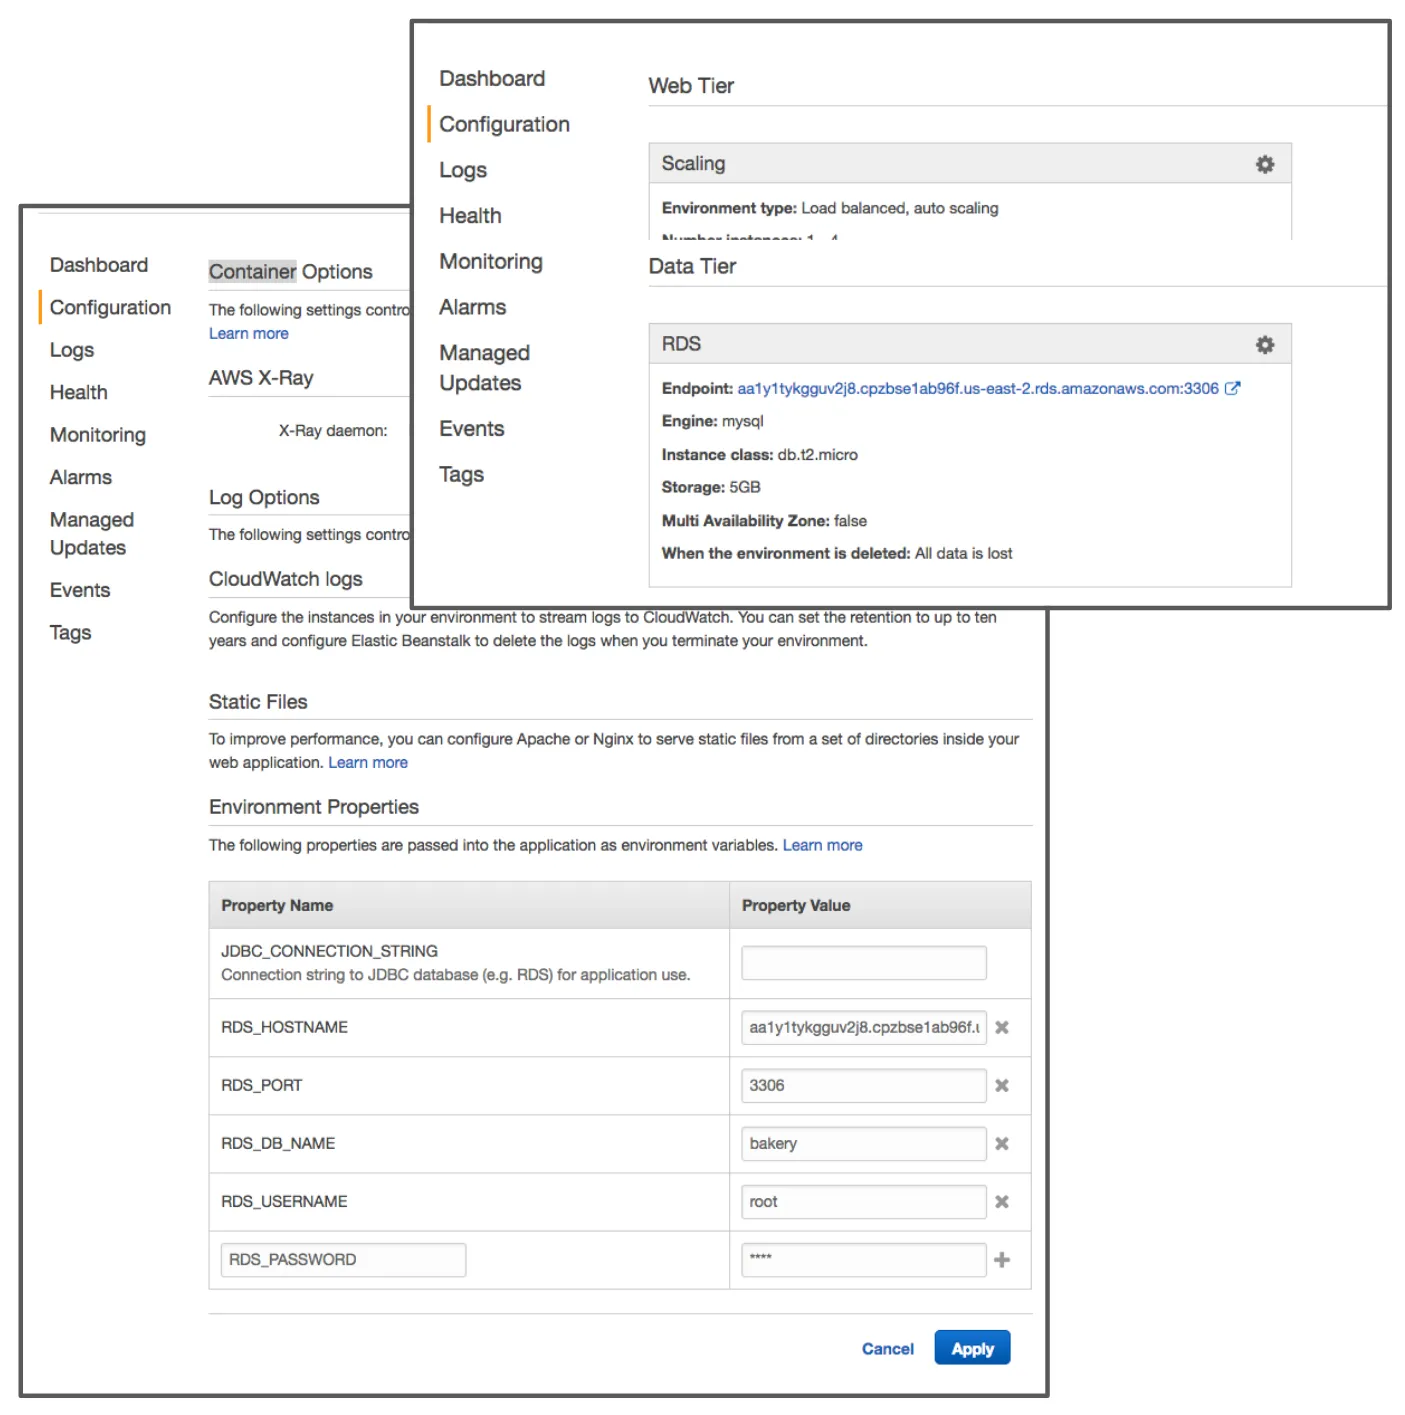
Enabling Production Database
But still we need to configure our application to connect to the database. You need to visit again the "Data Tier" section on "Configuration" in order to get the host-name and port of the database created, note that EB uses the "ebdb" database name by default.
Once you know those values, set the "Environment Properties" in the "Software Configuration" section.
When you apply the change, your environment will be restarted with the new configuration, wait for a while and you can connect to your application from browser by clicking in the URL displayed at the top of the configuration page, and verify our application is working.
Post Production
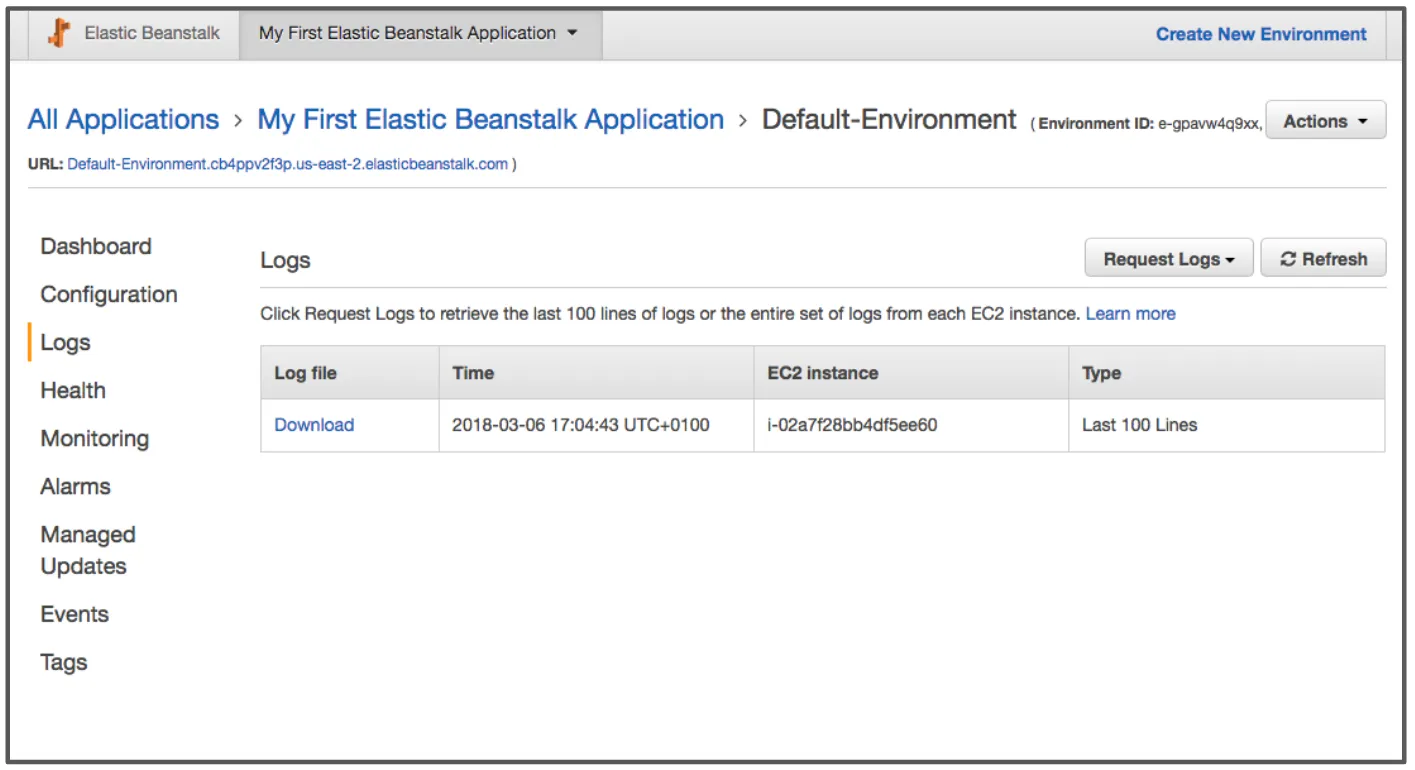
Once you have your application up-and-running with a production database, you might wonder how you can see the contents of your database. You can do this with the regular tools you use to connect to MySQL, but by default access is restricted; you need to modify your security realm. AWS provides a handy "My IP" shorthand.
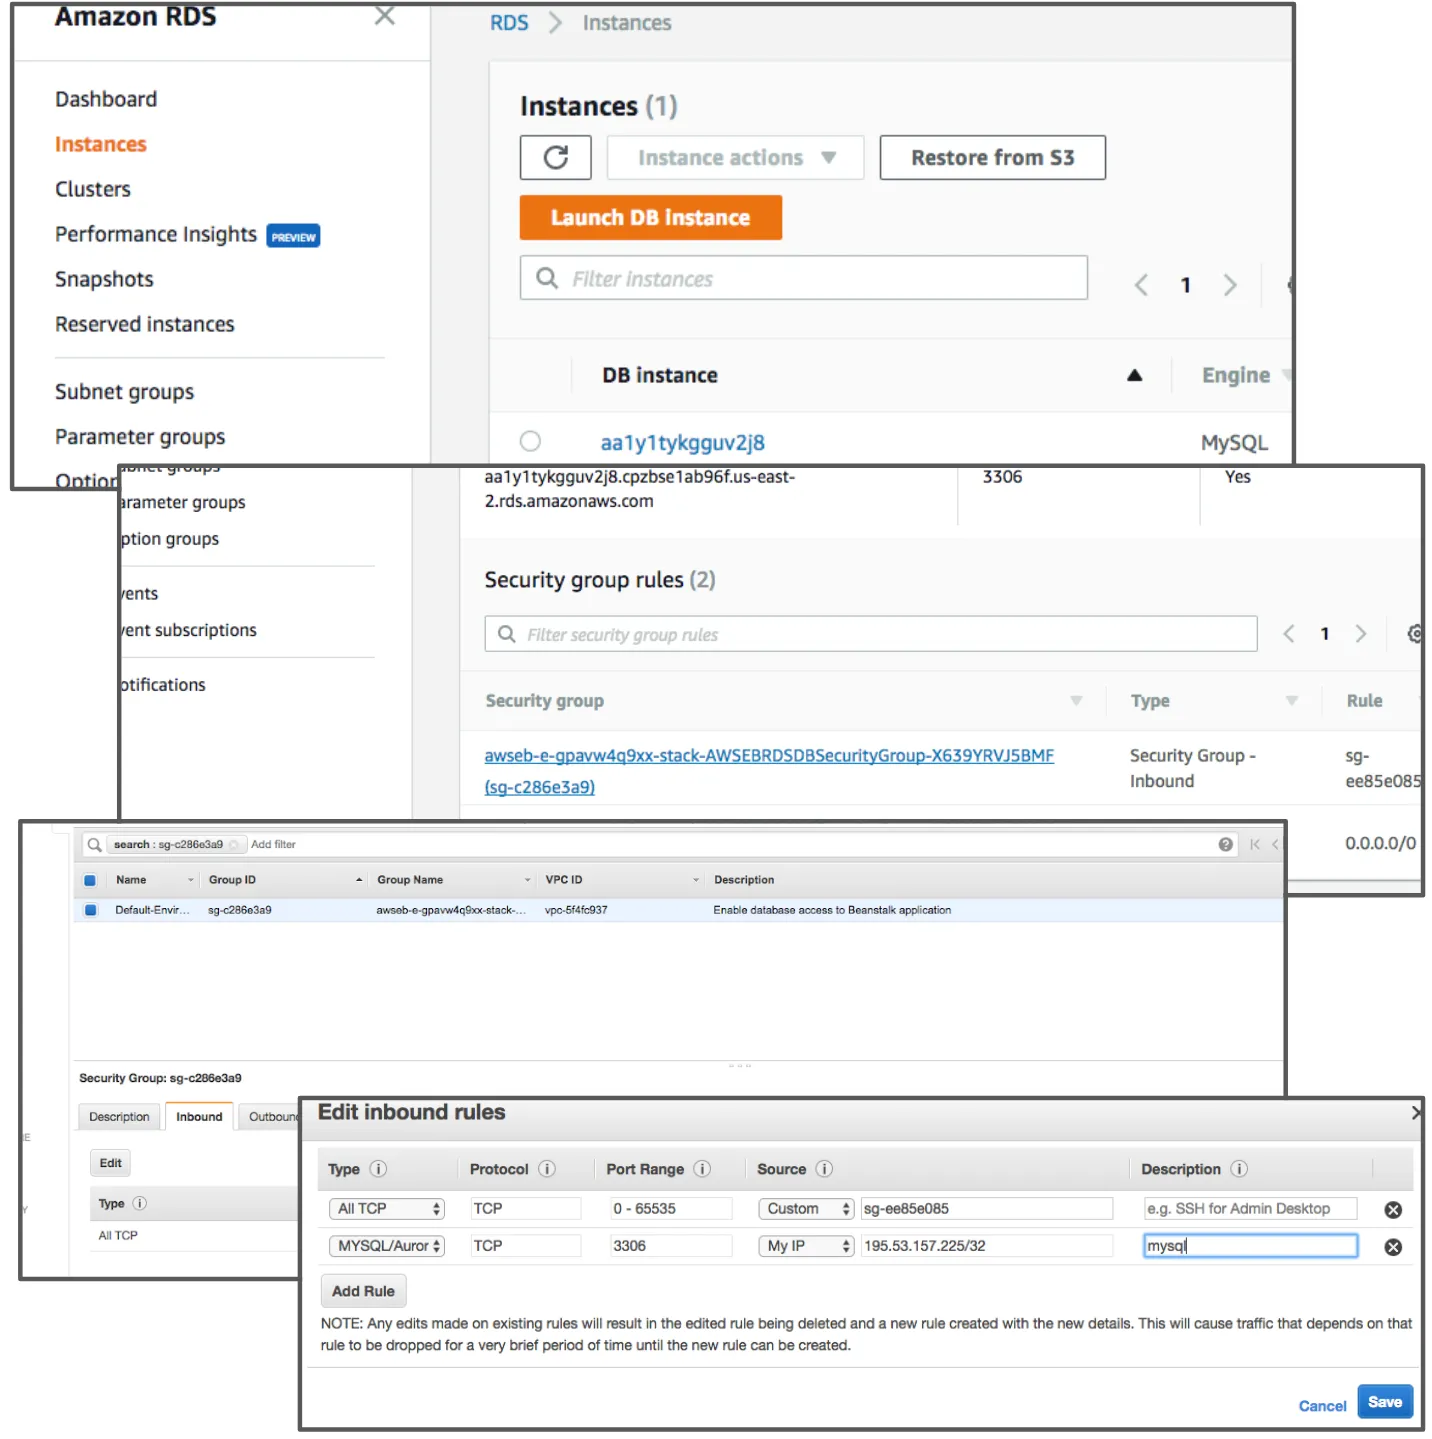
After applying, you should be able to connect to the database. You need to use your EB instance name.
Source code
mysql -u root -p -h ***.****.us-east-2.rds.amazonaws.com -D ebdbYou may also want to review server logs, especially if you run into problems. You can request and download (view) logs easily from the console:
Resources
There is a lot more you can do with AWS Elastic Beanstalk and Amazon Web Services in general, and fortunately the official documentation is very good.
Here are some further topics you might want to review:
BD3B5BE8-BC80-45D7-A51C-8B48F8E81422