Adding a view
- Creating a design
- Routing
- Process navigation
- Including the view to the application menu
- Restricting access to the view.
- Data binding
In the following, we’re going to create a new view and add it to the navigation, step-by-step. The view we are creating here is an "About" view.
Creating a design
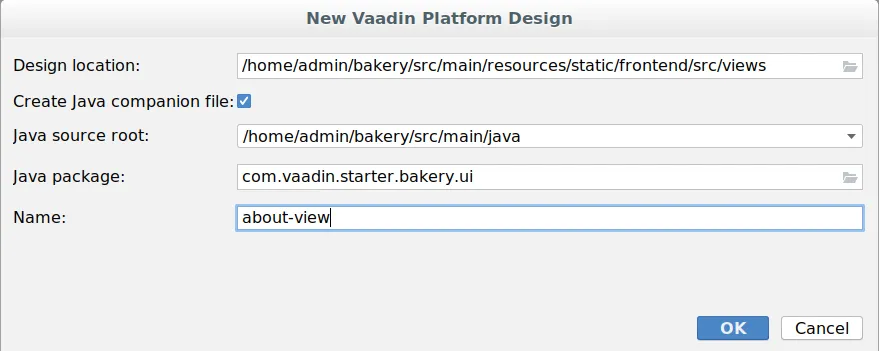
The views of bakery are built with Vaadin Designer. We start off by creating a new Vaadin Platform Design named about-view.js in src/main/resources/static/frontend/src. Designer will add the .js suffix for us. Check "Create Java companion file", pick "Java source root" as src/main/java and set "Java package" as com.vaadin.starter.bakery.ui. Vaadin Designer also will create a corresponding AboutView.java class.

Open the generated about-view.js template in Designer’s source mode and replace the contents with this:
Source code
js
import {html, PolymerElement} from '@polymer/polymer/polymer-element.js';

/**
 * `about-view`
 *
 * AboutView element.
 *
 * @customElement
 * @polymer
 */
class AboutView extends PolymerElement {

    static get template() {
        return html`
            <style include="shared-styles">
                 :host {
                     display: flex;
                     flex-direction: column;
                 }
                 div {
                     margin: auto;
                 }
            </style>
            <div>
                This is a new web application based on the <a href="https://vaadin.com/examples-and-demos">Vaadin Bakery App Starter.</a>
            </div>
        `;
    }

    static get is() {
        return 'about-view';
    }

    static get properties() {
        return {
            // Declare your properties here.
        };
    }
}

customElements.define(AboutView.is, AboutView);
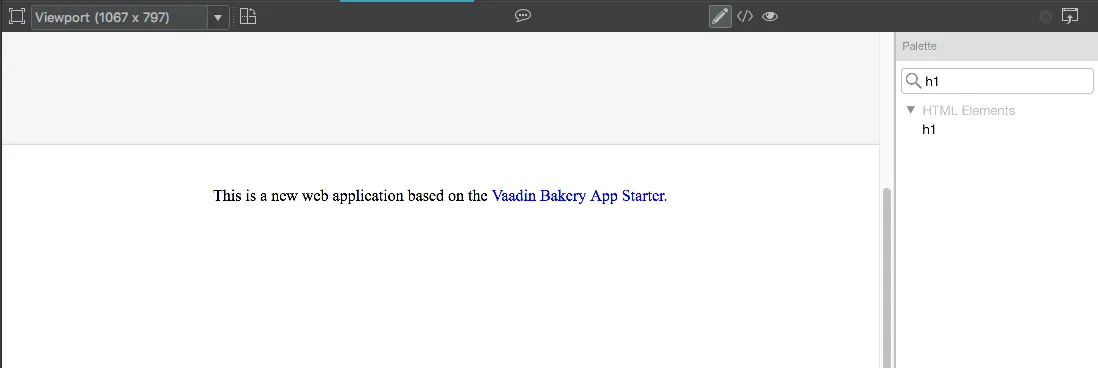
This defines the about-view as web component that displays a simple text and a link. You can add new components and content to this template.
Routing
Open the Java class AboutView in the com.vaadin.starter.bakery.ui package. AboutView instance will be initialized when the user wants to enter the view.
Add the Route annotation to the class:
Source code
Java
@Route(value = "about", layout = MainView.class)Now we have a valid view in our application, and you can access it at http://localhost:8080/about. Any logic or configuration that you want to add into the view goes here.
Process navigation
You can control the view navigation logic by implementing BeforeEnterObserver or BeforeLeaveObserver. More about
navigation lifecycle.
Including the view to the application menu
The last thing for us is to add the view in our UI. This is achieved by adding the following into the getAvailableTabs method of MainView:
Source code
Java
if (SecurityUtils.isAccessGranted(AboutView.class)) {
  tabs.add(createTab(VaadinIcon.QUESTION_CIRCLE_O, "About", AboutView.class));
}
After this change, the view also appears in the application main menu.
|
Note
|
You probably want to add the parameters as constants in BakeryConst instead of using strings here directly. This is left as an exercise for the reader.
|
Restricting access to the view.
If you want to restrict access to some views, you can require the user to have certain roles by adding an annotation. Restricting access to the about view might not make much sense usually, but we’ll do it anyway by adding the following annotation to AboutView:
Source code
Java
@Secured(Role.ADMIN)@Secured(Role.ADMIN) will require that the logged in user has the ADMIN role to be able to access the view. If the user does not have the role, then the link to the view will not present in the menu and the user will get an "Access denied" message in case he tries to access it with a direct URL or otherwise.
Data binding
There are several ways to exchange data between server and client.
Bind by Id
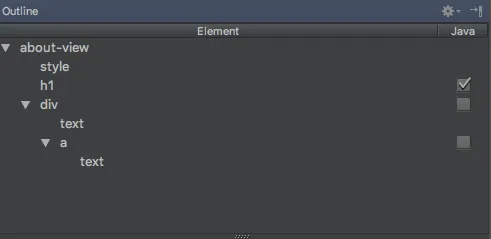
Any element in the design can be bound by id. For example, drag h1 element from Designer Palette to Outline.


|
Tip
| Template can be edited in source code mode as well. |
To bind new element to the server-side just check Java check-box at the Outline. Go to AboutView.java, Designer generated there the following code:
Source code
Java
@Id("h1") private H1 h1;As an example, add such constructor:
Source code
Java
public AboutView() {
    h1.setText("About view");
}
Bind by Polymer template property
Read more about binding Model Data in a PolymerTemplate
F6221785-914A-44F5-A6CF-2556007782D2