
If you're familiar with Vaadin, you know that add-ons significantly enhance the development experience. They offer a wealth of additional functionality, widgets, and presentation options for your Vaadin-based applications.
Upgrading to a newer Vaadin version can sometimes lead to compatibility issues with certain add-ons. This was particularly evident with the transition from Java EE to Jakarta EE in Vaadin 24, similar to the discontinuation of GWT support in Vaadin 10. While all add-ons are open source and, in theory, can be upgraded by anyone, their specialized nature often makes them dependent on specific versions, making upgrades far from straightforward.
This article focuses on three main areas that require attention during the upgrade process, applicable to virtually any add-on upgrade:
- Implementation of the add-on: This includes both the client-side and frontend build processes and tooling, which are completely different.
- Testing of add-ons: Setting up automated testing for add-ons makes sense, but the tools have changed and improved a lot.
- Demo application deployment: Unless you are hosting the demos yourself, be aware that the cloud services have evolved. You will need a reliable service with a good free tier for small demos.
Today, we'll take a journey from Vaadin 8 to Vaadin 24, focusing on the migration of my handy Idle add-on. This small, efficient tool monitors user mouse and keyboard inactivity, sending these events to the server. It's ideal for implementing inactivity notifications or starting background processes when users are inactive.
Migrate from JavaScript to… JavaScript
First, let's examine the changes in implementation. In my add-ons, I've always been cautious about incorporating too many dependencies, which proved beneficial in this scenario. My primary dependency was just Vaadin 8, specifically, the JavaScriptExtension API.
However, that alone was significant. I had to phase out the old event framework and implement new proprietary events and listeners. My goal was to maintain as much backward compatibility as possible: the code examples for Idle remain unchanged.
Additionally, there were a few internal upgrades that I wanted to implement:
- Use JavaScript class instead of the function object pattern. This is just pure JavaScript and not React.
- Use custom DOM events to notify the server.
- Use the Maven project layout and place client-side resources in
src/main/resources.
These changes make the JavaScript part a bit more modern but should not affect the functionality.
Since Vaadin 24 depends on frontend resources being loaded and packaged on a separate build (much like GWT builds back in the day), there was no longer a way to load my JavaScript the same way. Instead, I used the JSLoader for Vaadin add-ons to load and serve the JavaScript and CSS files from the Java classpath. This approach kept my code changes to a minimum, providing other benefits. I was good to go.
Testing the testing
Next up was every developer's favorite topic: automated testing. Years ago, I got the automated test as a contribution and needed to learn them better. However, my goal was to keep these tests and perhaps even expand them. The integration tests were built with Jetty, Selenium, and PhantomJS – a very solid setup. Despite this, I had already heard good things about Playwright and Spring Boot in add-on testing, and I was eager to use them in this context.
Spring Boot in test scope
Spring Boot has been a familiar tool in Vaadin development for many years, and for running a server for integration tests, it makes perfect sense. Basically, you only need to know how to add the dependencies in pom.xml so that you only include it in the test scope. Also, since you have the Spring Boot, you want to use @SpringBootTest, which gives you some extra tools for testing:
@SpringBootTest(webEnvironment = SpringBootTest.WebEnvironment.RANDOM_PORT)
public class TestIdleDemo  {
    @LocalServerPort
    private int port; // Assign random HTTP port for the test
   ...
}
Please note that Spring Boot 3.0+ is needed for Vaadin 24.
From Selenium to Playwright
Playwright is conceptually very much like Selenium and PhantomJS, and replacing the test with a new framework wasn’t too complicated, mainly because the test used the Page object model.
Creating a browser and page using Playwright allows us to use the same logic:
/* Selenium */
this.driver = WebDriverExtensionsContext.getDriver();
startBrowser(driver); // utility method
this.driver.navigate().to(url);
this.page = PageFactory.initElements(driver, IdleDemoPage.class);

/* Playwright */
Playwright playwright = Playwright.create();
Browser browser = playwright.chromium().launch();
this.page = browser.newPage();
this.page.navigate(url);
I changed the Selenium @FindBy locators to use Playwright’s locator syntax:
/* Using Selenium */
@FindBy(tagName = "body")
private WebElement body;

public String getBodyClass() {
    return body.getAttribute("class");
}

/* Using Playwright */
public String getBodyClass() {
    return page.locator("body").getAttribute("class");
}
From com.vaadin.ui.UI to @Route
After that step, upgrading the test UI from Vaadin 8 to Vaadin 24 was pretty straightforward. The APIs have changed very little, and the tests required no layout modifications:
- Create an Application class and move the
@Themeannotations to it from the UI - Rename
TestUItoTestView, add the@Routeannotation, and extendVerticalLayoutinstead ofUI. - Change
@Titleto@PageTitle
Deploying the demo application
I wanted to experiment with something new. Previously, my demos ran on my own server, which doesn't support the newer Java versions or servlet environments (I know, I could update it). But this time, I wanted to avoid manual deployment steps and sought a solution that integrates seamlessly with GitHub workflows. This was the perfect opportunity to test out Fly.io.
To be honest, it turned out to be more work than I anticipated. Fly.io doesn't natively support Java applications, so I had to set up a Maven build in Docker, run the application through Docker, and manage all this within a GitHub action.
- Create a Docker build for building and running your application. Have a look at the Dockerfile and .dockerignore. I’m using the public add-on version in the demo to avoid copying files to the Docker build.
- Sign up for fly.io. Nothing special here except that you don’t need a credit card yet.
- Install the command line tooling. I made this step harder for myself by installing it also in Docker.
- Follow the official instructions for GitHub actions.
The default setup publishes everything when commits are pushed to the main branch. Considering this, I might want to create a separate branch specifically for demo deployments in the future.
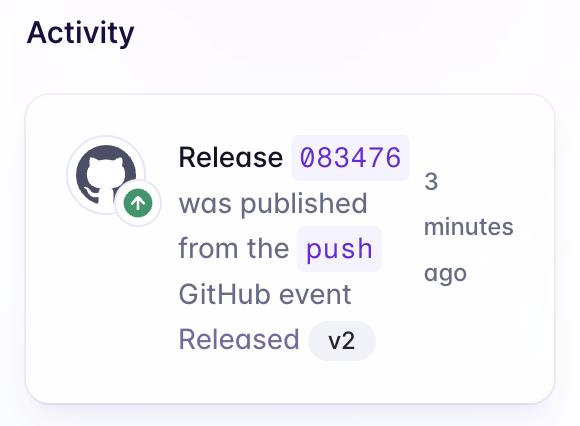
There we have it, idle-demo.fly.dev. This is not yet a production-quality deployment. The first load takes really long sometimes, but it is quite enough for deploying add-on demos. The nice thing is that SSL is enabled by default, enhancing security right from the start.
Wrapping up
I hope you found this journey as enjoyable as I did. Admittedly, not every part was a breeze, but the satisfaction of delivery made it worth it. This blog aimed to provide an overview of upgrading an older Vaadin add-on to newer versions. Your experience might differ, particularly with GWT-based add-ons, but the basic steps should be similar.
Feel free to drop a comment if you're interested in a deep dive into any of the topics discussed.