
Overview
Vaadin Flow is a full-stack web framework that runs on Java. It has:
- A Java-based component API.
- Automatic server-client communication over XHR or WebSockets.
- A customizable design system with 40+ UI components.
- Routing.
- Forms.
- Internationalization.
- Dependency injection (supports Spring and CDI).
Vaadin Flow is a unique framework because it lets developers build single-page applications fully in Java. HTML, JavaScript, and CSS can be used for customization, but they are not required to build an app. When using the Java API, Vaadin apps run on the server and give you access to data and services, without the need to create REST APIs.
Hilla is a full-stack web framework that runs on Java. It has:
- A TypeScript-based component model.
- Reactive, declarative templates.
- Asynchronous, type-safe communication to Java backends.
- A customizable design system with 40+ UI components.
- Routing and code splitting.
- Efficient DOM rendering.
Hilla is designed for building client-side apps. Views are based on web components, built with LitElement and TypeScript. The Vaadin server exports typed, async functions for server access, giving you the same type information both on the server and in the client. The type information is automatically generated based on the server classes, which means you'll notice breaking API changes at compile time, but not at runtime.
Vaadin also supports building components in Java with the Flow framework. Flow is covered separately for easier comparison. Both frameworks can be used simultaneously in the same application.
React is a JavaScript library for building user interfaces. It includes:
- A component model.
- Reactive, declarative templates.
- Efficient DOM rendering.
React is often considered a framework, but it's in fact a component model.
React's component model is flexible and can be combined with third-party libraries for features, like routing and state management. This allows developers to build "frameworks" that are specific to the project they are working on.
Angular is a frontend web and mobile app framework. It has:
- A TypeScript-based component model.
- Reactive, declarative templates.
- Dependency injection.
- Internationalization.
- Animations.
- Forms.
- Modules.
- Material design UI components.
Angular is a frontend framework with many of the features enterprise developers are used to, like modules and dependency injection. Angular abstracts away from underlying web technologies and introduces several framework-specific concepts.
The size and complexity of the Angular framework can make it more difficult to learn than a component model like React or LitElement that Vaadin uses.
Vue is a frontend web application framework. It has:
- A component model.
- Reactive, declarative templates.
- Virtual DOM-based rendering.
- Routing.
- Forms.
- State management.
Vue is a light-weight frontend framework that contains the essentials for building a web app. In addition to an API for creating individual components, it supports routing and state management for building more complex applications. It also includes support for creating forms.
Discover in practice what makes Vaadin better & learn the business benefits over other frameworks!
Sample application
Here is a complete application example that shows all the concepts combined. You can open the application in your browser and try it out for yourself.
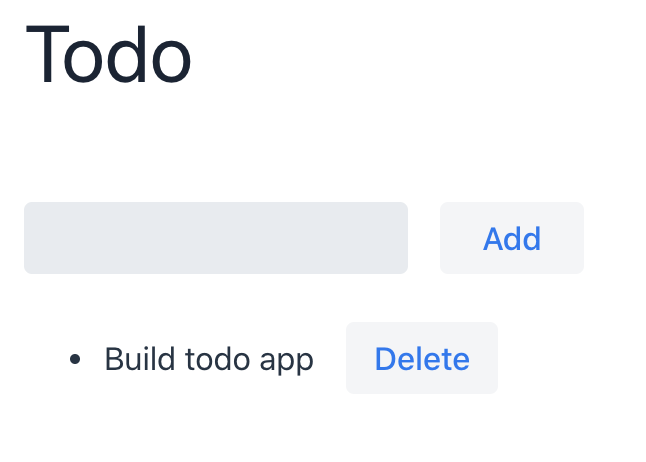
TodoApp.java
@Route("")
public class TodoApp extends VerticalLayout {
  private TextField task = new TextField("Task");
  private Button button = new Button("Add");
  private UnorderedList taskList = new UnorderedList();
  private TodoService service;
  private Binder<Todo> binder = new BeanValidationBinder<>(Todo.class);

  TodoApp(TodoService service) {
    this.service = service;
    HorizontalLayout form = new HorizontalLayout(task, button);
    form.setDefaultVerticalComponentAlignment(Alignment.BASELINE);

    add(
      new H1("Todo"),
      form,
      taskList
    );

    binder.bindInstanceFields(this);
    button.addClickListener(this::addTask);
    updateTasks();
  }


  private void updateTasks() {
    taskList.removeAll();

    for (Todo todo : service.getTodos()) {
      HorizontalLayout taskLayout = new HorizontalLayout(
        new Span(todo.getTask()),
        new Button("Delete", e -> deleteTask(todo.getId()))
      );
      taskLayout.setDefaultVerticalComponentAlignment(Alignment.BASELINE);
      taskList.add(new ListItem(taskLayout));
    }
  }

  private void addTask(ClickEvent<Button> e) {
    Todo todo = new Todo();
    if (binder.writeBeanIfValid(todo)) {
      service.saveTodo(todo);
      binder.readBean(new Todo());
      updateTasks();
    }
  }

  private void deleteTask(Long id) {
    service.deleteTodo(id);
    updateTasks();
  }
}
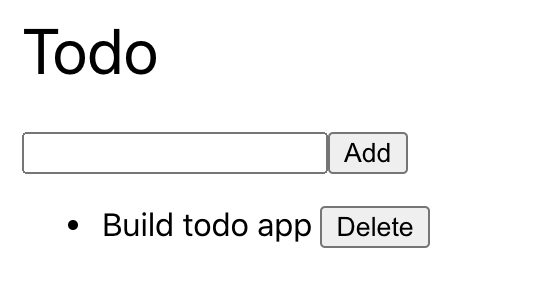
Here is a complete application example that shows all the concepts combined. You can open the application in your browser and try it out for yourself.
todo-view.ts
@customElement("todo-view")
export class TodoView extends LitElement {
  @property({ type: Array })
  private todos: Todo[] = [];
  private binder = new Binder(this, TodoModel);

  protected render() {
    return html`
      <h1>Todo</h1>

      <div class="form">
        <vaadin-text-field
          label="Task"
          ...=${field(this.binder.model.task)}
        ></vaadin-text-field>
        <vaadin-button @click=${this.add}>Add</vaadin-button>
      </div>

      <ul>
        ${this.todos.map((todo) => html`
          <li>
            ${todo.task}
            <vaadin-button @click=${() => this.clear(todo.id)}>
              Delete
            </vaadin-button>
          </li>
        `)}
      </ul>
    `;
  }

  async firstUpdated() {
    this.todos = await getTodos();
  }

  async add() {
    const saved = await this.binder.submitTo(saveTodo);
    if (saved) {
      this.todos = [...this.todos, saved];
      this.binder.clear();
    }
  }

  async clear(id: any) {
    await deleteTodo(id);
    this.todos = this.todos.filter((t) => t.id !== id);
  }
}
Here is a complete application example that shows all the concepts combined. You can open the application in your browser and try it out for yourself.
TodoApp.jsx
function TodoApp() {
  const API_URL = "https://vaadin-todo-api.herokuapp.com/todos";
  const [task, setTask] = useState("");
  const [todos, setTodos] = useState([]);
  const [error, setError] = useState("");

  const addTodo = async (e) => {
    e.preventDefault();
    setError("");
    if (!task) {
      setError("Task cannot be empty");
      return;
    }
    const res = await fetch(API_URL, { method: "POST", body: task });
    setTodos([...todos, await res.json()]);
    setTask("");
  };

  const clearTodo = async (id) => {
    await fetch(`${API_URL}/${id}`, { method: "DELETE" });
    setTodos(todos.filter((t) => t.id !== id));
  };

  useEffect(() => {
    const getTodos = async () => {
      const result = await fetch(API_URL);
      setTodos(await result.json());
    };
    getTodos();
  }, []);

  return (
    <div className="TodoApp">
      <h1>Todo</h1>
      <form onSubmit={addTodo}>
        <input
          type="text"
          value={task}
          onChange={(e) => setTask(e.target.value)} />
        <div className="errors">{error}</div>
        <button type="submit">Add</button>
      </form>
      <ul>
        {todos.map((todo) => (
          <li key={todo.id}>
            {todo.task}{" "}
            <button onClick={() => clearTodo(todo.id)}>Delete</button>
          </li>
        ))}
      </ul>
    </div>
  );
}

export default TodoApp;
Here is a complete application example that shows all the concepts combined. You can open the application in your browser and try it out for yourself.

todo-view.component.ts
const API_URL = 'https://vaadin-todo-api.herokuapp.com/todos';

interface Todo {
  id?: number;
  task: string;
}

@Component({
  selector: 'app-todo-view',
  templateUrl: './todo-view.component.html',
})
export class TodoViewComponent implements OnInit {
  taskForm = new FormGroup({
    task: new FormControl('', [
      Validators.required
    ]),
  });

  todos: Todo[] = [];

  constructor(private http: HttpClient) {}

  ngOnInit(): void {
    this.http
      .get<Todo[]>(API_URL)
      .subscribe((todos: Todo[]) => (this.todos = todos));
  }

  async addTodo(taskForm: FormGroup, formDirective: FormGroupDirective) {
    const { task } = taskForm.value;

    this.http.post<Todo>(API_URL, task).subscribe((todo: Todo) => {
      this.todos = [...this.todos, todo];
      // Double reset workaround needed to reset form validations
      // https://github.com/angular/components/issues/4190
      taskForm.reset();
      formDirective.resetForm();
    });
  }

  async clearTodo(id: string) {
    this.http
      .delete(`${API_URL}/${id}`)
      .subscribe((_) => (this.todos = this.todos.filter((t) => t.id !== id)));
  }

  get task() {
    return this.taskForm.get('task');
  }
}
todo-view.component.html
<h1>Todo</h1>
<form
  [formGroup]="taskForm"
  #formDirective="ngForm"
  (ngSubmit)="addTodo(taskForm, formDirective)"
>
  <mat-form-field>
    <input matInput type="text" formControlName="task" />
    <mat-error *ngIf="task.invalid">Task cannot be empty</mat-error>
  </mat-form-field>
  <button mat-button type="submit">Add</button>
</form>
<ul>
  <li *ngFor="let todo of todos">
    {{ todo.task }}
    <button mat-button (click)="clearTodo(todo.id)">Delete</button>
  </li>
</ul>
Here is a complete application example that shows all the concepts combined. You can open the application in your browser and try it out for yourself.

 <script setup lang="ts">
import { ref } from 'vue';

interface Todo {
  id?: number;
  task: string;
  done: boolean;
}

const API_URL = "https://vaadin-todo-api.herokuapp.com/todos";

const task = ref("");
const error = ref("");
const todos = ref([] as Todo[]);

const fetchTodos = async () => {
const todosResponse = await fetch(API_URL);
  todos.value = await todosResponse.json();
}

fetchTodos();

const addTodo = async () => {
  error.value = "";
  if (!task.value) {
    error.value ="Task cannot be empty";
    return;
  }

  const res = await fetch(API_URL, { method: "POST", body: task.value });
  todos.value.push(await res.json());
  task.value = "";
}

const deleteTodo = async (id: number) => {
  await fetch(`${API_URL}/${id}`, { method: "DELETE" });
  todos.value = todos.value.filter((t) => t.id !== id);
}
</script>

<template>
  <h1>Todo</h1>
  <form @submit.prevent="addTodo">
    <input type="text" v-model="task" />
    <button type="submit">Add</button>
  </form>
  <div className="errors">{{error}} </div>
  <ul>
    <li v-for="todo in todos" :key="todo.id">
      {{todo.task}}
      <button @click="deleteTodo(todo.id)">Delete</button>
    </li>
  </ul>
</template>

<style scoped>
.errors {
  color: red;
}
</style>
Here is a complete application example that shows all the concepts combined. You can open the application in your browser and try it out for yourself.
TodoApp.java
@Route("")
public class TodoApp extends VerticalLayout {
  private TextField task = new TextField("Task");
  private Button button = new Button("Add");
  private UnorderedList taskList = new UnorderedList();
  private TodoService service;
  private Binder<Todo> binder = new BeanValidationBinder<>(Todo.class);

  TodoApp(TodoService service) {
    this.service = service;
    HorizontalLayout form = new HorizontalLayout(task, button);
    form.setDefaultVerticalComponentAlignment(Alignment.BASELINE);

    add(
      new H1("Todo"),
      form,
      taskList
    );

    binder.bindInstanceFields(this);
    button.addClickListener(this::addTask);
    updateTasks();
  }


  private void updateTasks() {
    taskList.removeAll();

    for (Todo todo : service.getTodos()) {
      HorizontalLayout taskLayout = new HorizontalLayout(
        new Span(todo.getTask()),
        new Button("Delete", e -> deleteTask(todo.getId()))
      );
      taskLayout.setDefaultVerticalComponentAlignment(Alignment.BASELINE);
      taskList.add(new ListItem(taskLayout));
    }
  }

  private void addTask(ClickEvent<Button> e) {
    Todo todo = new Todo();
    if (binder.writeBeanIfValid(todo)) {
      service.saveTodo(todo);
      binder.readBean(new Todo());
      updateTasks();
    }
  }

  private void deleteTask(Long id) {
    service.deleteTodo(id);
    updateTasks();
  }
}
Here is a complete application example that shows all the concepts combined. You can open the application in your browser and try it out for yourself.
todo-view.ts
@customElement("todo-view")
export class TodoView extends LitElement {
  @property({ type: Array })
  private todos: Todo[] = [];
  private binder = new Binder(this, TodoModel);

  protected render() {
    return html`
      <h1>Todo</h1>

      <div class="form">
        <vaadin-text-field
          label="Task"
          ...=${field(this.binder.model.task)}
        ></vaadin-text-field>
        <vaadin-button @click=${this.add}>Add</vaadin-button>
      </div>

      <ul>
        ${this.todos.map((todo) => html`
          <li>
            ${todo.task}
            <vaadin-button @click=${() => this.clear(todo.id)}>
              Delete
            </vaadin-button>
          </li>
        `)}
      </ul>
    `;
  }

  async firstUpdated() {
    this.todos = await getTodos();
  }

  async add() {
    const saved = await this.binder.submitTo(saveTodo);
    if (saved) {
      this.todos = [...this.todos, saved];
      this.binder.clear();
    }
  }

  async clear(id: any) {
    await deleteTodo(id);
    this.todos = this.todos.filter((t) => t.id !== id);
  }
}
Here is a complete application example that shows all the concepts combined. You can open the application in your browser and try it out for yourself.
TodoApp.jsx
function TodoApp() {
  const API_URL = "https://vaadin-todo-api.herokuapp.com/todos";
  const [task, setTask] = useState("");
  const [todos, setTodos] = useState([]);
  const [error, setError] = useState("");

  const addTodo = async (e) => {
    e.preventDefault();
    setError("");
    if (!task) {
      setError("Task cannot be empty");
      return;
    }
    const res = await fetch(API_URL, { method: "POST", body: task });
    setTodos([...todos, await res.json()]);
    setTask("");
  };

  const clearTodo = async (id) => {
    await fetch(`${API_URL}/${id}`, { method: "DELETE" });
    setTodos(todos.filter((t) => t.id !== id));
  };

  useEffect(() => {
    const getTodos = async () => {
      const result = await fetch(API_URL);
      setTodos(await result.json());
    };
    getTodos();
  }, []);

  return (
    <div className="TodoApp">
      <h1>Todo</h1>
      <form onSubmit={addTodo}>
        <input
          type="text"
          value={task}
          onChange={(e) => setTask(e.target.value)} />
        <div className="errors">{error}</div>
        <button type="submit">Add</button>
      </form>
      <ul>
        {todos.map((todo) => (
          <li key={todo.id}>
            {todo.task}{" "}
            <button onClick={() => clearTodo(todo.id)}>Delete</button>
          </li>
        ))}
      </ul>
    </div>
  );
}

export default TodoApp;
Here is a complete application example that shows all the concepts combined. You can open the application in your browser and try it out for yourself.
todo-view.component.ts
const API_URL = 'https://vaadin-todo-api.herokuapp.com/todos';

interface Todo {
  id?: number;
  task: string;
}

@Component({
  selector: 'app-todo-view',
  templateUrl: './todo-view.component.html',
})
export class TodoViewComponent implements OnInit {
  taskForm = new FormGroup({
    task: new FormControl('', [
      Validators.required
    ]),
  });

  todos: Todo[] = [];

  constructor(private http: HttpClient) {}

  ngOnInit(): void {
    this.http
      .get<Todo[]>(API_URL)
      .subscribe((todos: Todo[]) => (this.todos = todos));
  }

  async addTodo(taskForm: FormGroup, formDirective: FormGroupDirective) {
    const { task } = taskForm.value;

    this.http.post<Todo>(API_URL, task).subscribe((todo: Todo) => {
      this.todos = [...this.todos, todo];
      // Double reset workaround needed to reset form validations
      // https://github.com/angular/components/issues/4190
      taskForm.reset();
      formDirective.resetForm();
    });
  }

  async clearTodo(id: string) {
    this.http
      .delete(`${API_URL}/${id}`)
      .subscribe((_) => (this.todos = this.todos.filter((t) => t.id !== id)));
  }

  get task() {
    return this.taskForm.get('task');
  }
}
todo-view.component.html
<h1>Todo</h1>
<form
  [formGroup]="taskForm"
  #formDirective="ngForm"
  (ngSubmit)="addTodo(taskForm, formDirective)"
>
  <mat-form-field>
    <input matInput type="text" formControlName="task" />
    <mat-error *ngIf="task.invalid">Task cannot be empty</mat-error>
  </mat-form-field>
  <button mat-button type="submit">Add</button>
</form>
<ul>
  <li *ngFor="let todo of todos">
    {{ todo.task }}
    <button mat-button (click)="clearTodo(todo.id)">Delete</button>
  </li>
</ul>
Here is a complete application example that shows all the concepts combined. You can open the application in your browser and try it out for yourself.
 <script setup lang="ts">
import { ref } from 'vue';

interface Todo {
  id?: number;
  task: string;
  done: boolean;
}

const API_URL = "https://vaadin-todo-api.herokuapp.com/todos";

const task = ref("");
const error = ref("");
const todos = ref([] as Todo[]);

const fetchTodos = async () => {
const todosResponse = await fetch(API_URL);
  todos.value = await todosResponse.json();
}

fetchTodos();

const addTodo = async () => {
  error.value = "";
  if (!task.value) {
    error.value ="Task cannot be empty";
    return;
  }

  const res = await fetch(API_URL, { method: "POST", body: task.value });
  todos.value.push(await res.json());
  task.value = "";
}

const deleteTodo = async (id: number) => {
  await fetch(`${API_URL}/${id}`, { method: "DELETE" });
  todos.value = todos.value.filter((t) => t.id !== id);
}
</script>

<template>
  <h1>Todo</h1>
  <form @submit.prevent="addTodo">
    <input type="text" v-model="task" />
    <button type="submit">Add</button>
  </form>
  <div className="errors">{{error}} </div>
  <ul>
    <li v-for="todo in todos" :key="todo.id">
      {{todo.task}}
      <button @click="deleteTodo(todo.id)">Delete</button>
    </li>
  </ul>
</template>

<style scoped>
.errors {
  color: red;
}
</style>
Discover in practice what makes Vaadin better & learn the business benefits over other frameworks!