In the first four tutorials in this series, we’ve built an app with LitElement, using Redux for state management, Vaadin Router for navigation and Webpack for building and code splitting.
In this final tutorial, we turn the application into an offline-capable Progressive Web App.
If you didn’t do the previous steps of the tutorial, you can check out the code from the previous step as a starter:
|
Tip
|
You can find out more about Progressive Web Apps on Vaadin’s PWA page. |
Adding a Web App Manifest
The first step in turning an app into a PWA is adding a manifest file to identify the app to the browser.
In the src folder, create a file manifest.webmanifest:
src/manifest.webmanifest
{
  "name": "Todo App",
  "short_name": "Todo",
  "start_url": ".",
  "display": "standalone",
  "background_color": "#2A3443",
  "description": "LitElement tutorial",
  "theme_color": "#2A3443",
  "icons": [
    {
      "src": "./img/icons/icon-192x192.png",
      "sizes": "192x192",
      "type": "image/png"
    },
    {
      "src": "./img/icons/icon-512x512.png",
      "sizes": "512x512",
      "type": "image/png"
    }
  ]
}index.html:
src/index.html
  <head>
    <meta charset="UTF-8" />
    <meta name="viewport" content="width=device-width, initial-scale=1.0" />
    <meta http-equiv="X-UA-Compatible" content="ie=edge" />
    <title>Todo</title>
+    <link rel="manifest" href="./manifest.webmanifest" />
Add the manifest file to the list of files Webpack copies over during the build:
webpack.config.js
const assets = [
  {
    from: 'src/img',
    to: 'img/'
  },
+  'src/manifest.webmanifest'
];
Adding a ServiceWorker
The second step in turning an app into a PWA is adding a ServiceWorker. The ServiceWorker is a script that sits between your app and the network that can be used to cache and serve resources, so the app loads fast and works reliably regardless of the network conditions.
In this project, we are using Workbox for generating the service worker. It is a widely used library for building production-grade ServiceWorkers. The project Webpack configuration uses the Workbox plugin to automatically generate a ServiceWorker that caches and serves all the static assets.
Open sw.js in the src folder.
src/sw.js
if ('workbox' in self) {
  workbox.precaching.precacheAndRoute(self.__precacheManifest || []);
}
Webpack only adds a ServiceWorker when running the prod or dev:sw scripts. Detect whether or not workbox is loaded. If it is, call precacheAndRoute with self.__precacheManifest which is an array of assets generated by the build script.
Load the ServiceWorker file in index.js:
src/sw.js
window.addEventListener('load', () => {
  initRouter();
+  registerSW();
});
src/sw.js
async function registerSW() {
  if ('serviceWorker' in navigator) { (1)
    try {
      await navigator.serviceWorker.register('./sw.js'); (2)
    } catch (e) {
      console.log('ServiceWorker registration failed. Sorry about that.', e);
    }
  } else {
    console.log('Your browser does not support ServiceWorker.');
  }
}-
Ensure that the browser supports ServiceWorker before trying to register it.
-
Register the ServiceWorker. Note that the path of the ServiceWorker determines its scope.
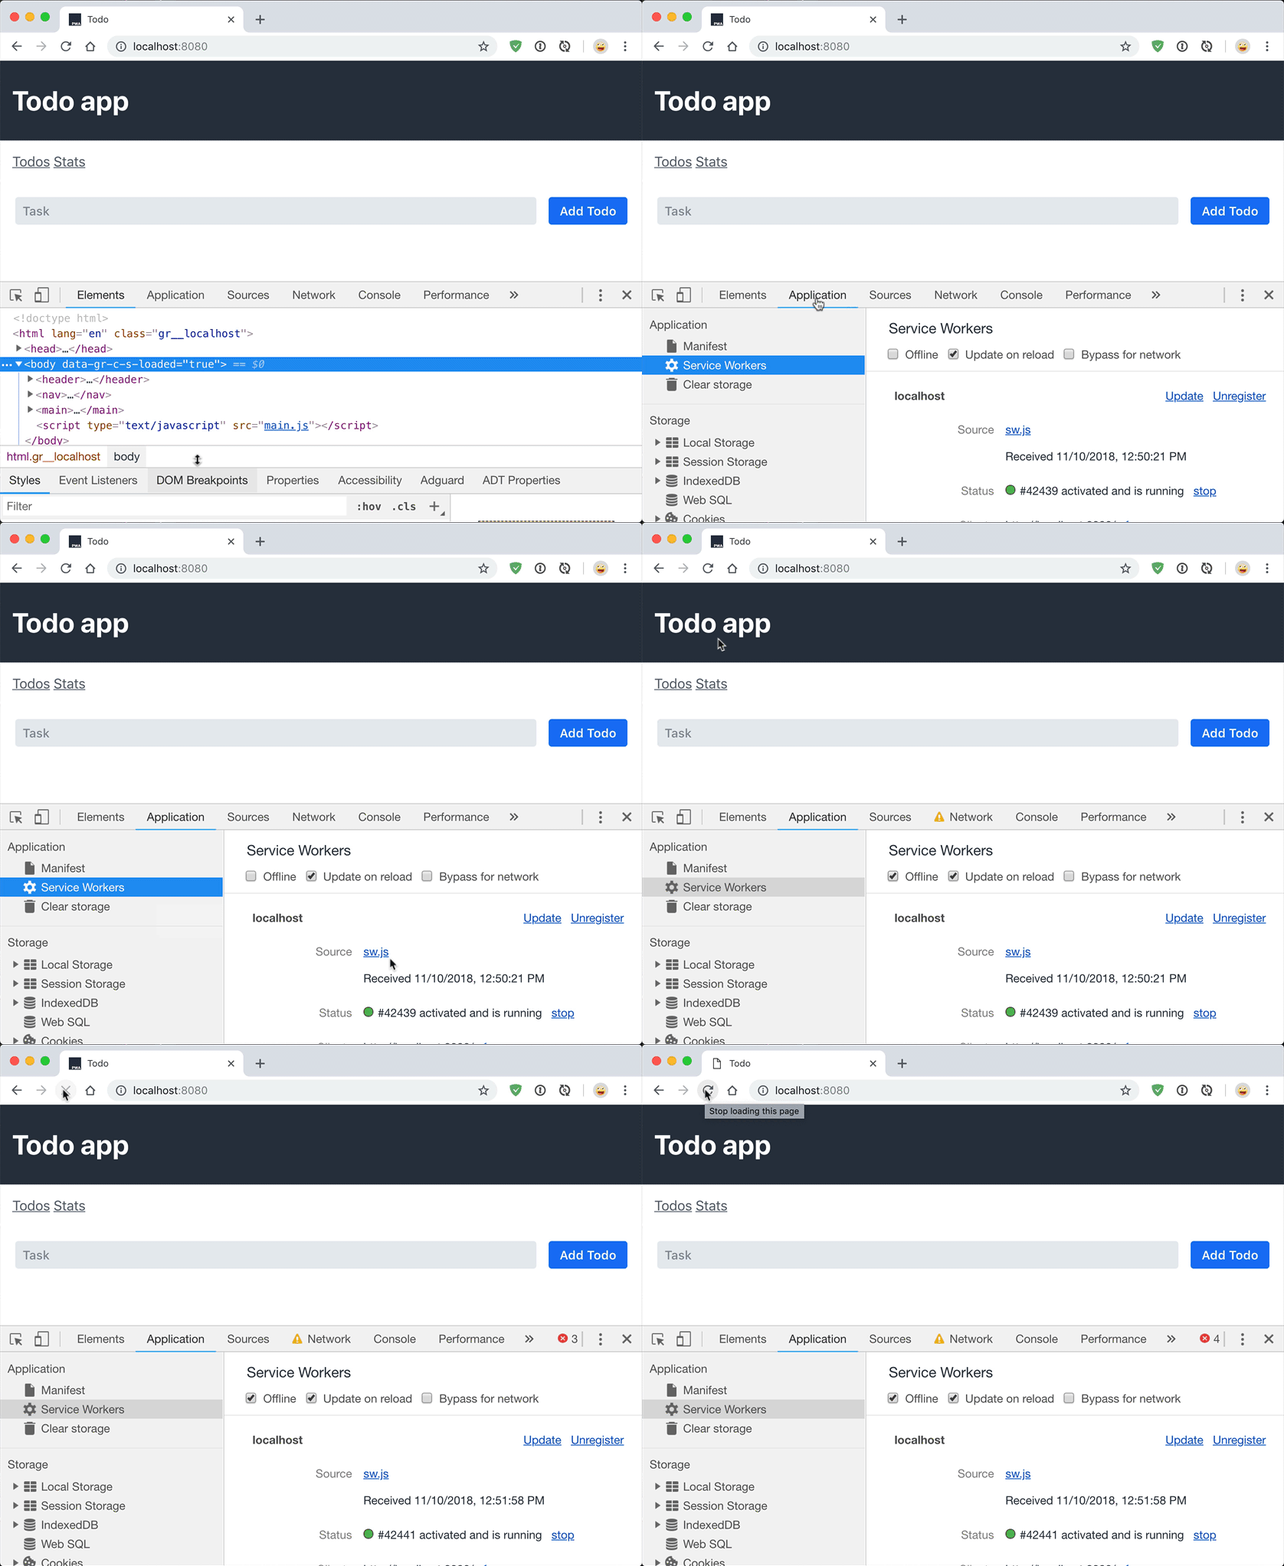
Start the app with the ServiceWorker enabled, and you should see the loaded ServiceWorker in the "Application" tab of DevTools. You should also be able to go offline and refresh the page and verify that the app still loads.
$ npm run dev:sw
Saving the state to localstorage
The application can now start offline, but it doesn’t persist the todos between runs.
Because the state of the application is in a central Redux store, we have a clean way of persisting and loading the state in localstorage.
Start by adding functions for saving and loading the state in store.js.
src/redux/store.js
const STORAGE_KEY = '__todo_app__';

const saveState = state => {
  localStorage.setItem(STORAGE_KEY, JSON.stringify(state));
};

const loadState = () => {
  const json = localStorage.getItem(STORAGE_KEY);
  return json ? JSON.parse(json) : undefined;
};
Then, load the state from localstorage when creating the store:
src/redux/store.js
export const store = createStore(
  reducer,
+  loadState(),
  window.__REDUX_DEVTOOLS_EXTENSION__ && window.__REDUX_DEVTOOLS_EXTENSION__()
);
Finally, subscribe to the store to call saveState on any state changes.
src/redux/store.js
store.subscribe(() => {
  saveState(store.getState());
});
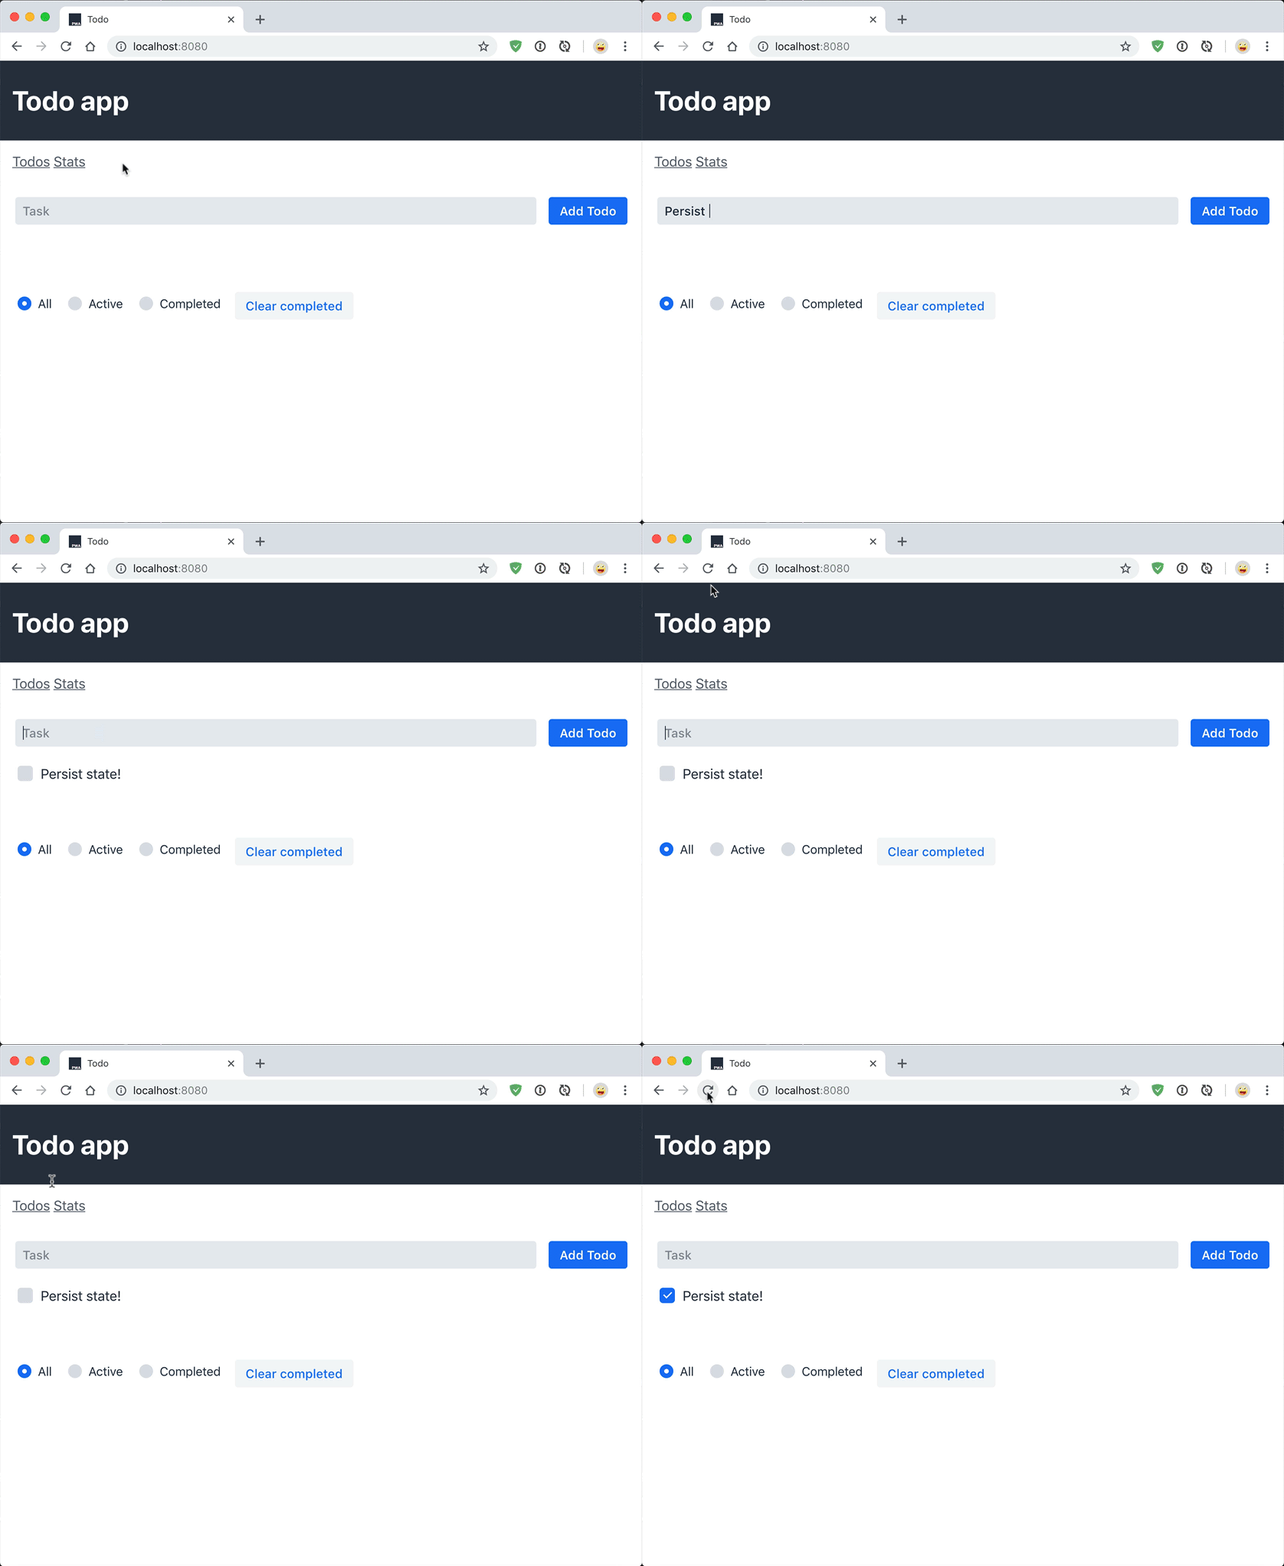
Now, if you rerun the application, you should be able to see the application state persists between refreshes.

Conclusion
This five-part tutorial has walked you through building a PWA with LitElement and Redux.
You can find the finished code in GitHub:
