
Updated September 2024.
In this step-by-step tutorial, you will learn how to use Vaadin to call server-side Java code from client-side JavaScript code. All you need to follow this tutorial is a basic understanding of the Java Programming Language, the fundamentals of JavaScript, JDK 8 or later, and a Java IDE.
Typically, applications make server-side Java methods available to the client side by exposing them as endpoints in a REST web service. Although this is a perfectly valid approach, this tutorial shows an alternative way to call Java methods on the server without having to implement web services. This is possible thanks to Vaadin, a framework that incorporates a set of Java classes that allows you to build web UIs in plain Java and includes an automated communication mechanism that makes calling Java methods from JavaScript straightforward.
Although in Vaadin applications, you typically don’t need to think about client-server communication at all, this lower-level functionality will be handy when integrating to existing JS features or building custom components.
You can find the source code for this tutorial on GitHub.
Setting up the project
-
Download a “Plain Java” hello world starter template. Alternatively, you can pick any of the other Hello World templates, but you might need to adapt a bit.
-
The ZIP contains a Maven project. Import the project into your favorite IDE (see the instructions).
-
The starter creates a simple "Hello, World" application we don’t need right now. We want to keep the project as simple as possible, so go ahead and delete all Java files and the resources, frontend/src, and frontend/styles directories (keep the frontend directory).
Now we have a clean starting point with no distracting code. Let’s start hacking!
Creating an empty web page
Java web applications are implemented through Servlets. A Servlet is a class that enhances the functionality of a web server (which usually only serves files such as HTML documents and images). This enhancement could include server-side logic, for example, dynamically creating an HTML document to include content from a database. When you include Vaadin in your project, a VaadinServlet is automatically created for you. This servlet allows us to create a web page using pure Java.
To see this in action, create a new class with the name MainView inside the com.example package:
src/main/java/com/example/MainView.java
packagecom.example;
public class MainView {
}
We want to expose this class as a web page in the browser. Since we have Vaadin in our project and it creates a VaadinServlet all we need to do is annotate the previous class with @Route and make it extend a UI component such as Div. Also, add an H1 component into the Div with some text so that you get something else than an empty screen:
MainView.java
import com.vaadin.flow.component.html.Div;
import com.vaadin.flow.component.html.H1;
import com.vaadin.flow.router.Route;

@Route
public class MainView extends Div {

    public MainView() {
        add(new H1("It works!"));
    }
}
By default, the @Route annotation makes Vaadin map the class with the context root when the annotated class is named MainView. So when http://localhost:8080/ is requested, the MainView class will have the chance to perform any logic on the server side. If we wanted to map the class, we would need to say it explicitly with @Route("example").
If you run the project at this point, you will get an empty web page. Let’s confirm this by executing the Maven Jetty Plugin. If you have Maven installed in your machine, just run mvn jetty:run in the command line. If you are using an IDE, create a run configuration for the jetty:run goal. See the detailed instructions for IntelliJ IDEA, Eclipse, and NetBeans.
The Jetty Maven Plugin is configured in the pom.xml file. This plugin allows us to easily deploy the web application to a Jetty server without having to install it manually.
Point your browser to http://localhost:8080 to see the empty web page. Nothing exciting just yet, but you have a running Java web application ready.
Calling JavaScript
Although Vaadin allows you to execute JavaScript directly from the Java code, it is often better to create a separate JavaScript file. Create a new file with the name script.js in the frontend/directory and code a simple function in it:
frontend/script.js
window.greet = function greet(name, element) {
   console.log("Hi, " + name);
   element.$server.greet("server");
}
To get the greet function defined in the browser window, we need to import this file in the Java class. Annotate the MainView class with @JavaScript as follows:
MainView.java
@JavaScript("./script.js")
@Route
public class MainView extends Div {

    public MainView() {
        add(new H1("It works!"));
    }
}
The frontend directory is used as the default directory for static resources.
With the JavaScript file loaded, we can call the greet function in the constructor as follows:
MainView.java
public MainView() {
    add(new H1("It works!"));
    callJsMethodInTheBrowser();
}

private void callJsMethodInTheBrowser() {
    getElement().executeJs("greet("client")");
}
The getElement()method returns a Java representation of the <div> element in the DOM. There is a small improvement we can make to this line of code. We can separate the argument values from the function call and get the same behavior:
MainView.java
public MainView(){
    getElement().executeJavaScript("greet($0)","client");
}
Try the application now. Stop the server and rerun it (using the run configuration in your IDE or mvn jetty:run in the command line).
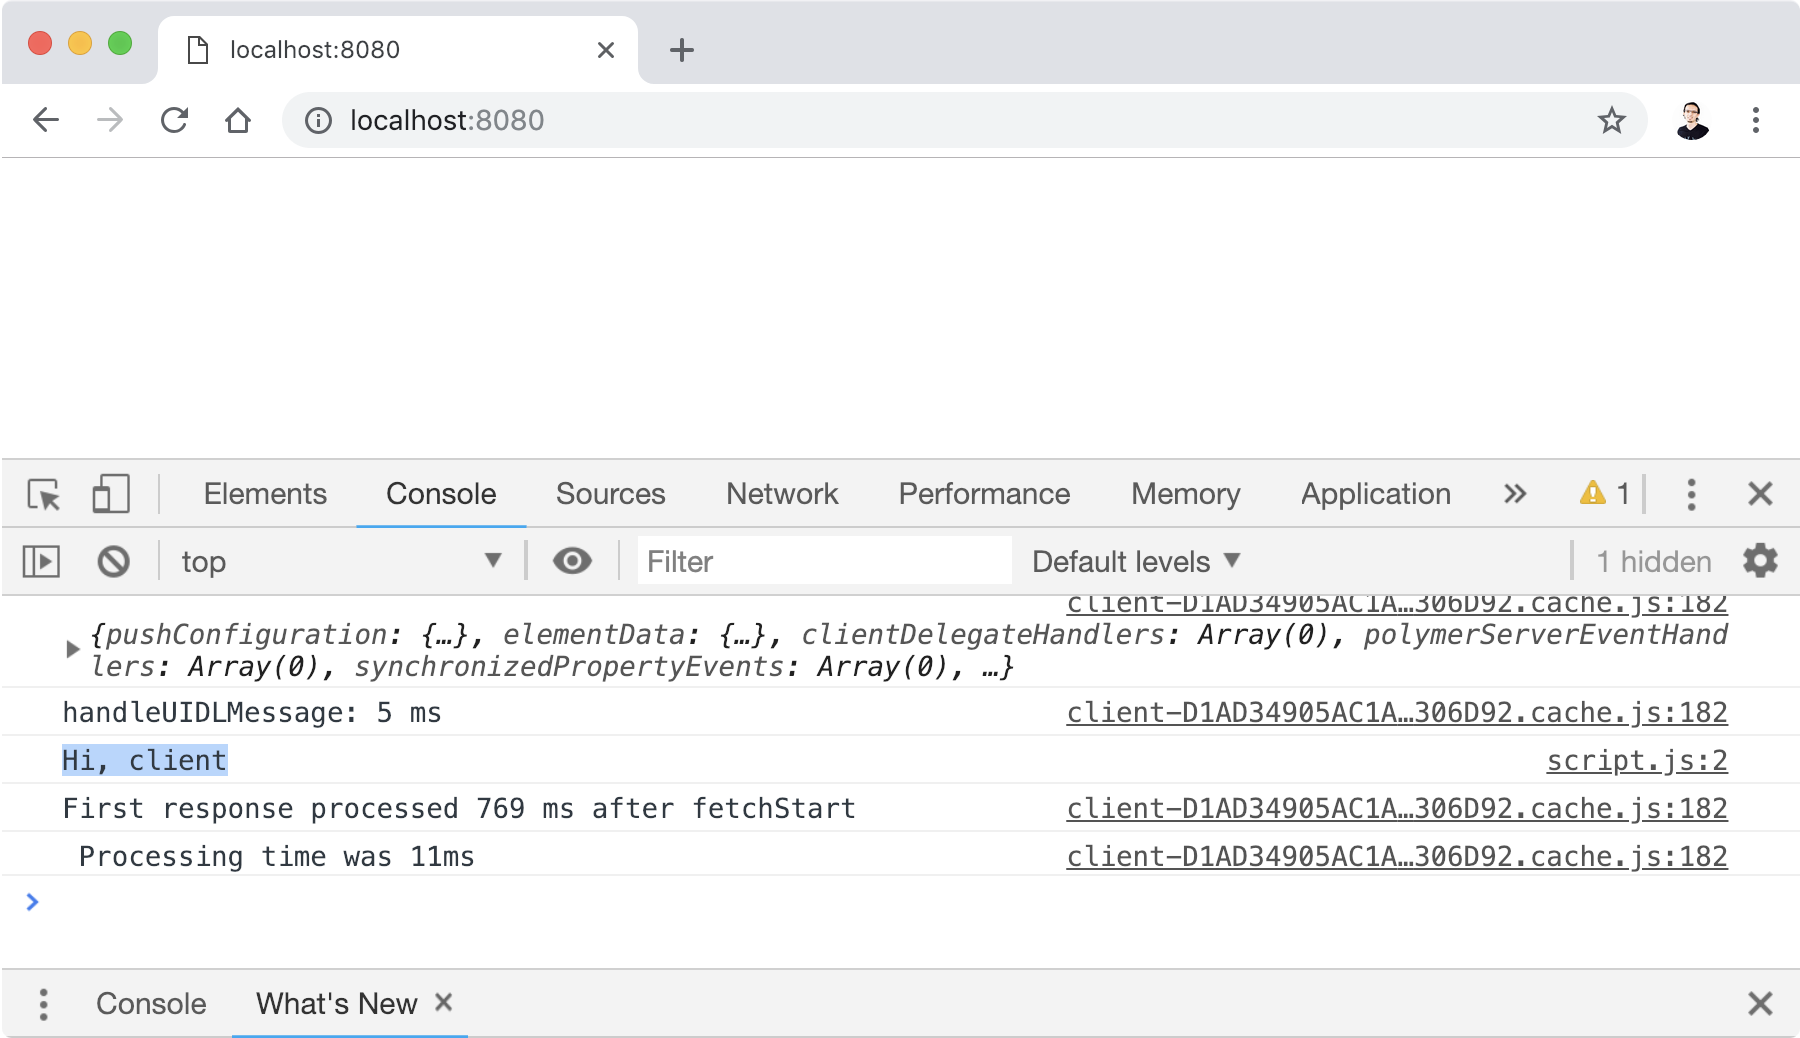
If you right-click your browser and choose Inspect Element, you should see the greeting in the browser’s console:
Calling Java
Now that Java to JavaScript is working let’s complete the circle by calling a Java method from a JavaScript function. First, we need a Java method. Let’s implement a server-side Java version of a greeting by adding the following to the MainView class:
MainView.java
public class MainView extends Div {
    ...

    public void greet(String name) {
        System.out.println("Hi, " + name);
    }
}
By default, all methods are safely inaccessible from the client-side and only exist in the JVM. However, to build integrations with native browser technology, we may need to expose some. We just need to pay extra attention to data handling, as this escapes the secure default development model of Vaadin. To make the greet method in the JVM available for the client-side, annotate it with @ClientCallable:
MainView.java
@ClientCallable
public void greet(String name) {
System.out.println("Hi, " + name);
}
The DOM element of the corresponding Java component now has a proxy to the actual Java method. We need the reference that the Java getElement() method returns to invoke it from the client side. We can send it to the JavaScript function by modifying the callJsMethodInTheBrowsermethod as follows:
MainView.java
private void callJsMethodInTheBrowser() {
     getElement().executeJs("greet($0,$1)", "client", getElement());
}
Notice how we added the argument to the function call ($1) and how we added the actual value as an extra argument in the call to the executeJavaScript method.
Now we can accept this value in the client-side JavaScript by adding a parameter to the greet function in the JS file as follows:
script.js
window.greet = function greet(name, element) {
    console.log("Hi, " + name);
}
The element object includes a $server member that we can use to call the server-side Java greet method. Here’s how:
window.greet = function greet(name, element) {
    console.log("Hi, " + name);
    element.$server.greet("server");
}
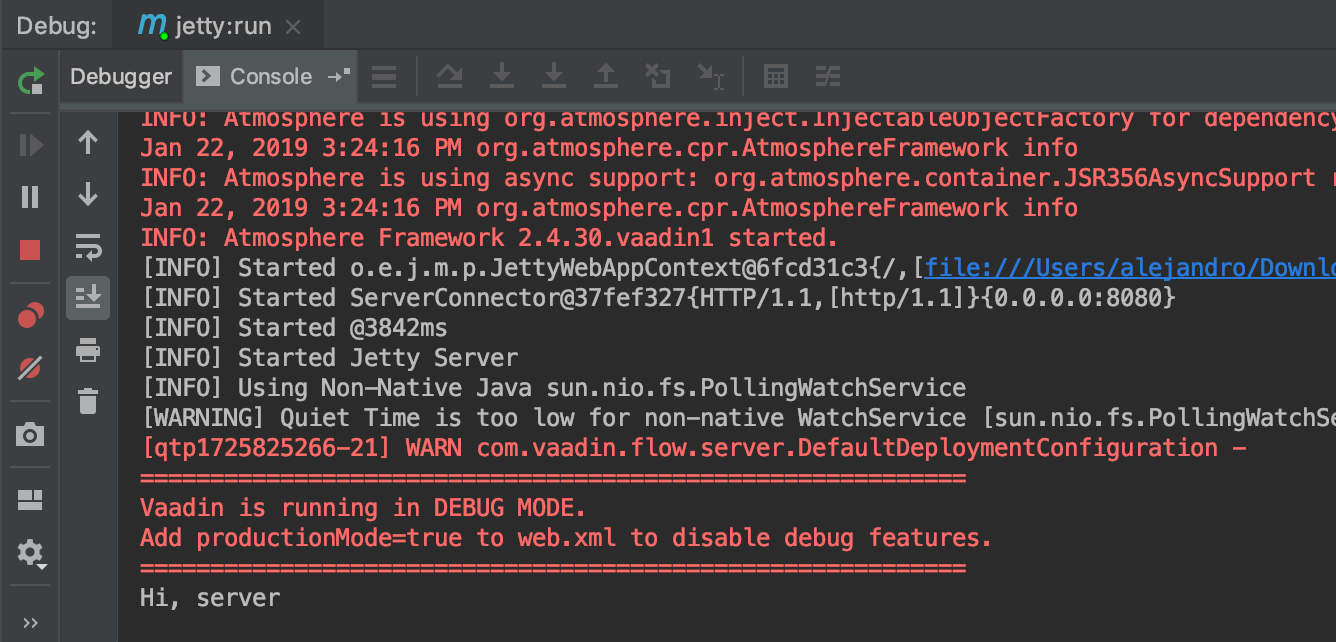
Restart the Jetty server again and try the application to see the greeting in the server’s log:
What’s next?
So, the circle is closed–we called JavaScript from Java and Java from JavaScript without using REST Web Services. If you follow this tutorial, you might already have ideas on what to try next. You might want to try adding some CSS (you can do it with something like @StyleSheet("frontend://styles.css")), or you might want to add your own JavaScript and Java business logic.
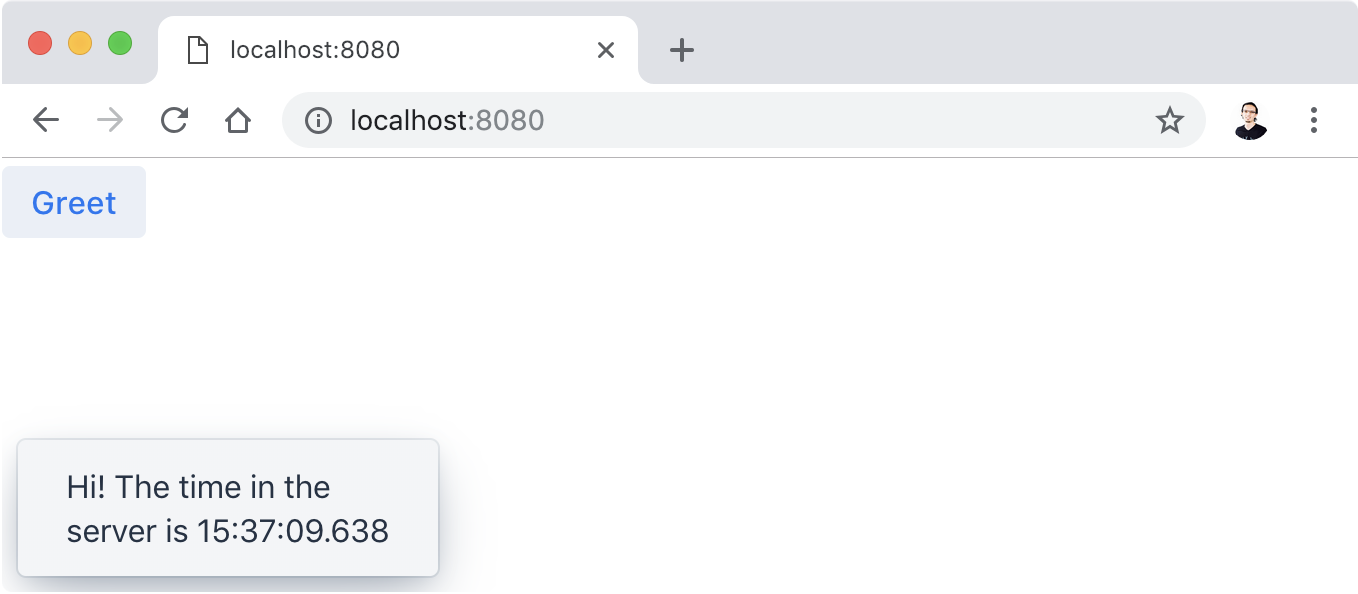
However, Vaadin is much more than a library to connect JavaScript with Java. As you can imagine, Vaadin’s automated communication mechanism can be used to generate powerful web user interfaces. Well, Vaadin allows you to do so in pure Java! For example, try modifying the MainView class to the following:
@Route
public class MainView extends Div {

    public MainView() {
        Button button = new Button("Greet");
        button.addClickListener(event -> {
            LocalTime now = LocalTime.now();
            Notification.show("Hi! The time in the server is " + now);
        });
        add(button);
    }
}
Without coding any JavaScript at all, you get this HTML-based web application in the browser:
If you want to learn more about this, try this tutorial next!