
So far in this tutorial series, we have built an app with LitElement and connected it to a Redux store for state management. In this tutorial, we add a new view for stats to learn how to navigate between views and how to split code for performance.
If you didn’t do the previous steps of the tutorial, you can download the source from the previous step as a starter:
Install dependencies
We use Vaadin Router for navigation and Vaadin Charts to display stats.
$ npm install --save @vaadin/router @vaadin/vaadin-charts|
Note
|
Vaadin Charts is a commercial charting library. You can try it free for 30 days by having a vaadin.com account. You can also complete this tutorial without installing it by showing textual statistics on the stats view. |
Set up the router
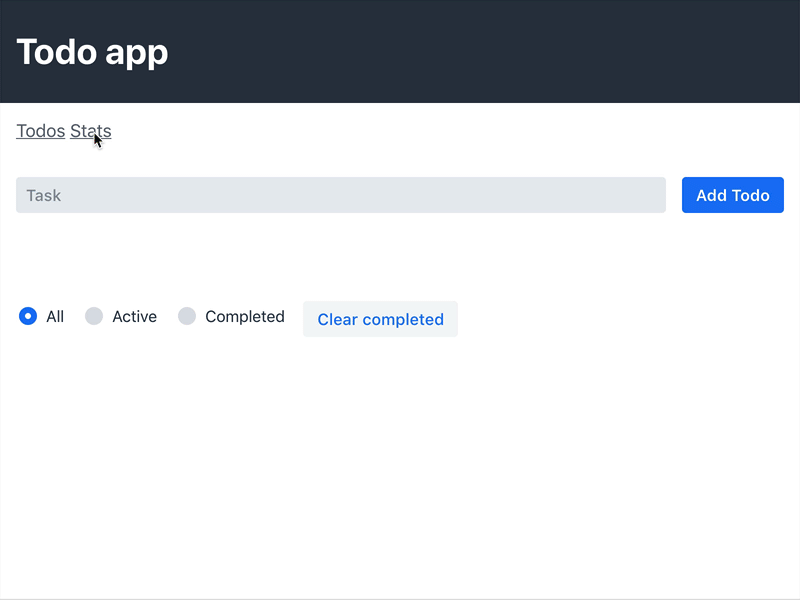
Vaadin router needs an outlet where it can display the views. Update index.html to remove the hard-coded <todo-view> and add a new <nav> section with links to the two views.
index.html
<body>
    <header>
      <h1>Todo app</h1>
    </header>
    <nav>
      <a href="/">Todos</a>
      <a href="/stats">Stats</a>
    </nav>
    <main></main>
  </body>
Then, update index.js;
index.js
import './styles.css';
import './views/todo-view';
import { Router } from '@vaadin/router';

window.addEventListener('load', () => { (1)
  initRouter();
});

function initRouter() {
  const router = new Router(document.querySelector('main')); (2)
  router.setRoutes([
    {
      path: '/',
      component: 'todo-view'
    },
    {
      path: '/stats',
      component: 'stats-view',
      action: () =>
        import(/* webpackChunkName: "stats" */ './views/stats-view') // (3)
    },
    {
      path: '(.*)', (4)
      component: 'not-found-view',
      action: () =>
        import(/* webpackChunkName: "not-found-view" */ './views/not-found-view')
    }
  ]);
}-
Wait for the
loadevent before registering the router. This allows the browser to render the page before we run JavaScript, and ensure that the page feels fast. -
Initialize the router and tell it to output content into the
<main>section. -
Use the dynamic
import()syntax to only load the stats view if a user navigates to it. -
Define a catch-all as the last route that we can use to show a "not found" page
Code splitting
Webpack will by default split code loaded with import() into separate modules. Webpack only loads them when they are needed to speed up the initial page load. The /* webpackChunkName: "stats" */ comment syntax allows you to specify the base name for the JavaScript bundle, which can make it easier to spot in the network inspector when developing.
|
Note
|
Client-side routing requires your web server to fallback to index.html for any route that it is not able to resolve. That way the client-side router can resolve the route and display the correct page. The Angular docs have good examples of how to set up common servers. The Webpack dev server in this project uses the --history-api-fallback flag to achieve this. |
Implementing views
We are going to add two new views: the stats view and the "not found" fallback view. We want all our views to render without a shadow root. To avoid code duplication, we’ll create a base class that all the views can extend from.
Base view class
Create a new file, src/views/base-view.js:
src/views/base-view.js
import { LitElement } from 'lit-element';
export class BaseView extends LitElement {
  createRenderRoot() {
    return this;
  }
}
Todo view
src/views/todo-view.js
-import { LitElement, html } from 'lit-element';
+import { html } from 'lit-element';
---
-class TodoView extends connect(store)(LitElement) {
+class TodoView extends connect(store)(BaseView) {
---
-  createRenderRoot() {
-    return this;
-  }
}
Not found view
src/views/not-found-view.js
import { html } from 'lit-element';
import { BaseView } from './base-view.js';

class NotFoundView extends BaseView {
  render() {
    return html`
      <h1>View not found!</h1>
      <p>
        Please check your URL.
      </p>
    `;
  }
}

customElements.define('not-found-view', NotFoundView);
Stats view
Next, we’ll implement the stats view. It shows a pie chart with the percentages of completed vs. active todos. If there are no todos, it shows a funny message. If you did not install Vaadin Charts earlier, you can change the implementation to show the stats as text instead.
To have some stats to show, first add a new selector in reducer.js. The selector uses reselect, so it only needs to recalculate the stats if the todos have changed.
src/redux/reducer.js
export const statsSelector = createSelector(getTodosSelector, todos => {
  const completed = todos.filter(todo => todo.complete).length;
  return {
    completed,
    active: todos.length - completed
  };
});
Then create a new file stats-view.js in the views-folder, :
src/views/stats-view.js
import { html } from 'lit-element';
import { connect } from 'pwa-helpers';
import { store } from '../redux/store.js';
import { statsSelector } from '../redux/reducer.js';
import '@vaadin/vaadin-charts';
import { BaseView } from './base-view.js';

class StatsView extends connect(store)(BaseView) { (1)
  static get properties() {
    return {
      chartConfig: { type: Object } (2)
    };
  }

  stateChanged(state) {
    const stats = statsSelector(state);
    this.chartConfig = [ (3)
      { name: 'Completed', y: stats.completed },
      { name: 'Active', y: stats.active }
    ];

    this.hasTodos = state.todos.length > 0; (4)
  }
}

customElements.define('stats-view', StatsView);-
Connect the view to the Redux store
-
Define a property for the chart configuration. We want the view to get updated any time it changes.
-
Construct a config object for Vaadin Charts based on the stats selector
-
Track if there are any todos to show the chart conditionally.
Then, define the template in the render() method.
src/views/stats-view.js
render() {
    return html`
      <style>
        stats-view {
          display: block;
        }
      </style>

      ${this.getChart()} (1)
    `;
  }

  getChart() {
    if (this.hasTodos) { (2)
      return html`
        <vaadin-chart type="pie">
          <vaadin-chart-series
            .values="${this.chartConfig}"
          ></vaadin-chart-series>
        </vaadin-chart>
      `;
    } else {
      return html`
        <p>Nothing to do! 🌴🍻☀️</p>
      `;
    }
}-
Split out the chart into a helper method.
-
If there are todos, return a template with a
vaadin-chart, otherwise return a simple message.
Building for production
Finally, we’ll do a production build of the app and see that our code splitting works as intended.
$ npm run prod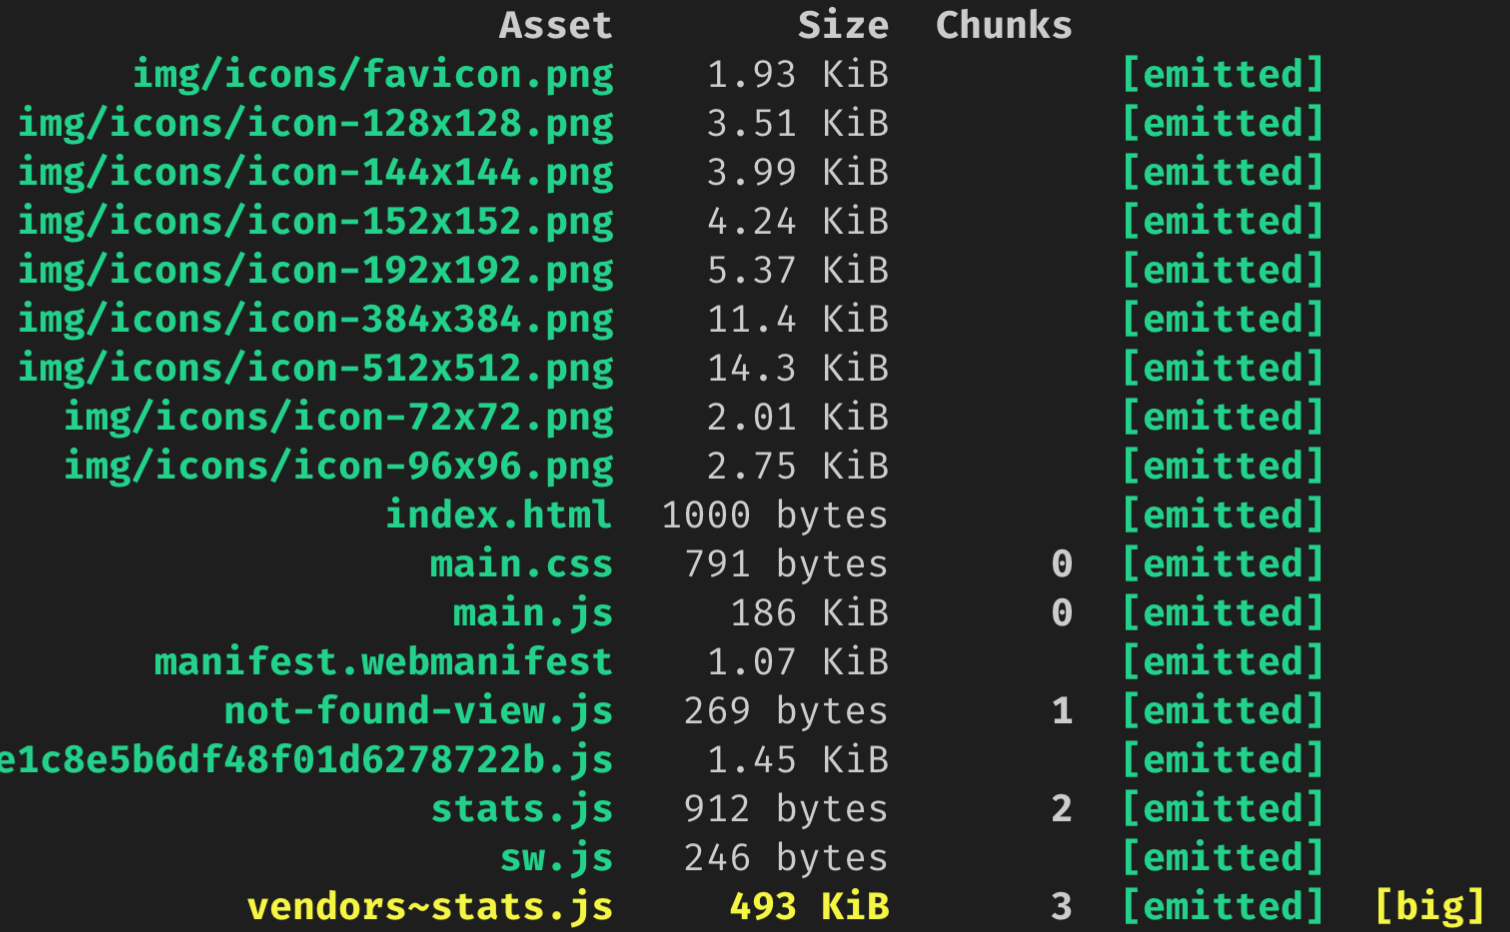
You can see that there are now three principal JavaScript bundles: main.js, stats.js + vendors~stats.js, and not-found-view.js. By splitting out the stats view into a deferred bundle, users that are only viewing the todo-view do not need to download the charts library.
You can try this out by serving the dist folder with a web server.
Next
In the first four steps, we built an app with LitElement, hooked it up to a Redux store, and implemented navigation with code splitting.
In the final part of the series, we’ll turn the application into an offline-capable Progressive Web App (PWA) by registering a ServiceWorker and storing the state in localstorage.