
There are good reasons to use Identity & Access Managers (IAM) with Single Sign On (SSO) capabilities in your applications. Users typically want to authenticate once with the SSO solution rather than reauthenticate with individual applications repeatedly. SSO saves time and improves the overall user experience. While IAM providers typically build on top of well-accepted standards, like OpenID Connect, it’s still not that easy to integrate them into existing applications.
In one of our previous blog posts, we announced a number of Vaadin Acceleration Kits, one of them being the Vaadin SSO Kit. This kit helps to quickly set up SSO authentication using any IAM provider, which builds on the OpenID Connect standard. One of the products, which implement this standard, is cidaas - a Germany-based Cloud Identity & Access Management provider.
Although enabling Vaadin SSO Kit in a Spring Boot application is easy, configuring the selected IAM provider properly may sometimes be challenging.
This tutorial explains the minimum steps needed to configure both cidaas and a Vaadin SSO Kit, so they work together seamlessly.
Configuring cidaas
Let’s start with configuring cidaas first.
Later in this tutorial, we will demonstrate a cidaas integration on a demo application, which runs on localhost (using URL http://localhost:8080). The following steps will show you how to configure cidaas as an authentication provider for such a localhost application.
First, go to the cidaas IAM pricing page and create a free IAM account by clicking the “Getting started” button in the appropriate section.
After registration, you will be prompted to create a new “company” in cidaas administration. This company represents you as a user of cidaas.
The next step is to create an identity manager instance for the demo application. This instance will contain all the users who can access the demo application's private views using SSO login. Start by choosing the “Individual / Free” plan on the “New Plan” screen:

That will bring you to the instance creation screen. Fill all the necessary fields here and pay special attention to the Instance URL - this is where SSO Kit will redirect users to perform their login:

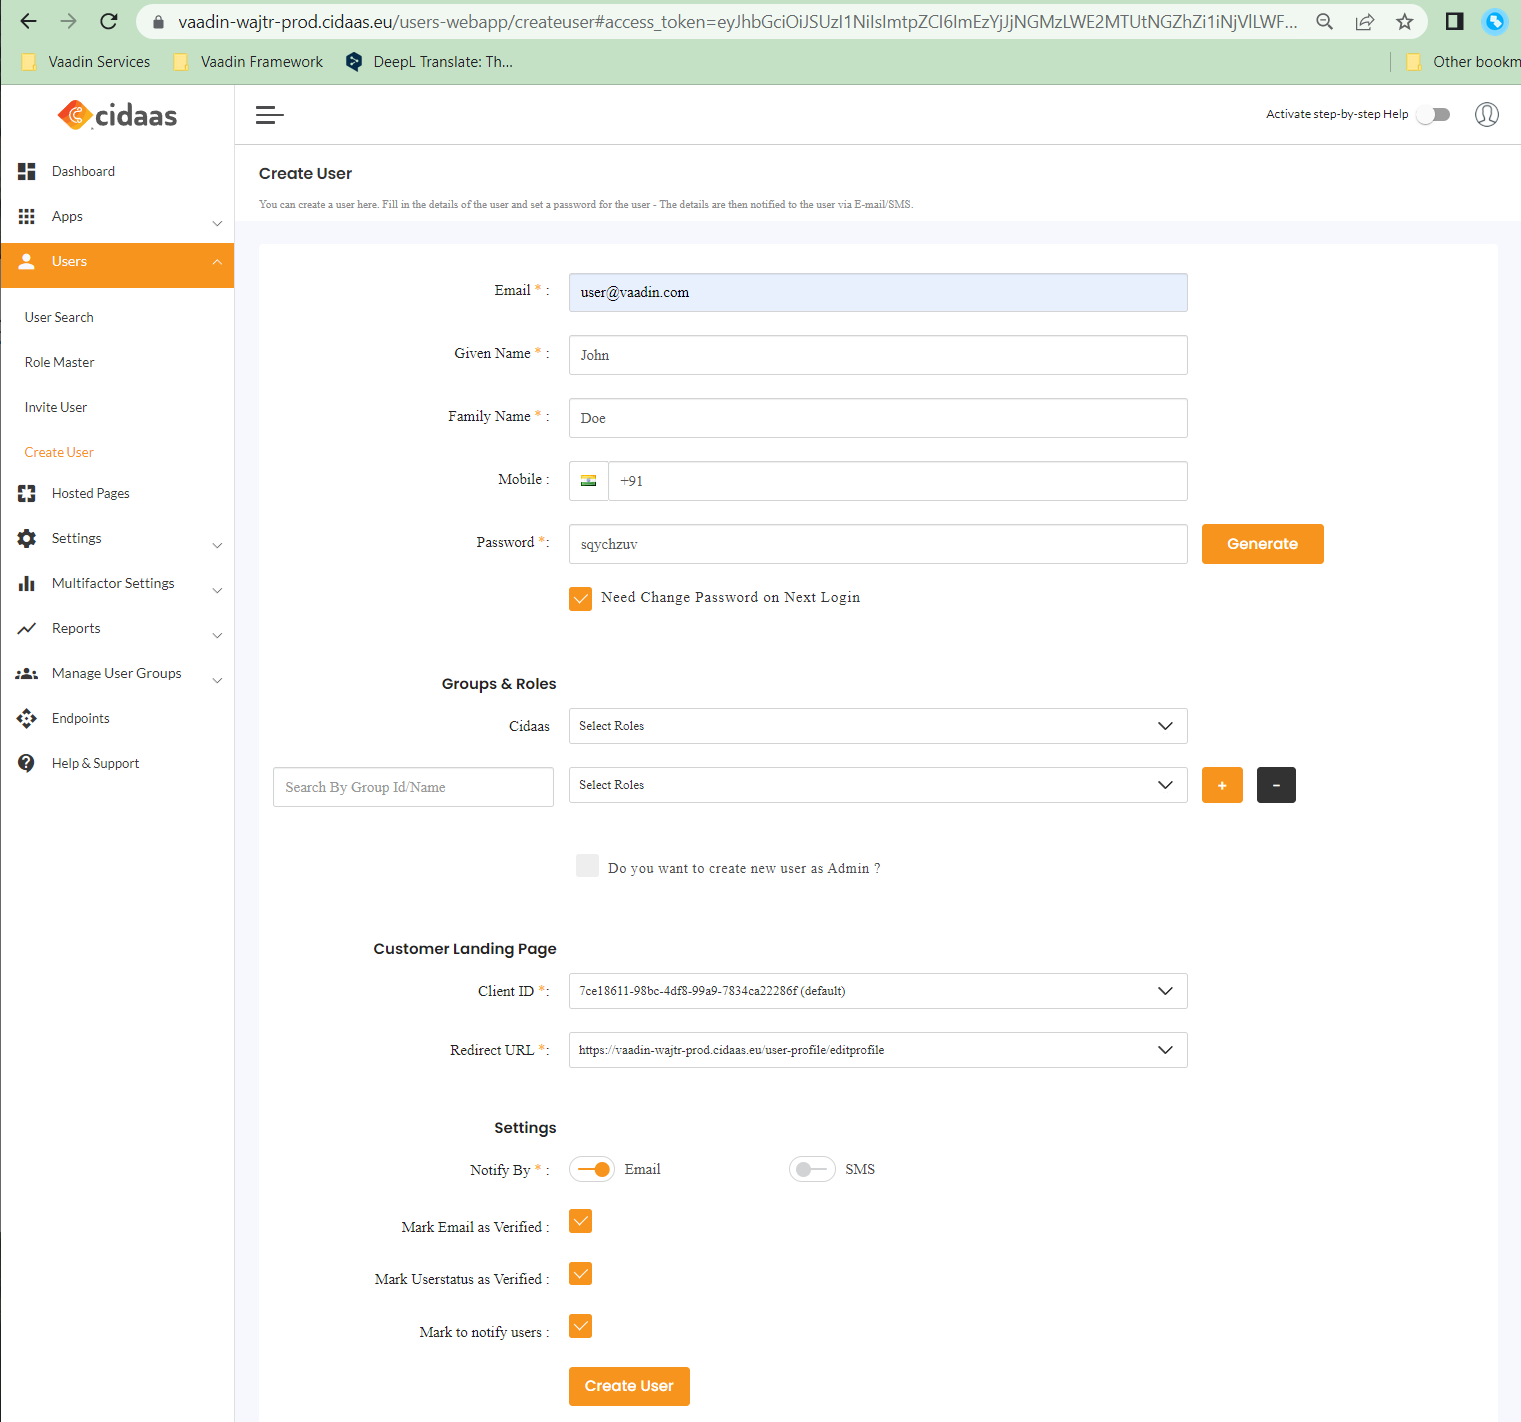
Instance creation takes some time, but typically only up to a few minutes. Once the instance is ready, go to the instance Admin portal (e.g., for the example in the picture above, it’s https://vaadin-wajtr-prod.cidaas.eu/admin-ui) and add as many users as you need. An example user might look like this:
After we have users, we can create an "App," which represents an application that wants to utilize the cidaas instance for authentication. By configuring the associated "App," you may specify roles, access rights, and connectivities.
Let’s create an “App” configuration for the demo application now. Go to App Settings overview and click the “Create new App” button.
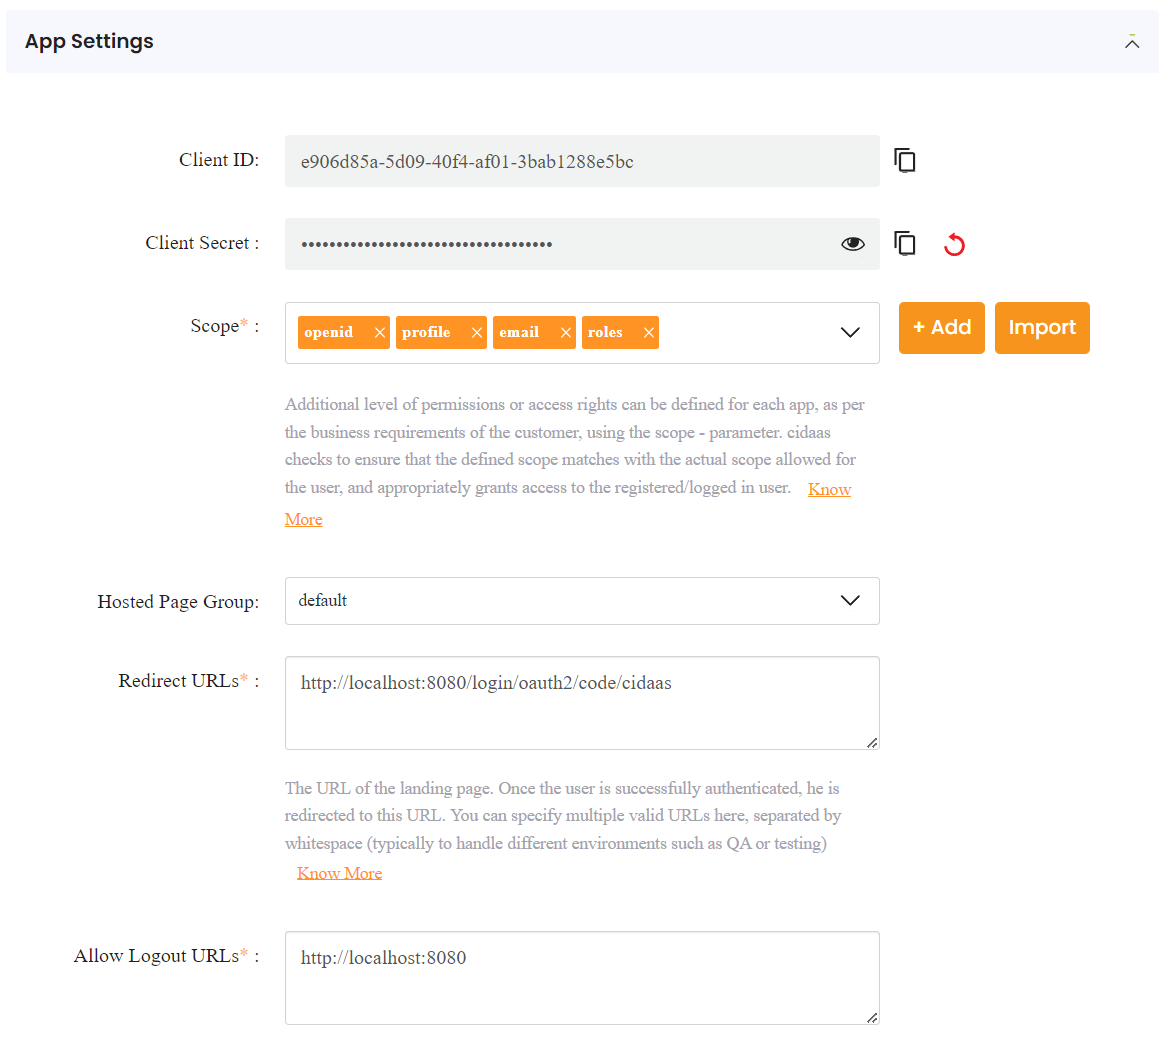
This action will open an App creation wizard. Use any values you see fit in the first step of the wizard (“App Details”). Click on the “Next” button to continue the App creation process, and on the next screen, use the following values:
- Scope: OpenID, profile, email, roles
- Redirect URLs: http://localhost:8080/login/oauth2/code/cidaas
- Allow logout URLs: http://localhost:8080
The “App Settings” page should therefore look similar to this:
The last page of the App creation wizard will let you fill in more details about the application - the company details, website URL, Terms, and Conditions URL, etc. Fill in any values you see fit and click the “Submit” button to complete the App creation process.
Once the App is created, one additional step is configuring the OpenId Connect settings properly. Find the newly created App in the “App Settings” overview, open its details using the “Edit App” action, and go to the “Advanced settings” section.
The only configuration that must be changed here is in the “OAuth2/OIDC Settings” subsection. Set the following values there:
- Response Types: only "code"
- Grant Types: only "authorization_code"
- Backchannel logout URI: http://localhost:8080/logout/back-channel/cidaas
- Backchannel logout session: set to enabled
The “OAuth2/OIDC Settings” section should therefore look like this:

Click the “Save” button, and you are done with configuring the cidaas instance.
Configuring the SSO Kit
With the cidaas instance ready to be used, we can now configure Vaadin SSO Kit in a Spring Boot application to use it.
We will showcase the SSO Kit integration on a Spring Security-enabled demo application consisting of a public and private view. While the public view is accessible to any user, the private view is accessible only to users logged in using cidaas authentication.
Either directly download the source code for the demo application, or use Vaadin Start to create the foundation for such an application rapidly. Spring Boot and Vaadin 23+ are necessary for the SSO Kit.
You should start by adding a dependency on SSO Kit in project pom.xml:
<dependency>
  <groupId>com.vaadin</groupId>
  <artifactId>sso-kit-starter</artifactId>
</dependency>
The next step is to mark those Routes which should be publicly accessible using @AnonymousAllowed annotation:
@PageTitle("Public view")
@Route(value = "")
@AnonymousAllowed
public class PublicView extends VerticalLayout {
    public PublicView() {
        add(new H3("This page is accessible to anyone"));
    }
}
And annotate those Routes which should be accessible only to logged-in users with @PermitAll annotation:
@PageTitle("Private view")
@Route(value = "private")
@PermitAll
public class PrivateView extends VerticalLayout {
    public PrivateView() {
        add(new H3("This page is accessible to only logged in users"));
    }
}
The final step in the SSO Kit configuration is to modify values in the application.properties file. The following configuration properties connect the demo application with the cidaas IAM instance, which we created in the first part of this tutorial:
# SSO Kit configuration
spring.security.oauth2.client.provider.cidaas.issuer-uri=[put issuer URI here, e.g. https://xxxxxxx-prod.cidaas.eu]
spring.security.oauth2.client.registration.cidaas.client-id=[client id can be found in cidaas app administration]
spring.security.oauth2.client.registration.cidaas.client-secret=[client secret can be found in cidaas app administration]
spring.security.oauth2.client.registration.cidaas.scope=profile,openid,email,roles
vaadin.sso.login-route=/oauth2/authorization/cidaas
You only have to replace the values in the square brackets with the actual values of the configured cidaas instance. You can find the “client id” and “client secret” values in the App details in cidaas Admin Portal.
Running the example
That’s it. Both cidaas and the demo application are now configured for SSO.
Run the demo application and try to access the private page on http://localhost:8080/private.
You should be redirected to the cidaas login page, and after entering the correct login credentials, you should be redirected back to the private view of the demo application.
Troubleshooting
If anything goes wrong and the authentication is not working, the first step you can take is to enable Spring Security to debug logging in application.properties:
logging.level.org.springframework.security=TRACE The detailed logging should shed light on the problem at hand.
As of February 2023, cidaas used a caching strategy that had not added the security key of the newly created App to the set of known keys immediately but only after 24 hours. As a result, the authentication didn’t work with SSO Kit immediately, but you had to wait for at least one day. Such a “missing key problem” manifested itself by the following exception in the application log (with the above debug logging enabled):
Caused by: com.nimbusds.jose.proc.BadJOSEException: Signed JWT rejected: Another algorithm expected, or no matching key(s) found We reported this problem to cidaas, and they informed us about upcoming changes in caching, which would remedy this issue.
Summary
There are many configuration options in cidaas, which allow you to configure, for example, what the login screen looks like, types of authentication methods, two-factor authentication setup, etc. In this article, we have not gone into that much detail on configuring a cidaas IAM instance but have shown the minimum settings needed to make it work with the SSO Kit. Please refer to the cidaas documentation for more information about advanced configuration options.
The source code of the demo application is also available on GitHub.
See the Vaadin SSO Kit documentation for more information about kit configuration options, backchannel logout setup, and the possibility of using a different IAM provider. Or, try the SSO Kit out with a free trial license.