
This tutorial will teach you the the basic Progressive Web App concepts by turning an existing web app into a PWA only using the native browser API. The tutorial does not use any framework, everything you learn will be relevant no matter what framework you use in your project.
What’s needed
In order to complete this tutorial, you’ll need
-
20 minutes
-
Basic HTML and JavaScript knowledge
-
Google Chrome for PWA developer tools
The demo app
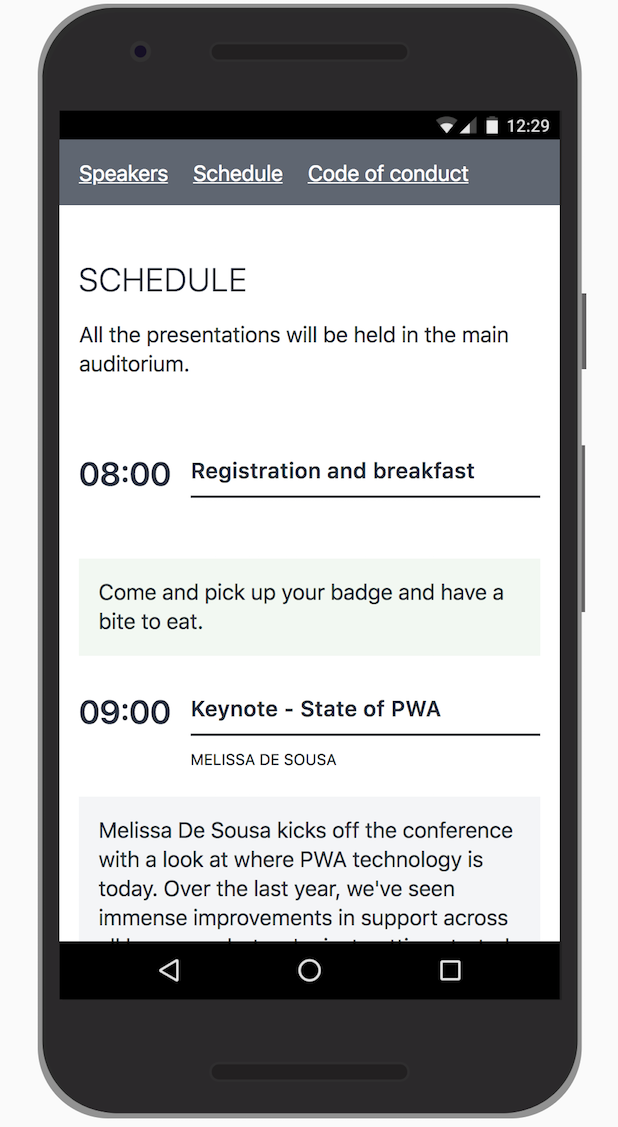
Here’s our situation: We’re planning on hosting a PWA conference and just finished building a simple site for it highlighting the speakers and displaying the schedule. The only problem is that the app isn’t a PWA, which is embarrassing. So let’s fix that.
You can try out the application here.
The application consists of three files: app.js, styles.css, and index.html. The HTML file contains all the static information on our site. Speaker and schedule data are fetched asynchronously from JSON files, to simulate REST API calls.
Get set up
Start by downloading the base website that we will turn into a PWA.
Unzip the application somewhere convenient, and open the folder in your favorite editor. If you don’t have a code editor handy, I recommend VS Code.
Finally, serve the folder using a local server. If you don’t have one handy, you can npm install serve and then serve .
Adding a Web App Manifest
There are two main steps to turning a plain web app into a Progressive Web App: adding a Web App Manifest and adding a ServiceWorker.
Let’s start by adding the manifest. In the root of your application, add a new file: manifest.json:
manifest.json
{
  "name": "PWAConf",
  "short_name": "PWAConf",
  "start_url": ".",
  "display": "standalone",
  "background_color": "#2A3443",
  "description": "A demo app for a fictional conference",
  "theme_color": "#2A3443",
  "icons": [
    {
      "src": "./img/icons/icon-512x512.png",
      "sizes": "512x512",
      "type": "image/png"
    }
  ]
}
This is a fairly straight forward file, describing our application, its colors and icons. We also define which URL (relative to the URL the app is loaded from) should be opened if the application is installed to a device.
Save the file, and move over to index.html. Just before </head>, insert the following link:
index.html
<link rel="manifest" href="./manifest.json">This will load the manifest file and identify our site as an application to the browser.
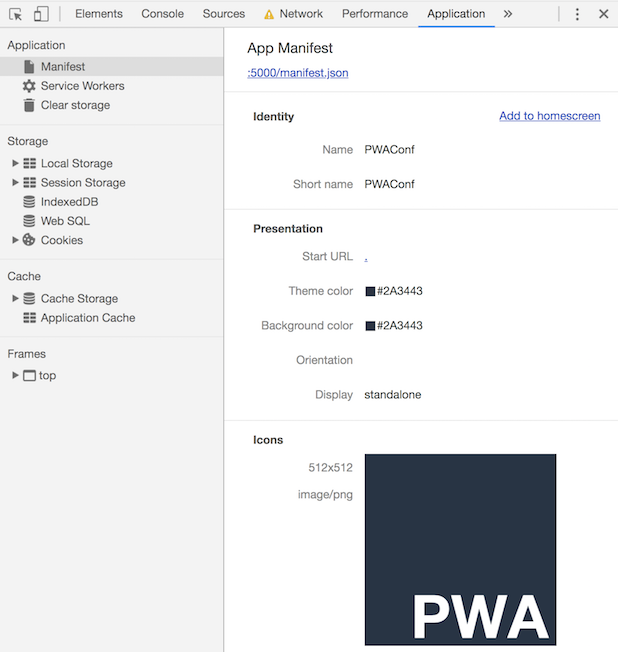
Verify that everything worked by opening Chrome DevTools (⌘-⌥-I or Ctrl-Shift-I) and selecting the Application tab. Under the application tab, select the Manifest section and you should see the information we just entered in our manifest file.
If you click the "Add to homescreen" link, you’ll notice that we’re not able to install our app quite yet because we do not have a ServiceWorker. Let’s take care of that next.
Registering a ServiceWorker
The Web App Manifest identifies our website as an app to the browser. The ServiceWorker is the last piece of the puzzle, the piece that will take our plain, old, website and give it superpowers like loading offline.
The ServiceWorker is a JavaScript worker that sits between your application and the network. With it (and some supporting APIs like Cache API) we’re able to have full control over how our application behaves in any network situation. But before we get ahead of ourselves, let’s create an empty ServiceWorker and register it.
In the root of your application, create a file sw.js. You can leave it empty for now.
Next, we need to register our ServiceWorker so that our browser can install it. Go into app.js, and add the following line in the load event listener.
app.js
window.addEventListener('load', e => {
  new PWAConfApp();
  registerSW(); (1)
});-
Add a call to
registerSW()
|
Tip
|
It’s good practice to delay this kind of work until after the load event so we don’t slow down the initial page load. |
Before we register the ServiceWorker, we want to ensure that the browser supports it. Add the following method after the load even listener:
app.js
async function registerSW() { (1)
  if ('serviceWorker' in navigator) { (2)
    try {
      await navigator.serviceWorker.register('./sw.js'); (3)
    } catch (e) {
      alert('ServiceWorker registration failed. Sorry about that.'); (4)
    }
  } else {
    document.querySelector('.alert').removeAttribute('hidden'); (5)
  }
}-
We’re using an async function for registering the ServiceWorker for easier to read code.
-
Ensure that the browser supports ServiceWorker before trying to register one.
-
Register the ServiceWorker with
navigator.serviceWorker.register. -
Let the user know if things failed.
-
Show an unintrusive notice that offline is not supported if the browser doesn’t support ServiceWorker.
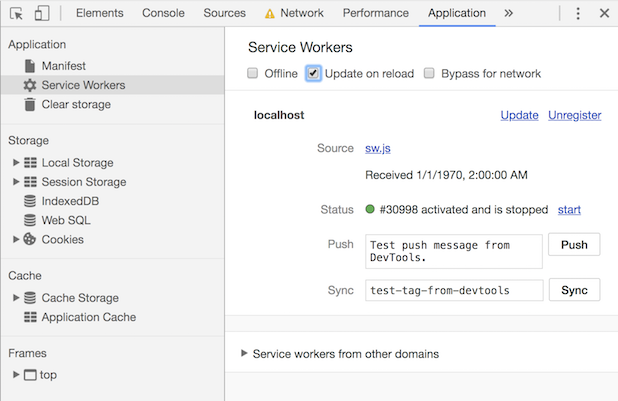
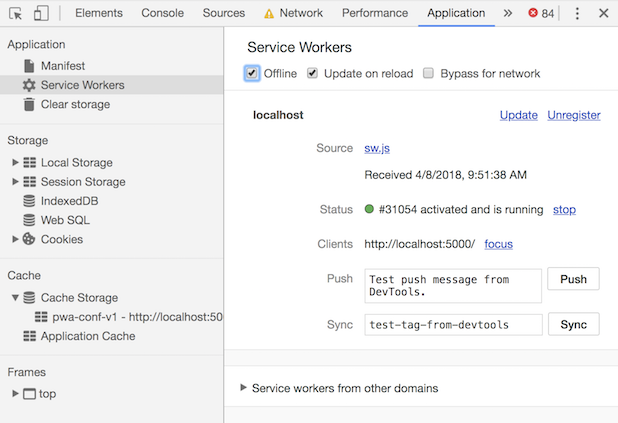
Reload your browser and switch to the ServiceWorker section of the Application tab in DevTools. You should see your service worker listed. To make our lives easier while developing, check "Update on reload". Normally, a new ServiceWorker is only loaded once all tabs using it have been closed, so we would not get our new version visible by just refreshing the page while developing otherwise.
Now that we have a ServiceWorker registered, let’s put it to use by caching some stuff.
Caching and serving static assets
The ServiceWorker file is entirely event-driven. This means that it won’t run any code unless it’s responding to an event. The main events we are interested in are install and fetch. We can listen to them by adding the following lines to our sw.js file. In a ServiceWorker context, self refers to the ServiceWorker itself.
sw.js
self.addEventListener('install', async event => {
  console.log('install event')
});

self.addEventListener('fetch', async event => {
  console.log('fetch event')
});
The install event is called whenever a new ServiceWorker file is detected.
|
Note
|
Any change in the sw.js file will trigger a new install event to allow you to update the app. |
sw.js
const cacheName = 'pwa-conf-v1';
const staticAssets = [
  './',
  './index.html',
  './app.js',
  './styles.css'
];
Notice the use of relative paths for the static assets. This is needed especially if you are on a host like GitHub Pages, where your app isn’t deployed to the root of the domain. Also note that we’ve added paths for both ./ and ./index.html. The Cache API is very literal, we need to explicitly cache both even though they result in the same file on the server.
With our assets sorted out, we can now setup our cache:
sw.js
self.addEventListener('install', async event => {
  const cache = await caches.open(cacheName); (1)
  await cache.addAll(staticAssets); (2)
});-
Open or create a new cache with the name we specified.
-
Tell the cache to fetch and add all the static assets.
|
Note
|
The addAll operation will fail if any of the assets fail to be fetched, so be careful with the paths. |
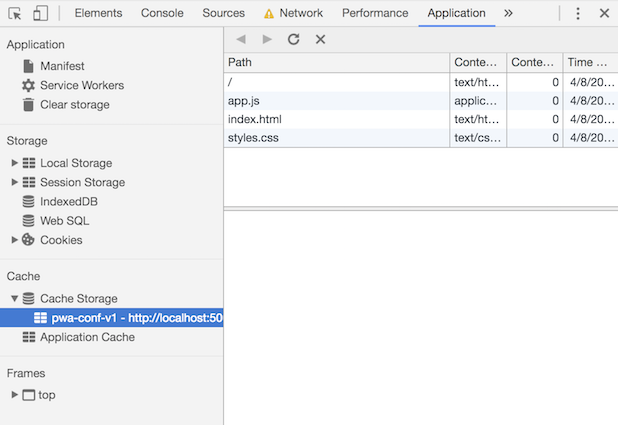
Reload the browser and open the Cache Storage section of the Application tab in DevTools to verify that everything worked as expected.
|
Tip
|
Tip: You can debug a ServiceWorker by opening it in DevTools, either by clicking the filename in the ServiceWorker section of the Applications tab or by finding it in the Sources tab. You can then set breakpoints by clicking the gutter next to the line numbers. You can learn more about debugging JavaScript on the Google Developers page. |
Serving cached content
We now have all the static content of our app stored in a cache, but it’s not doing us much yet. The next step in turning our app into a PWA is to intercept fetch events and serving this cached content.
In sw.js, add the following to your fetch event listener:
sw.js
self.addEventListener('fetch', event => {
  const req = event.request;
  event.respondWith(cacheFirst(req));
});
Here, we get the request from the fetch event, and then tell the event that we would like to respond with the cacheFirst function. Add the cacheFirst function below the fetch event listener in sw.js.
sw.js
async function cacheFirst(req) {
  const cache = await caches.open(cacheName); (1)
  const cachedResponse = await cache.match(req); (2)
  return cachedResponse || fetch(req); (3)
}-
Open the cache with the name we specified earlier.
-
Try to fetch a cached response that matches the request. You can think of the cache as a map of key-value pairs where the request is the key and the cached response is the value.
-
Finally return either the cached response if there is one, or delegate the request to the network
Refresh the page and ensure that everything is still working. After that, go to the ServiceWorker section of the Applications tab in DevTools and check the offline checkbox. This will simulate an offline situation. Refresh the page. Instead of seeing an offline dinosaur, you should now see the styled HTML of your app. Progress!
Dynamic caching
Even though our application is now loading, it’s not very useful. That is because the speakers, their pictures, and the schedule are all loaded dynamically and are not therefore in our cache. Let’s take care of that next.
The way we want our cache to work is that any JSON calls should first go to the network and attempt to get the most up to date information and store that in the cache before returning. That way, if the network is down, we always have the most recent version available. We’ll call this strategy networkFirst.
We’ll assume that images are static. For images, we’ll use the cacheFirst function we wrote earlier, but modify it to also cache the response so that we can return the image from cache the next time.
First, let’s change the fetch listener in sw.js to differentiate between the types of requests:
sw.js
self.addEventListener('fetch', event => {
  const req = event.request;

  if (/.*(json)$/.test(req.url)) {
    event.respondWith(networkFirst(req));
  } else {
    event.respondWith(cacheFirst(req));
  }
});
Here, we determine whether the request is for a JSON file or not and call networkFirst for them. All other requests will go to the cacheFirst function.
Below the cacheFirst function in your sw.js file, add a networkFirst function:
sw.js
async function networkFirst(req) {
  const cache = await caches.open(cacheName);
  try { (1)
    const fresh = await fetch(req);
    cache.put(req, fresh.clone());
    return fresh;
  } catch (e) { (2)
    const cachedResponse = await cache.match(req);
    return cachedResponse;
  }
}-
We then try to fetch the request from the network. If that succeeds, we put a clone of the response in our cache (requests can only be read once) and return the response.
-
If the network call fails, we return the latest cached version.
Finally, update cacheFirst to call networkFirst in case nothing is found in the cache, so that images get cached as they are fetched.
sw.js
async function cacheFirst(req) {
  const cache = await caches.open(cacheName);
  const cachedResponse = await cache.match(req);
  return cachedResponse || networkFirst(req);
}
Uncheck the offline checkbox in DevTools if you still have it checked. Then refresh your page twice (once to load the new ServiceWorker and once to have it process all requests your site makes on the initial load). You should now see the JSON files and images in the Cache Storage subsection of the Application tab in DevTools.
Finally, go back to the ServiceWorker section, check the offline checkbox, cross your fingers and refresh. If all went well, you should see your app as if you were online. Success!
Next steps
Even though our application works and is really nice, it has a few shortcomings:
-
We need to remember to update a timestamp in the ServiceWorker any time we update static resources
-
Our initial caching can easily fail if network errors cause a single file to fail
-
There is no way to update only changed static resources to save bandwidth
-
The dynamic caching never expires and can potentially grow large
While we could solve all of these issue ourselves, it makes more sense to use a tool like Workbox to help create and manage the ServiceWorker. Read the next tutorial to learn how to set up a production PWA build system.