Vaadin Elements has been paving the way as the go-to UI components library for progressive web apps. But what about mobile apps?
To use Vaadin Elements in a mobile app, you need to have the same web view as you would have in the browser. Thanks to open source SDKs, like Ionic with Cordova, you can easily create a hybrid mobile app from your existing web app that uses the same web view as browsers.
With a hybrid app you are no longer constrained by the limitations of the browser. You’re able to use native app features like camera and accelerometer access, but still write your app using web technologies.
Getting Started
The fastest way to start building mobile apps is to use the Ionic framework. Ionic is an open source front-end SDK for developing mobile apps with web technologies.
Install Ionic
First install Cordova and Ionic and then use Ionic’s command line interface to start a new app:
$ npm install -g cordova ionic
$ ionic start elementsApp blank
This creates an elementsApp/ directory, which contains your Ionic project. Try out your app by running ionic serve from the elementsApp/ directory:
$ cd elementsApp
$ ionic serve
Browse to the Ionic's development server to check your app:

Install Vaadin Elements
Install Vaadin Elements with bower. Vaadin Elements will be installed to the www/lib/ directory:
$ bower install --save vaadin-core-elements
Import Web Components polyfill
Not all browsers support web components natively, so you need to import the Web Components polyfill to the root of your app. Add the polyfill to index.html in the elementsApp/www/ directory:
<script src="lib/webcomponentsjs/webcomponents-lite.min.js"></script>
Import Vaadin Elements
Import Vaadin Elements in index.html in the elementsApp/www/ directory:
<link rel="import" href="lib/vaadin-core-elements/vaadin-core-elements.html">
Now you are ready to use Vaadin Elements in your mobile application.
Start coding!
Add Elements
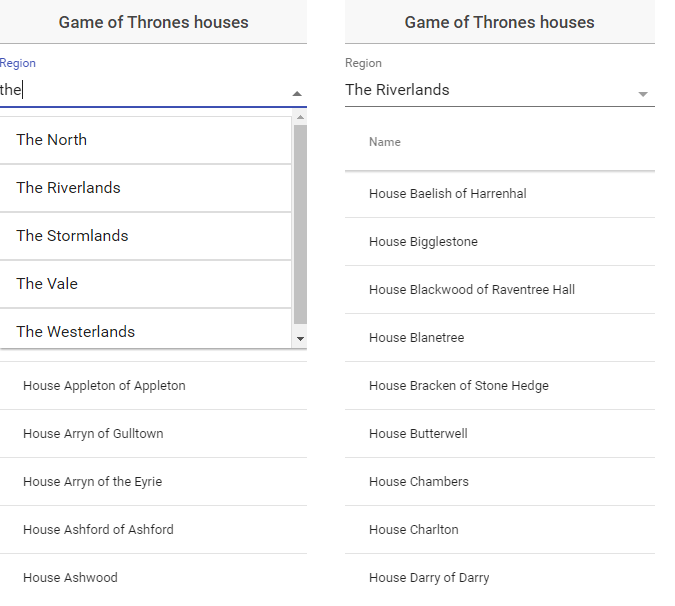
Start by adding a few Vaadin Elements inside the body of your index.html. You can seamlessly use Vaadin Elements together with Ionic’s native UI components.
<body ng-app="starter">
   <ion-pane>
     <ion-header-bar class="bar-stable">
       <h1 class="title">Game of Thrones houses</h1>
     </ion-header-bar>
     <ion-content>
       <div class="filters">
         <vaadin-combo-box label="Region"></vaadin-combo-box>
       </div>
       <vaadin-grid>
         <table>
           <colgroup>
             <col name="name">
           </colgroup>
         </table>
       </vaadin-grid>
     </ion-content>
   </ion-pane>
 </body>
Add Business logic
The next step is to show some data in our application. Wrap your business logic inside an HTMLImports.whenReady event callback to make sure that the elements are ready to use. In this example we are using An Api of Ice and Fire to populate vaadin-combo-box and vaadin-grid.
<script>
     var grid = document.querySelector('vaadin-grid');
     var combobox = document.querySelector('vaadin-combo-box');

     HTMLImports.whenReady(function () {

       updateHouses();

       // Add items to combo-boxes
       document.querySelector('vaadin-combo-box').items = ['Dorne', 'The North', 'The Riverlands', 'The Stormlands', 'The Vale', 'The Westerlands'];

       // Update grid items when combo-box value changes
       combobox.addEventListener('selected-item-changed', function(event) {
         updateHouses(event.detail.value);
       });
     });

     // Add items to vaadin-grid
     function updateHouses(region) {
       region = region ? region : '';
       getJSON('http://www.anapioficeandfire.com/api/houses?region='+region, function (json) {
         grid.items = json;
       });
     }
</script> 
Conclusion
Vaadin Elements and Ionic both use Bower so it’s easy to extend an Ionic app with Vaadin Elements. The responsive design of Vaadin Elements makes it a favourable choice when selecting the UI components for mobile apps. In addition, the material design fits nicely with the CSS components of Ionic.
See the complete source code on GitHub