
Updates on the subject:
- There are built-in helpers for Web Push API in Vaadin Flow available since version 24.2
- Also check out Web Push Notifications: A real-world example with electricity prices
Web push notifications are an effective way to keep users engaged with your web application even when they're not actively using it. They can be used to deliver real-time updates, reminders, and other important messages that can help improve user experience and increase user retention. Just be sure to follow best practices and avoid spamming your users.
The Web Push Notification API has been supported in most browsers for years. The final holdout, Safari on iOS, is adding support for Web Push in iOS 16.4. You can now use Web Push Notifications in all major browsers.
How does web push work?
When a user signs up for web push notifications, their browser contacts a 3rd party web push server hosted by the browser vendor (Google, Mozilla, Apple, Microsoft). The user receives a subscription containing a unique endpoint URL, secret, and keys. The subscription is saved on the server and associated with the user it belongs to.

When sending a message, the Vaadin Flow server uses the information in the subscription to send a message to the 3rd party push server using the webpush-java library. The push server delivers the message to the user.

Requirements
In this tutorial, you'll learn how to send push messages from a Vaadin Flow application. The tutorial assumes you have a Spring Boot project, but it is not required for sending push messages.
- Java 17+
- Vaadin Flow 24+
Completed project source code
You can find the source code for the completed project on GitHub.
Create a project (optional)
If you don't already have a Vaadin Flow project, you can configure and download one at https://start.vaadin.com.
Unzip the downloaded archive and open the Maven project in an IDE of your choice.
Add dependencies
Start by adding the needed dependencies to the pom.xml file:
<dependency>
    <groupId>nl.martijndwars</groupId>
    <artifactId>web-push</artifactId>
    <version>5.1.1</version>
</dependency>
<dependency>
    <groupId>org.bouncycastle</groupId>
    <artifactId>bcprov-jdk15on</artifactId>
    <version>1.69</version>
</dependency>
Turn the application into a PWA
On the Application.java class, add a @PWA annotation to instruct Vaadin Flow to generate a service worker file. The service worker script is used to receive incoming push messages even when the user isn't actively using the application.
@PWA(name = "Web Push", shortName = "Push")
public class Application implements AppShellConfigurator {
...
}
Run the application to generate the service worker
Run the application either by running Application.java in your IDE or with the included Maven wrapper:
Linux/Mac
./mvnw Windows
.\mvnw Once the application is running, copy the generated service worker from target/sw.ts to frontend/sw.ts.
Add listeners for incoming push notifications by adding the following to the end of sw.ts:
// Handle web push

self.addEventListener('push', (e) => {
  const data = e.data?.json();
  if (data) {
    self.registration.showNotification(data.title, {
      body: data.body,
    });
  }
});

self.addEventListener('notificationclick', (e) => {
  e.notification.close();
  e.waitUntil(focusOrOpenWindow());
});

async function focusOrOpenWindow() {
  const url = new URL('/', self.location.origin).href;

  const allWindows = await self.clients.matchAll({
    type: 'window',
  });
  const appWindow = allWindows.find((w) => w.url === url);

  if (appWindow) {
    return appWindow.focus();
  } else {
    return self.clients.openWindow(url);
  }
}
The code displays a visible notification on incoming push messages and opens the application when the user clicks/taps on the notification. It first attempts to find an already-open instance of the application and focus the window. If that fails, it will open a new window instead.
Generate VAPID keys
You need a set of public/private VAPID keys to send push notifications. If you have Node installed, you can run the following command to generate the keys:
npx web-push generate-vapid-keys
You can also generate the keys using the webpush-java library. Follow the instructions here.
Once you have the keys, add the following three configuration properties as environment variables (see Spring Boot Docs):
VAPID_PUBLIC_KEY=[public key]
VAPID_PRIVATE_KEY=[private key]
VAPID_SUBJECT=[mailto:your@email.com OR https://your-website.com]
Create a service for sending push messages
Create a new class, WebPushService.java with the following content:
@Service
public class WebPushService {

    @Value("${vapid.public.key}")
    private String publicKey;
    @Value("${vapid.private.key}")
    private String privateKey;
    @Value("${vapid.subject}")
    private String subject;

    private PushService pushService;

    private final Map<String, Subscription> endpointToSubscription = new HashMap<>();

    @PostConstruct
    private void init() throws GeneralSecurityException {
        Security.addProvider(new BouncyCastleProvider());
        pushService = new PushService(publicKey, privateKey, subject);
    }

    public String getPublicKey() {
        return publicKey;
    }

    public void sendNotification(Subscription subscription, String messageJson) {
        try {
            HttpResponse response = pushService.send(new Notification(subscription, messageJson));
            int statusCode = response.getStatusLine().getStatusCode();
            if (statusCode != 201) {
                System.out.println("Server error, status code:" + statusCode);
                InputStream content = response.getEntity().getContent();
                List<String> strings = IOUtils.readLines(content, "UTF-8");
                System.out.println(strings);
            }
        } catch (GeneralSecurityException | IOException | JoseException | ExecutionException
                 | InterruptedException e) {
            e.printStackTrace();
        }
    }

    public void subscribe(Subscription subscription) {
        System.out.println("Subscribed to " + subscription.endpoint);
        /*
         * Note, in a real world app you'll want to persist these
         * in the backend. Also, you probably want to know which
         * subscription belongs to which user to send custom messages
         * for different users. In this demo, we'll just use
         * endpoint URL as key to store subscriptions in memory.
         */
        endpointToSubscription.put(subscription.endpoint, subscription);
    }

    public void unsubscribe(Subscription subscription) {
        System.out.println("Unsubscribed " + subscription.endpoint + " auth:" + subscription.keys.auth);
        endpointToSubscription.remove(subscription.endpoint);
    }


    public record Message(String title, String body) {
    }

    ObjectMapper mapper = new ObjectMapper();

    public void notifyAll(String title, String body) {
        try {
            String msg = mapper.writeValueAsString(new Message(title, body));
            endpointToSubscription.values().forEach(subscription -> {
                sendNotification(subscription, msg);
            });
        } catch (JsonProcessingException e) {
            throw new RuntimeException(e);
        }
    }
}
The service:
- Configures the underlying push service with the keys you created.
- Keeps track of subscriptions in a HashMap. In a real application, you need to save the subscription information along with the user it is associated with so you can send messages to the right person.
- Provides an API for getting the public key
- Provides an API for sending messages
Create a component for subscribing to push notifications
Before you can send push notifications to a user, they need to authorize and subscribe to them.
You only get one chance to ask for permission. If the user denies approval, the browser will not prompt them again on that domain unless they reset the permission manually in their browser.
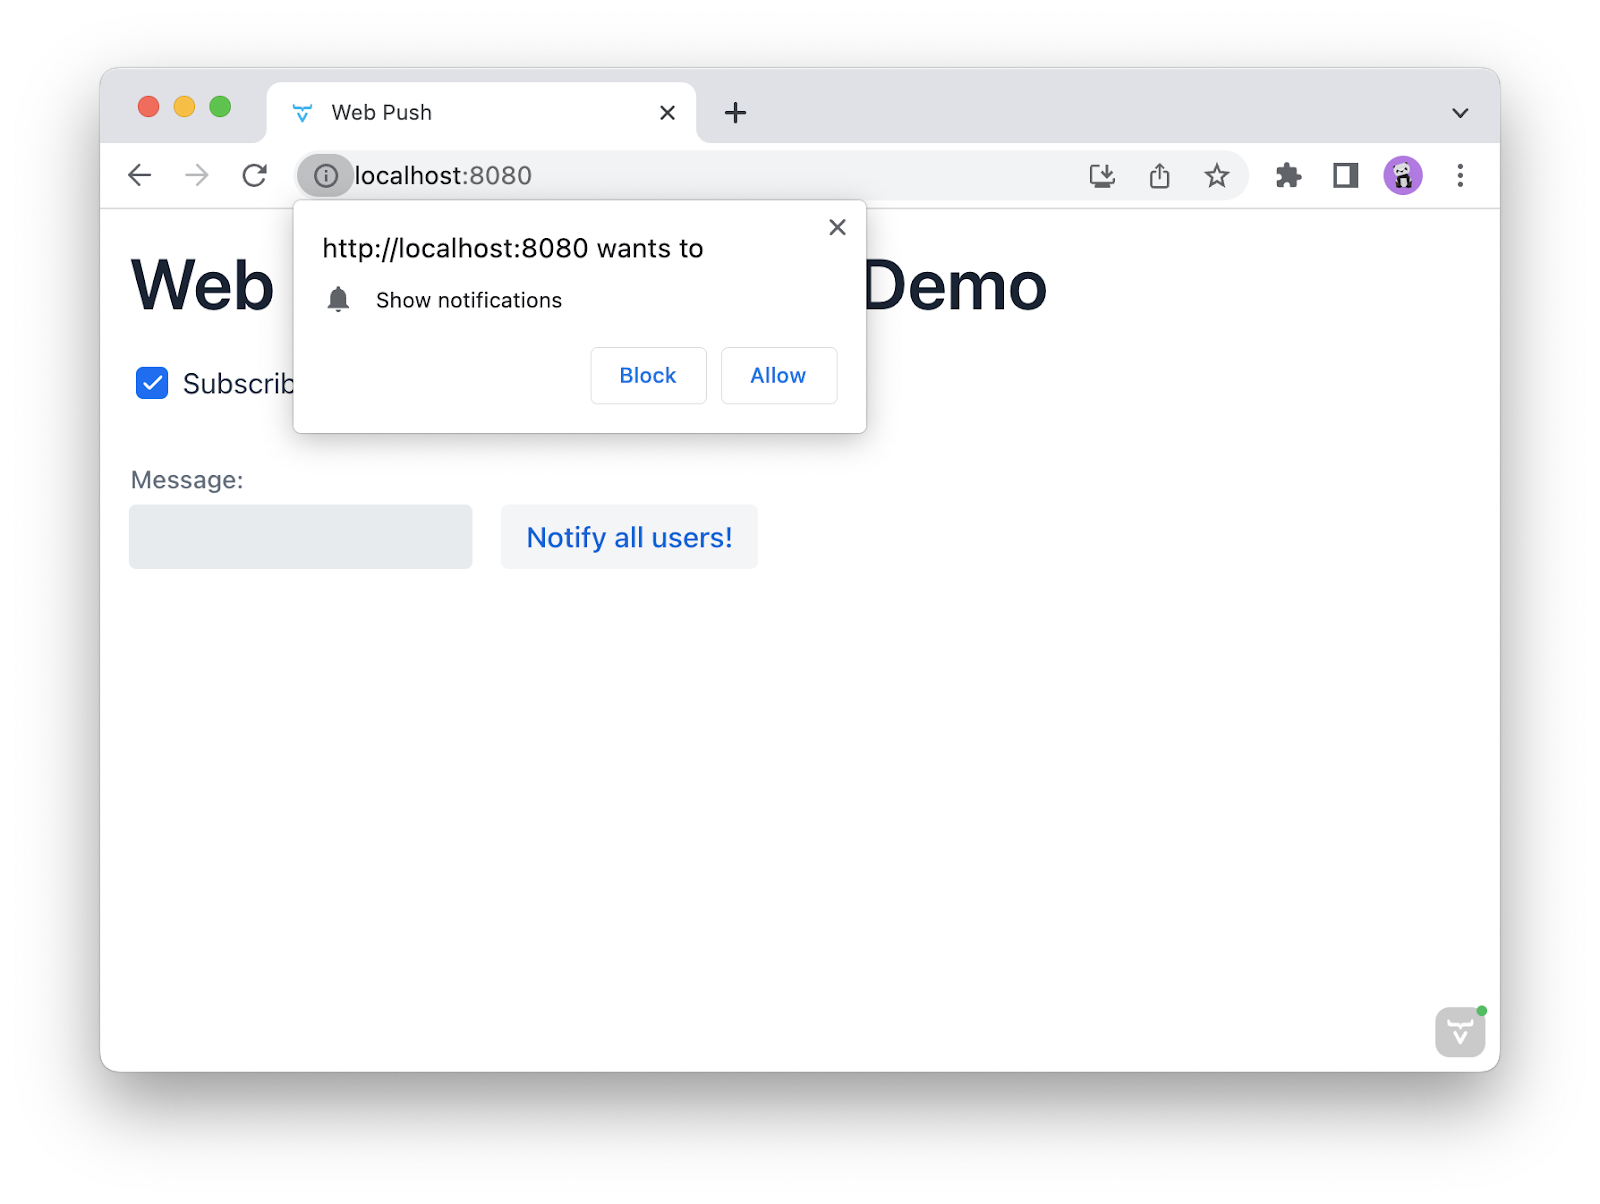
In order to provide a clear UX and set the right expectations for the user, you will create a check box to toggle the notification state. The first time a user checks the checkbox to enable notifications, the browser will prompt them for permission. Because the prompt is triggered by them explicitly asking to turn on push notifications, they will likely agree to it.
The component will have two parts, a client-side TypeScript component and a server-side Java counterpart.
Begin by creating the client-side component, frontend/web-push-toggle.ts:
import {css, html, LitElement, nothing} from 'lit';
import {customElement, property, state} from 'lit/decorators.js';
import '@vaadin/button';
import '@vaadin/checkbox';
import {CheckboxCheckedChangedEvent} from "@vaadin/checkbox";

@customElement('web-push-toggle')
export class WebPushToggle extends LitElement {
  @property({type: String}) caption = 'Subscribe to push notifications';
  @property({type: String}) publicKey = '';
  @state() denied = Notification.permission === 'denied';
  @state() subscribed = false;

  static styles = css`
    :host {
      display: block;
    }
  `;

  render() {
    return html`
        ${this.denied
                ? html` <b> You have blocked notifications. You need to manually enable them in your browser. </b> `
                : nothing}
        <vaadin-checkbox
                ?checked=${this.subscribed}
                label=${this.caption}
                @checked-changed=${this.updateSubscription}
        ></vaadin-checkbox>

    `;
  }

  first = true;
  updateSubscription(e: CheckboxCheckedChangedEvent){

    // The checkbox fires an event on initialization, ignore it.
    if(this.first){
      this.first = false;
      return;
    }

    // The checkbox value is set on initialization based on the service worker subscription.
    // Don't re-subscribe if we're already subscribed.
    if(e.detail.value === this.subscribed) {
      return;
    }
    if(e.detail.value){
      this.subscribe();
    } else {
      this.unsubscribe();
    }
  }

  async connectedCallback() {
    super.connectedCallback();
    const registration = await navigator.serviceWorker.getRegistration();
    this.subscribed = !!(await registration?.pushManager.getSubscription());
  }

  async subscribe() {
    const notificationPermission = await Notification.requestPermission();

    if (notificationPermission === 'granted') {
      const registration = await navigator.serviceWorker.getRegistration();
      const subscription = await registration?.pushManager.subscribe({
        userVisibleOnly: true,
        applicationServerKey: this.urlB64ToUint8Array(this.publicKey),
      });

      if (subscription) {
        this.subscribed = true;
        console.log(subscription);
        console.log(JSON.parse(JSON.stringify(subscription)));
        this.dispatchEvent(new CustomEvent('web-push-subscribed', {
          bubbles: true,
          composed: true,
          // Serialize keys uint8array -> base64
          detail: JSON.parse(JSON.stringify(subscription))
        }));
      }
    } else {
      this.denied = true;
    }
  }

  async unsubscribe() {
    const registration = await navigator.serviceWorker.getRegistration();
    const subscription = await registration?.pushManager.getSubscription();
    if (subscription) {
      await subscription.unsubscribe();

      this.dispatchEvent(new CustomEvent('web-push-unsubscribed', {
        bubbles: true,
        composed: true,
        // Serialize keys uint8array -> base64
        detail: JSON.parse(JSON.stringify(subscription))
      }));

      this.subscribed = false;
    }
  }

  private urlB64ToUint8Array(base64String: string) {
    const padding = '='.repeat((4 - (base64String.length % 4)) % 4);
    const base64 = (base64String + padding).replace(/\-/g, '+').replace(/_/g, '/');
    const rawData = window.atob(base64);
    const outputArray = new Uint8Array(rawData.length);
    for (let i = 0; i < rawData.length; ++i) {
      outputArray[i] = rawData.charCodeAt(i);
    }
    return outputArray;
  }
}
- The component displays a checkbox for toggling notifications on/off by default.
- If a user has expressly denied push notifications, it will show a text informing them of that and how to re-enable them.
- The component handles subscribing and unsubscribing to push notifications through the service worker and dispatching events upon completion.
Next, create the server-side counterpart of the component, WebPushToggle.java:
@Tag("web-push-toggle")
@JsModule("./web-push-toggle.ts")
public class WebPushToggle extends Component {

    public WebPushToggle(String publicKey) {
        setPublicKey(publicKey);
    }

    public void setPublicKey(String publicKey) {
        getElement().setProperty("publicKey", publicKey);
    }

    public void setCaption(String caption) {
        getElement().setProperty("caption", caption);
    }


    // Events

    public static class WebPushSubscriptionEvent extends ComponentEvent<WebPushToggle> {
        private final Subscription subscription;

        public WebPushSubscriptionEvent(WebPushToggle source,
                                        boolean fromClient,
                                        Subscription subscription) {
            super(source, fromClient);
            this.subscription = subscription;
        }

        public Subscription getSubscription() {
            return subscription;
        }
    }

    @DomEvent("web-push-subscribed")
    public static class SubscribeEvent extends WebPushSubscriptionEvent {
        public SubscribeEvent(
                WebPushToggle source,
                boolean fromClient,
                @EventData("event.detail.endpoint") String endpoint,
                @EventData("event.detail.keys.auth") String auth,
                @EventData("event.detail.keys.p256dh") String p256dh) {
            super(source, fromClient, new Subscription(endpoint, new Subscription.Keys(p256dh, auth)));
        }
    }

    @DomEvent("web-push-unsubscribed")
    public static class UnsubscribeEvent extends WebPushSubscriptionEvent {

        public UnsubscribeEvent(
                WebPushToggle source,
                boolean fromClient,
                @EventData("event.detail.endpoint") String endpoint,
                @EventData("event.detail.keys.auth") String auth,
                @EventData("event.detail.keys.p256dh") String p256dh) {

            super(source, fromClient, new Subscription(endpoint, new Subscription.Keys(p256dh, auth)));
        }
    }

    public Registration addSubscribeListener(ComponentEventListener<SubscribeEvent> listener) {
        return addListener(SubscribeEvent.class, listener);
    }

    public Registration addUnsubscribeListener(ComponentEventListener<UnsubscribeEvent> listener) {
        return addListener(UnsubscribeEvent.class, listener);
    }
}
The component provides Java listeners for the client-side events and sends the public key to the client.
Subscribe to and send messages
You now have all the needed pieces to subscribe to push notifications and send messages to users. Here is an example of handling subscriptions and sending messages:
@PageTitle("Web Push")
@Route(value = "push")
public class PushView extends VerticalLayout {

    public PushView(WebPushService webPushService) {

        var toggle = new WebPushToggle(webPushService.getPublicKey());
        var messageInput = new TextField("Message:");
        var sendButton = new Button("Notify all users!");
        var messageLayout = new HorizontalLayout(messageInput, sendButton);
        messageLayout.setDefaultVerticalComponentAlignment(Alignment.BASELINE);

        add(
            new H1("Web Push Notification Demo"),
            toggle,
            messageLayout
        );

        toggle.addSubscribeListener(e -> {
            webPushService.subscribe(e.getSubscription());
        });
        toggle.addUnsubscribeListener(e -> {
            webPushService.unsubscribe(e.getSubscription());
        });

        sendButton.addClickListener(e -> webPushService.notifyAll("Message from user", messageInput.getValue()));
    }
}
The view:
- Creates a new
WebPushToggle, passing in the public key from the service. - Adds listeners to both subscribe and unsubscribe events, passing them to the
WebPushService - Provides a text field for writing a message and a button that calls the
WebPushServiceto send the message to all subscribed users.
Run the application and navigate to http://localhost:8080/push to try it out in action.
Completed project source code
You can find the source code for the completed project on GitHub.