
The Apache Causeway project implements the naked objects pattern for Java. In the naked object pattern, the UI is essentially auto-generated based on the domain objects. With only the domain model, and typically some UI hints declared on the domain model, you get a fully functioning UI “for free.” This gives you a nice boost on the developer productivity, in case you don’t have strict requirements on the UI.
While naked object pattern works great for admin interfaces and prototyping, auto-generated UIs have their limits. If the auto-generated UI by Causeway is not flexible enough for some use cases, you can plug in custom UIs for the backend, for example, using Vaadin. It is possible to expose the objects via REST or GraphQL and build a view with e.g. React, but as you are most likely a Java developer, why not do it in pure Java instead? Causeway builds on Spring Boot, so dropping in Vaadin there is a breeze.
In this tutorial, we’ll continue from the PetClinic example (check out the last tag of the version 3 tutorial) and expose a trivial Vaadin UI for pet owners to check their visits.
Vaadin dependencies & configuration
We’ll add a simple search UI directly to the web app module. This way, there will still be only a single artifact to deploy. The vaadin-spring-boot-starter is a good basis for us as Apache Causeway also uses Spring boot. One could define the version directly in the dependency, but to prepare for possible UI modules or even separately deployable Vaadin UIs, I went ahead and added the Vaadin BOM to the parent project and defined the Vaadin version as a property (for the plugin we will add later).
Add the vaadin.version property to the top-level pom.xml:
<properties>
   <!-- other properties here —>
   <vaadin.version>24.3.12</vaadin.version>
</properties>
Next, add the vaadin-bom to the same file:
<dependency>
   <groupId>com.vaadin</groupId>
   <artifactId>vaadin-bom</artifactId>
   <version>${vaadin.version}</version>
   <type>pom</type>
   <scope>import</scope>
</dependency>
Then, add the actual dependency to the simple-jpa-web-app/pom.xml:
<dependency>
   <groupId>com.vaadin</groupId>
   <artifactId>vaadin-spring-boot-starter</artifactId>
</dependency>
As we don’t want to make Vaadin “hijack” the whole UI, we’ll map our Vaadin views to /vaadin with the following configuration to the application.properties (or similar to application.yaml):
vaadin.urlMapping=/vaadin/*
This is all we need to get started. Adding a view like below to the web app module will make it accessible under /vaadin:
package domainapp.webapp.custom;

import com.vaadin.flow.component.orderedlayout.VerticalLayout;
import com.vaadin.flow.router.Route;

@Route("") // maps to root of Vaadin servlet
public class AppointmentCheckerView extends VerticalLayout {
   public AppointmentCheckerView() {
       add("It works!?");
   }
}
Accessing the data
To keep the code clean, it is best to create a separate API for the public checker view we are building. In it we can use the existing Causeway infrastructure. We will not force the visitors to log into this view, so we’ll “impersonate” all requests with one admin user (“sven” in this app) in the same way as the REST endpoint is built in the same example app. The public API allows the user (technically the Vaadin UI) to search for all appointments for a given pet owner and their pet name.
package domainapp.webapp.custom;

import domainapp.modules.petowner.dom.petowner.PetOwner;
import domainapp.modules.petowner.dom.petowner.PetOwners;
import domainapp.modules.visit.contributions.PetOwner_visits;
import domainapp.modules.visit.dom.visit.Visit;
import jakarta.inject.Inject;
import java.util.Collections;
import java.util.List;
import java.util.Optional;
import java.util.concurrent.Callable;
import lombok.RequiredArgsConstructor;
import org.apache.causeway.applib.services.iactnlayer.InteractionContext;
import org.apache.causeway.applib.services.iactnlayer.InteractionService;
import org.apache.causeway.applib.services.user.UserMemento;
import org.apache.causeway.applib.services.wrapper.WrapperFactory;
import org.apache.causeway.applib.services.xactn.TransactionalProcessor;
import org.springframework.stereotype.Service;

@Service
@RequiredArgsConstructor(onConstructor_ = {
   @Inject})
public class PublicAppointmentService {

   private final InteractionService interactionService;
   private final TransactionalProcessor transactionalProcessor;
   private final WrapperFactory wrapperFactory;
   private final PetOwners petOwners;

   public List<Visit> findByOwnerAndPet(String ownerName, String petName) {
       Optional<List<Visit>> visits = callAsSven(() -> {
           PetOwner petOwner = petOwners.findByNameExact(ownerName);
           if(petOwner != null) {
               PetOwner_visits petOwnerVisits = wrapperFactory.wrapMixin(PetOwner_visits.class, petOwner);
               return petOwnerVisits.coll().stream()
                       .filter(v -> v.getPet().getName().equals(petName))
                       .toList();
           }
           return null;
       });
       return visits.orElse(Collections.emptyList());
   }

   private <T> Optional<T> callAsSven(final Callable<T> callable) {
       return interactionService.call(

InteractionContext.ofUserWithSystemDefaults(UserMemento.ofName("sven")),
               () -> transactionalProcessor.callWithinCurrentTransactionElseCreateNew(callable)
       )
               .ifFailureFail()
               .getValue();
   }
}
The Appointment search UI
As Causeway runs as a Spring Boot application and we added Vaadin with the Spring Boot starter, our UIs are now Spring managed. To access this new API, we can simply inject it into the constructor of our UI:
public AppointmentCheckerView(PublicAppointmentService service) {
       add("It works!?");
   }
The rest is trivial Vaadin UI code. The example I built only uses pure Java to format the data, simple layouts, and basic text components. In a real-world scenario, you’ll probably use more advanced components and compose the UI logic into multiple classes or sub-modules.
@Route("") // maps to root of Vaadin servlet
public class AppointmentCheckerView extends VerticalLayout {
   TextField name  = new TextField("Your name");
   TextField pet  = new TextField("Pet name");
   Button search = new Button("Search");
   public Div searchResults = new Div();

   public AppointmentCheckerView(PublicAppointmentService publicAppointmentService) {
       add(new H1("Check your appointment"));
       add(new Paragraph("""
           Forgot your appointment time? No worries, as long as you still remember your own name
           and your pet's name, check out your appointments below.
           """));
       var searchForm = new HorizontalLayout(name, pet, search);
       searchForm.setAlignItems(Alignment.END);
       add(searchForm);
       add(searchResults);

       search.addThemeVariants(ButtonVariant.LUMO_PRIMARY);
       search.addClickShortcut(Key.ENTER);

       search.addClickListener(e -> {
           searchResults.removeAll();
           List<Visit> visits = publicAppointmentService.findByOwnerAndPet(name.getValue(), pet.getValue());
           if(visits.isEmpty()) {
               searchResults.add(new H3("No appointments found, check your search terms or call customer service!"));
           } else {
               searchResults.add(new H3("Following appointment times for " + pet.getValue() + " found:"));
               visits.forEach(visit -> {
                   var dateTime = visit.getVisitAt();
                   var p = new Paragraph(DateTimeFormatter.ofLocalizedDate(FormatStyle.FULL).format(dateTime));
                   if(dateTime.isBefore(LocalDateTime.now())) {
                       p.getStyle().setColor("gray");
                   }
                   searchResults.add(p);
               });
           }
       });
   }
}
If you deploy the app with a “dev” Spring Boot profile (so that demo data gets inserted automatically), navigate to http://localhost:8080/vaadin and search with the terms “Jamal Washington” and “Max” you should see something like this:
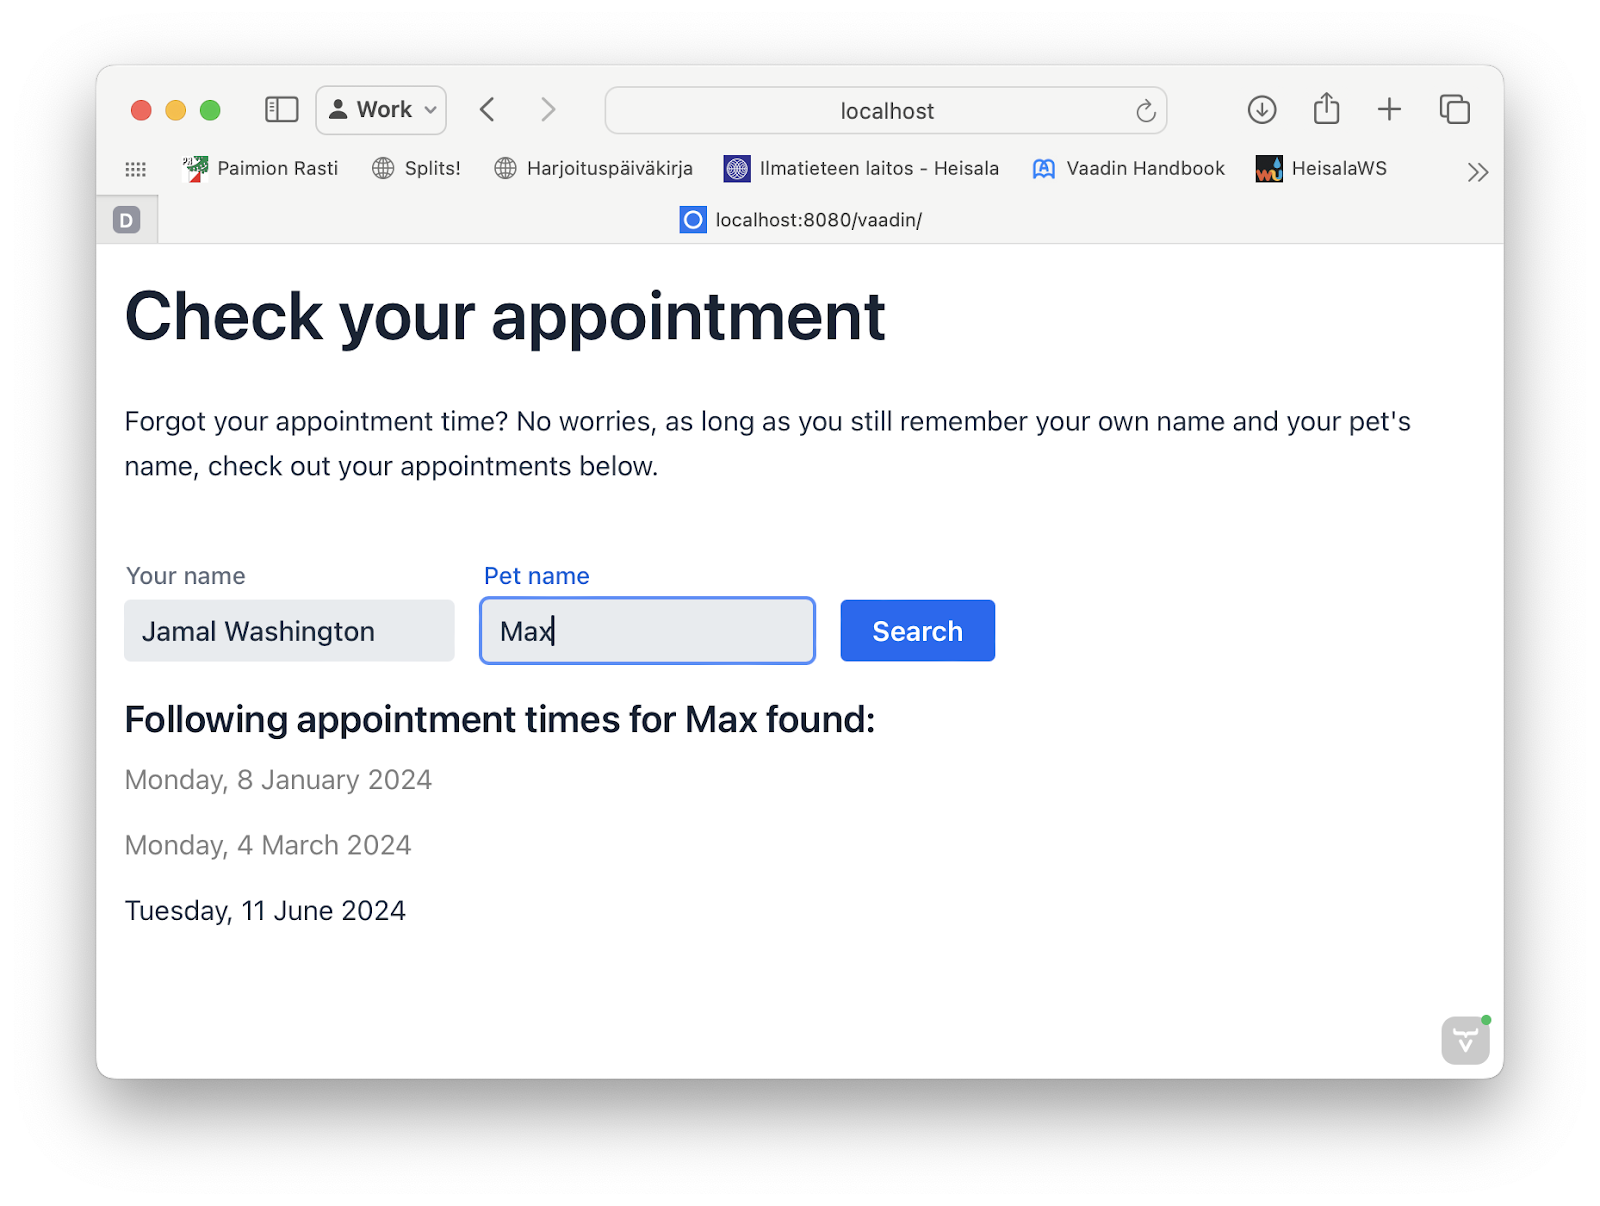
Screenshot of a public Vaadin UI built on top of Apache Causeway petclinic example.
Preparing for production deployment
All good so far, but only if you run the app locally in development mode. For optimized performance and better UX, we should still add the Vaadin Maven plugging to the project so that we can build a proper production bundle. In production mode, Vaadin's “client bundle” gets optimized, and we’ll exclude some dependencies that are not relevant to production deployment. Also, possible custom client-side extensions in Vaadin might require NPM compilation, and you probably don’t want to have npm on your deployment server.
The following Maven profile, added to the webapp/pom.xml file, will help you create a production-ready Vaadin client bundle.
<profile>
   <id>production</id>
   <dependencies>
       <dependency>
           <groupId>com.vaadin</groupId>
           <artifactId>vaadin-core</artifactId>
           <exclusions>
               <exclusion>
                   <groupId>com.vaadin</groupId>
                   <artifactId>vaadin-dev</artifactId>
               </exclusion>
           </exclusions>
       </dependency>
   </dependencies>

   <build>
       <plugins>
           <plugin>
               <groupId>com.vaadin</groupId>
               <artifactId>vaadin-maven-plugin</artifactId>
               <version>${vaadin.version}</version>
               <executions>
                   <execution>
                       <goals>
                           <goal>prepare-frontend</goal>
                           <goal>build-frontend</goal>
                       </goals>
                       <phase>compile</phase>
                   </execution>
               </executions>
               <configuration>

                   <!-- To always force an optimized production bundle build set this configuration to 'true' -->
                   <!-- To possibly use the pre-compiled production bundle remove or set to 'false' -->

                   <forceProductionBuild>true</forceProductionBuild>

                   <!-- To have a reproducible build by running 'npm ci' -->

                   <ciBuild>true</ciBuild>
               </configuration>
           </plugin>
       </plugins>
   </build>
</profile>
You can check more about Vaadin production deployment via the documentation.
If you now run the web app, for example, via the command line mvn spring-boot:run -Pproduction, the tiny }> icon marking Vaadin development mode should be gone, and the server will never need to run npm during the deployment.
Check out the full example
If you want to check out the full example, the source code with the custom Vaadin UI is available on GitHub. Note that only the custom visit checker UI is built with Vaadin in this tutorial. The generic UI is the bread and butter of Causeway. That auto-generated UI contains all the features and is currently generated by Wicket (we’ll see about that in the future ;-) ).