
As you may already know, with Vaadin you don’t have to worry about HTML. However, this doesn’t mean that Vaadin would prevent you from using it. There might be cases in which you want to design a layout using plain HTML and add Vaadin components into it. Moreover, you might want to add functionality using some already developed JavaScript libraries.
While this is possible with the CustomLayout component, you might want to dynamically generate the HTML template by using a template engine such as Velocity or FreeMarker. This is the case if you want to generate a simple HTML table, for example. You might need to generate an HTML table with a number of rows that is determined at runtime. Most of the time you would use the Grid component, of course, but should the case arise, this article will show you how to integrate Vaadin and FreeMarker to dynamically generate HTML layouts.
FreeMarker is a template engine often used to generate dynamic HTML web pages. The basic idea of a template engine is to separate how to present data and what data to present. The “how to present data” part is done through a template, which in the case of FreeMarker is written in the FreeMarker Template Language. The “what data to present” part can be done in Java by connecting to backend services or by performing any other kind of business logic. The process is depicted in the following figure:

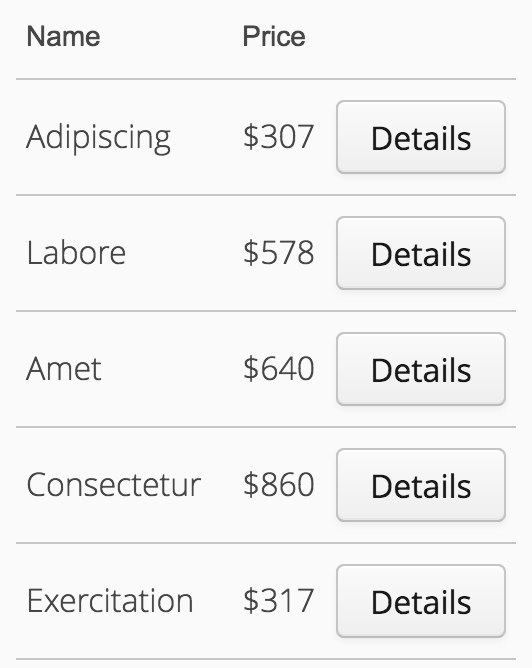
We can throw in CustomLayout to obtain a Vaadin component based on a FreeMarker template as shown in the following figure:

Let’s see how this can be done in code. Suppose we want to render the following HTML table that shows products:
Related reading that might interest you
Download our free guide to the Future of Web Apps
Suppose the products can be retrieved from a backend service as follows:
List<Product> products = service.findAll();
Where Product is a Java bean encapsulating data about a product:
public class Product {

    private Long id;
    private String name;
    private Double price;

    ... getters and setters ...
}
We can start with a FreeMarker template like the following:
<table id="products" class="products">
    <tr>
        <th>Name</th>
        <th>Price</th>
    </tr>
    <#list products as product>
        <tr>
            <td class="name">${product.name?capitalize}</td>
            <td>$${product.price}</td>
            <td><div location="button-${product.id}" /></td>
        </tr>
    </#list>
</table>
This FreeMarker template expects a collection of products in the data model. For each product in the collection, we create a table row showing columns for the name and the price. Because we have a getter for each property in the Product class, FreeMarker can access the values of these properties while processing the template. We are also taking advantage of the available built-ins in FreeMarker to capitalize the first letter in the name of the product. Consult the FreeMarker documentation to learn more about the built-ins and the FreeMarker Template Language.
Notice that we are also adding a column with an empty div element:
<div location="button-${product.id}" /> This div has the location attribute that CustomLayout can use to add Vaadin components into the template. The value of the location attribute includes the id of the product. This is useful to differentiate locations between rows. For example, we know that “button-7” is the location in the template for the button in the row showing the product with id 7.
With the template in place, we can use FreeMarker to process the template and pass the output as a template for CustomLayout. One way of implementing this is by extending the CustomLayout class:
public class ProductTable extends CustomLayout {

    private static Configuration configuration =
            new Configuration(Configuration.VERSION_2_3_23);

    static {
        configuration.setClassForTemplateLoading(
                ProductTable.class, "/");
    }

    private List<Product> products;

    public ProductTable(List<Product> products) {
        this.products = products;
    }

    @Override
    public void attach() {
        try {
            super.attach();
            Template template = configuration.getTemplate(
                    "products-table.html");
            StringWriter writer = new StringWriter();
            template.process(this, writer);
            String html = writer.toString();
            setTemplateContents(html);

        } catch (IOException | TemplateException e) {
            throw new RuntimeException(e);
        }
    }

    public List<Product> getProducts() {
        return products;
    }

}
Notice that we used products-table.html as the name for the template file and passed the CustomLayout instance itself as an object model (this). We provided the getProducts method to return the list of products passed in the constructor so that FreeMarker can access the products collection. You could use any other class as the object model, as long as you provide the getProducts method.
The last thing we need to do is to add the buttons into the table. This is straightforward with CustomLayout. We can do it by modifying the constructor to the following:
public class ProductTable extends CustomLayout {

    ...

    public ProductTable(List<Product> products) {
        this.products = products;

        for (Product product : products) {
            Button button = new Button("Details");
            button.addClickListener(e -> Notification.show(
                    product.getName() + " clicked"));
            addComponent(button, "button-" + product.getId());
        }
    }

    ...

}
This implementation iterates over the products and creates a Button that shows a notification when clicked.
Adding CSS and JavaScript to the template is also possible with CustomLayout. For example, if you want to add some client-side pagination and styles for the products table, you can use the @JavaScript and @StyleSheet annotations as follows:
@JavaScript({"vaadin://jquery-1.12.3.min.js",
             "vaadin://jquery-ui.js", "vaadin://paging.js"})
@StyleSheet({"vaadin://products-table.css"})
public class ProductTable extends CustomLayout {
    ...
}
With the annotations in place, you can add a script into the template to init the JavaScript paging functionality:
<script>
    window.$("#products").paging({limit:9});
</script>
Notice that currently you need to use the window context in your scripts.
I’ve implemented and packaged all the logic required to integrate FreeMarker and CustomLayout in a FreemarkerLayout class and published it as a Vaadin add-on so that you can easily use FreeMarker templates in Vaadin applications. With the add-on you can extend or use the FreemarkerLayout and focus on creating the template and adding the Vaadin components to it. For example, you can use the FreemarkerLayout class to create a “details view” for a product:
FreemarkerLayout productLayout = new FreemarkerLayout();
productLayout.setTemplateFileName("product-details.html");
productLayout.setDataModel(product);
productLayout.addComponent(new Image(null, new ClassResource(product.getImage())), "image");
The product-details.html template can look like the following:
<div class="product">
    <div class="left">
        <div class="price">$${price}</div>
        <div class="image"><span location="image"></span></div>
        <div class="name">${name?capitalize}</div>
    </div>
    <div class="right">
        <div class="description">${description?cap_first}</div>
    </div>
</div>
See the complete example here.
You can use the approach explained in this tutorial to use any other template engine as well. Moreover, you could publish it as your own add-on!
Learn more about Vaadin
Discover the easiest way to build web apps in Java
Related reading that might interest you
Download our free guide to the Future of Web Apps