In this second tutorial in a series about building LitElement apps, we cover templating, events, and properties in a LitElement component.
If you didn’t complete the first part, you can check out the source as a starting point:
Defining properties
Before we begin building the UI, we define the data model for the view. We’ll do this via LitElement properties. LitElement observes these properties and triggers an update of the component if any of them change.
views/todo-view.js
const VisibilityFilters = { (1)
  SHOW_ALL: 'All',
  SHOW_ACTIVE: 'Active',
  SHOW_COMPLETED: 'Completed'
};

class TodoView extends LitElement {

  static get properties() { (2)
    return {
      todos: { type: Array },
      filter: { type: String },
      task: { type: String }
    };
  }

  constructor() { (3)
    super();
    this.todos = [];
    this.filter = VisibilityFilters.SHOW_ALL;
    this.task = '';
  }

  render() {
    ...
  }
}-
Define an object with the different filter options
-
Define a static getter for
propertiesthat returns an object that defines the property names and types. -
Create a constructor and set reasonable default values for the properties.
Installing UI components
We are going to use a text field, button and a few other UI components from the open source Vaadin component set to build the view. Begin by installing them through npm and importing them in the todo view JavaScript file.
$ npm install --save @vaadin/vaadin-text-field @vaadin/vaadin-button @vaadin/vaadin-checkbox @vaadin/vaadin-radio-buttonviews/todo-view.js
import '@vaadin/vaadin-text-field';
import '@vaadin/vaadin-button';
import '@vaadin/vaadin-checkbox';
import '@vaadin/vaadin-radio-button/vaadin-radio-button';
import '@vaadin/vaadin-radio-button/vaadin-radio-group';
Including the component registers them in the browser’s CustomElements registry the same way as we did with TodoView.
Writing a template with lit-html
lit-html uses JavaScript template strings as it’s format. That means you can use plain JavaScript in your templates. Also, it adds helpers for setting properties, boolean attributes and for listening to events.
|
|
Set an attribute (string) |
|
|
Set a property (object) |
|
|
Toggle a boolean attribute |
|
|
Bind an event |
We’ll write the template inside the html`` template in the render() function. The tutorial omits the surrounding JavaScript method in the templating section for clarity.
views/todo-view.js
render() {
  return html`
    <p> Template goes here! </p>
  `;
}|
Tip
|
There is a VS Code plugin for lit-html which gives you HTML syntax highlighting and code completion in lit-html templates. You can download it here. The Prettier code formatter also supports lit-html syntax. |
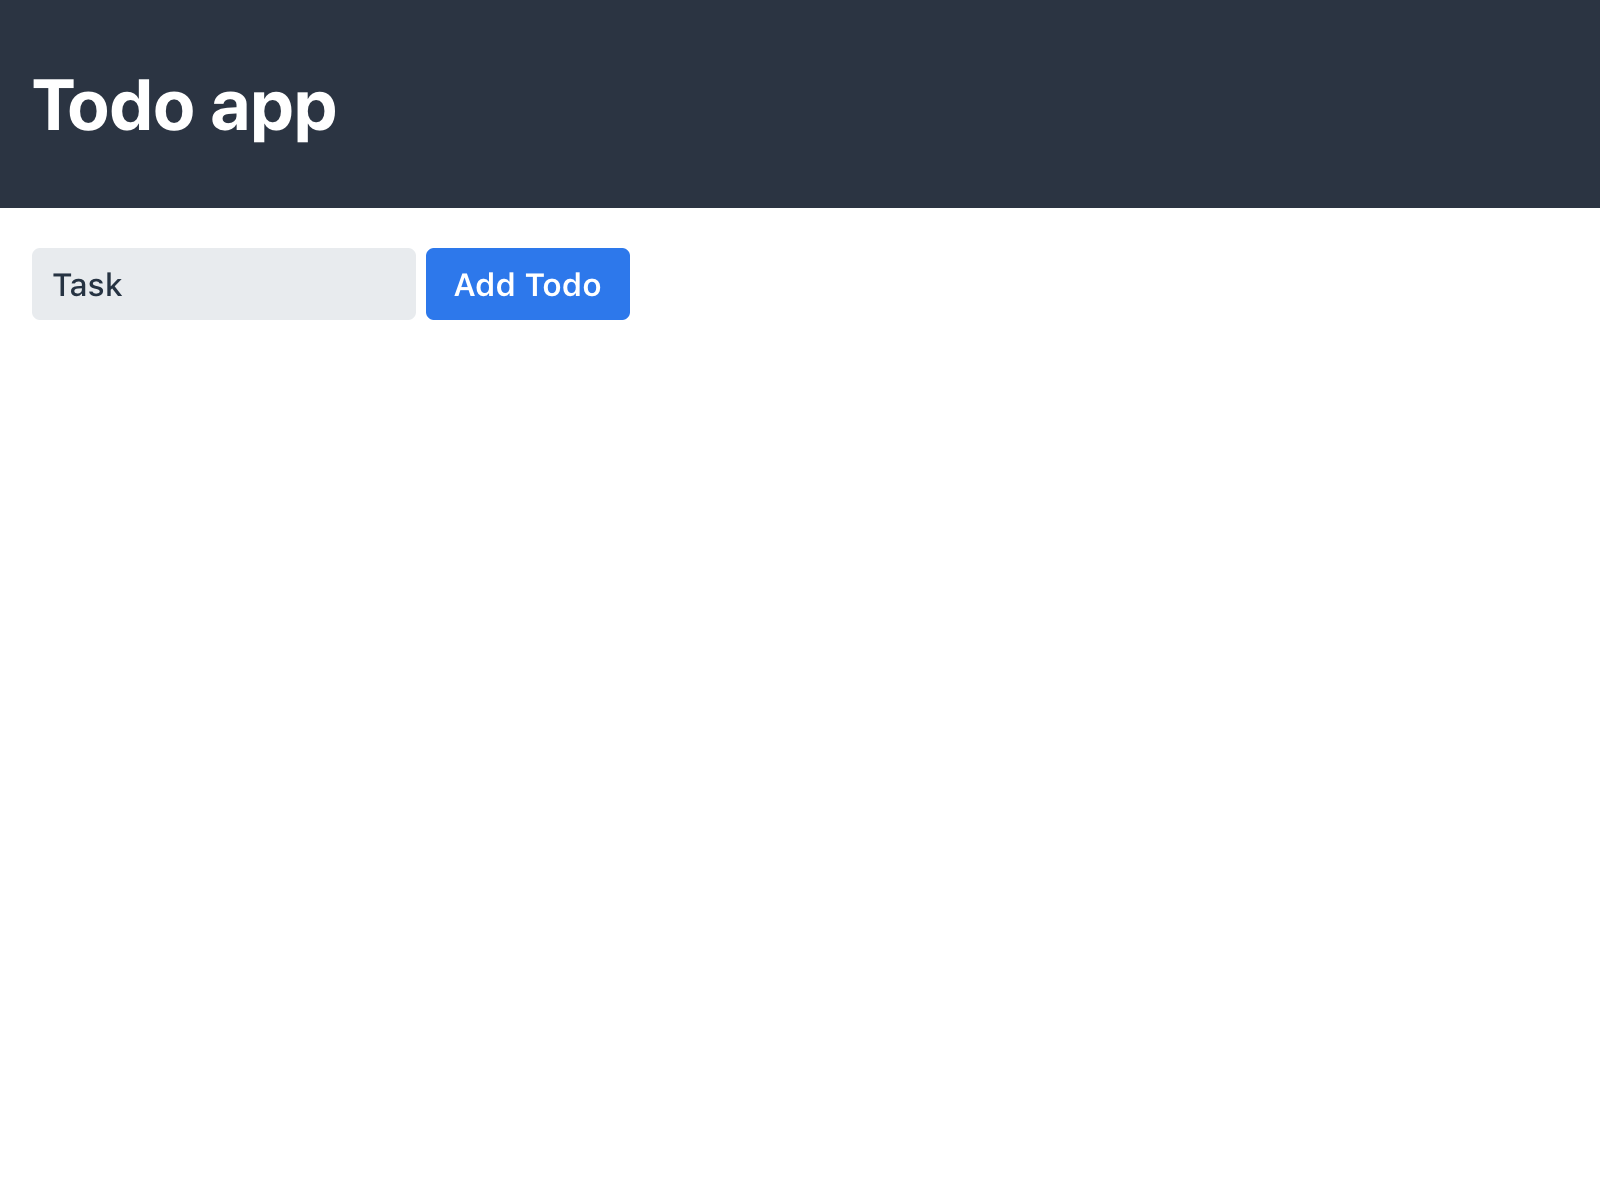
Adding todos
The first part of the template is the input field for adding new todos.
<div class="input-layout"
  @keyup="${this.shortcutListener}"> (1)

  <vaadin-text-field
    placeholder="Task"
    value="${this.task}" (2)
    @change="${this.updateTask}"> (3)
  </vaadin-text-field>

  <vaadin-button
    theme="primary"
    @click="${this.addTodo}"> (4)
      Add Todo
  </vaadin-button>
</div>-
Listen for
keyupevents on the surrounding<div>so we can add todos with Enter. -
Bind the value of the text field to the task property.
-
Listen for the
changeevent on the text field and callthis.updateTask -
Bind the button click event to
this.addTodo
Then, implement the methods on TodoView:
views/todo-view.js
class TodoView extends LitElement {
  static get properties() {...}
  constructor() {...}
  render() {...}

  addTodo() {
    if (this.task) {
      this.todos = [...this.todos, { (1)
          task: this.task,
          complete: false
      }];
      this.task = ''; (2)
    }
  }

  shortcutListener(e) {
    if (e.key === 'Enter') { (3)
      this.addTodo();
    }
  }

  updateTask(e) {
    this.task = e.target.value; (4)
  }
}-
Create a new array with the new todo object
-
Clear the task property
-
If the
keyupevent originates from theEnterkey, callthis.addTodo() -
Update the
taskproperty to the value of the text field on change events
If you run the app, you should see the input layout and be able to input new tasks (although you won’t see them quite yet).
Listing todos
Now that we can add todos, the next task is to display them. Loop through the todos array and produce a template for each todo.
Under the input layout, add the following:
<div class="todos-list">
  ${this.todos.map(
      todo => html` (1)
        <div class="todo-item">
          <vaadin-checkbox
            ?checked="${todo.complete}" (2)
            @change="${ e => this.updateTodoStatus(todo, e.target.checked)}"> (3)
            ${todo.task}
          </vaadin-checkbox>
        </div>
      `
    )
  }
</div>-
Use the
.map()operation to map each todo object to a lit-html template -
Bind the checked boolean attribute to the complete property on the todo object
-
Call
this.updateTodoStatuswith the todo and a boolean for status onchangeevents
Then, implement updateTodoStatus
views/todo-view.js
class TodoView extends LitElement {
  static get properties() {...}
  constructor() {...}
  render() {...}
  shortcutListener(e) {...}
  updateTask(e) {...}
  addTodo() {...}

  updateTodoStatus(updatedTodo, complete) {
    this.todos = this.todos.map(todo =>
      updatedTodo === todo ? { ...updatedTodo, complete } : todo
    );
  }
}|
Note
|
LitElement only observes changes to objects and arrays, not changes to their contents. That’s why we always create a new array of todos with the changes. Using immutable data structures also makes it easier for us to start using Redux for state management in the next part. |
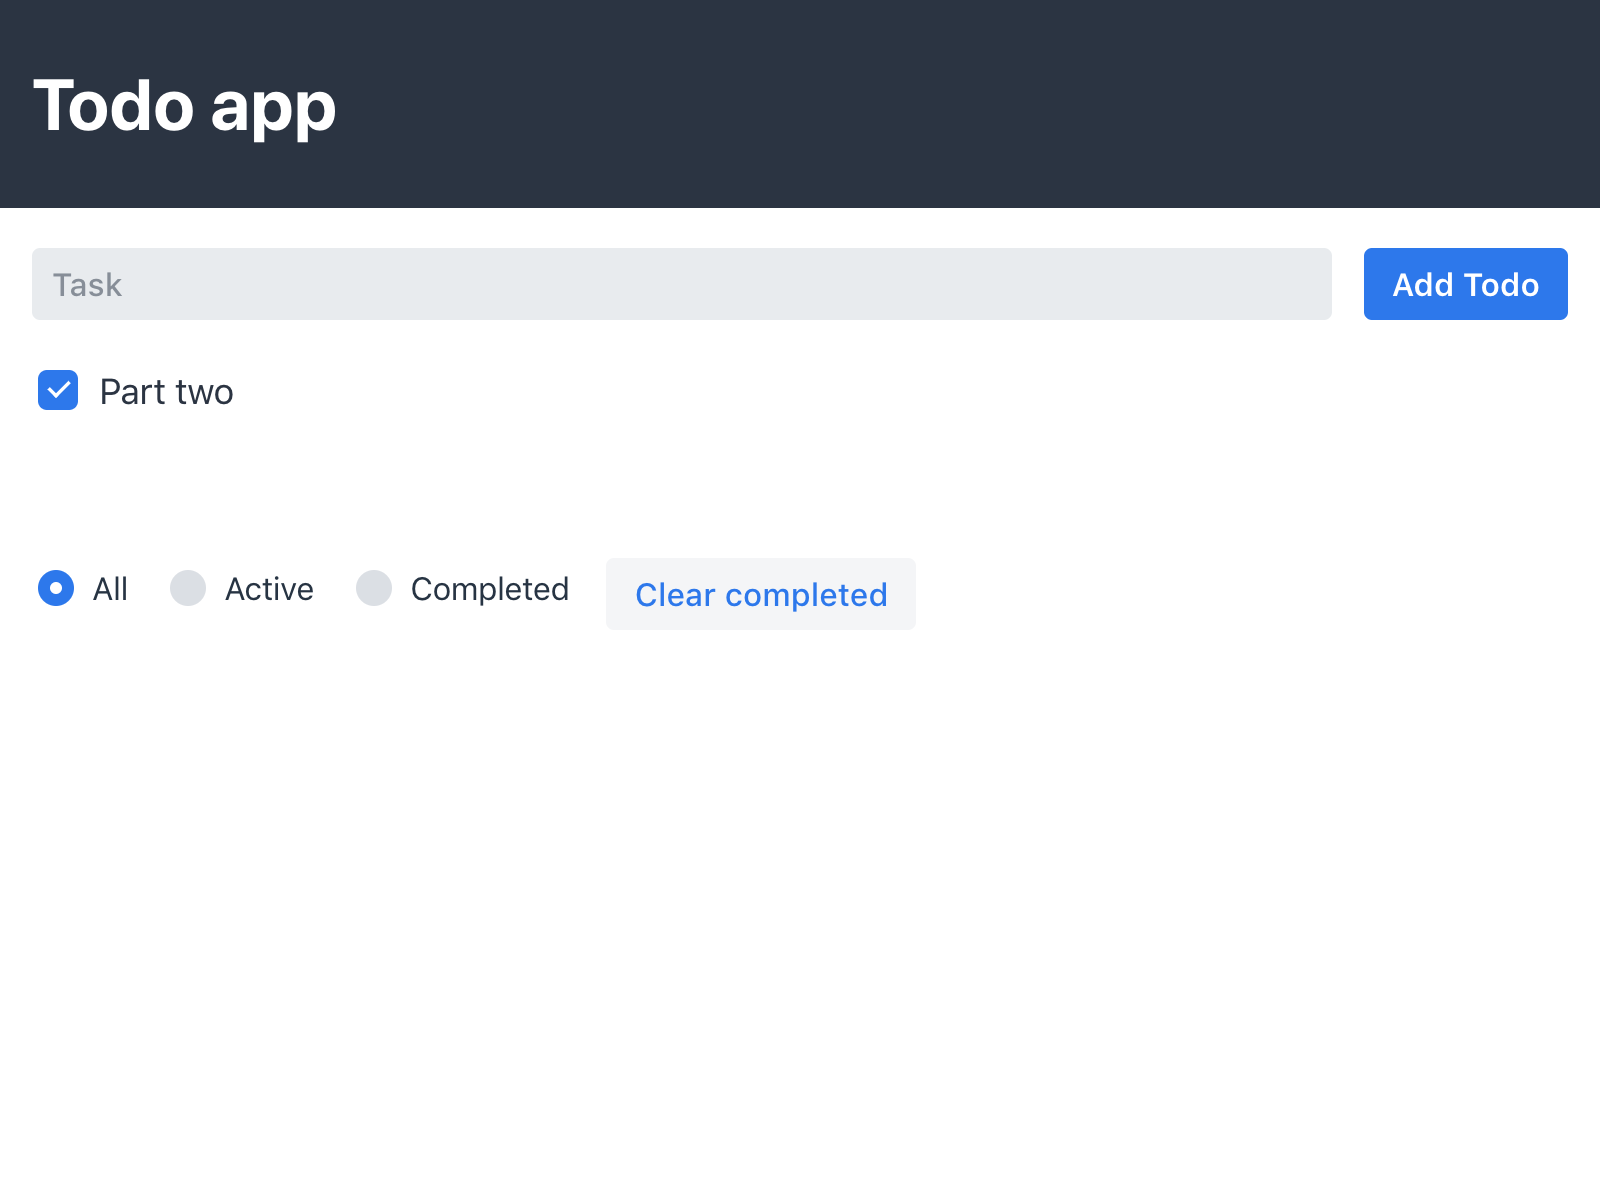
Filtering todos
The last piece of functionality we add in this part of the tutorial is filtering and clearing todos.
Add the following to the template:
<vaadin-radio-group
  class="visibility-filters"
  value="${this.filter}"
  @value-changed="${this.filterChanged}"> (1)

  ${Object.values(VisibilityFilters).map( (2)
    filter => html`
      <vaadin-radio-button value="${filter}">
        ${filter}
      </vaadin-radio-button>`
  )}
</vaadin-radio-group>
<vaadin-button
  @click="${this.clearCompleted}"> (3)
    Clear completed
</vaadin-button>-
Bind the value to the
filterproperty and thevalue-changedevent to thethis.filterChangedmethod -
Loop over the filter values and create a radio button for each
-
Hook up the clear button click event to
this.clearCopleted
Then add the JavaScript methods:
views/todo-view.js
class TodoView extends LitElement {
  static get properties() {...}
  constructor() {...}
  render() {...}
  shortcutListener(e) {...}
  updateTask(e) {...}
  addTodo() {...}
  updateTodoStatus(updatedTodo, complete) {...}

  filterChanged(e) { (1)
    this.filter = e.target.value;
  }

  clearCompleted() { (2)
    this.todos = this.todos.filter(todo => !todo.complete);
  }

  applyFilter(todos) { (3)
    switch (this.filter) {
      case VisibilityFilters.SHOW_ACTIVE:
        return todos.filter(todo => !todo.complete);
      case VisibilityFilters.SHOW_COMPLETED:
        return todos.filter(todo => todo.complete);
      default:
        return todos;
    }
  }
}-
Update the
filterproperty based on the event value. -
Update the
todosproperty to a new array only containing the non-completed todos. -
Create a method that returns only the todos that pass the filter criteria.
Finally, update the template to use the applyFilter method to only show the filtered todos:
<div class="todos-list">
-  ${this.todos.map(
+  ${this.applyFilter(this.todos).map(
      todo => html`
Adding CSS styles
Finally, let’s add a few finishing touches with CSS.
At the top of your template, add the following <style> tag:
<style>
  todo-view { (1)
    display: block;
    max-width: 800px;
    margin: 0 auto;
  }
  todo-view .input-layout {
    width: 100%;
    display: flex;
  }
  todo-view .input-layout vaadin-text-field {
    flex: 1;
    margin-right: var(--spacing); (2)
  }
  todo-view .todos-list {
    margin-top: var(--spacing);
  }
  todo-view .visibility-filters {
    margin-top: calc(4 * var(--spacing));
  }
</style>-
Scope styles to this view.
-
Using a CSS custom property defined in
styles.css.
By default, the content of a LitElement component is shielded from external CSS by a Shadow DOM. This is a feature that is valuable when building reusable leaf-node components. When building an application, it is often best to not create a shadow root to allow application-level styling.
|
Tip
|
Mattia Astorino wrote a good blog post explaining when to use Shadow DOM and when to avoid it. |
At the end of TodoView, add the following method to tell LitElement to render directly into the light DOM.
views/todo-view.js
createRenderRoot() {
    return this;
}
Run the app, and you should see the CSS styles applied.