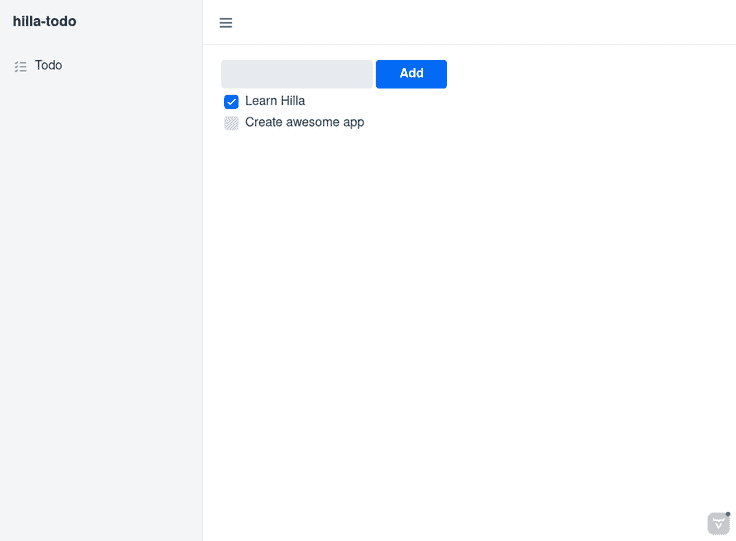
What You Will Build
In this guide, we build a full-stack To-Do app with Spring Boot and React using the Hilla framework. You can find the complete source code for this tutorial in GitHub: https://github.com/tarekoraby/hilla-todo.
What You Will Need
- 10 minutes
- Java 17 or newer
- Node 18.0 or newer
Step 1: Import a Starter Project
Click here to download a project starter. Unpack the downloaded zip into a folder on your computer, and import the project in the IDE of your choice. The pom.xml of the starter project comes with all the dependencies necessary to complete this tutorial.
Step 2: Create a Spring Boot Backend
Begin by setting up the data model and services for accessing the database. You can do this in two steps:
- Define an entity.
- Create a repository for accessing the database.
This tutorial uses an in-memory H2 database and JPA for persistence. The starter you downloaded already includes the needed dependencies in the pom.xml file.
Define an Entity
Define a JPA entity class for the data model, by creating a new file, Todo.java, in src/main/java/com/example/application with the following content:
package com.example.application;

import jakarta.persistence.Entity;
import jakarta.persistence.GeneratedValue;
import jakarta.persistence.Id;
import jakarta.validation.constraints.NotBlank;

@Entity
public class Todo {

  @Id
  @GeneratedValue
  private Integer id;

  private boolean done = false;

  @NotBlank
  private String task;

  public Todo() {}

  public Todo(String task) {
    this.task = task;
  }

  public Integer getId() {
    return id;
  }

  public void setId(Integer id) {
    this.id = id;
  }

  public boolean isDone() {
    return done;
  }

  public void setDone(boolean done) {
    this.done = done;
  }

  public String getTask() {
    return task;
  }

  public void setTask(String task) {
    this.task = task;
  }
}
Notice that we added @NotBlank Java bean validation annotation to enforce validity both in the React view and on the server.
Create a Repository
Next, create a repository for accessing the database by creating a new file, TodoRepository.java, in src/main/java/com/example/application, with the following contents:
package com.example.application;

import org.springframework.data.jpa.repository.JpaRepository;

public interface TodoRepository extends JpaRepository<Todo, Integer> {
}
Step 3: Create a Hilla RPC Service
Instead of juggling REST endpoints, Hilla provides a simple approach to create backend services that can be easily called from the frontend. When you annotate a class with @BrowserCallable, Hilla creates the needed REST-like endpoints, secures them, and generates TypeScript interfaces for all the data types and public methods used. Having full-stack type safety helps you stay productive through autocomplete and helps guard against breaking the UI when you change the data model on the server.
Create a new TodoEndpoint.java file in src/main/java/com/example/application with the following content
package com.example.application;

import java.util.List;

import com.vaadin.flow.server.auth.AnonymousAllowed;
import dev.hilla.BrowserCallable;
import dev.hilla.Nonnull;


@BrowserCallable
@AnonymousAllowed
public class TodoEndpoint {
  private TodoRepository repository;

  public TodoEndpoint(TodoRepository repository) {
    this.repository = repository;
  }

  public @Nonnull List<@Nonnull Todo> findAll() {
    return repository.findAll();
  }

  public Todo save(Todo todo) {
    return repository.save(todo);
  }
}
Step 4: Create a Todo View
Next we create a React view for adding and viewing to-do items. Open the frontend/views/todo/TodoView.tsx file and replace its contents with the following:
import Todo from 'Frontend/generated/com/example/application/Todo';
import TodoModel from 'Frontend/generated/com/example/application/TodoModel';
import { useEffect, useState } from 'react';
import { useForm } from '@hilla/react-form';
import { Button } from '@hilla/react-components/Button.js';
import { Checkbox } from '@hilla/react-components/Checkbox.js';
import { TextField } from '@hilla/react-components/TextField.js';
import { TodoEndpoint } from 'Frontend/generated/endpoints';

export default function TodoView() {
    const [todos, setTodos] = useState(Array<Todo>());

    useEffect(() => {
        TodoEndpoint.findAll().then(setTodos);
    }, []);

    const { model, field, submit, reset, invalid } = useForm(TodoModel, {
        onSubmit: async (todo: Todo) => {
            const saved = await TodoEndpoint.save(todo);
            if (saved) {
                setTodos([...todos, saved]);
                reset();
            }
        }
    });

    async function changeStatus(todo: Todo, done: boolean) {
        const newTodo = { ...todo, done: done };
        const saved = await TodoEndpoint.save(newTodo);
        if (saved) {
            setTodos(todos.map(item => item.id === todo.id ? saved : item));
        }
    }

    return (
        <> <div className="m-m flex items-baseline gap-m"> <TextField label="Task" {...field(model.task)}></TextField> <Button theme="primary" disabled={invalid} onClick={submit}> Add </Button> </div> <div className="m-m flex flex-col items-stretch gap-s"> {todos.map((todo) => (
                    <Checkbox key={todo.id} label={todo.task} checked={todo.done} onCheckedChanged={({ detail: { value } }) => changeStatus(todo, value)} />
                ))} </div> </>
    );
}
Run the Application
Run the project from the command using Maven:
mvnNote that there is no need to separately start the frontend development server, as it is automatically started by Hilla's Maven plugin.
That's it! You now have a fully functional to-do application running on http://localhost:8080.
Notice that when you refresh the browser, it keeps the same todo items, as they are persisted in the database. Notice also that the validation is enforced both on the client and on the server just by adding the @NotBlank annotation to the task field in the Todo Java class.

Next Steps
- You can find the complete source code of the completed application on my GitHub.
