
I recently hosted a webinar with Catherine Edelveis from BellSoft on optimizing Docker images for Java applications. Catherine presented examples using a Spring Boot app with a Vaadin frontend, MongoDB, Kafka, and Spring Security — a setup that's closer to production reality than most demo apps. (You can find the demo app, NeuroWatch, on GitHub.)

The biggest takeaway? There's no single "perfect" Docker image. Perfection depends on what you're optimizing for: image size, startup speed, push/pull efficiency, build simplicity, or security. What you get instead is a toolkit of techniques you can mix and match based on your priorities.
Here's what I learned.
Psst...Missed the live session? Watch the full webinar recording below.
Start with multi-stage builds and a lightweight base
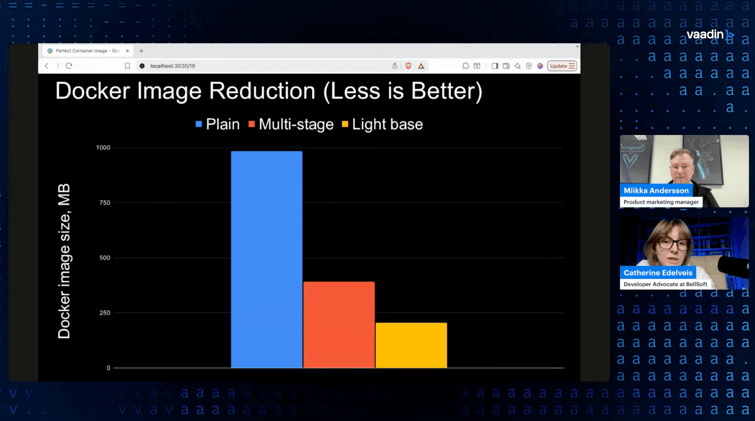
Catherine's demo app produced a container image of almost 1 GB out of the box. A simple Java application, nearly a gigabyte. That matters when your team pushes dozens of commits a day and each one produces a new image.
The first fix is straightforward: multi-stage builds. You build the project with a JDK image, then copy only the resulting JAR into a clean JRE image. That alone cut the image size in half, down to about 390 MB, without any code changes.
The second step is swapping the base OS. Debian and Ubuntu are common choices but not exactly lightweight. Catherine explained that switching to a smaller Linux distribution (she used Alpaquita Linux with musl) brought the image down to around 206 MB. If your app needs packages that musl doesn't include by default, you can add them in the build stage and keep the final image slim.
The practical point that stuck with me: none of this requires refactoring your application. You're changing the Dockerfile, not the code.
Layer your JARs for faster push and pull
Total image size is one thing, but the size of the layer that changes on every deploy matters just as much. A fat JAR bundles your application code with all its dependencies into one layer. Change one line of code, and you're pushing 74 MB again.
Spring Boot supports splitting the JAR into layers: dependencies, the Spring Boot loader, snapshot dependencies, and your application code. You extract these into separate Docker layers, ordered so the most frequently updated layer (your app code) sits on top. The total image size stays the same, but the actively pushed layer drops from 74 MB to under 2 MB.
Catherine explained the Dockerfile changes for this, and they're not complex. You add an intermediate "optimizer" stage that extracts the layers using; java -Djarmode=tools -jar app.jar extract --layers --destination extractedthen copy each layer into the final image in the right order. Spring Boot handles the rest.
Build packs: skip the Dockerfile entirely
If maintaining Dockerfiles isn't your thing, build packs are worth looking at. You run one command (spring-boot:build-image with Maven or Gradle), and you get a production-ready container image with layered JARs and a software bill of materials — no Dockerfile needed.
The tradeoff: the default Spring Boot build packs use Ubuntu, so the image is larger (around 400 MB in Catherine's demo). Bellsoft provides Alpaquita-based build packs that bring this down to about 215 MB. One thing to note is that you can't easily add OS packages to a build pack image, so if your build needs something specific (like Node.js for a Vaadin frontend), you may need to use a glibc-based variant instead of musl.
Build packs also always pull the latest minor version of the JDK and OS, which keeps your base fresh without manual updates. That's a real operational win.
Faster startup: AOT cache and native images
Java startup time is a real concern, especially for scaling and serverless use cases. Catherine's demo app started in about 4 seconds — not bad for a simple app, but production applications can take much longer.
AOT cache (available from Java 24+) is the low-effort option. You perform a trial run of the application during the Docker build, which creates a cache of parsed, loaded, and linked classes. On subsequent starts, the JVM skips that work. In Catherine's examples, the app went from ~4 seconds to ~1.4 seconds with this approach, and it required no code changes — just a few flags in the Dockerfile. The catch: AOT cache currently improves startup but doesn't address warm-up time. That's being worked on in Project Leyden.
GraalVM native image is the high-impact option. It compiles your Java app ahead of time into a standalone executable. No JVM, no warm-up, startup in under a second. In Catherine's examples, the app started in less than a second and ran at peak performance immediately. The image size was comparable to the standard JVM image (225 MB).
The tradeoffs are real, though. Native image builds are resource-hungry and take several minutes. Dynamic Java features like reflection need special handling (though the compiler catches most cases automatically). And since the output is a single binary, you can't use JAR layering — every code change means rebuilding the whole image. If you're deploying 100 times a day, that's probably not ideal.
Hardened images: security as a base layer
The final technique Catherine covered was image hardening. The average container image apparently contains around 64 known vulnerabilities. That creates CVE noise, delays releases, and forces engineers to patch code they didn't write.
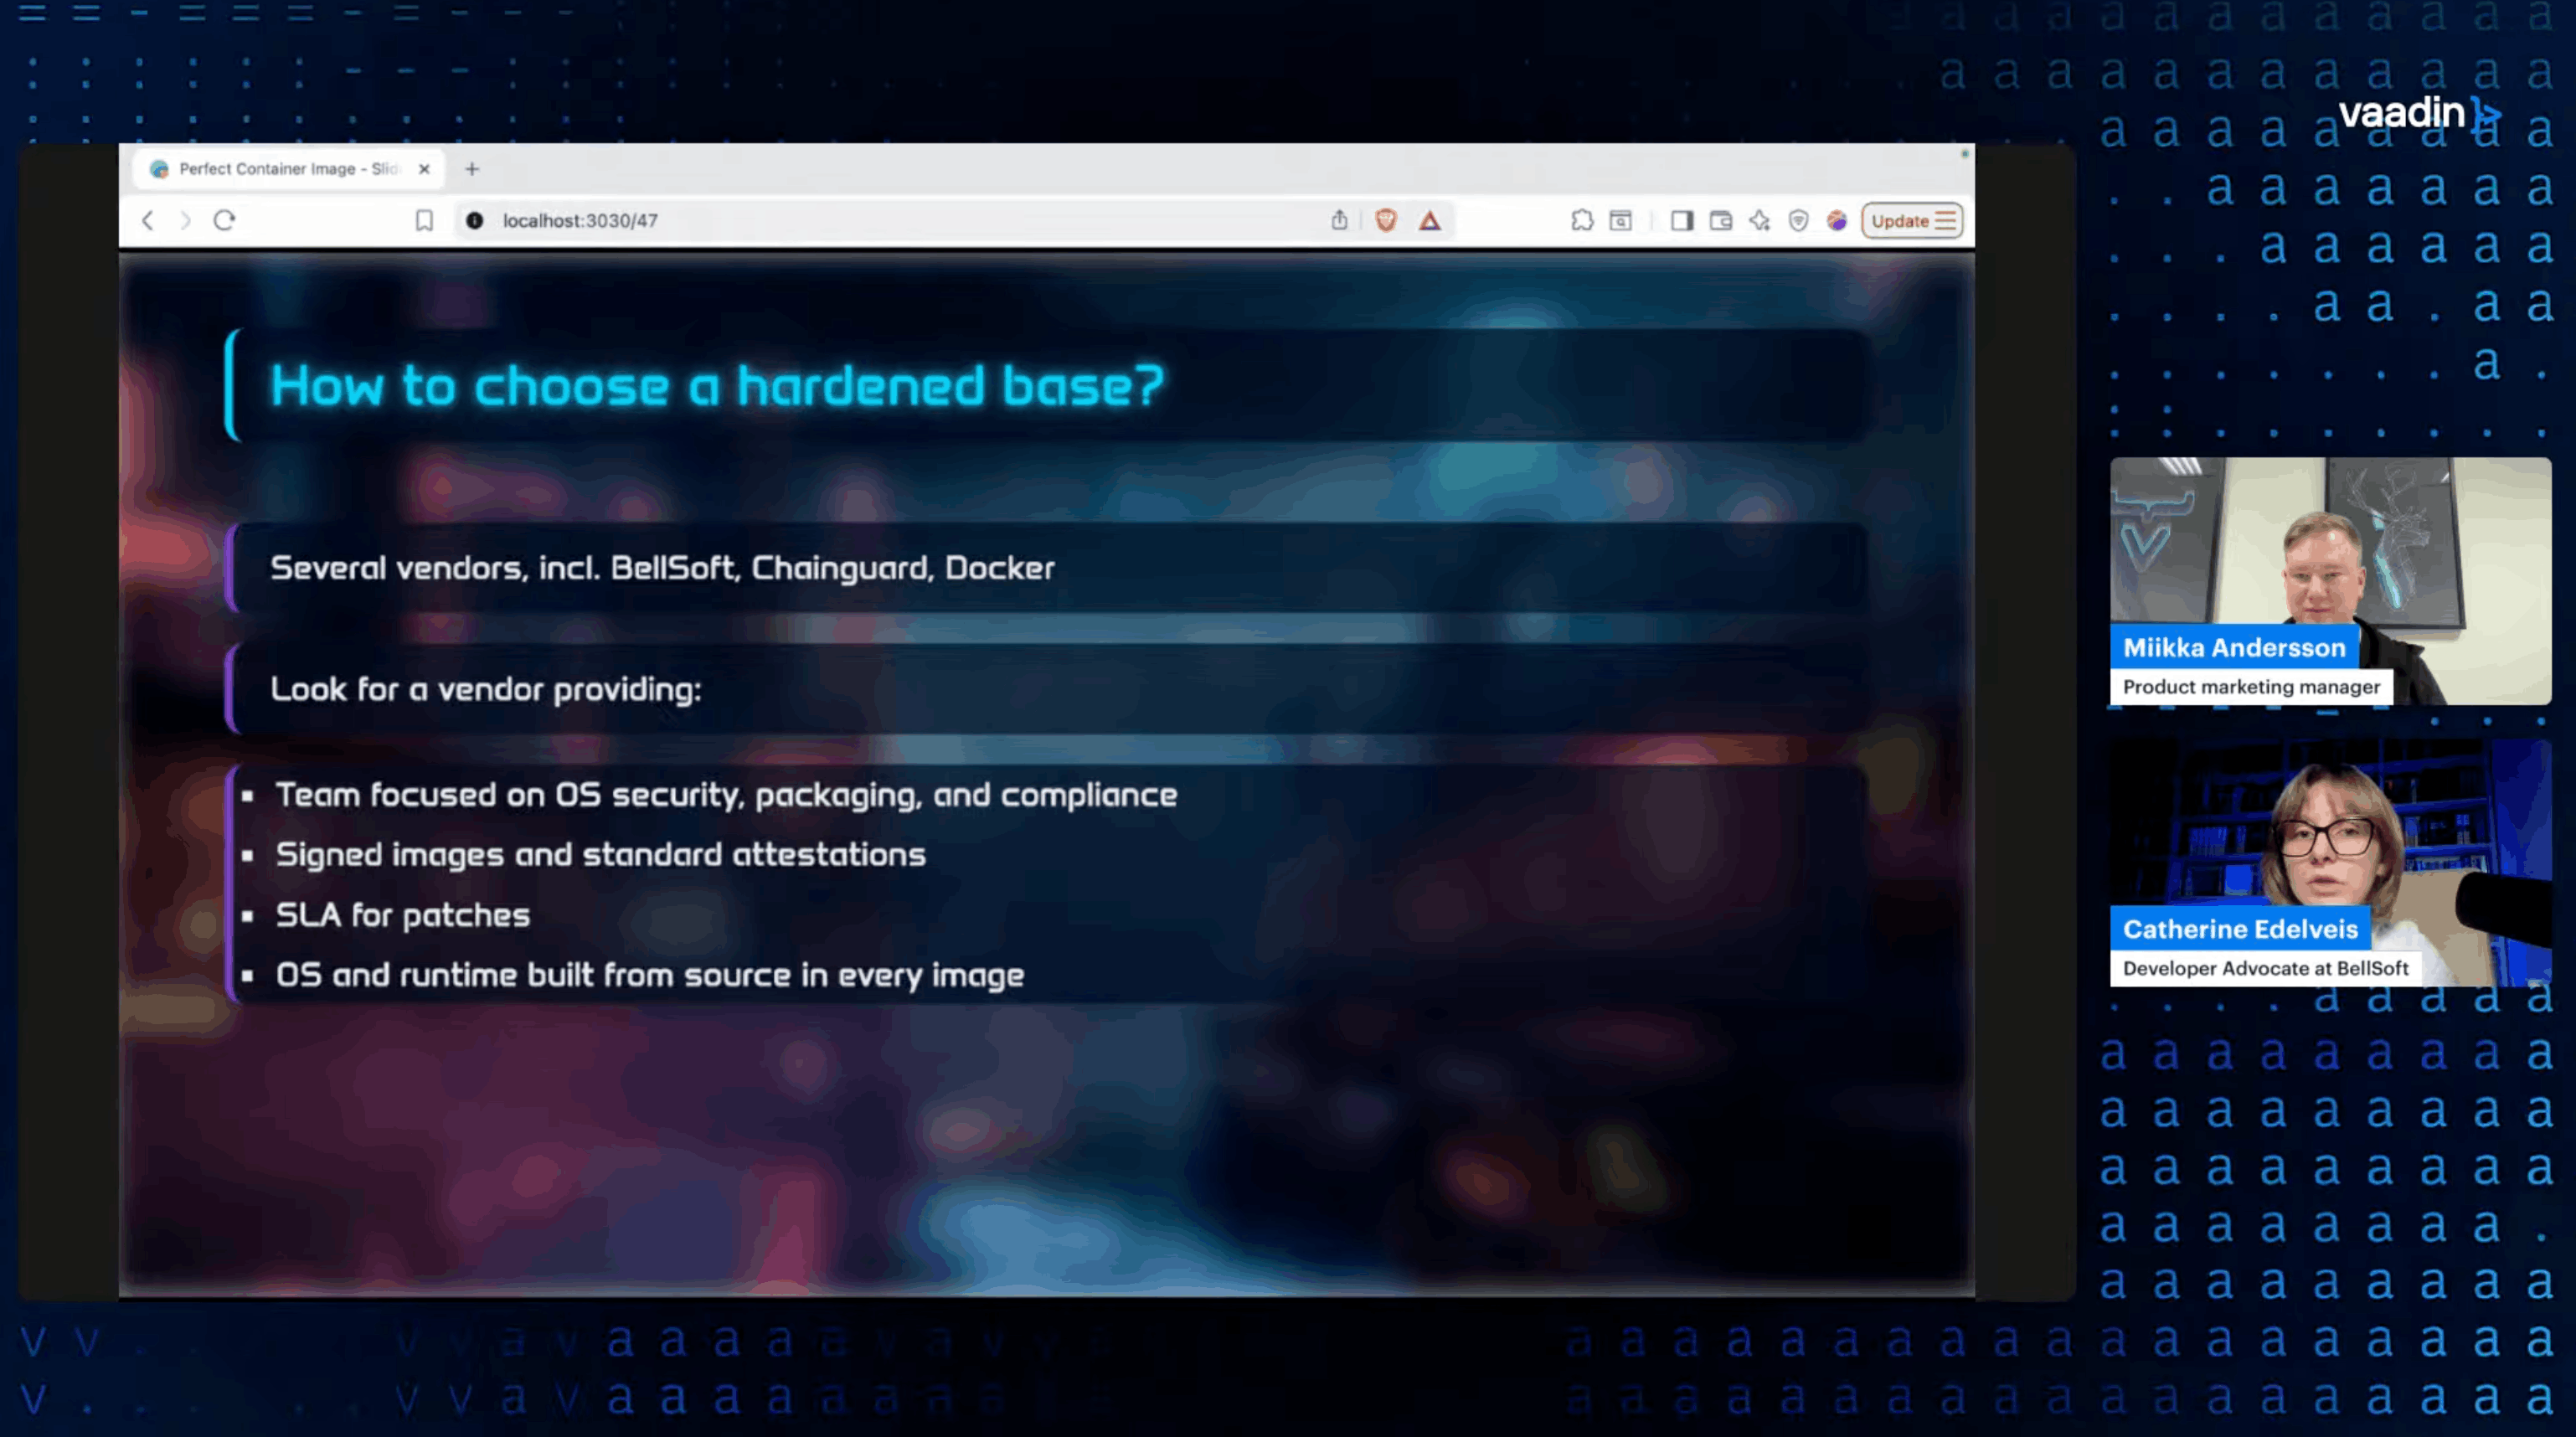
Hardened base images start with zero or near-zero CVEs, contain only the packages needed to run your app, have no package manager, and are continuously patched by the vendor. They also ship with SBOMs and digital signatures for compliance.
The migration is simple: change the FROM line in your Dockerfile. Your application code, your build process, everything else stays the same. You can use a regular base image for the build stages and the hardened image only for the final runtime stage.
Pick your priorities, then combine
What I took away from Catherine's session is that these techniques aren't competing — they're complementary. You can combine multi-stage builds with a lightweight OS and JAR layering for optimized size and push/pull speed. Add AOT cache or native images for startup. Top it off with a hardened base for security.
The key is knowing what matters for your specific application and infrastructure, then picking the right tools from the kit.
If you want to see the complete presentation with examples, comparative data, and the audience Q&A, check out the webinar recording. Catherine explains each technique in detail with real numbers and Dockerfile examples.