Free expert help on getting started!
Getting Started with Copilot 
1. Set Up Your IDE
Get the most out of Vaadin Copilot by ensuring your IDE is set up with the right plugins and extensions.
IntelliJ IDEA
- Install the Vaadin Plugin
Visual Studio Code
- Install the Vaadin Extension
- Install the Extension Pack for Java
- Install the Spring Boot Extension Pack
Eclipse
- Install the Vaadin Integration from Vaadin Tools.
2. Run Your Vaadin Project Locally
Now that you have downloaded a Vaadin project, unzip it in your chosen project directory and run it in Debug with Hotswap enabled.
IntelliJ IDEA
Click on Debug using HotswapAgent and follow the prompts to ensure the JetBrains Runtime JDK is installed.
Visual Studio Code
Navigate to the main class in Application.java and select Debug (hotswap).
Eclipse
Eclipse users must set up hotswap manually for their system.
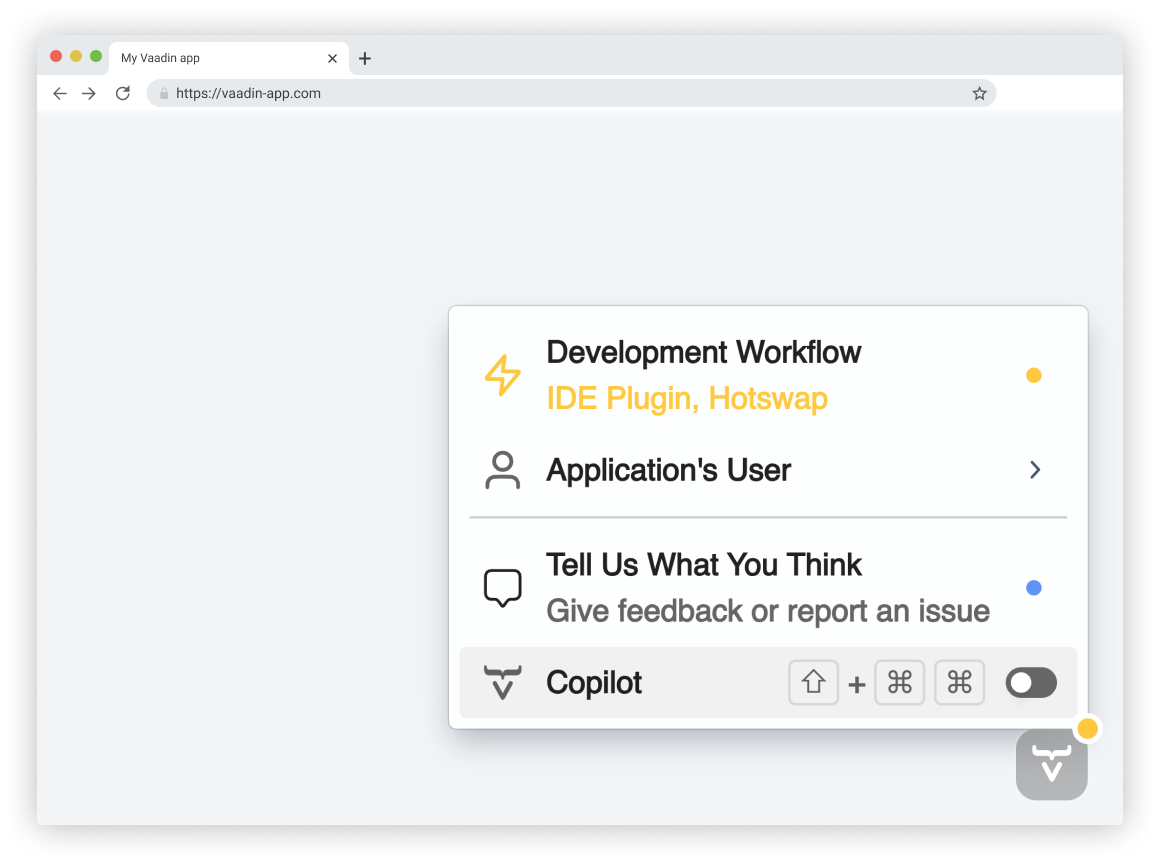
3. Activate Vaadin Copilot
Now that your project is running in the browser, just look for the Vaadin Copilot icon ![]() to get started.
to get started.
Alternatively, use the keyboard shortcut SHIFT+CTRL+CTRL or SHIFT+CMD+CMD.
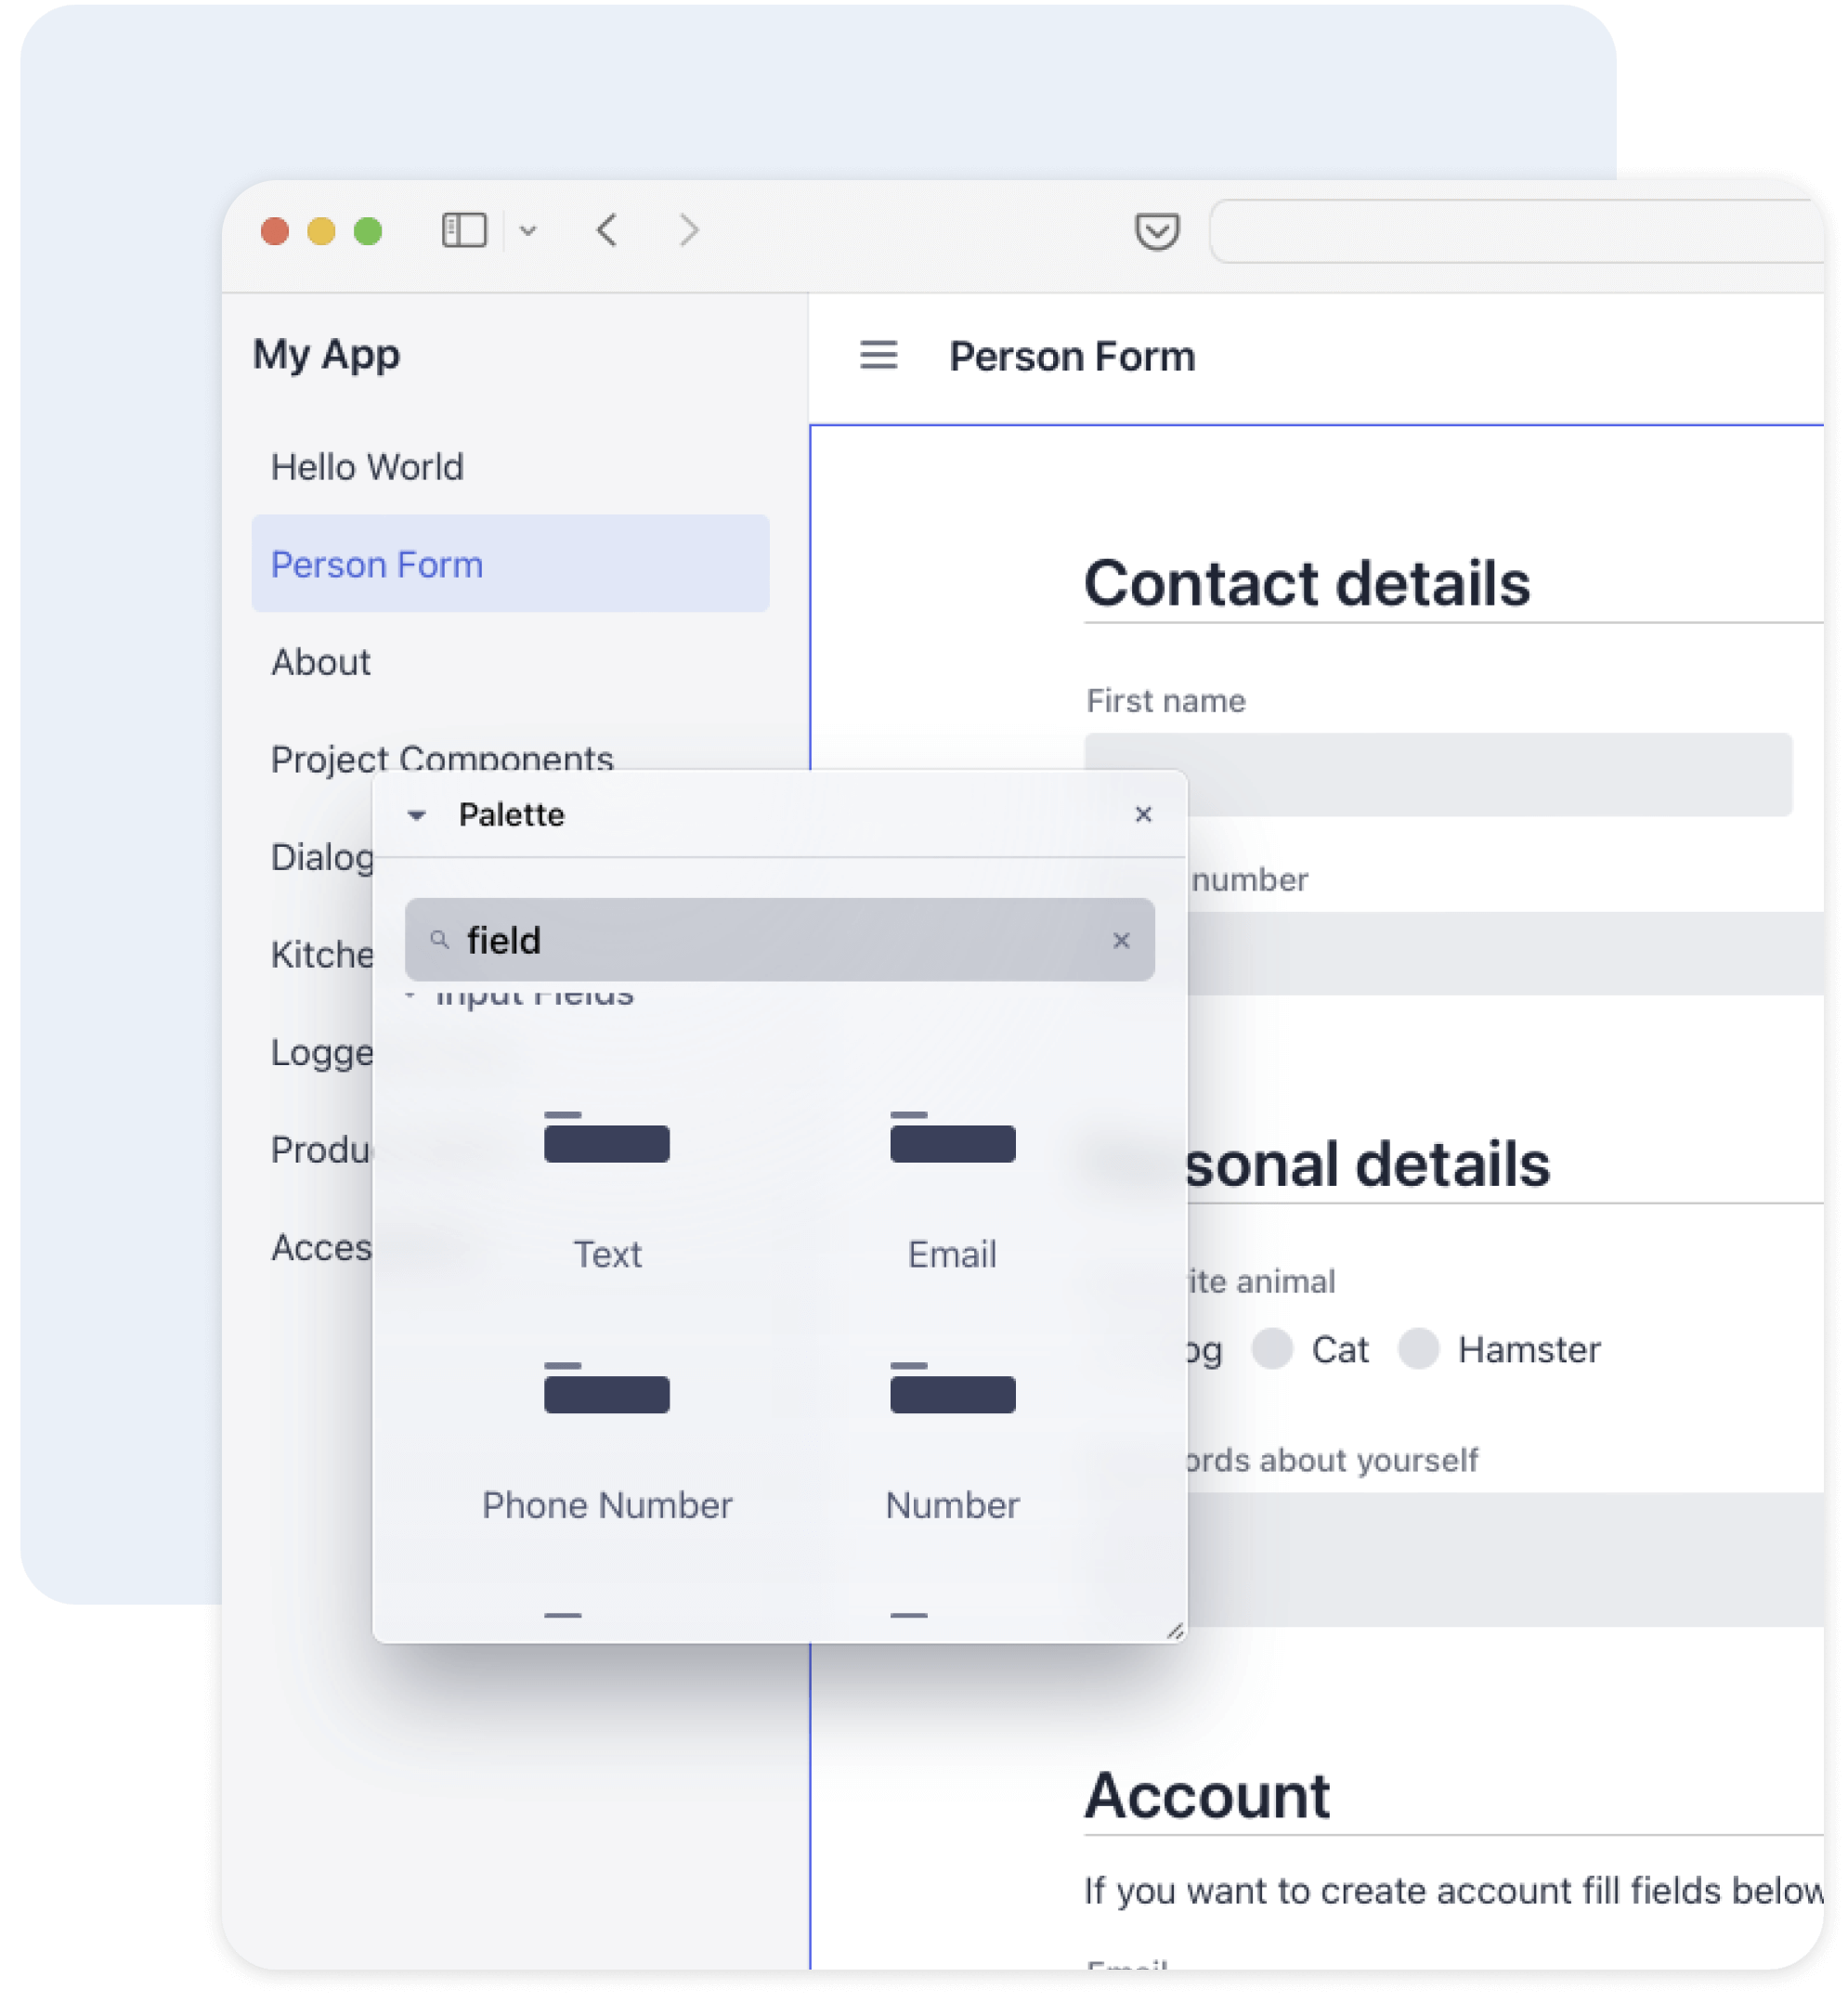
Visual Editing
Drag and drop components, rearrange layouts, and update labels—directly in the application you're building. You can edit custom and composite components, and adjust layout parameters like alignment, padding, spacing, and visibility by selecting elements and updating their properties.
Hierarchical overview
Use the Outline to get a clear overview of the UI structure, without extra cruft—no need to do manual code-to-UI mapping. Select any element to highlight it in the UI and jump directly to its source in your IDE.
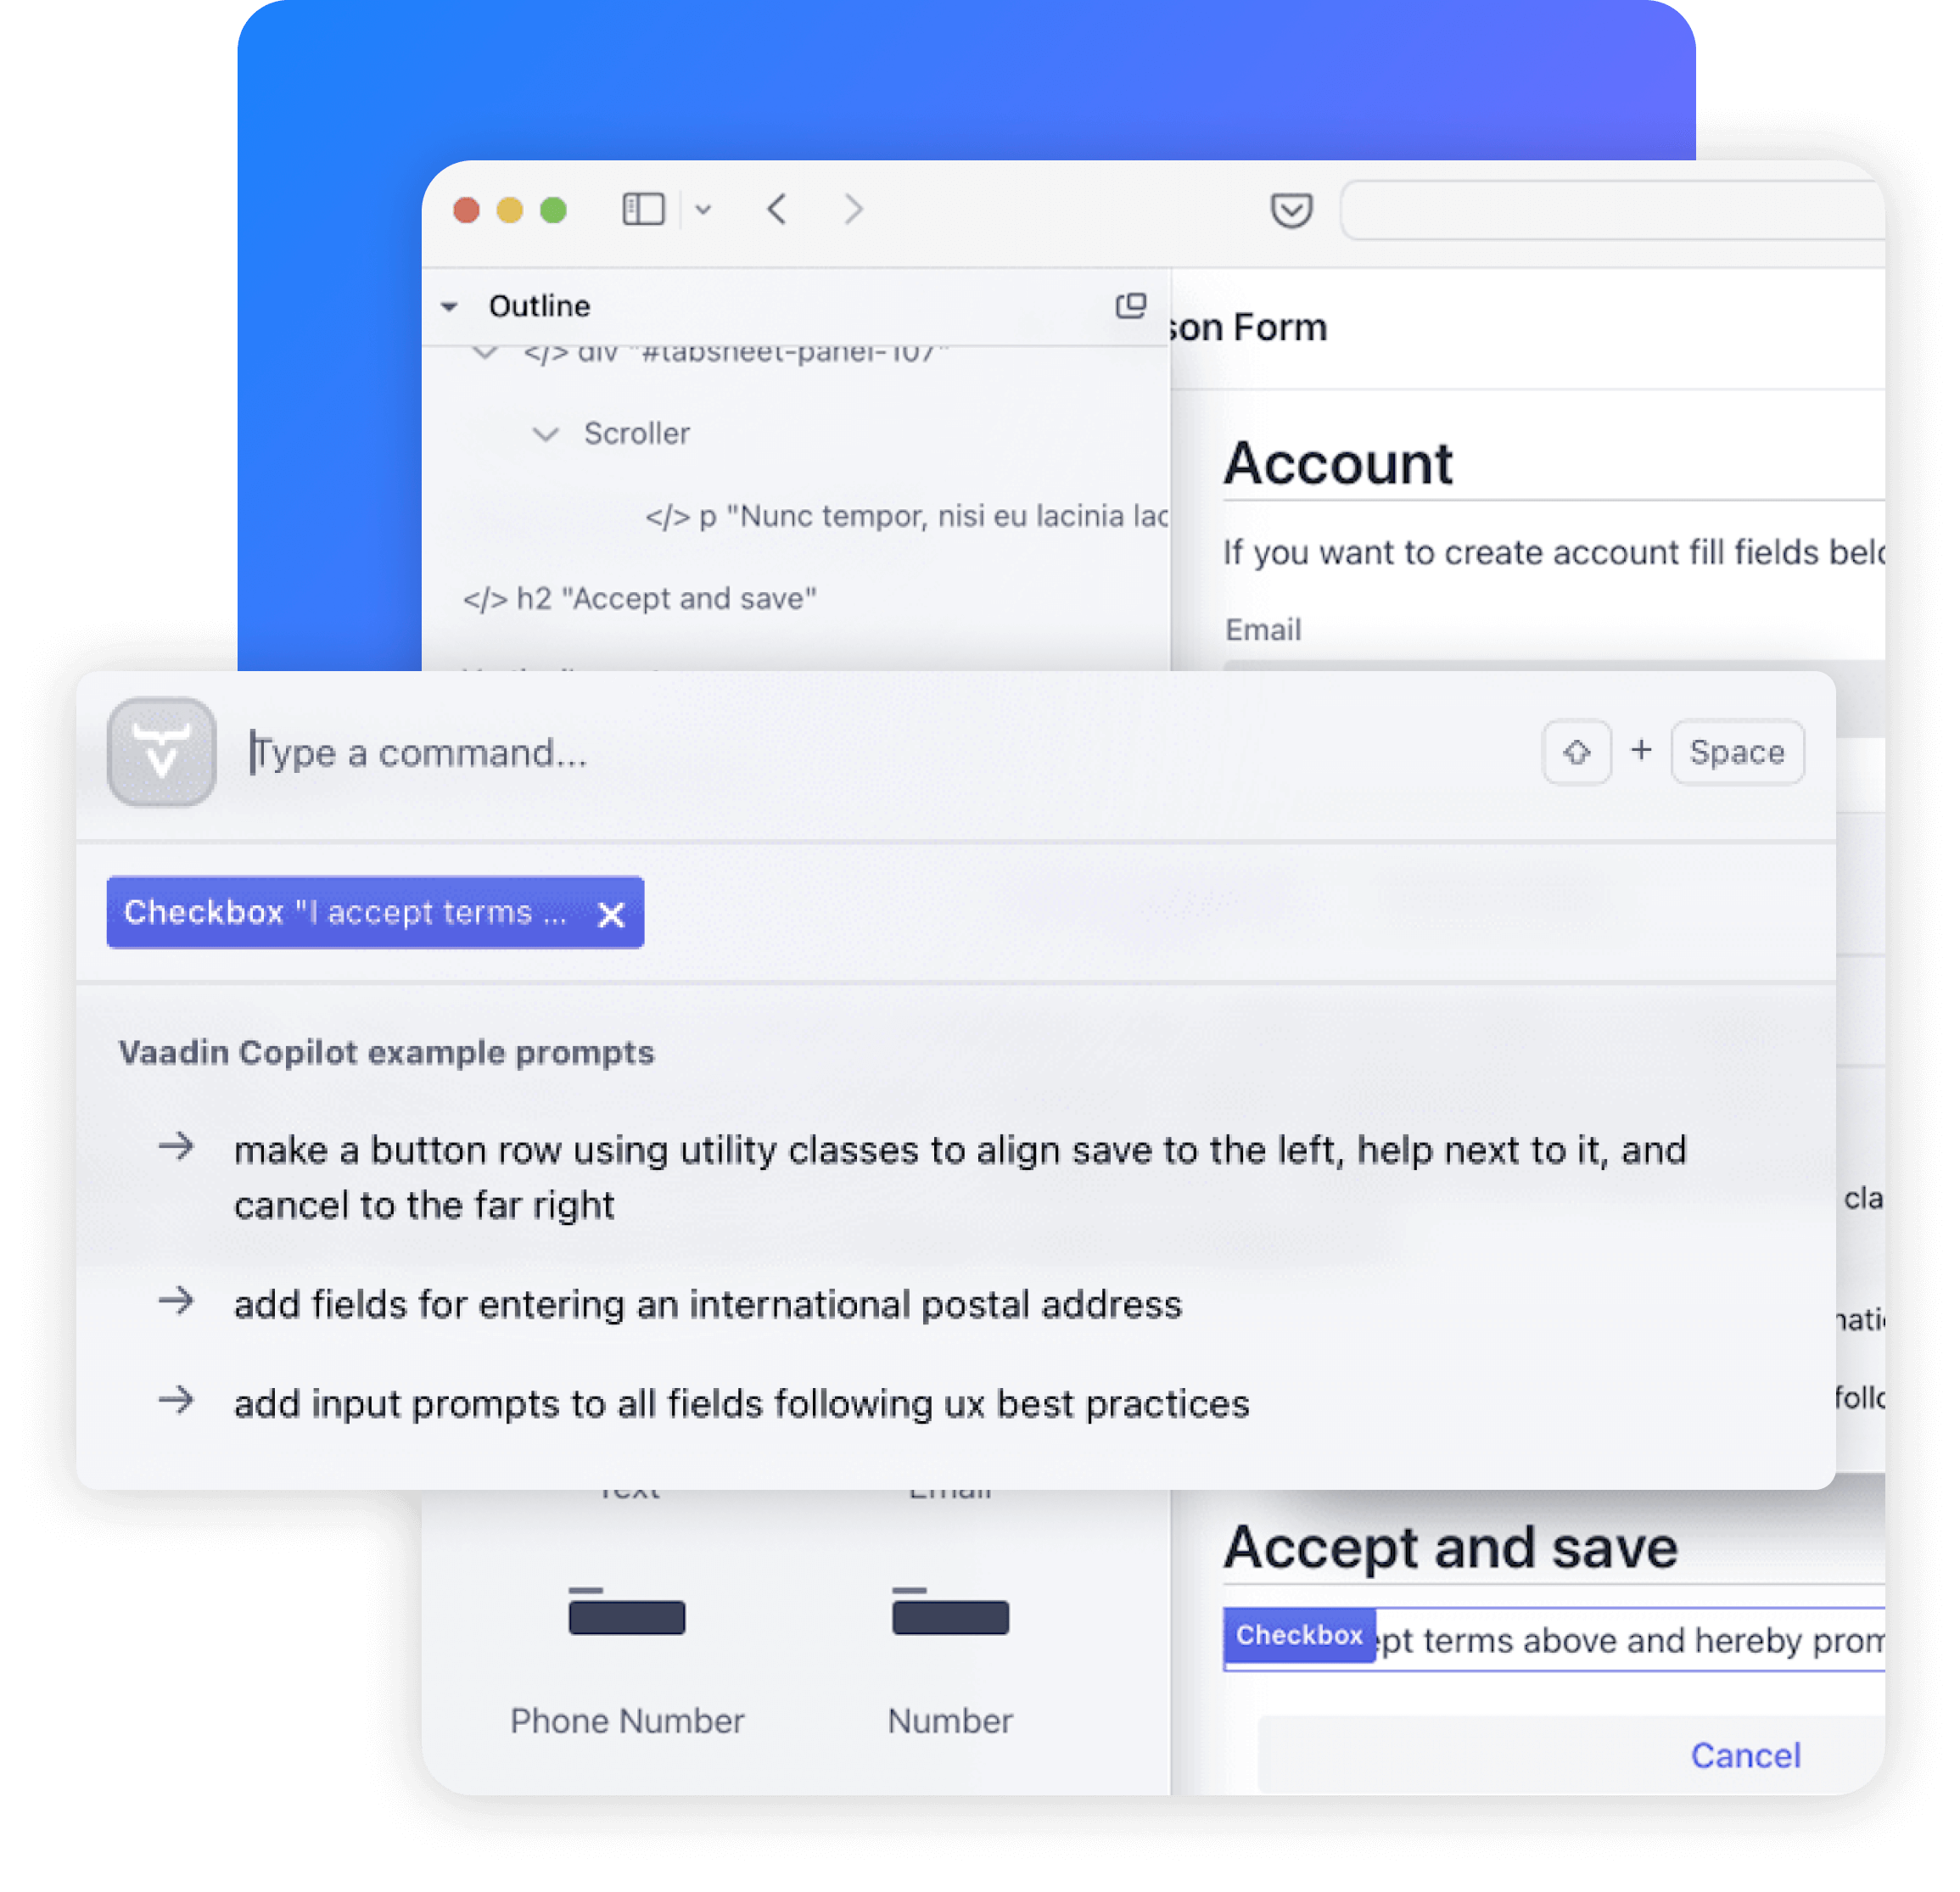
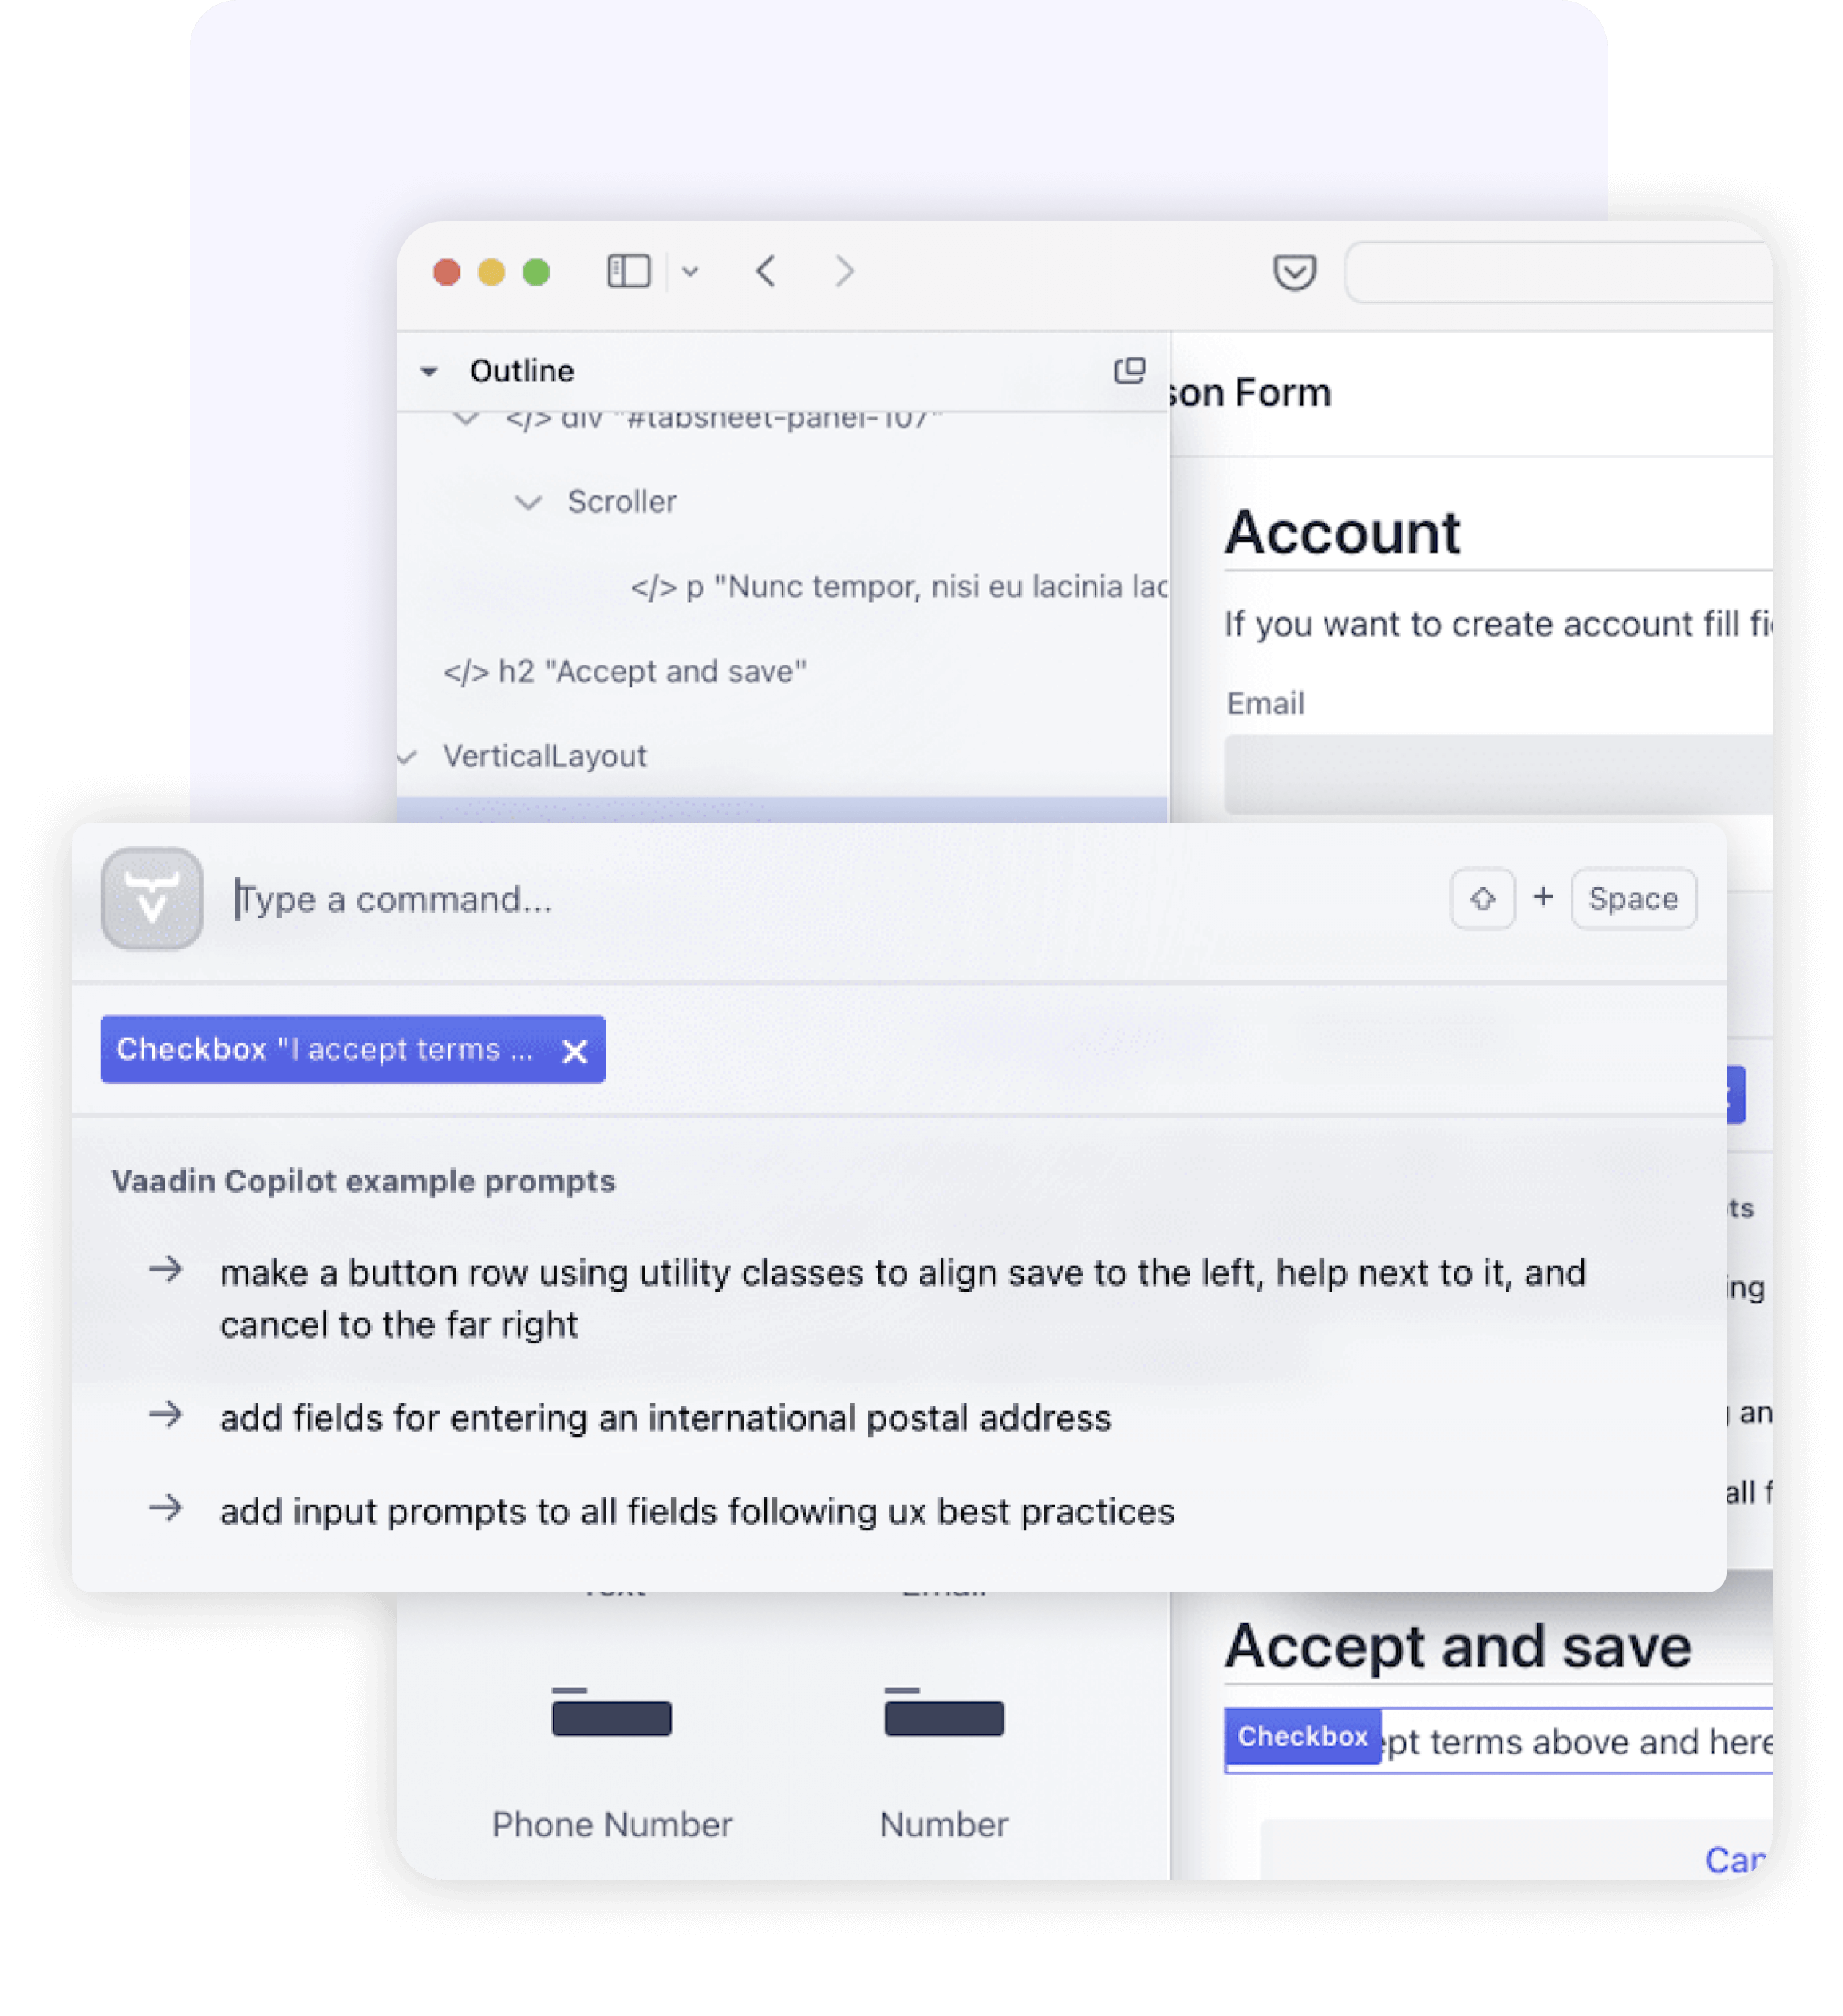
AI assistance
Use plain language to generate views, add mock data, or scaffold backend services. Copilot can turn screenshots or Figma designs into UI code, create JPA entities with repositories and services, and connect components like Grid or ComboBox to backend data.
Code-first editing
Changes you make with Copilot, with or without AI assistance, appear instantly in your IDE. Your codebase is the source of truth, and Copilot is specifically engineered to support switching back and forth between browser and IDE – just like you do anyway, but now the browser has superpowers. It's a bit like low-code, but also the opposite.
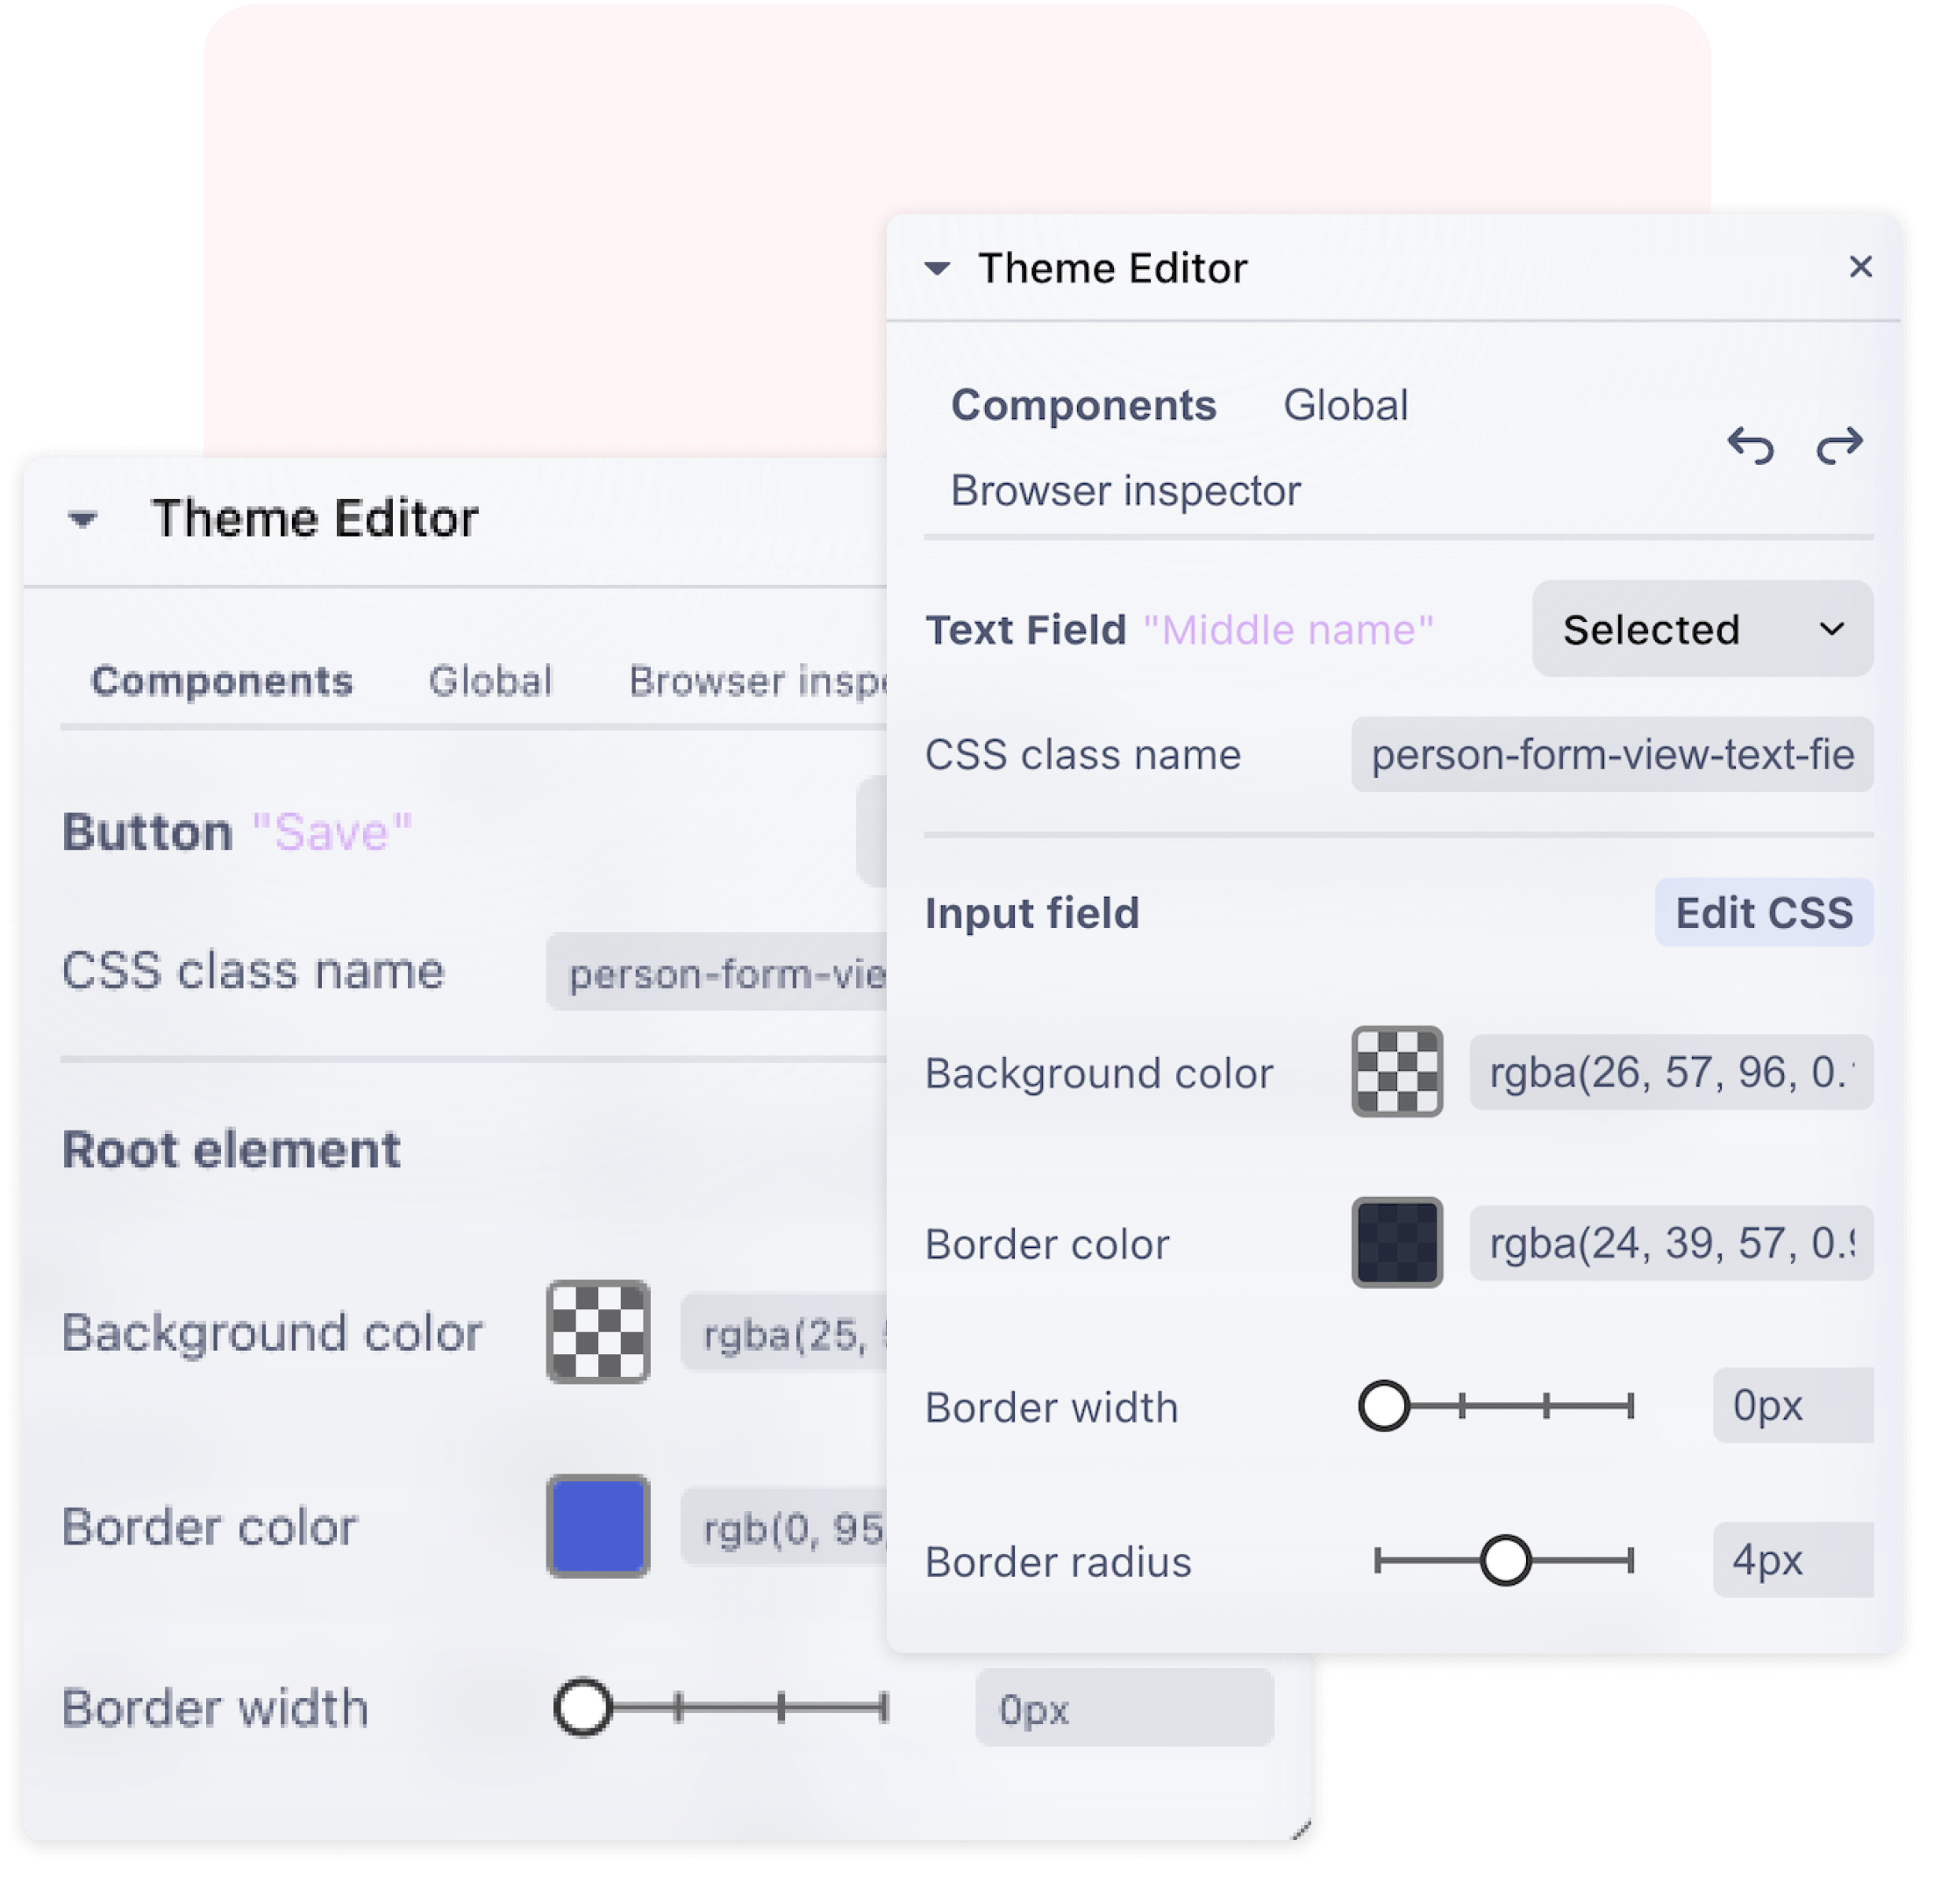
Theme Editor
Change the look of components, globally or individually, by adjusting properties using this visual tool. Minimize guesswork and the need to hop back and forth between CSS and browser – no need to awkwardly copy and paste from the browser inspector.
Properties Editor
Configure components visually by updating text content, layout settings, and custom attributes. The Properties Editor makes adjustments straightforward—even for settings that aren’t editable on the canvas.
Copy & paste for Flow
Quickly reuse UI components by copying and pasting them directly in the editor. Speeds up layout building and reduces repetitive work.
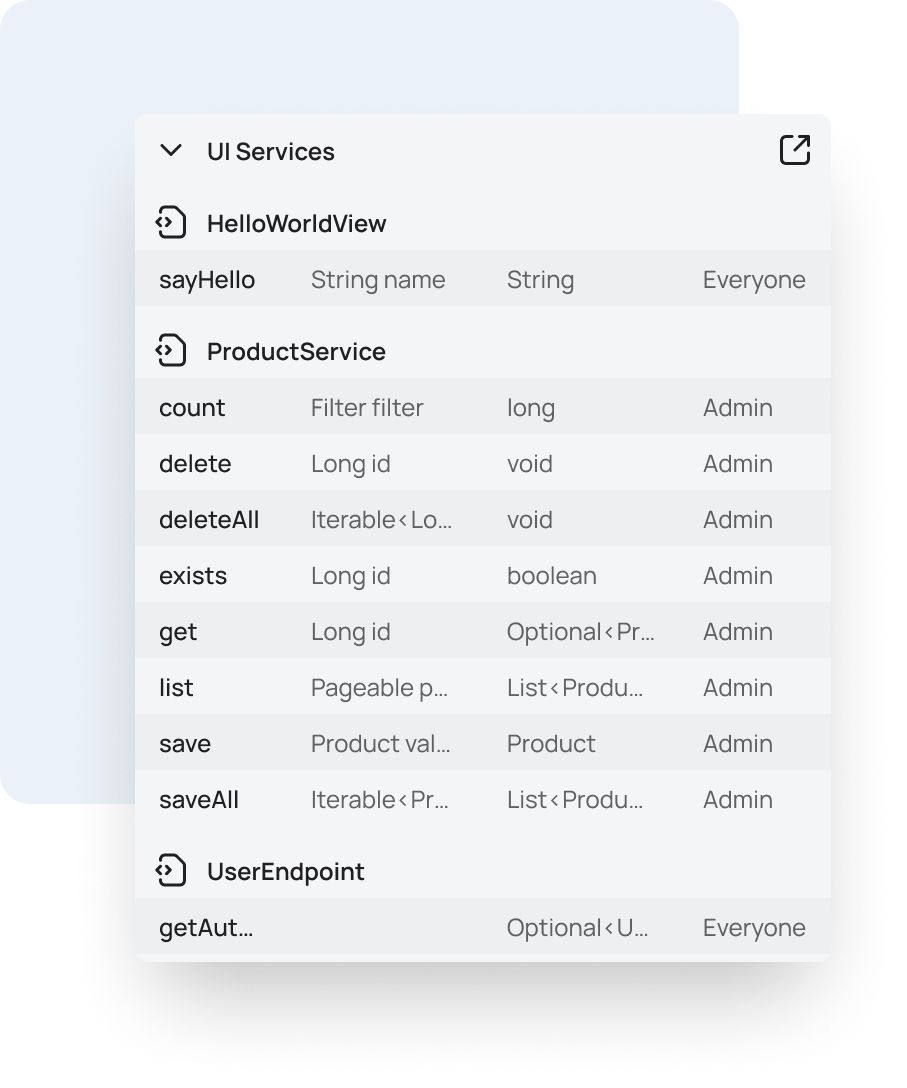
UI Services
View all Hilla services in your app along with their security configurations. Ensure proper access control and gain confidence that your UI is secure.
Version Upgrade Helper
Identify and update outdated Vaadin dependencies directly in your project. Stay current with minimal overhead and no guesswork.
Internationalization
Simplify global app development with automated translations that get you started and built-in support for professional localization workflows. Effortlessly manage and apply translations across your app.
Impersonation
Switch between user accounts to test role-based behavior without logging in and out. Useful for quickly verifying access control and permissions.
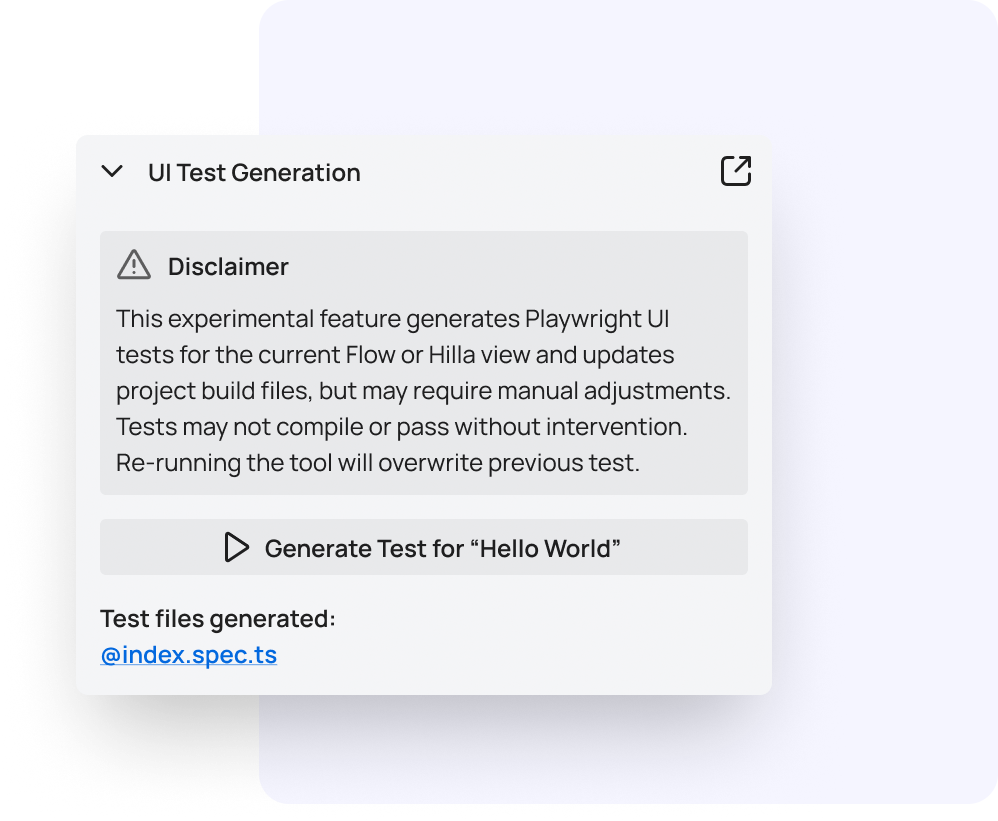
Test generation with AI (experimental)
Automatically generate test cases to catch regressions before they happen. Note: generated test cases require TestBench to run. TestBench is included in subscriptions Pro, Premium, and Ultimate.
Documentation
Quickly access documentation for any selected component directly from Copilot – no need to hunt through external resources.
Designed for Your Workflow
Vaadin Copilot is engineered to blend into your development process. When the application is running in development mode, Copilot is ready to spring into action whenever you view the live application. Just a shortcut away whenever you need it, and just as quick to hide when not needed.
AI-Powered UI Design - A Future of Possibilities
At the heart of Vaadin Copilot lies its AI capabilities. Ask our generative AI to modify the UI, explore new design possibilities, and streamline your workflow. Although in its early stages, this feature is set to redefine the boundaries of UI development.