Build the Contact Form
- Creating a New Design for the Form
- Adding Two Text Fields for the Name
- Adding the email field
- Adding Company and Status Fields
- Adding Buttons
- Adding the Form to the Main View
- Sizing the Grid and Form
It is good to keep your designs focused on one thing. When there are too many focus areas in one view, splitting them into smaller parts helps to keep things clear. We will create the form in its own design with a Form Layout for editing the information of a single contact in it.
Creating a New Design for the Form
-
In the Project tree, right click the
frontend/src/viewsfolder and select New > Vaadin 10+ Design. -
In the Name field, type
contact-form. -
Make sure that
-
the Create Java companion file checkbox is checked.
-
the Java package is
com.example.application.
-
-
Click OK to generate the files.
-
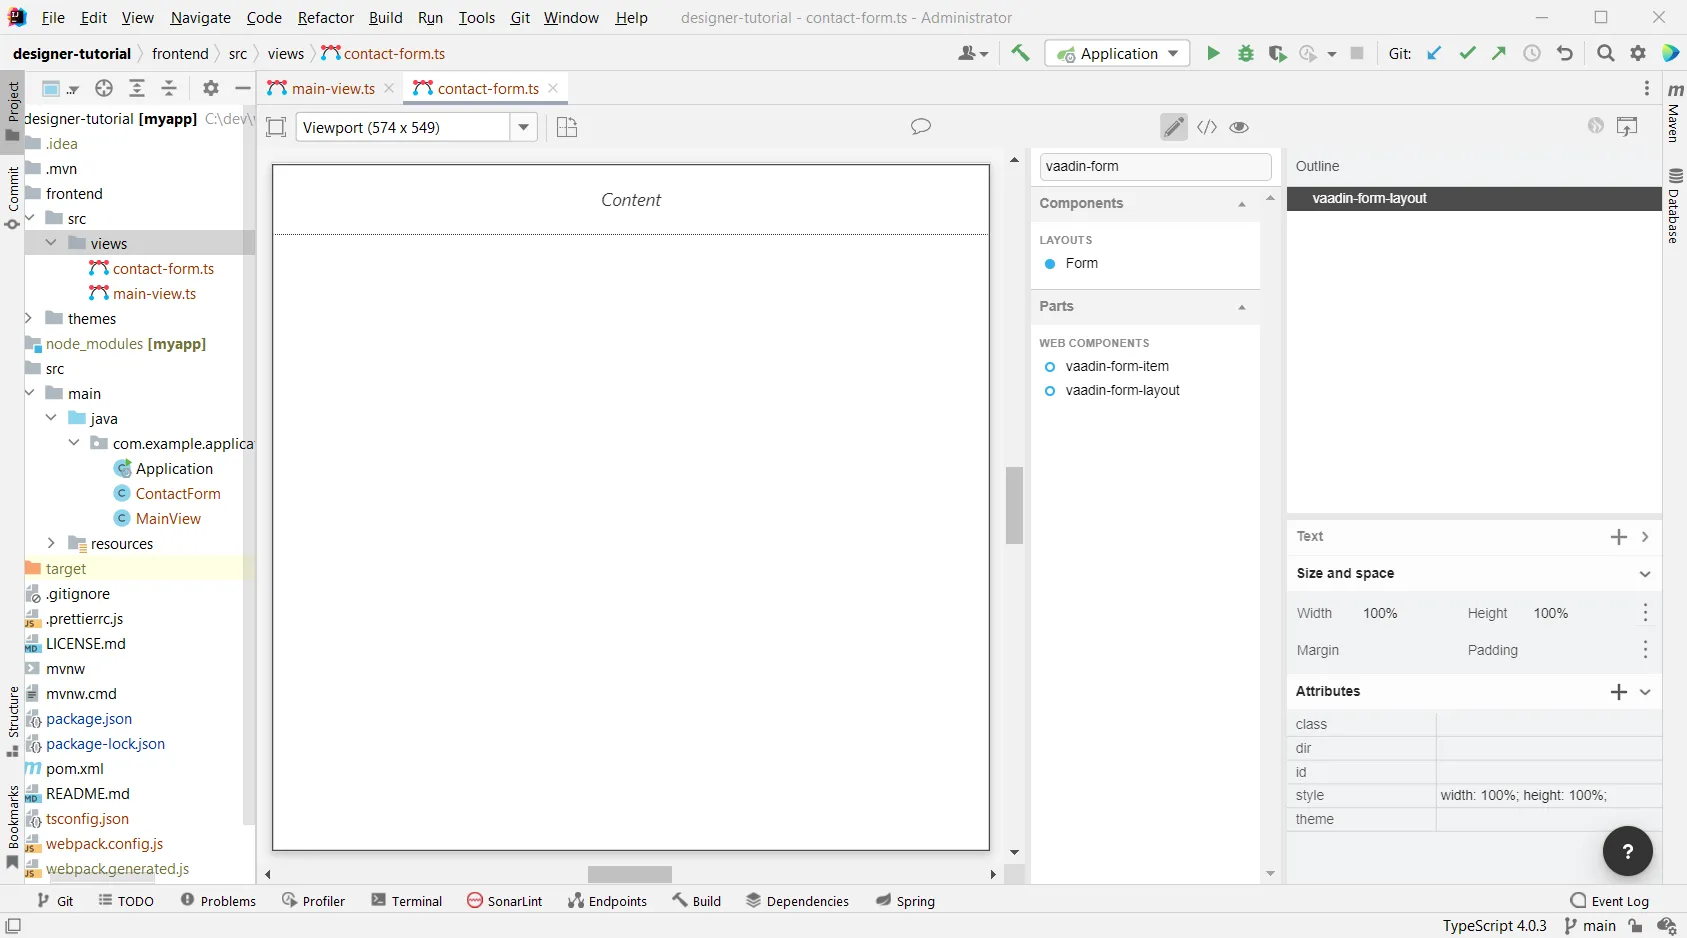
The design will open in the IDE.
-
In the palette, search for "vaadin-form" and drag
vaadin-form-layoutonto the drop section in the paper.
Our form component will have:
-
Two text fields for the first and last name.
-
An email field.
-
Two select fields: one to select the company and the other to select the contact status.
Adding Two Text Fields for the Name
-
Find Vaadin Text Field in the palette and drag it twice onto
vaadin-form-layout. -
Select the first
vaadin-text-fieldin the design. In the properties view, go to the attributes panel. Find the label attribute and replace the text with "First name". Find the placeholder attribute and remove the value. -
Select the second
vaadin-text-fieldin the design. In the properties view, go to the attributes panel. Find the label attribute and replace the text with "Last name". Find the placeholder attribute and remove the value.
|
Note
|
If your paper is wide, the text fields will line up horizontally. You can drag the left and right paper edges to make it narrower.
This will make the form fields stack vertically.
This behavior comes from vaadin-form-layout by default, which arranges its fields into one or two columns depending on the width.
|
Adding the email field
-
In the palette, find
vaadin-email-fieldand drag it onto thevaadin-form-layout. -
In the properties view, go to the attributes panel. Find the label attribute and type in "Email".
Adding Company and Status Fields
-
In the palette, find vaadin-combo-box and drag it onto the
vaadin-form-layouttwice. -
Select the first
vaadin-combo-boxin the design. In the properties view, go to the attributes panel. Find the label attribute and add the value "Company". -
Select the second
vaadin-combo-boxin the design. In the properties view, go to the attributes panel. Find the label attribute and add the value "Status".
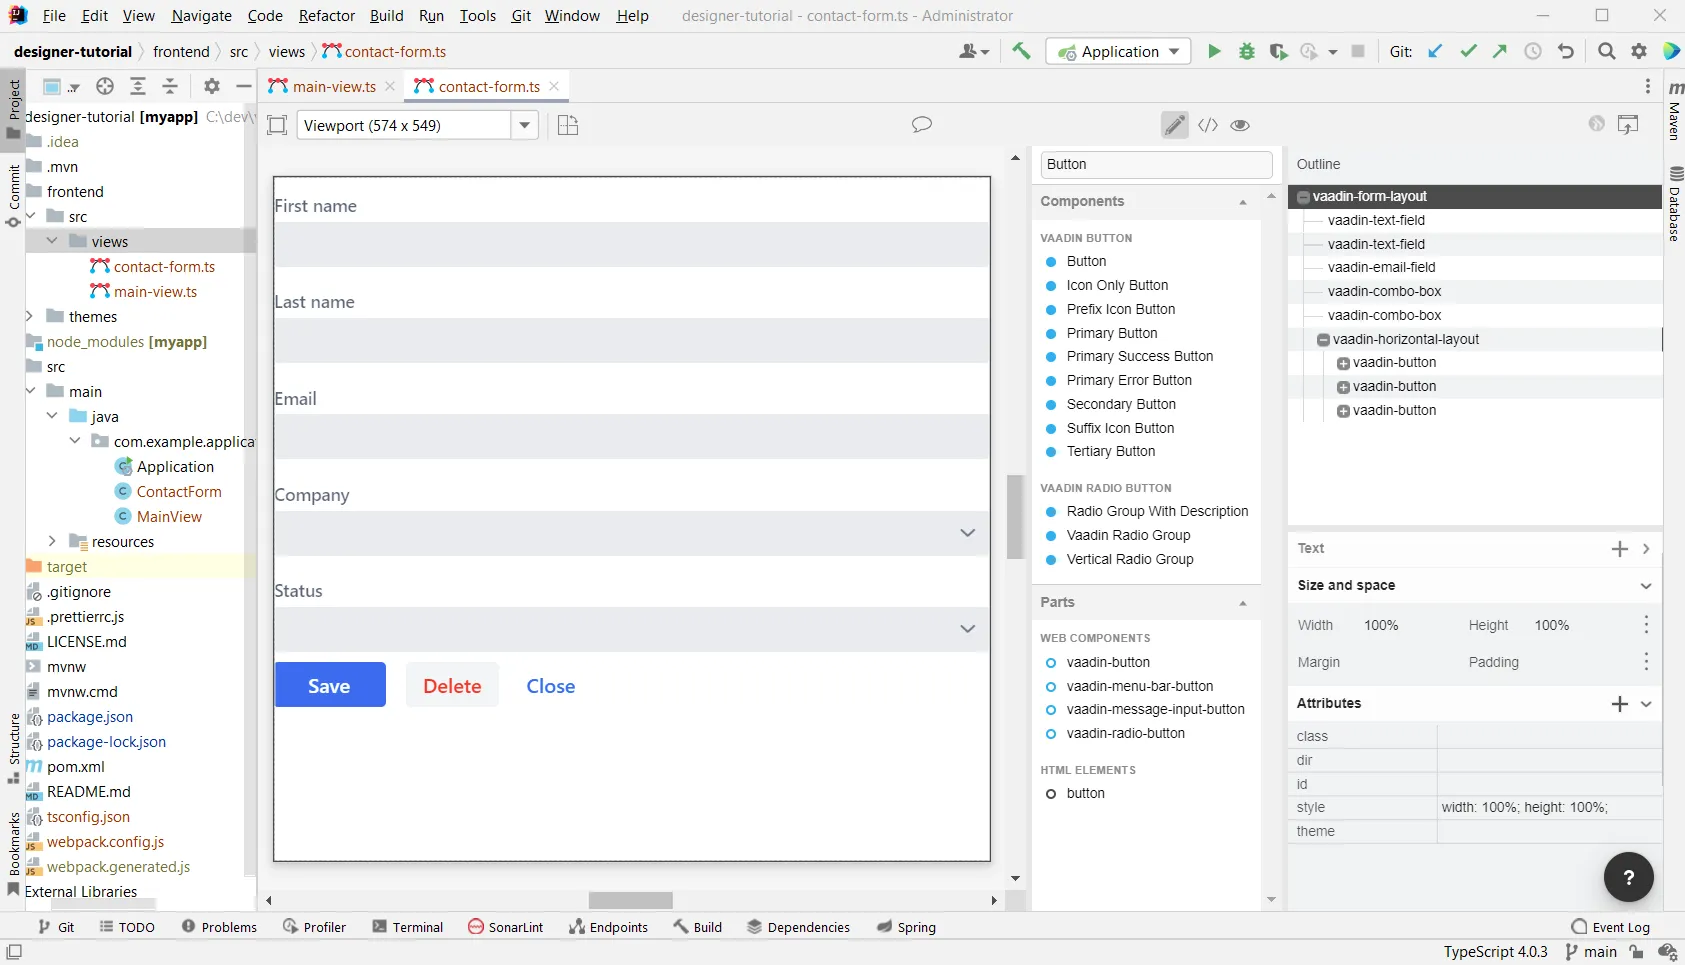
Adding Buttons
We need to add save, delete and close buttons to the form. Save is the primary action and should be highlighted. Delete can be a dangerous action and should be marked as an error. Close is not an important action and can be downplayed with a tertiary styling.
-
In the palette, find Horizontal layout and drag it onto the
vaadin-form-layout. -
In the Vaadin button section of the palette, drag the following three buttons onto the horizontal layout: Primary Button, then Primary Error Button next to it, and finally Tertiary Button next to that.
-
Select the Primary button and change the button text to "Save".
-
Select the Primary Error button and change the button text to "Delete". In the attributes panel, change the theme attribute from "primary error" to "error".
-
Select the Tertiary button and change the button text to "Close".
Now, our form is done.
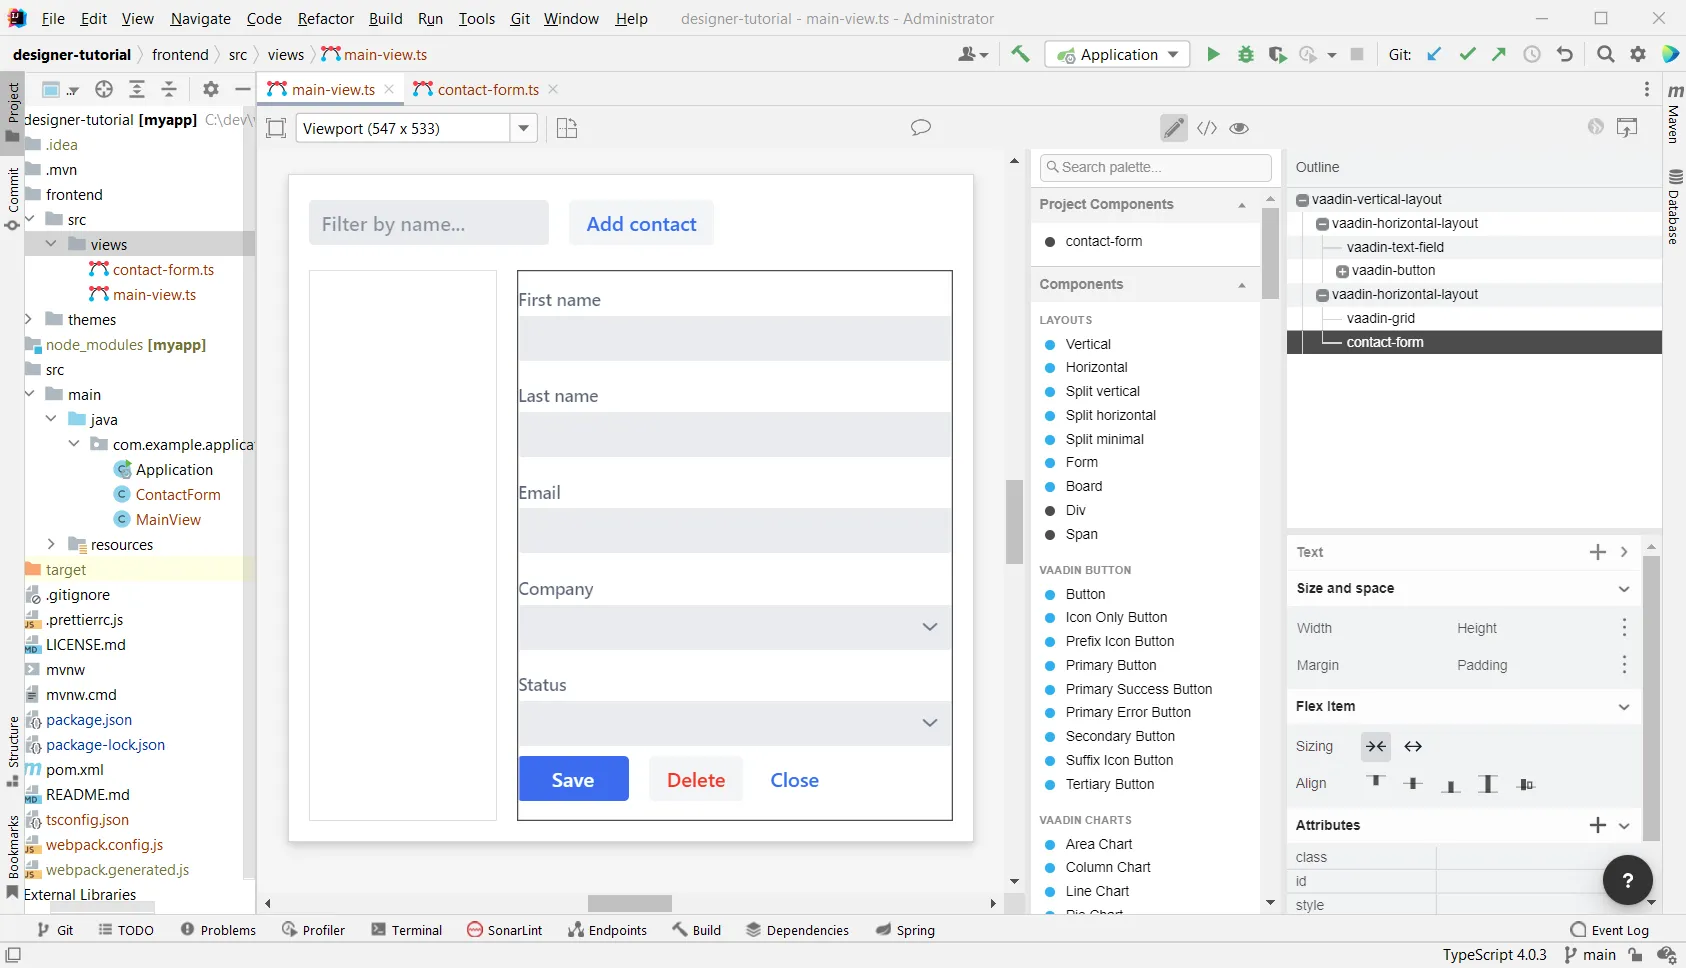
Adding the Form to the Main View
We can now go back to our main view and add the contact form next to the Grid.
The main-view design should already be opened, but if it is not, open the main-view.ts file again in IntelliJ IDEA.
In the palette, you should now see a section called Project Components that lists all designs you have created inside the project. By dragging items from this list, you can embed other designs into the one that is currently open.
-
In the palette of the
main-viewdesign, locate contact-form in Project Components. -
Drag contact-form onto the second
vaadin-horizontal-layout.
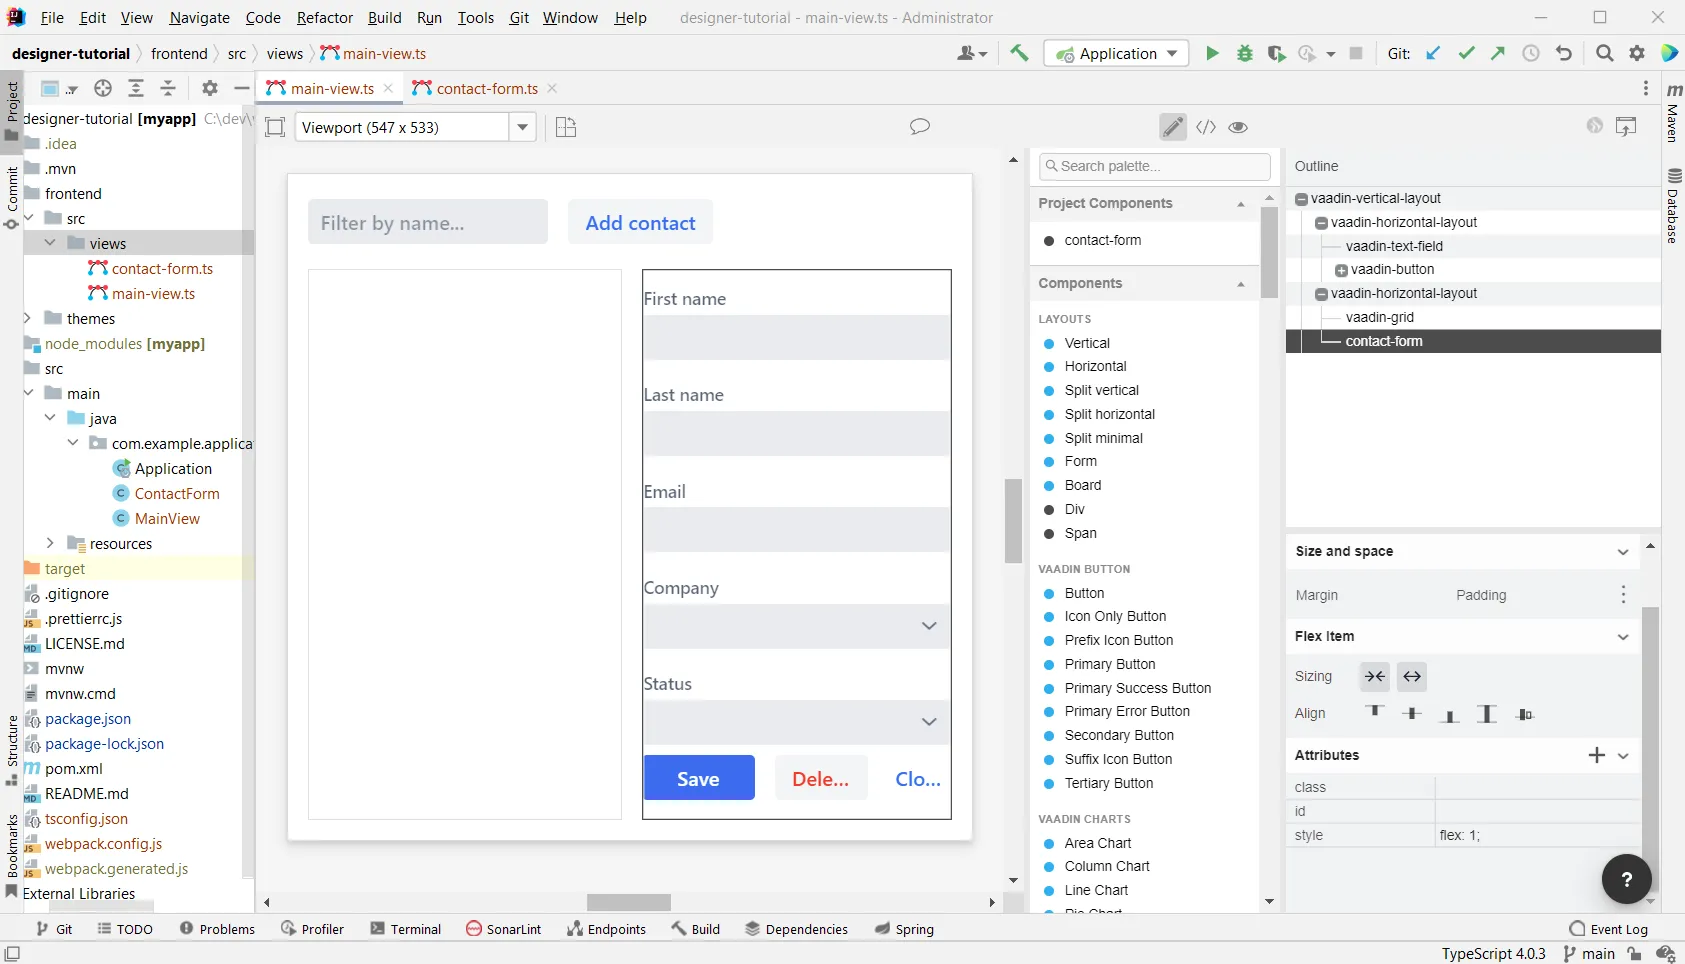
Sizing the Grid and Form
We want to give most of the space to the grid. For this, we use flex sizing to set a 2:1 ratio between the grid and the form.
-
Select the
vaadin-grid. In the properties view, find the style attribute in the attributes panel and add the value "flex: 2;" at the end. -
Select
contact-form. In the properties view, find the style attribute in the attributes panel and set the value to "flex: 1;".
Now, our layout is done.
Proceed to the next chapter to run your application: Get your application up and running.
3440199F-18BA-488B-8398-05718971153F