Compose Views From Reusable Designs
- Prepare workspace
- Create the top menu component
- Create the search bar component
- Create the content view
- Add a route to the view
In this tutorial, we will create a content view, with a top menu and a search bar, by using reusable components in Vaadin Designer. Then we could implement some simple logic to connect the content view and the search bar using Java code. The result will look like the figure below:

Prepare workspace
-
First off, let’s start with a Project Base from https://vaadin.com/start
-
Build the project using
mvn clean packageso that we get all the necessary components. -
Import the project into your IDE of choice. (In this tutorial, we are going to use IntelliJ IDEA 2018)
Create the top menu component
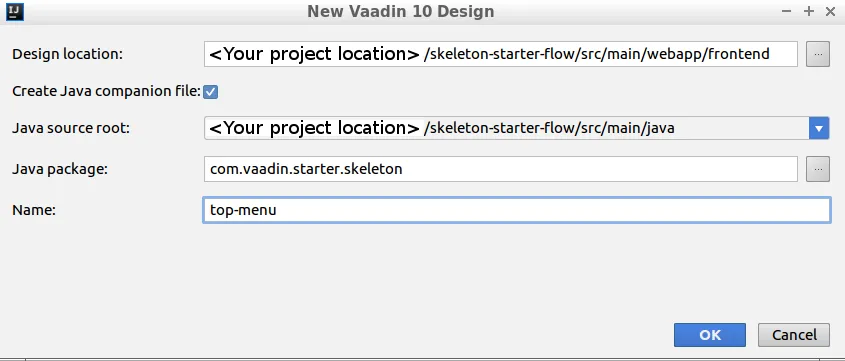
- Create a new design by using New Vaadin 10 Design wizard
-
-
Create a new Vaadin 10 Design via the IDE menu
-
Select the folder
src/main/webapp/frontendfor the Design location-
Optional: Select the Create Java companion file checkbox to generate a Java companion file for this component.
-
-
Enter design name, for example:
top-menu -
Press to create the design
-
|
Tip
|
In this tutorial, we will not use the top-menu component in Java code, so creating a Java companion file is an optional step.
|
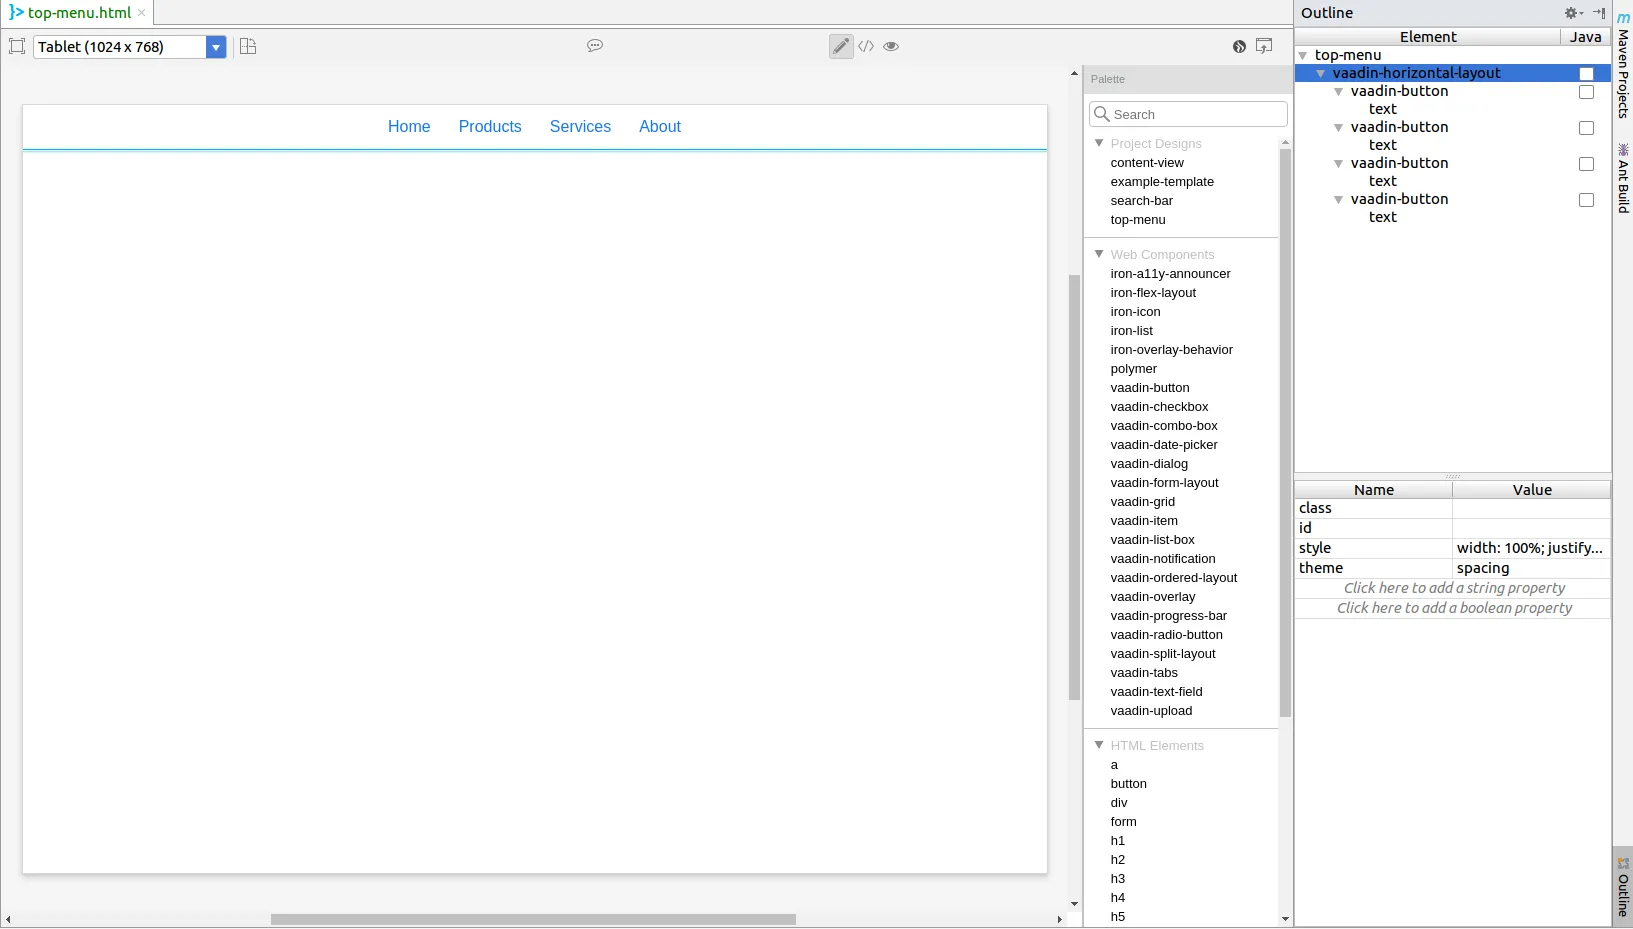
- Now, let’s add a
vaadin-horizontal-layoutas a root with fourvaadin-buttonas children with the below steps -
-
Search for
vaadin-horizontal-layoutin the Search field of the Palette. Thevaadin-horizontal-layoutwill appear under the groupvaadin-ordered-layout. -
Drag and drop it into the paper or just double-click on it.
-
Similarly, add four
vaadin-buttoninto thevaadin-horizontal-layout. -
Change the text content of the buttons to anything you want by selecting the
textundervaadin-buttonin the Outline, then editing itscontentproperty in the Properties table.-
Optional: You can set
tertiaryas the button’sthemeproperty to make it look more like a menu item. You can find more themes at vaadin-button page
-
-
Select the
vaadin-horizontal-layoutand change itsstyleproperty towidth: 100%; justify-content: center;. This will make our buttons stay in the center of the design.-
Optional: Using
spacingtheme forvaadin-horizontal-layoutwill append a little bit more space between our buttons
-
-
Source code
top-menu.html
<link rel="import" href="../bower_components/polymer/polymer.html">
<link rel="import" href="../bower_components/vaadin-ordered-layout/src/vaadin-horizontal-layout.html">
<link rel="import" href="../bower_components/vaadin-button/src/vaadin-button.html">

<dom-module id="top-menu">

    <template>
      <vaadin-horizontal-layout style="width: 100%; justify-content: center;" theme="spacing">
        <vaadin-button theme="tertiary">
          Home
        </vaadin-button>
        <vaadin-button theme="tertiary">
          Products
        </vaadin-button>
        <vaadin-button theme="tertiary">
          Services
        </vaadin-button>
        <vaadin-button theme="tertiary">
          About
        </vaadin-button>
      </vaadin-horizontal-layout>
    </template>

    <script>
        class TopMenu extends Polymer.Element {
            static get is() {
                return 'top-menu';
            }
        }
        customElements.define(TopMenu.is, TopMenu);
    </script>

</dom-module>
Create the search bar component
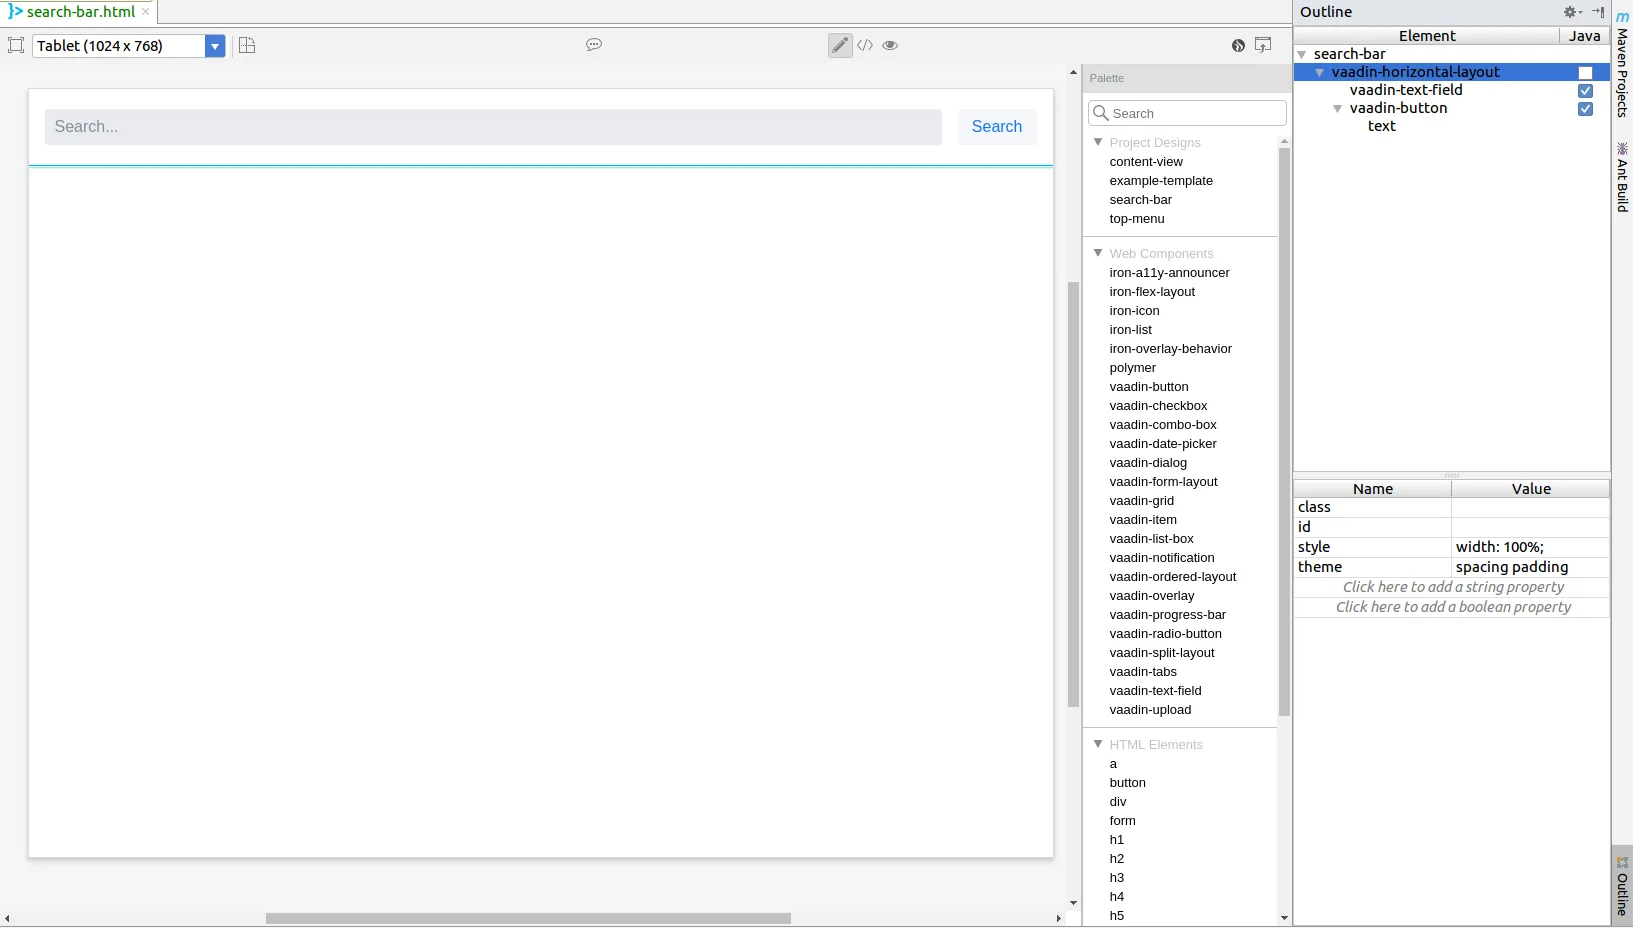
With the same steps from the top-menu component creation, let’s create another component named search-bar and its Java companion file, as well. The search-bar component will contain two elements: search field and search button, which line up horizontally. Therefore, we can use vaadin-horizontal-layout as the root, vaadin-text-field for the search field and vaadin-button for the search button.
- We can decorate the component with these steps
-
-
Set
styleproperty ofvaadin-horizontal-layouttowidth: 100%;because we don’t want the search bar to expand vertically -
Add
spacingandpaddingtheme for the layout to reserve some spaces between the elements and the padding from the document. -
Set
styleproperty ofvaadin-text-fieldtoflex-grow: 1; -
Set your placeholder text for the search field using
placeholderproperty
-
Later in this tutorial, we might need to use the search field and the search button in Java code. Let’s export them by checking their Java checkboxes in the Outline.
The search-bar design should look like search-bar design
Source code
search-bar.html
<link rel="import" href="../bower_components/polymer/polymer.html">
<link rel="import" href="../bower_components/vaadin-text-field/src/vaadin-text-field.html">
<link rel="import" href="../bower_components/vaadin-ordered-layout/src/vaadin-horizontal-layout.html">
<link rel="import" href="../bower_components/vaadin-button/src/vaadin-button.html">

<dom-module id="search-bar">

    <template>
      <vaadin-horizontal-layout style="width: 100%;" theme="spacing padding">
        <vaadin-text-field style="flex-grow: 1;" id="vaadinTextField" placeholder="Search..."></vaadin-text-field>
        <vaadin-button id="vaadinButton">
          Search
        </vaadin-button>
      </vaadin-horizontal-layout>
    </template>

    <script>
        class SearchBar extends Polymer.Element {
            static get is() {
                return 'search-bar';
            }
        }
        customElements.define(SearchBar.is, SearchBar);
    </script>

</dom-module>
Create the content view
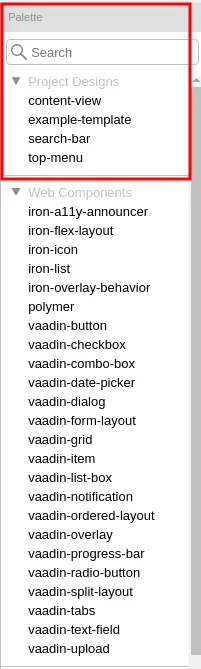
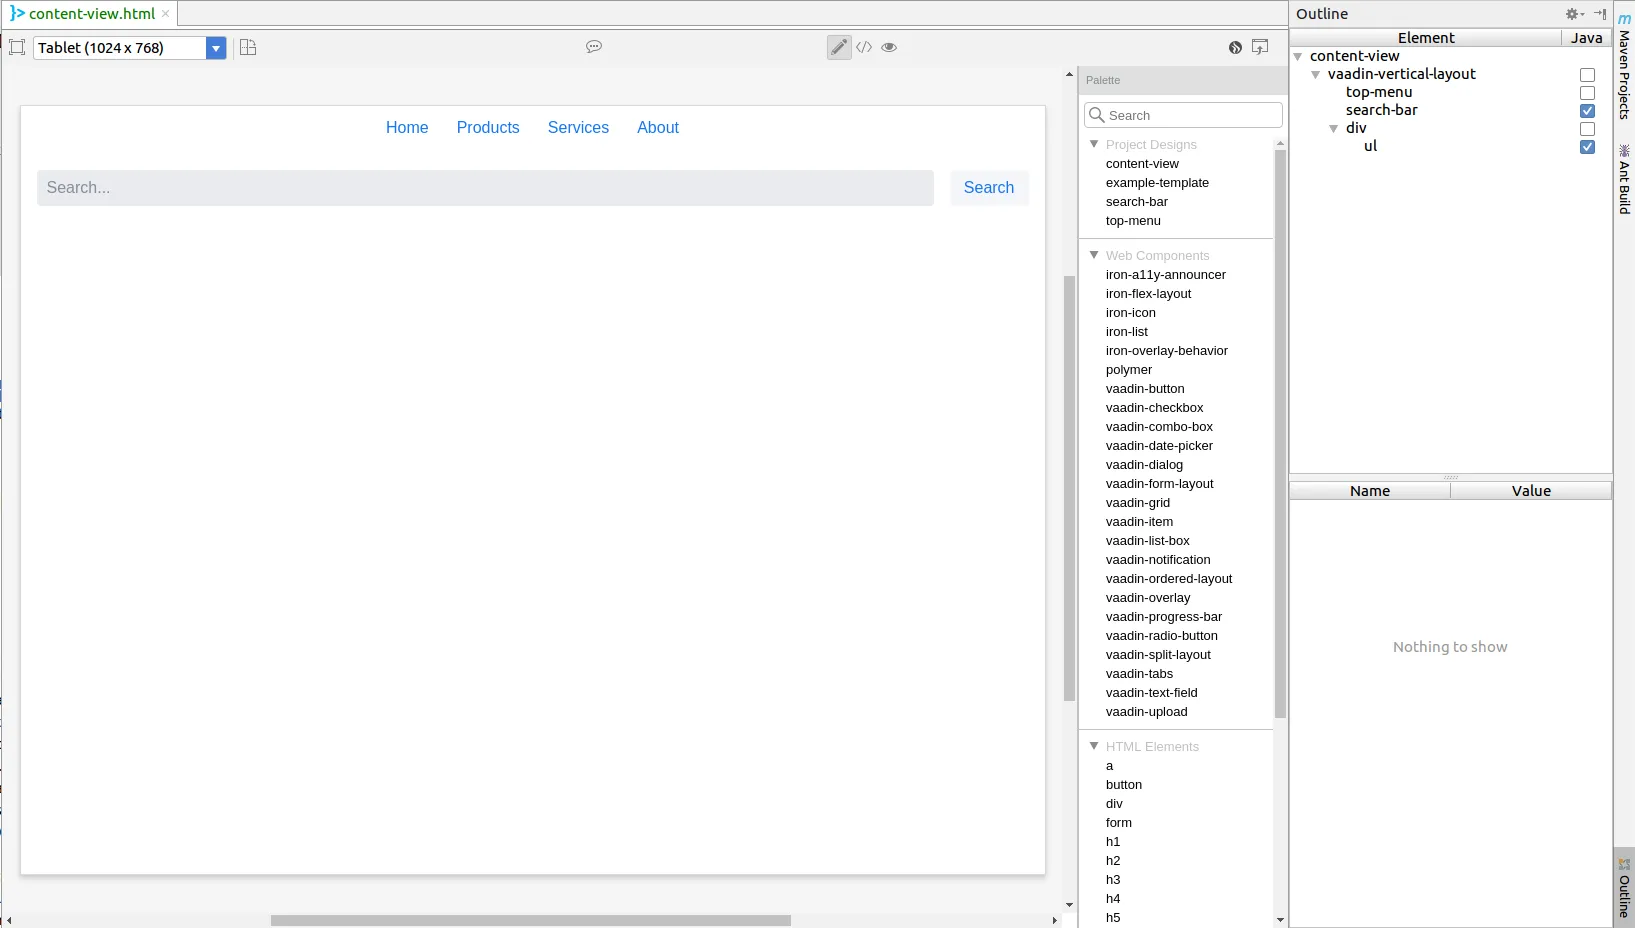
In the same way as above, we can create a new design called content-view along with its Java companion file ContentView.java. In this design, we will add a vaadin-vertical-layout as the root layout. After that, from the Project designs section of the Palette, we can add the top-menu and the search-bar as children of the layout.
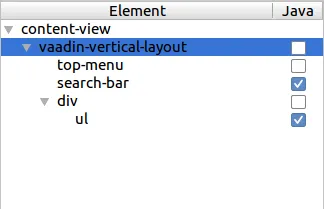
We also need a div and ul as the container for our search result in the view. Then our content-view structure will be like content-view design structure.
To prepare for some simple functionalities later, we should export search-bar and ul to Java.
- Let’s add some additional styles for the design
-
-
Set
top-menustyle property towidth: 100%; -
Set
search-barstyle property towidth: 100%; -
Set
divstyle property towidth: 100%; flex-grow: 1;
-
Source code
content-view.html
<link rel="import" href="../bower_components/polymer/polymer.html">
<link rel="import" href="search-bar.html">
<link rel="import" href="../bower_components/vaadin-ordered-layout/src/vaadin-vertical-layout.html">
<link rel="import" href="top-menu.html">

<dom-module id="content-view">

    <template>
      <vaadin-vertical-layout style="width: 100%; height: 100%;" id="vaadinVerticalLayout">
      <top-menu style="width: 100%;"></top-menu>
      <search-bar style="width: 100%" id="searchBar"></search-bar>
      <div style="width: 100%; flex-grow: 1;">
        <ul id="ul"></ul>
      </div>
      </vaadin-vertical-layout>
    </template>

    <script>
        class ContentView extends Polymer.Element {
            static get is() {
                return 'content-view';
            }
        }
        customElements.define(ContentView.is, ContentView);
    </script>

</dom-module>
Add a route to the view
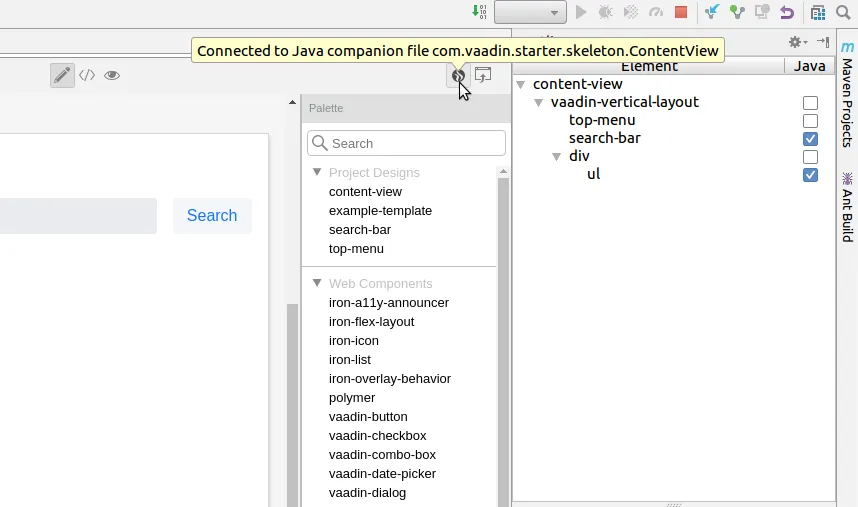
To add a route to the content-view, we need to open the Java companion file (ContentView.java) by either navigating via the project explorer, or clicking on the Java connection indicator. Then add @Route("content-view") annotation to the ContentView class.
Source code
ContentView.java
...
@Tag("content-view")
@HtmlImport("frontend://src/content-view.html")
@Route("content-view")
public class ContentView extends PolymerTemplate<ContentView.ContentViewModel> {
...
Add simple search functionality
Let’s add some code to set the content from search field to the content view when pressing the Search button.
Source code
SearchBar.java
@Tag("search-bar")
@HtmlImport("frontend://src/search-bar.html")
public class SearchBar extends PolymerTemplate<SearchBar.SearchBarModel> {

    @Id("vaadinTextField")
    private TextField vaadinTextField;
    @Id("vaadinButton")
    private Button vaadinButton;

    private final List<SearchBarListener> listeners;

    public interface SearchBarModel extends TemplateModel {

    }

    public SearchBar() {
        listeners = new CopyOnWriteArrayList<>();
        vaadinButton.addClickListener(buttonClickEvent -> {
            for (SearchBarListener listener :
                    listeners) {
                listener.onSearch(vaadinTextField.getValue());
            }
        });
    }

    public void addSearchListener(SearchBarListener listener) {
        listeners.add(listener);
    }

    public void removeSearchListener(SearchBarListener listener) {
        listeners.remove(listener);
    }

    @FunctionalInterface
    public interface SearchBarListener {
        void onSearch(String text);
    }
}
Source code
ContentView.java
@Tag("content-view")
@HtmlImport("frontend://src/content-view.html")
@Route("content-view")
public class ContentView extends PolymerTemplate<ContentView.ContentViewModel> {

    @Id("ul")
    private UnorderedList ul;
    @Id("searchBar")
    private SearchBar searchBar;
    private final SearchBar.SearchBarListener searchBarListener;

    public interface ContentViewModel extends TemplateModel {

    }

    public ContentView() {
        searchBarListener = text -> ul.add(new ListItem(text));
        searchBar.addSearchListener(searchBarListener);
    }

    @Override
    protected void onDetach(DetachEvent detachEvent) {
        super.onDetach(detachEvent);
        searchBar.removeSearchListener(searchBarListener);
    }
}
It’s time to start the application and see our result by running mvn jetty:run from the project folder. Our view is available at http://localhost:8080/content-view