Getting Started
|
Note
| Vaadin Board is only available for Vaadin Framework 8.1 and newer. |
In this chapter, we are going to create a simple Vaadin application and use the Vaadin Board add-on to create a responsive layout.
Prerequisites
In order to follow this tutorial, you will need the following tools/setup:
-
Command line Maven
-
JDK installed
-
IDE (optional)
Project setup
To start off, we need to create a new project where we can use Vaadin Board.
We will use Maven to set up a project, which can later be imported into your favorite IDE.
You can also use your IDE to generate a new maven project using the vaadin-archetype-application archetype, version 8.1.0.
Execute the following command to create the project:
Source code
mvn archetype:generate  \
    -DarchetypeGroupId=com.vaadin \
    -DarchetypeArtifactId=vaadin-archetype-application  \
    -DarchetypeVersion=8.1.0
You will be asked a few questions for setting up the project. In the following, the suitable answers are given for going through this quickstart:
Source code
Define value for property 'groupId': : com.vaadin
Define value for property 'artifactId': : getting-started
Define value for property 'version':  1.0-SNAPSHOT: : <return>
Define value for property 'package':  com.vaadin: : <return>
[INFO] Using property: themeName = mytheme
[INFO] Using property: uiName = MyUI
[INFO] Using property: widgetsetName = MyAppWidgetset
Confirm properties configuration:
groupId: com.vaadin
artifactId: spreadsheet-quickstart
version: 1.0-SNAPSHOT
package: com.vaadin
themeName: mytheme
uiName: MyUI
widgetsetName: MyAppWidgetset
Y: : <return>
Now you should have a generated project in a directory that you specified its name after the artifactId, for example, getting-started.
You can run the new project by issuing the following commands:
Source code
cd getting-started
mvn jetty:run
The latter command will compile all sources and start a local web server. Wait until it prints out “Started Jetty Server” and navigate to http://localhost:8080 using your favorite browser.
In your browser, you should see a button. When you click it, the text “Thank you for clicking” should appear below it. Great, the application works! We can now move on to replace this button with a Vaadin Board! Stop the web server by pressing Ctrl+C in the window where you started it.
Let us first add the Vaadin Board dependency to the project and compile the widget set. Open the pom.xml file and find the dependencies tag. Add the following dependency declaration just before the end tag (/dependencies):
Source code
…
<dependency>
<groupId>com.vaadin</groupId>
<artifactId>vaadin-board</artifactId>
<version>1.1.0</version>
</dependency>
</dependencies>
…It is recommended to use the latest version available, the version number can be checked at Vaadin Directory.
After this, we need to fetch a license for Vaadin Board in order to be able to compile the widget set. You can get a free trial key from Vaadin Directory. Click the large orange “Free trial key” button to the right and copy and paste the key into a file named .vaadin.board.developer.license in your home directory.
Now we have created a new project, added the Vaadin Board add-on to it and can move on to create our layout.
Go to MyUI class and replace init method with the following one:
Source code
Java
    protected void init(VaadinRequest request) {
        Board board = new Board();
        board.setSizeFull();
        Label lbl1 =  createLabel("LABEL1");
        Label lbl2 =  createLabel("LABEL2");
        Label lbl3 =  createLabel("LABEL3");
        Label lbl4 =  createLabel("LABEL4");

        board.addRow(lbl1, lbl2, lbl3, lbl4);
        setContent(board);
    }
    private Label createLabel(String content) {
        Label label = new Label(content);
        label.setSizeFull();
        label.addStyleName(ValoTheme.LABEL_H1);
        label.addStyleName("mystyle");
        return label;
    }
Board is divided into rows, using Row.
Rows are divided into columns.
You can put any Vaadin Component inside the Row.
Every element inside the row can take from one to four columns.
Vaadin Board rearranges child elements based on available space.
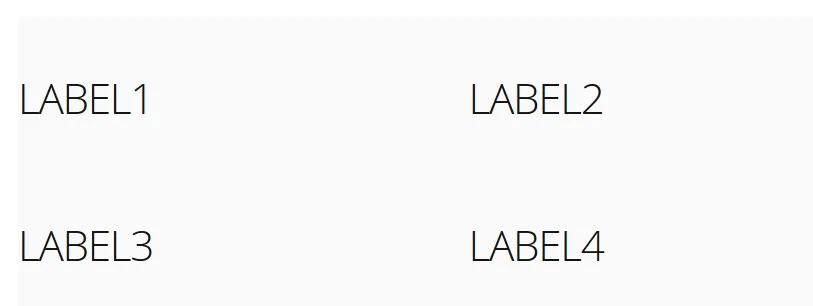
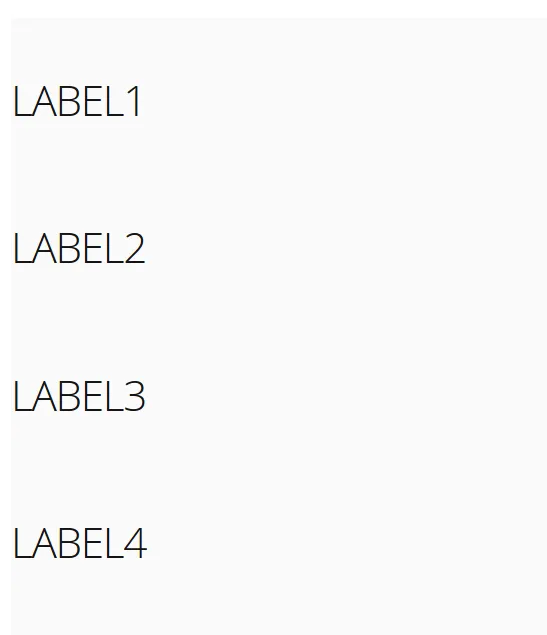
In the example below every label will use 25% on Desktop, but will be rearranged to two rows when switching to tablet: one row with 2 items 50% of available space each and second row with 100% width item.
Then we can add styling to our content. Insert the following CSS to your theme, inside the mytheme.scss file:
Source code
HTML
  .v-label.mystyle  {
    display: block;
    margin-left: 0;
    margin-right: 0;
    font-weight: bold;
    border-style: solid;
    border-width: 5px;
    border-color: #fff;
    text-align: center;
    background-color: #cacaca;
}|
Note
| By default, mobile browsers have fixed viewport size. Set the viewport size to follow the screen-width of the device by adding the @Viewport annotation to the UI class: |
Source code
Java
@Viewport("width=device-width")
public class MyUI extends UI {
Start your server to see the result:
Source code
mvn jetty:run
Vaadin Board rearranges child elements based on viewport size. You can change the size of the Web browser window to see how your application will look on different devices.