Going to production with Java EE & Bluemix
- Getting a Bluemix account
- Configuring Vaadin for Production
- Configuring a Production Database
- Preparing a production WAR
- Preparing your Bluemix Account
- Creating a database for production
- Deploying the Application
- Post Production
In the following we’ll take a look at how to deploy the JavaEE version to IBM Bluemix.
Bluemix is a cloud platform as a service based on Cloud Foundry technology. It hides a lot of the complexity with provisioning, load balancing, scaling etc, since you do not have to deal with each of these individually. You can still take full control of the individual services, if you have specific needs, or as your application grows.
Getting a Bluemix account
In order to use Bluemix, you need to have a Bluemix account. Head over to https://console.bluemix.net/ to read more about he service, and create an account.
|
Tip
| These deployment instructions are based on a free 30-day account for Bluemix, meant to test it out. For a real deployment, you should get a real account. |
Configuring Vaadin for Production
The provided manifest.yml file will automatically set your Vaadin application to run in production mode by specifying -Dvaadin.productionMode=true for the server.
Configuring a Production Database
The database configuration is defined in src/main/resources/META-INF/persistence.xml. By default, the application uses a JTA data source named BakeryDS and looks it up through standard JNDI. There is no need to change this as long as you create a database using the same identifier in Bluemix (see below).
What you need to change to avoid dropping and re-creating your production database on each redeploy, is to remove
Source code
<property name="javax.persistence.schema-generation.database.action" value="drop-and-create" />from persistence.xml.
|
Tip
|
If you are just testing deployment to Bluemix, leave the schema-generation.database.action there for the first deploy to get initial data into the database. Remember to remove it afterwards.
|
Preparing a production WAR
Bluemix does not provide an SLF4J implementation. Uncomment the dependency to slf4j-simple in pom.xml to make sure you see all the log messages.
Run
Source code
mvn installto build and package the application into a .war -file (it will be placed in the target folder).
Preparing your Bluemix Account
When you log in to https://console.bluemix.net for the first time, you will be asked to create an organization for your account.
To be able to use the instructions in this document, create an organization in the "US South" region. The name of the organization can be anything. Once you created an organization, create a "space" inside the organization and name it "dev".
Once the organization and space is created, we can use the command line tools to setup and deploy the application.
First, download the Cloud Foundry command line tools based on the instructions in https://github.com/cloudfoundry/cli#downloads.
Once the command line tools are installed, define the Bluemix API endpoint to use for deployment:
Source code
cf api https://api.ng.bluemix.net|
Note
| If you chose another region than "US South", you need to use the corresponding API endpoint. |
We then need to authenticate to Bluemix using our credentials:
Source code
cf login|
Tip
| If you get a message about "No org or space targeted, use 'cf target -o ORG -s SPACE'" it might be that you have created the space in another region and did not change the API endpoint. Fix that before continuing. |
Creating a database for production
Once the organization and space has been found, we can create a database to use:
Source code
cf create-service elephantsql turtle BakeryDSThis will create a free (slow) PostgreSQL server to store the data. The application is already configured to use a data source named "BakeryDS", so the newly created database will automatically be used as long as you do not change the identifier.
|
Tip
|
The turtle plan of ElephantSQL is run on a shared server and the size of the database is quite limited. For a real production deployment, you should consider a better plan (or another database).
|
Deploying the Application
With everything set up, we can deploy the application using:
Source code
cf push|
Tip
|
If you get a message about "Server error, status code: 400, error code: 210003, message: The host is taken" you need to change the name: attribute in manifest.yml. The name attribute is used to determine the hostname of the application, e.g. name.mybluemix.net
|
If all goes well, you should see something like
Source code
0 of 1 instances running, 1 starting
1 of 1 instances running

App started

OK

App mybakery was started using this command `.liberty/initial_startup.rb`
...
urls: app.mybluemix.net
once the application has been deployed.
Open the url in your browser to access the application (https://app.mybluemix.net, change app in the URL to whatever your application name is in the manifest).
|
Tip
|
If all does not go well, run cf logs mybakery to see the deployment logs for the application. It might just be something which is slower than usual. Try waiting for a while longer or re-reun the cf push command.
|
|
Note
|
When running in production mode, the application will by default create the database and add only an admin@vaadin.com user and nothing else.
|
Post Production
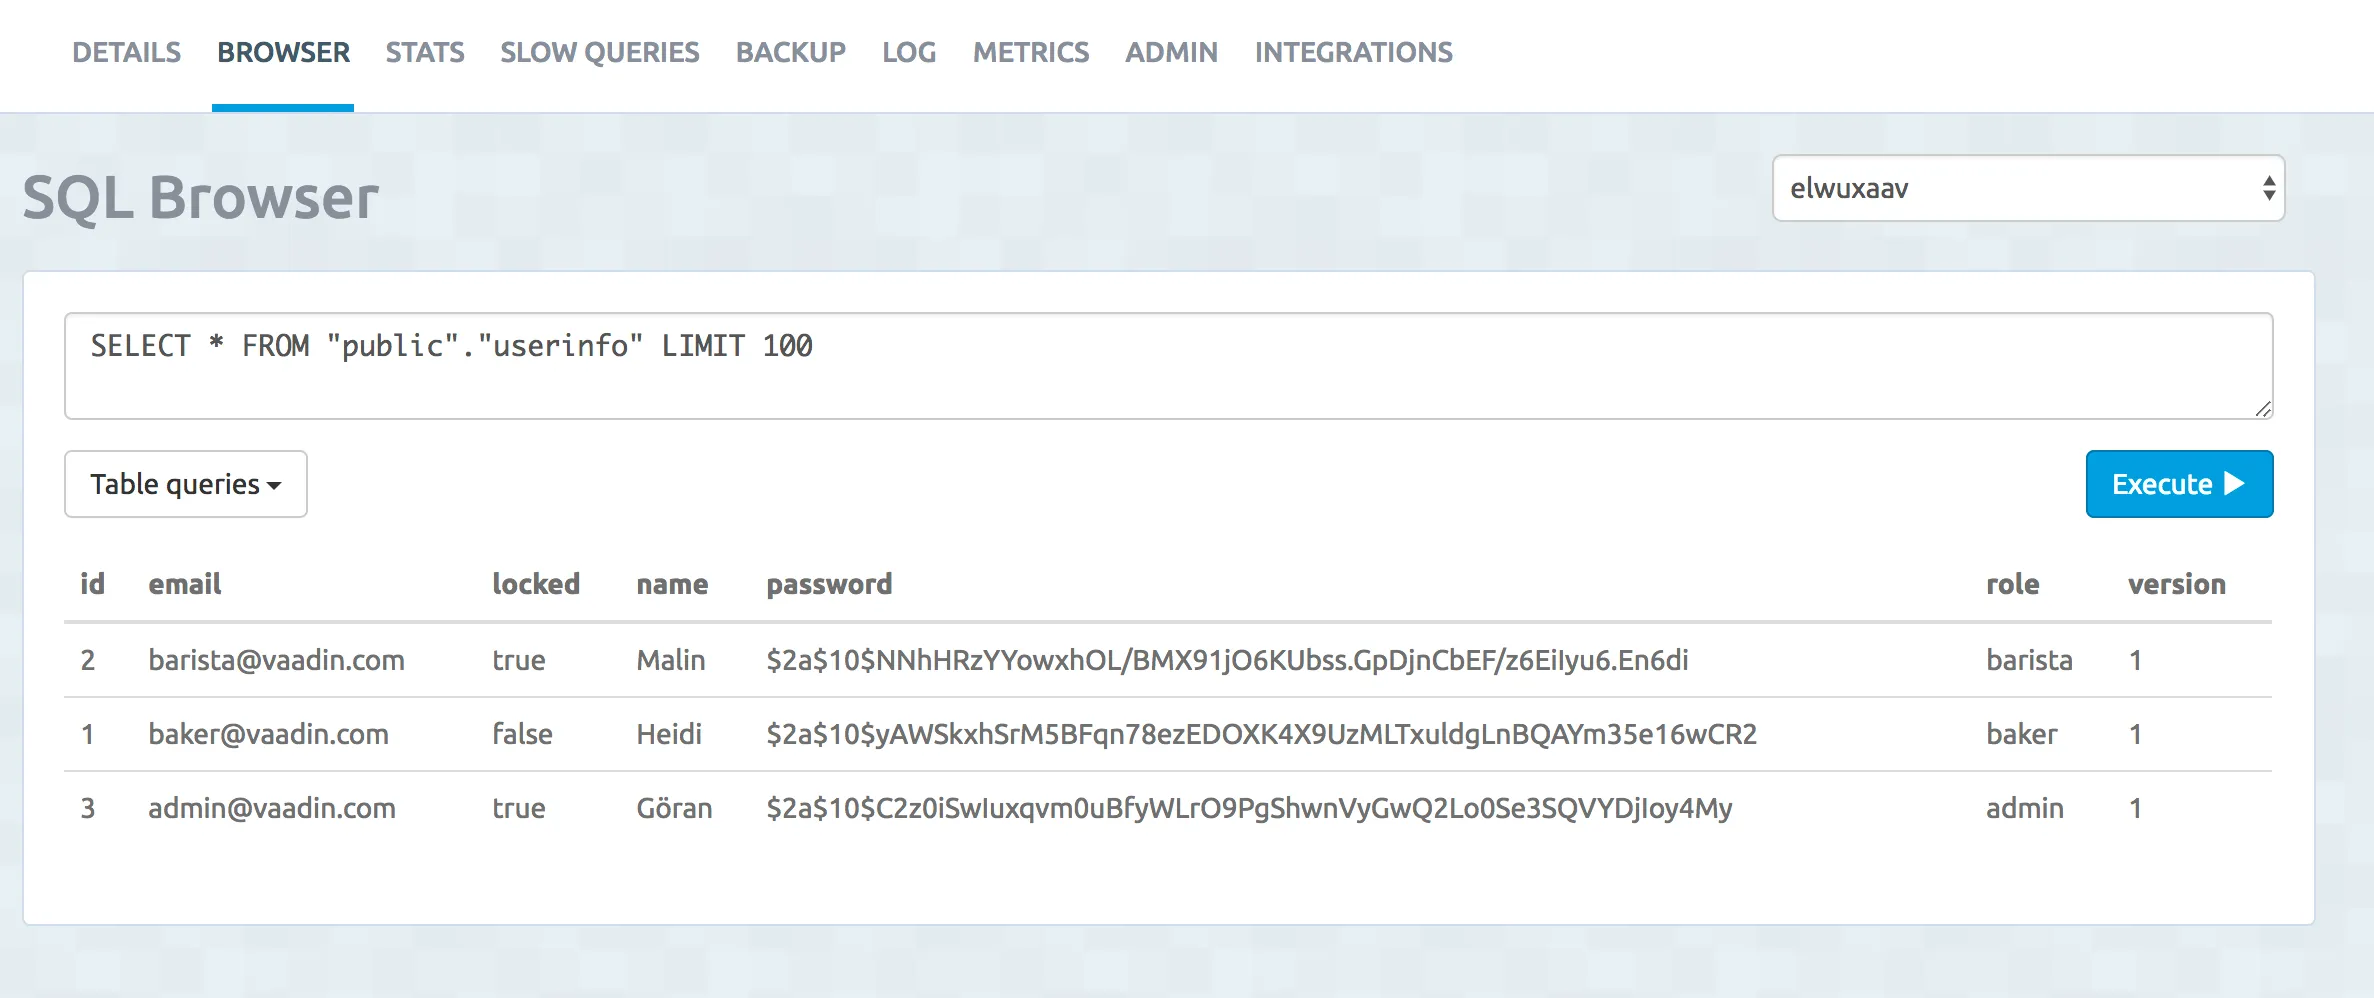
Once you have your application up-and-running with a production database, you might wonder how you can see the contents of your database. You can do this through the Bluemix console at https://console.bluemix.net/. Click on the BakeryDS service and then open the ElephantSQL dashboard. This will show you the URL to the database together with username and password. It will also allow you to browser the DB using the BROWSER tab.
If you want to review logs in the browser, they are also available through https://console.bluemix.net/ → select your Cloud Foundry app → select Logs
There is a lot more you can do with Bluemix, and fortunately the official documentation is quite comprehensive.