Your First Project with IT Mill Toolkit
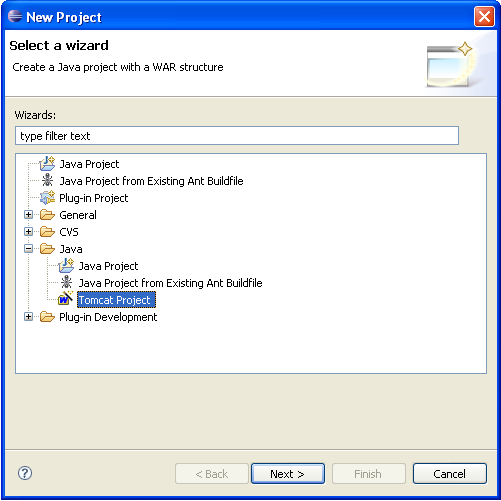
Let us create the first application project with the tools installed in the previous section. Launch Eclipse and create a project by selecting from menu. From the New Project window, select "Tomcat Project" under the folder as shown below. Click .
Give the project name "calc" and leave Use default location selected to create the new project under the default workspace location. Click .
The wizard will suggest /calc for a context
name. This will be the subpath in the URL, for example
http://localhost:8888/calc. The default for
application root will be / (root).
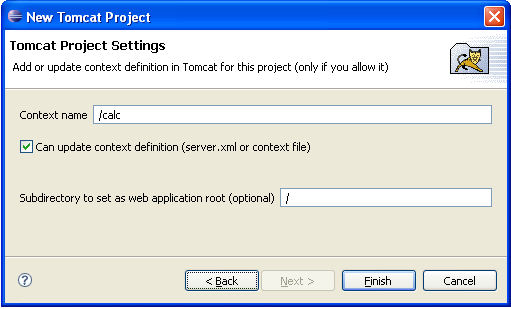
You can just accept the defaults and click . The wizard closes and creates the project.
Feel free to explore the contents of the project skeleton. It
will include a Java Runtime library, Tomcat Servlet API, and and
some other Tomcat libraries. Your source code will go under
WEB-INF/src. IT Mill Toolkit libraries and
any resource files will go under WEB-INF.
You need to include IT Mill Toolkit libraries in the
project. Copy the following packages from the directory where you
unpacked IT Mill Toolkit distribution to
WEB-INF/lib folder:
lib/itmill-toolkit-4.0.3.jar,lib/itmill-toolkit-src-4.0.3.jar, andlib/itmill-toolkit-themes-4.0.3.jar
lib/itmill-toolkit-license.xml to
WEB-INF.
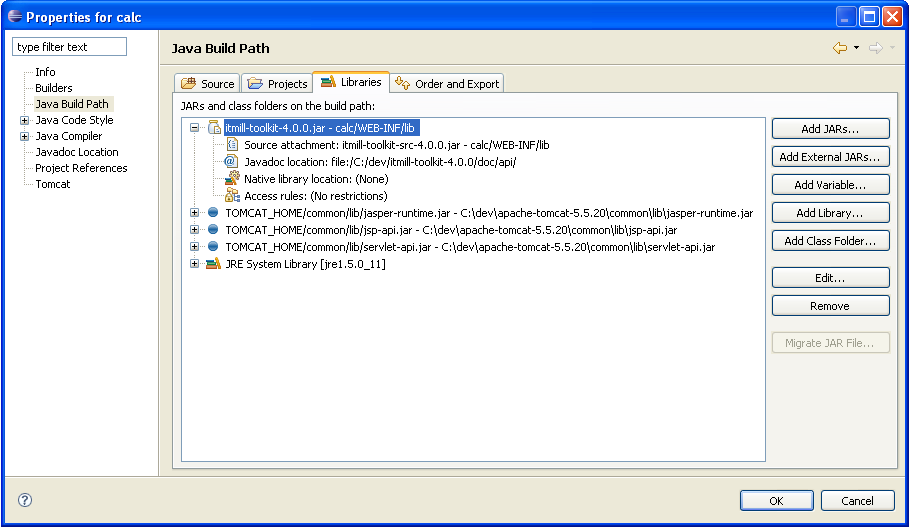
You must add IT Mill Toolkit library to project build
settings. Select from
menu. Select from the tree and add the
itmill-toolkit-4.0.3.jar to libraries. You
should also link the added library to the source package and
javadocs as illustrated below:
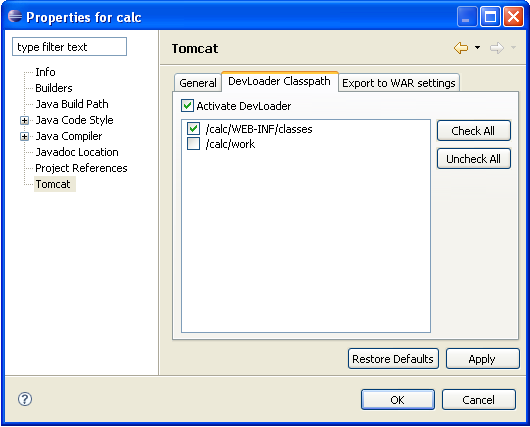
In order to use dynamic class loader feature of the Sysdeo Tomcat plugin, you need to activate dynamic loading for classes built in this project. This is also done in project settings, but on page:
Right-click on the WEB-INF/src folder and
select . Enter the "Calc"
class name in Name field. Leave
Package empty to create the class in the
default package. Click to create
the class and its source file. The skeleton of the file will be
opened in the editor.
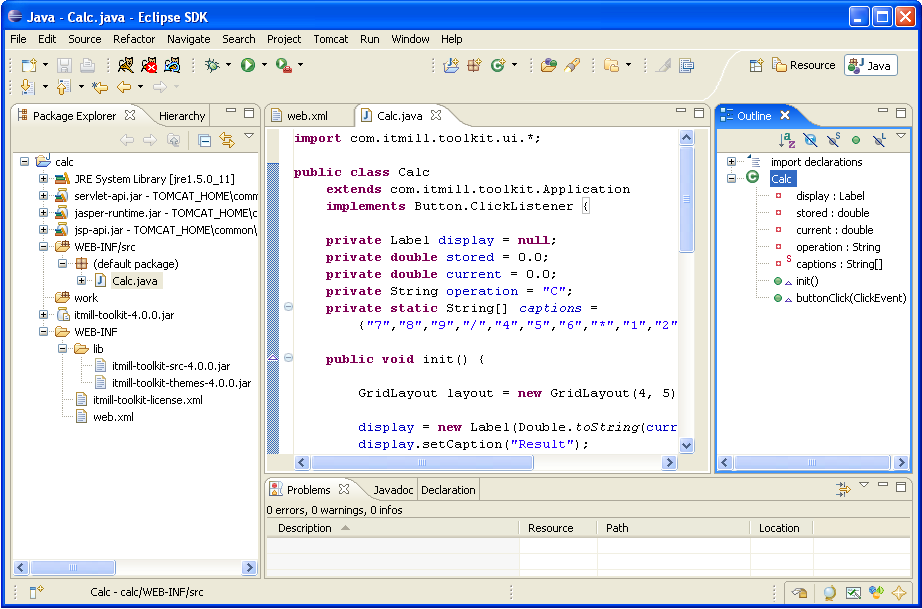
You can now write the source code. As we are writing the Calculator example, you can copy and paste the source code for the Calc application from Example 1.2, “Calc.java” or from the demo application.
If you are in a lazy mood, you can import the source file into the project. Just remember to import the source file under the default package or you have to include the package in the classname in the deployment descriptor below.
You need to set up the application environment as described in
the section called “Application Environment” and provide a deployment
descriptor WEB-INF/web.xml. The contents of
the descriptor for the Calc application is given in Example 1.3, “web.xml” below.
Example 1.3. web.xml
<?xml version="1.0" encoding="UTF-8"?>
<web-app id="WebApp_ID" version="2.4" xmlns="http://java.sun.com/xml/ns/j2ee"
    xmlns:xsi="http://www.w3.org/2001/XMLSchema-instance"
    xsi:schemaLocation="http://java.sun.com/xml/ns/j2ee http://java.sun.com/xml/ns/j2ee/web-app_2_4.xsd">

    <servlet>
        <servlet-name>calc</servlet-name>
        <servlet-class>com.itmill.toolkit.terminal.web.ApplicationServlet</servlet-class>
        <init-param>
            <param-name>application</param-name>
            <param-value>Calc</param-value>
        </init-param>
    </servlet>
    <servlet-mapping>
        <servlet-name>calc</servlet-name>
        <url-pattern>/*</url-pattern>
    </servlet-mapping>
</web-app>
The descriptor defines a servlet with name
calc. The servlet class,
com.itmill.toolkit.terminal.web.ApplicationServlet,
is provided by IT Mill Toolkit framework and it should be the
same for all IT Mill Toolkit projects. The servlet takes the
class name Calc of the user application as
a parameter.
If you have everything set up as described above, all the rest is easy. To run your application, just select from -menu. After this your Tomcat will start on port 8080. Just head your web browser to http://localhost:8080/calc/
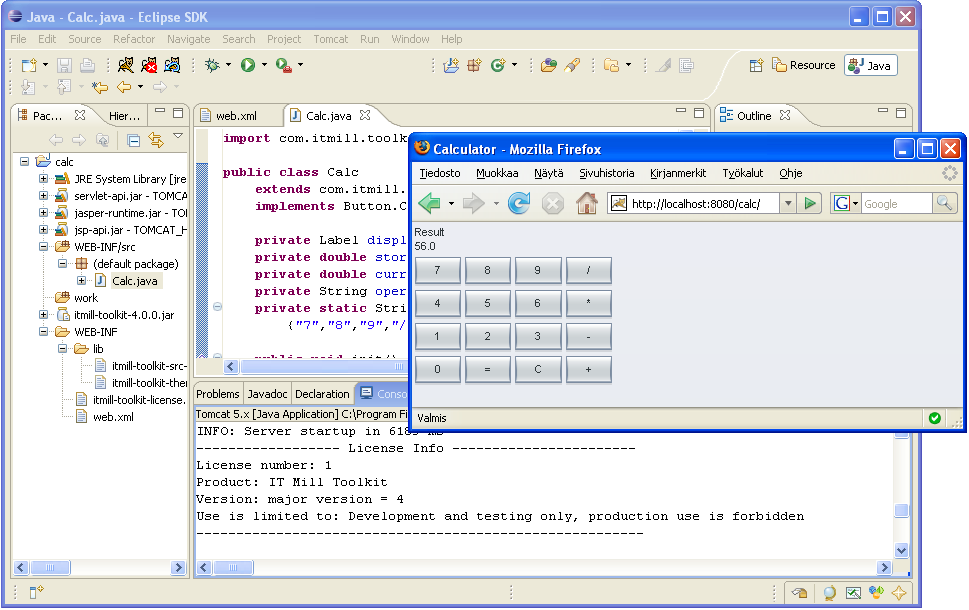
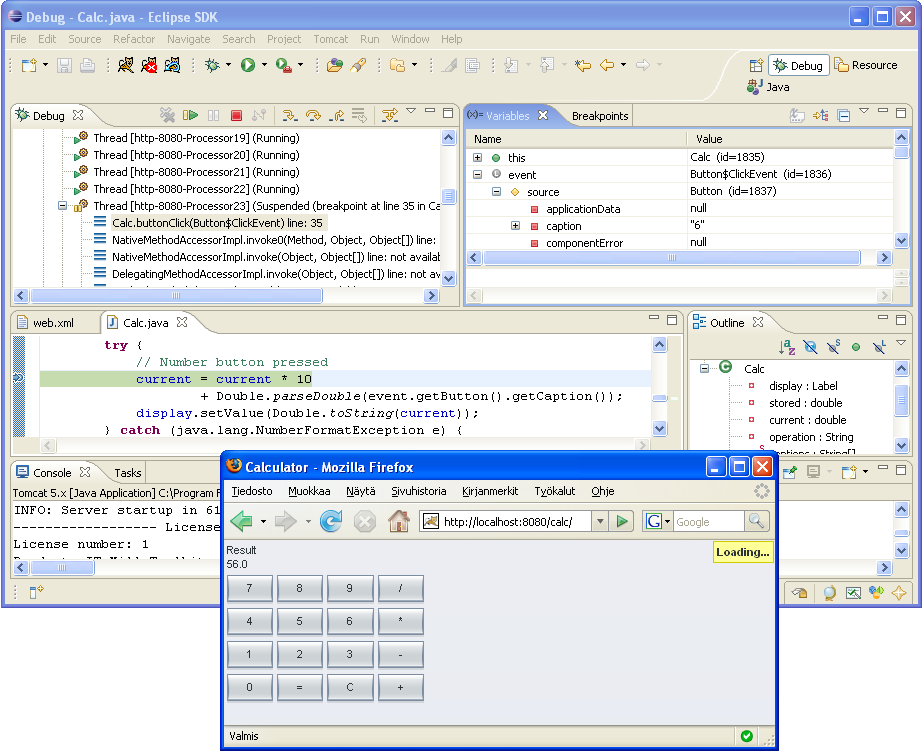
To examine how the application works, you can put break points in
the Java code by double clicking on left marginal of the source
code window. If you put a breakpoint into
buttonClick event handling method and
click any button on calculator, eclipse will open the
debugger. You can examine the state of the application and even make
some changes and then select
from menu.