20.5. Developing JUnit Tests
Tests are developed using the Selenium WebDriver, which is augmented with Vaadin TestBench API features useful for testing Vaadin applications.
Perhaps the easiest way to start developing tests is to use the Recorder to create a JUnit test stub, which is described in the next section. The main purpose of the recorder is to help identify the HTML DOM paths of the user interface elements that you want to interact with and use for assertions. Once you get the hang of coding tests, you should be able to do it without using the Recorder. Working with debug IDs and using a browser debugger, such as Firebug, is usually the easiest way to find out the DOM paths. You can also use the Recorder just to find the paths, and copy and paste them directly to your source code without going through the export hassle.
While this section describes the development of JUnit tests, Vaadin TestBench and the WebDriver are in no way specific to JUnit and you can use any test execution framework, or just regular Java applications, to develop TestBench tests.
Let us assume that you recorded a simple application, as described earlier, and exported it as a JUnit stub. You can add it to a project in a suitable package. You may want to keep your test classes in a separate source tree in your application project, or in an altogether separate project, so that you do not have to include them in the web application WAR. Having them in the same project may be nicer for version control purposes.
You need to perform at least the following routine tasks:
- Rename the package
- Rename the class
- Check the base URL
- Clean up unnecessary code
A JUnit stub will look somewhat as follows:
package com.example.tests;

import java.util.regex.Pattern;
import java.util.concurrent.TimeUnit;
import org.junit.*;
import static org.junit.Assert.*;
import static org.hamcrest.CoreMatchers.*;
import org.openqa.selenium.*;
import org.openqa.selenium.firefox.FirefoxDriver;
import org.openqa.selenium.support.ui.Select;
import com.vaadin.testbench.By;
import com.vaadin.testbench.TestBench;
import com.vaadin.testbench.TestBenchTestCase;

public class Testcase1 extends TestBenchTestCase {
    private WebDriver driver;
    private String baseUrl;
    private StringBuffer verificationErrors = new StringBuffer();
    ...
The verificationErrors is used to collect some
errors in some recorded commands, but can be removed if such commands are
not used. You can also use it to collect non-fatal errors, for example
screenshot comparison errors, and only fail on logic errors.
The set-up method, annotated with @Before, makes
the basic configuration for the test. Most importantly, it creates the
WebDriver instance, which is for Firefox by
default. Drivers for different browsers extend the
RemoteWebDriver class - see the API type
hierarchy for the complete list.
    @Before
    public void setUp() throws Exception {
        driver = TestBench.createDriver(new FirefoxDriver());
        baseUrl = "http://localhost:8080/myapp";
    }
Check that the baseUrl is the correct URL for
the application. It might not be.
The test case methods are marked with @Test
annotation. They normally start by calling the
get() method in the driver. This loads the
URL in the browser.
Actual test commands usually call the
findElement() method in the driver to get
hold of an HTML element to work with. The button has the
main.button ID, as we set that ID for the
Button object with the
setDebugId() method in the application. The
HTML element is represented as a WebElement
object.
@Test
public void testCase1() throws Exception {
    driver.get(concatUrl(baseUrl, "/myapp"));
    assertEquals("Push Me!", driver.findElement(By.vaadin(
        "bookexamplestobetested::PID_Smain.button")).getText());
    driver.findElement(By.vaadin(
        "bookexamplestobetested::PID_Smain.button")).click();
    assertEquals("Thanks!", driver.findElement(By.vaadin(
        "bookexamplestobetested::/VVerticalLayout[0]/"+
        "ChildComponentContainer[1]/VLabel[0]")).getText());
}
The get() call appends the application path
to the base URL. If it is already included in the base URL, you can
remove it.
Finally after running all the test cases, the method annotated with
@After is called. Calling
quit() for the driver closes the browser
window.
The stub includes code for collecting verification errors. If you do not collect those, as is often the case, you can remove the code.
    @After
    public void tearDown() throws Exception {
        driver.quit();

        String verificationErrorString =
            verificationErrors.toString();
        if (!"".equals(verificationErrorString)) {
            fail(verificationErrorString);
        }
    }
The Selenium WebDriver API provides a number of different
selectors for finding HTML DOM elements. The
available selectors are defined as static methods in the
org.openqa.selenium.By class. They create and
return a By instance, which you can use for the
findElement() method in
WebDriver.
The ID, CSS class, and Vaadin selectors are described below. For others, we refer to the Selenium WebDriver API documentation.
Selecting elements by their HTML element id
attribute is usually the easiest way to select elements. It requires
that you use debug IDs, as described in Section 20.3, “Preparing an Application for Testing”. The debug ID is used as is for the
id attribute of the top element of the
component. Selecting is done by the By.id()
selector.
For example, in the SimpleCalculatorITCase.java
example we use the debug ID as follows to click on the calculator
buttons:
@Test
public void testOnePlusTwo() throws Exception {
    openCalculator();

    // Click the buttons in the user interface
    getDriver().findElement(By.id("button_1")).click();
    getDriver().findElement(By.id("button_+")).click();
    getDriver().findElement(By.id("button_2")).click();
    getDriver().findElement(By.id("button_=")).click();

    // Get the result label value
    assertEquals("3.0", getDriver().findElement(
            By.id("display")).getText());
}
The ID selectors are used extensively in the TestBench examples.
In addition to the Selenium selectors, Vaadin TestBench provides a Vaadin selector, which allows pointing to a Vaadin component by its layout path. The JUnit test cases saved from the Recorder use Vaadin selectors by default.
You can create a Vaadin selector with the
By.vaadin() method. You need to use the
Vaadin By, defined in the
com.vaadin.testbench package, which extends the
Selenium By.
The other way is to use the
findElementByVaadinSelector() method in the
TestBenchCommands interface. It returns
the WebElement object.
A Vaadin selector begins with an application identifier. It is the
path to application without any slashes or other special
characters. For example, /book-examples/tobetested
would be bookexamplestobetested. After the
identifier, comes two colons "::", followed by a
slash-delimited component path to the component to be selected. The
elements in the component path are client-side classes of the Vaadin
user interfacer components. For example, the server-side
VerticalLayout component has
VVerticalLayout client-side counterpart. All
path elements except the leaves are component containers, usually
layouts. The exact contained component is identified by its index in
brackets.
A reference to a debug ID is given with a PID_S
suffix to the debug ID.
For example:
// Get the button's element.
// Use the debug ID given with setDebugId().
WebElement button = driver.findElement(By.vaadin(
    "bookexamplestobetested::PID_Smain.button"));

// Get the caption text
assertEquals("Push Me!", button.getText());

// And click it
button.click();

// Get the Label's element by full path
WebElement label = driver.findElement(By.vaadin(
    "bookexamplestobetested::/VVerticalLayout[0]/"+
    "ChildComponentContainer[1]/VLabel[0]"));

// Make the assertion
assertEquals("Thanks!", label.getText());
An element with a particular CSS style class name can be selected with
the By.className() method. CSS selectors are
useful for elements which have no ID, nor can be found easily from the
component hierarchy, but do have a particular unique CSS
style. Tooltips are one example, as they are floating
div elements under the root element of the
application. Their v-tooltip style makes it
possible to select them as follows:
// Verify that the tooltip contains the expected text
String tooltipText = driver.findElement(
    By.className("v-tooltip")).getText();
For a complete example, see the
AdvancedCommandsITCase.java file in the examples.
The Eclipse IDE integrates JUnit with nice control features. To run TestBench JUnit test cases in Eclipse, you need to do the following:
-
Add the TestBench JAR to a library folder in the project, such as
lib. You should not put the library inWEB-INF/libas it is not used by the Vaadin web application. Refresh the project by selecting it and pressing F5. - Right-click the project in Project Explorer and select Properties, and open the Java Build Path and the Libraries tab. Click , navigate to the library folder, select the library, and click .
-
Switch to the Order and Export tab in the project
properties. Make sure that the TestBench JAR is above the
gwt-dev.jar(it may contain an oldhttpclientpackage), by selecting it and moving it with the and buttons. - Click to exit the project properties.
- Right-click a test source file and select → .
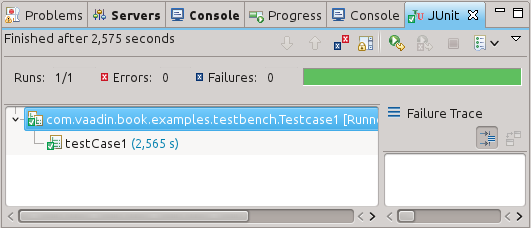
A JUnit view should appear, and it should open the Firefox browser, launch the application, run the test, and then close the browser window. If all goes well, you have a passed test case, which is reported in the JUnit view area in Eclipse, as illustrated in Figure 20.12, “Running JUnit Tests in Eclipse”.
If you are using some other IDE, it might support JUnit tests as well. If not, you can run the tests using Ant or Maven.
Apache Ant has built-in support for executing JUnit tests. To enable the
support, you need to have the JUnit library junit.jar
and its Ant integration library ant-junit.jar in the
Ant classpath, as described in the Ant documentation.
Once enabled, you can use the <junit> task in an
Ant script. The following example assumes that the source files are
located under a src directory under the current
directory and compiles them to the classes
directory. The the class path is defined with the
classpath reference ID and should include the TestBench
JAR and all relevant dependencies.
<project default="run-tests">
    <path id="classpath">
        <fileset dir="lib"
                 includes="vaadin-testbench-standalone-*.jar" />
    </path>

    <!-- This target compiles the JUnit tests. -->
    <target name="compile-tests">
        <mkdir dir="classes" />
        <javac srcdir="src" destdir="classes"
               debug="on" encoding="utf-8">
            <classpath>
                <path refid="classpath" />
            </classpath>
        </javac>
    </target>

    <!-- This target calls JUnit -->
    <target name="run-tests" depends="compile-tests">
        <junit fork="yes">
            <classpath>
                <path refid="classpath" />
                <pathelement path="classes" />
            </classpath>

            <formatter type="brief" usefile="false" />

            <batchtest>
                <fileset dir="src">
                    <include name="**/**.java" />
                </fileset>
            </batchtest>
        </junit>
    </target>
</project>
You also need to deploy the application to test, and possibly launch a dedicated server for it.
Executing JUnit tests with Vaadin TestBench under Maven requires installing the TestBench library in the local Maven repository and defining it as a dependency in any POM that needs to execute TestBench tests.
A complete example of a Maven test setup is given in the
example/maven folder in the installation
package. Please see the README file in the folder for
further instructions.
You can install TestBench in the local Maven repository with the following commands:
$cdmaven$mvn install:install-file \ -Dfile=vaadin-testbench-3.1.0-SNAPSHOT.jar\ -Djavadoc=vaadin-testbench-3.1.0-SNAPSHOT-javadoc.jar\ -DpomFile=pom.xml
The maven folder also includes an
INSTALL file, which contains instructions for
installing TestBench in Maven.
Once TestBench is installed in the local repository as instructed in the previous section, you can define it as a dependency in the Maven POM of your project as follows:
    <dependency>
      <groupId>com.vaadin</groupId>
      <artifactId>vaadin-testbench</artifactId>
      <version>&version.testbench;-SNAPSHOT</version>
    </dependency>
For instructions on how to create a new Vaadin project with Maven, please see Section 2.5, “Creating a Project with Maven”.
To compile and run the tests, simply execute the
test lifecycle phase with Maven as follows:
$ mvn test
...
-----------------------------------------------------
 T E S T S
-----------------------------------------------------
Running TestBenchExample
Tests run: 6, Failures: 2, Errors: 0, Skipped: 1, Time elapsed: 36.736 sec <<< FAILURE!

Results :

Failed tests:
  testDemo(TestBenchExample):
      expected:<[5/17/]12> but was:<[17.6.20]12>
  testScreenshot(TestBenchExample): Screenshots differ

Tests run: 6, Failures: 2, Errors: 0, Skipped: 1
...
The example configuration starts Jetty to run the application that is
tested. Error screenshots from screenshot comparison are written to
the target/testbench/errors folder. To enable
comparing them to "expected" screenshots, you need to copy the
screenshots to the
src/test/resources/screenshots/reference/
folder. See Section 20.6, “Taking and Comparing Screenshots” for more
information regarding screenshots.
Test configuration is done in a method annotated with
@Before. The method is executed before each test
case. In a JUnit stub exported from Recorder, this is done in the
setUp() method.
The basic configuration tasks are:
- Set TestBench parameters
- Create the web driver
- Do any other initialization
TestBench parameters are defined with static methods in the
com.vaadin.testbench.Parameters class. The
parameters are mainly for screenshots and documented in Section 20.6, “Taking and Comparing Screenshots”.
Vaadin TestBench uses Selenium WebDriver to execute tests in a
browser. The WebDriver instance is created with the
static createDriver() method in the
TestBench class. It takes the driver as the
parameter and returns it after registering it. The test cases must extend
the TestBenchTestCase class, which manages the
TestBench-specific features.
The basic way is to create the driver in a method annotated with the
JUnit @Before annotation and close it in a method
annotated with @After.
public class AdvancedTest extends TestBenchTestCase {
    private WebDriver driver;

    @Before
    public void setUp() throws Exception {
        ...
        driver = TestBench.createDriver(new FirefoxDriver());
    }
    ...
    @After
    public void tearDown() throws Exception {
        driver.quit();
    }
}
This creates the driver for each test you have in the test class, causing
a new browser instance to be opened and closed. If you want to keep the
browser open between the test, you can use @BeforeClass
and @AfterClass methods to create and quit the
driver. In that case, the methods as well as the driver instance have to
be static.
public class AdvancedTest extends TestBenchTestCase {
    static private WebDriver driver;

    @BeforeClass
    static public void createDriver() throws Exception {
        driver = TestBench.createDriver(new FirefoxDriver());
    }
    ...
    @AfterClass
    static public void tearDown() throws Exception {
        driver.quit();
    }
}
Please see the API documentation of the
WebDriver interface for a complete list
of supported drivers, that is, classes implementing the interface.
Both the Internet Explorer and Chrome require a special driver, as was
noted in Section 20.2.7, “Installing Browser Drivers”. The
driver executable must be included in the operating system
PATH or be given with a driver-specific system
property in Java with: System.setProperty(prop,
key)).
- Chrome:
webdriver.chrome.driver - IE:
webdriver.ie.driver
If you use the Firefox 10.x ESR version, which is recommended because of test stability, you need to the binary when creating the driver as follows:
FirefoxBinary binary =
    new FirefoxBinary(new File("/path/to/firefox_ESR_10"));
driver = TestBench.createDriver(
    new FirefoxDriver(binary, new FirefoxProfile()));
A typical test case does the following:
- Open the URL
- Navigate to desired state
- Find a HTML element (
WebElement) for navigation - Use
click()and other commands to interact with the element - Repeat with different elements until desired state is reached
- Find a HTML element (
- Find a HTML element (
WebElement) to check - Get and assert the value of the HTML element
- Get a screenshot
The WebDriver allows finding HTML elements in a
page in various ways, for example, with XPath expressions. The access
methods are defined statically in the By class.
These tasks are realized in the following test code:
@Test
public void testCase1() throws Exception {
    driver.get(baseUrl + "/book-examples/tobetested");

    // Get the button's element.
    // (Actually the caption element inside the button.)
    // Use the debug ID given with setDebugId().
    WebElement button = driver.findElement(By.xpath(
        "//div[@id='main.button']/span/span"));

    // Get the caption text
    assertEquals("Push Me!", button.getText());

    // And click it. It's OK to click the caption element.
    button.click();

    // Get the Label's element.
    // Use the automatically generated ID.
    WebElement label = driver.findElement(By.xpath(
        "//div[@id='myapp-949693921']" +
        "/div/div[2]/div/div[2]/div/div"));

    // Make the assertion
    assertEquals("Thanks!", label.getText());
}
You can also use URI fragments in the URL to open the application at a
specific state. For information about URI fragments, see Section 12.10, “URI Fragment and History Management with UriFragmentUtility”.
You should use the JUnit assertion commands. They are static methods defined in the org.junit.Assert class, which you can import (for example) with:
import static org.junit.Assert.assertEquals;
Please see the Selenium
API documentation for a complete reference of the element search
methods in the WebDriver and
By classes and for the interaction commands in the
WebElement class.
TestBench has a collection of its own commands, defined in the
TestBenchCommands interface. You can get a command
object that you can use by calling testBench(driver) in
a test case.
Selenium is intended for regular web applications that load a page that is immediately rendered by the browser. Vaadin, on the other hand, is an Ajax framework where page is loaded just once and rendering is done in JavaScript. This takes more time so that the rendering might not be finished when the WebDriver continues executing the test. Vaadin TestBench allows waiting until the rendering is finished.
The waiting is automatically enabled. You can disable waiting by calling
disableWaitForVaadin() in the
TestBenchCommands interface. You can call
it in a test case as follows:
testBench(driver).disableWaitForVaadin();
When disabled, you can wait for the rendering to finish by calling
waitForVaadin() explicitly.
testBench(driver).waitForVaadin();
You can re-enable the waiting with
enableWaitForVaadin() in the same interface.
Component tooltips show when you hover the mouse over a component. Events caused by hovering are not recorded by Recorder, so this interaction requires special handling when testing.
Let us assume that you have set the tooltip as follows:
// Create a button with a debug ID
Button button = new Button("Push Me!");
button.setDebugId("main.button");

// Set the tooltip
button.setDescription("This is a tip");
The tooltip of a component is displayed with the
showTooltip() method in the
TestBenchElementCommands interface. You should wait
a little to make sure it comes up. The floating tooltip element is not
under the element of the component, but you can find it by
//div[@class='v-tooltip'] XPath expression.
@Test
public void testTooltip() throws Exception {
    driver.get(appUrl);

    // Get the button's element.
    // Use the debug ID given with setDebugId().
    WebElement button = driver.findElement(By.xpath(
        "//div[@id='main.button']/span/span"));

    // Show the tooltip
    testBenchElement(button).showTooltip();

    // Wait a little to make sure it's up
    Thread.sleep(1000);

    // Check that the tooltip text matches
    assertEquals("This is a tip", driver.findElement(
        By.xpath("//div[@class='v-tooltip']")).getText());

    // Compare a screenshot just to be sure
    assertTrue(testBench(driver).compareScreen("tooltip"));
}
Some Vaadin components, such as Table and
Panel have a scrollbar. To get hold of the
scrollbar, you must first find the component element. Then, you need to
get hold of the TestBenchElementCommands
interface from the WebElement with
testBenchElement(WebElement). The
scroll() method in the interface scrolls a
vertical scrollbar down the number of pixels given as the parameter. The
scrollLeft() scrolls a horizontal scrollbar by
the given number of pixels.
When testing notifications, you will need to close the notification box.
You need to get hold of the
TestBenchElementCommands interface from the
WebElement of the notification element with
testBenchElement(WebElement). The
closeNotification() method in the interface
closes the notification.
Opening context menus require special handling. You need to create a
Selenium Actions object to perform a context click
on a WebElement.
In the following example, we open a context menu in a
Table component, find an item by its caption text,
and click it.
// Select the table body element
WebElement e = getDriver().findElement(
        By.className("v-table-body"));

// Perform context click action to open the context menu
new Actions(getDriver()).moveToElement(e)
        .contextClick(e).perform();

// Select "Add Comment" from the opened menu
getDriver().findElement(
        By.xpath("//*[text() = 'Add Comment']")).click();
The complete example is given in the
AdvancedCommandsITCase.java example source file.
It is not just that it works, but also how long it takes. Profiling test execution times consistently is not trivial, as a test environment can have different kinds of latency and interference. For example in a distributed setup, timings taken on the test server would include the latencies between the test server, the grid hub, a grid node running the browser, and the web server running the application. In such a setup, you could also expect interference between multiple test nodes, which all might make requests to a shared application server and possibly also share virtual machine resources.
Furthermore, in Vaadin applications, there are two sides which need to be profiled: the server-side, on which the application logic is executed, and the client-side, where it is rendered in the browser. Vaadin TestBench includes methods for measuring execution time both on the server-side and the client-side.
The TestBenchCommands interface offers the
following methods for profiling test execution time:
totalTimeSpentServicingRequests()-
Returns the total time (in milliseconds) spent servicing requests in the application on the server-side. The timer starts when you first navigate to the application and hence start a new session. The time passes only when servicing requests for the particular session. The timer is shared in the servlet session, so if you have, for example, multiple portlets in the same application (session), their execution times will be included in the same total.
Notice that if you are also interested in the client-side performance for the last request, you must call the
timeSpentRenderingLastRequest()before calling this method. This is due to the fact that this method makes an extra server request, which will cause an empty response to be rendered. timeSpentServicingLastRequest()-
Returns the time (in milliseconds) spent servicing the last request in the application on the server-side. Notice that not all user interaction through the WebDriver cause server requests.
As with the total above, if you are also interested in the client-side performance for the last request, you must call the
timeSpentRenderingLastRequest()before calling this method. totalTimeSpentRendering()-
Returns the total time (in milliseconds) spent rendering the user interface of the application on the client-side, that is, in the browser. This time only passes when the browser is rendering after interacting with it through the WebDriver. The timer is shared in the servlet session, so if you have, for example, multiple portlets in the same application (session), their execution times will be included in the same total.
timeSpentRenderingLastRequest()-
Returns the time (in milliseconds) spent rendering user interface of the application after the last server request. Notice that not all user interaction through the WebDriver cause server requests.
If you also call the
timeSpentServicingLastRequest()ortotalTimeSpentServicingRequests(), you should do so before calling this method. The methods cause a server request, which will zero the rendering time measured by this method.
Generally, only interaction with fields in the
immediate mode cause server requests. This includes
button clicks. Some components, such as Table,
also cause requests otherwise, such as when loading data while
scrolling. Some interaction could cause multiple requests, such as when
images are loaded from the server as the result of user interaction.
The following example is given in the
VerifyExecutionTimeITCase.java file under the
TestBench examples.
@Test
public void verifyServerExecutionTime() throws Exception {
    openCalculator();

    // Get start time on the server-side
    long currentSessionTime = testBench(getDriver())
            .totalTimeSpentServicingRequests();

    // Interact with the application
    calculateOnePlusTwo();

    // Calculate the passed processing time on the serve-side
    long timeSpentByServerForSimpleCalculation = testBench()
        .totalTimeSpentServicingRequests() - currentSessionTime;

    // Report the timing
    System.out.println("Calculating 1+2 took about "
            + timeSpentByServerForSimpleCalculation
            + "ms in servlets service method.");

    // Fail if the processing time was critically long
    if (timeSpentByServerForSimpleCalculation > 30) {
        fail("Simple calculation shouldn't take "
             + timeSpentByServerForSimpleCalculation + "ms!");
    }

    // Do the same with rendering time
    long totalTimeSpentRendering =
            testBench().totalTimeSpentRendering();
    System.out.println("Rendering UI took " +
            totalTimeSpentRendering + "ms");
    if (timeSpentByServerForSimpleCalculation > 400) {
        fail("Rendering UI shouldn't take "
             + timeSpentByServerForSimpleCalculation + "ms!");
    }

    // A regular assertion on the UI state
    assertEquals("3.0", getDriver().findElement(
                        By.id("display")).getText());
}