5.22. LoginForm
The LoginForm component is a login form that allows a
password manager in the web browser to remember and later automatically fill
in the username and password. This commonly used functionality does not work
with regular Vaadin components and is a common problem with Ajax
applications.
// A wrapper with a caption for the login form
Panel loginPanel = new Panel("Login");
loginPanel.setWidth("250px");

LoginForm login = new LoginForm();
loginPanel.addComponent(login);
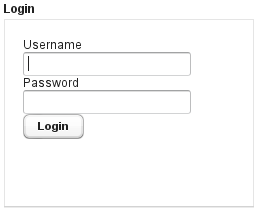
The resulting form is shown in Figure 5.69, “The LoginForm Component”.
The LoginForm uses static HTML inside an
iframe element to enable the functionality. The component
provides a default implementation of the static HTML; if you want to change
the layout, you need to reimplement the
getLoginHtml() method.
The login form has by default 100%x100% relative size, taking all the space
given by the containing layout. You may set the size to fixed values, but not
undefined in either direction, because the contained iframe
element takes all of this size (it also has 100%x100% size). How the actual
form uses this space depends on the static HTML. Giving too little space for
the form results in scroll bars.
Customization of the login form is necessary, for example, if you need to
change the layout or internationalize the form. Customization is done by
overriding the getLoginHtml() method, which
returns the static HTML of the form. The customization layer is very
"unvaadin"-like, and at best hack-ish, but dictated by the form management
in browsers.
Let us look at a custom login form that lets the user of the form to give the field captions:
class MyLoginForm extends LoginForm {
    String usernameCaption;
    String passwordCaption;
    String submitCaption;

    public MyLoginForm(String usernameCaption,
            String passwordCaption, String submitCaption) {
        this.usernameCaption = usernameCaption;
        this.passwordCaption = passwordCaption;
        this.submitCaption  = submitCaption;
    }
Then we override the method that generates the static HTML for the form:
@Override
protected byte[] getLoginHTML() {
    // Application URI needed for submitting form
    String appUri = getApplication().getURL().toString()
            + getWindow().getName() + "/";

    String x, h, b; // XML header, HTML head and body
The XML header is needed for the validity of the XHTML page:
    x = "<!DOCTYPE html PUBLIC \"-//W3C//DTD "
      + "XHTML 1.0 Transitional//EN\" "
      + "\"http://www.w3.org/TR/xhtml1/"
      + "DTD/xhtml1-transitional.dtd\">\n";
Notice that it is important to have a newline (\n) at
the end of the XML header line.
The HTML header part contains JavaScript definitions that handle submitting the form data. It also copies the style sheet references from the parent window.
    h = "<head><script type='text/javascript'>"
      + "var setTarget = function() {"
      + "  var uri = '" + appUri + "loginHandler';"
      + "  var f = document.getElementById('loginf');"
      + "  document.forms[0].action = uri;"
      + "  document.forms[0].username.focus();"
      + "};"
      + ""
      + "var styles = window.parent.document.styleSheets;"
      + "for(var j = 0; j < styles.length; j++) {\n"
      + "  if(styles[j].href) {"
      + "    var stylesheet = document.createElement('link');\n"
      + "    stylesheet.setAttribute('rel', 'stylesheet');\n"
      + "    stylesheet.setAttribute('type', 'text/css');\n"
      + "    stylesheet.setAttribute('href', styles[j].href);\n"
      + "    document.getElementsByTagName('head')[0]"
      + "                .appendChild(stylesheet);\n"
      + "  }"
      + "}\n"
      + "function submitOnEnter(e) {"
      + "  var keycode = e.keyCode || e.which;"
      + "  if (keycode == 13) {document.forms[0].submit();}"
      + "}\n"
      + "</script>"
      + "</head>";
The HTML body element contains the actual form. Notice that it is contained
within an inner iframe. The form and the button must
have JavaScript calls to submit the form content.
    b = "<body onload='setTarget();'"
      + "  style='margin:0;padding:0; background:transparent;'"
      + "  class='"
      + ApplicationConnection.GENERATED_BODY_CLASSNAME + "'>"
      + "<div class='v-app v-app-loginpage'"
      + "     style='background:transparent;'>"
      + "<iframe name='logintarget' style='width:0;height:0;"
      + "border:0;margin:0;padding:0;'></iframe>"
      + "<form id='loginf' target='logintarget'"
      + "      onkeypress='submitOnEnter(event)'"
      + "      method='post'>"
      + "<table>"
      + "<tr><td>" + usernameCaption + "</td>"
      + "<td><input class='v-textfield' style='display:block;'"
      + "           type='text' name='username'></td></tr>"
      + "<tr><td>" + passwordCaption + "</td>"
      + "    <td><input class='v-textfield'"
      + "          style='display:block;' type='password'"
      + "          name='password'></td></tr>"
      + "</table>"
      + "<div>"
      + "<div onclick='document.forms[0].submit();'"
      + "     tabindex='0' class='v-button' role='button'>"
      + "<span class='v-button-wrap'>"
      + "<span class='v-button-caption'>"
      + submitCaption + "</span>"
      + "</span></div></div></form></div></body>";
Then combine and return the page as a byte array.
    return (x + "<html>" + h + b + "</html>").getBytes();
}
We can use the custom login form as follows:
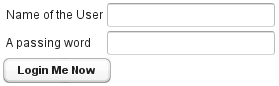
MyLoginForm loginForm = new MyLoginForm("Name of the User",
        "A passing word", "Login Me Now");
The customized LoginForm is shown in Figure 5.70, “Customizing the LoginForm”.
.v-customcomponent {}
.v-customcomponent .v-embedded {}
.v-app-loginpage {}
.v-app-loginpage .v-textfield {}
.v-app-loginpage .v-button  {}
The LoginForm component is a purely server-side
component that extends CustomComponent and
therefore has a v-customcomponent base style. If you
wish to do any styling for the component, you should give it a custom
style name to distinguish it from the regular
CustomComponent.
The component contains an iframe in an element with
v-embedded style. The other styles are defined in the
static HTML code returned by the getLoginHTML()
method. The default implementation reuses the styles of the
TextField and Button
components for the input fields and the button, that is,
v-textfield and v-button. The root
element has the same v-app style as a regular Vaadin
application would have, and an additional
v-app-loginpage style.
...
+ "<div class='v-app v-app-loginpage'
        style=\"background:transparent;\">"
...
+ "<input class='v-textfield' ...
...
+ "<div><input class='v-textfield' ...
...
<div ... class='v-button' role='button'>