12.3. Embedding Applications in Web Pages
Many web sites are not all Ajax, but Ajax is used only for specific functionalities. In practice, many web applications are a mixture of dynamic web pages and Ajax applications embedded in such pages.
Embedding Vaadin applications is easy and there are several different ways to
embed them. One is to have a <div> placeholder for
the web application and load the Vaadin Client-Side Engine with a simple
JavaScript code. Another method is even easier, which is to simply use the
<iframe> element. Both of these methods have
advantages and disadvantages. The <div> method can
only embed one application in a page, while the
<iframe> method can embed as many as needed. One
disadvantage of the <iframe> method is that the size
of the <iframe> element is not flexible according to
the content while the <div> method allows such
flexibility. The following sections look closer into these two embedding
methods. Additionally, the Vaadin XS add-on allows embedding Vaadin
applications in websites running in another server.
You can embed a Vaadin application inside a web page with a
method that is equivalent to loading the initial page content from the
application servlet in a non-embedded application. Normally, the
ApplicationServlet servlet generates an initial
page that contains the correct parameters for the specific
application. You can easily configure it to load multiple Vaadin
applications on the same page, assuming that they use the same widget set.
You can view the initial page for your application easily simply by
opening the application in a web browser and viewing the HTML source
code. You could just copy and paste the embedding code from the default
initial page. It has, however, some extra functionality that is not
normally needed: it generates some of the script content with
document.write() calls, which is useful only
when you are running the application as a portlet in a portal. The method
outlined below is much simpler.
Embedding requires four elements inside the HTML document:
-
In the
<head>element, you need to define the application URI and parameters and load the Vaadin Client-Side Engine. Thevaadinvariable is an associative map that can contain various runtime data used by the Client-Side Engine of Vaadin. ThevaadinConfigurationsitem is itself an associate map that contains parameters for each of the applications embedded in the page. The map must contain the following items:appUri-
The application URI consists of the context and the
application path. If the context is
/mycontextand the application path ismyapp, theappUriwould be/mycontext/myapp. pathInfo-
The
PATHINFOparameter for the Servlet. themeUri(optional)-
URI of the application theme. The URI must include
application context and the path to the theme
directory. Themes are, by default, stored under the
/VAADIN/themes/path. versionInfo-
This item is itself an associative map that contains two
parameters:
vaadinVersioncontains the version number of the Vaadin version used by the application. TheapplicationVersionparameter contains the version of the particular application. The contained parameters are optional, but theversionInfoparameter itself is not.
The following example defines two applications to run in the same window: the Calculator and Hello World examples. In the example, the application context is
/mycontext.<script type="text/javascript"> var vaadin = { vaadinConfigurations: { 'calc': { appUri:'/mycontext/Calc', pathInfo: '/', themeUri: '/mycontext/VAADIN/themes/example', versionInfo : { vaadinVersion: "6.7.6", applicationVersion: "NONVERSIONED" } }, 'hello': { appUri:'/mycontext/HelloWorld', pathInfo: '/', themeUri: '/mycontext/VAADIN/themes/example', versionInfo : {} } }}; </script> -
Loading the Vaadin Client-Side Engine, that is, the widget set, is done with the following kind of line in the
<head>element:<script language='javascript' src='/mycontext/VAADIN/widgetsets/com.vaadin.terminal.gwt.DefaultWidgetSet/com.vaadin.terminal.gwt.DefaultWidgetSet.nocache.js'></script>The engine URI consists of the context of the web application,
mycontextabove, followed by the path to the JavaScript (.js) file of the widget set, relative to the web application root (theWebContentdirectory in Eclipse). The line above assumes the use of the default widget set in Vaadin. If you have made custom widgets that are defined in a custom widget set, you need to use the path to the compiled widget set file. Widget sets must be compiled under theWebContent/VAADIN/widgetsetsdirectory. -
In the
<html>element, you need to do a routine inclusion of GWT historyiframeelement as follows:<iframe id="__gwt_historyFrame" style="width:0;height:0;border:0"></iframe> -
The location of the Vaadin application is defined with a
divplaceholder element havingid="calc", where the identifier is the same as in thevaadinConfigurationsparameter, as follows:<div id="calc"></div>The embedding element should not be self-closing.
Below is a complete example of embedding an application.
<?xml version="1.0" encoding="UTF-8" ?>
<!DOCTYPE html PUBLIC "-//W3C//DTD XHTML 1.0 Strict//EN"
          "http://www.w3.org/TR/xhtml1/DTD/xhtml1-strict.dtd">
<html xmlns="http://www.w3.org/1999/xhtml">
<head>
  <meta http-equiv="Content-Type"
        content="text/html; charset=UTF-8" />

  <title>Embedding a Vaadin Application in HTML Page</title>

  <!-- Define the application configuration -->
  <script type="text/javascript">
    var vaadin = {
      vaadinConfigurations: {
        helloworld: {
          appUri:'/book-examples/helloworld',
          pathInfo: '/',
          themeUri:'/book-examples/VAADIN/themes/book-examples',
          versionInfo : {}}
      }};
  </script>

  <!-- Load the widget set, that is, the Client-Side Engine -->
  <script language='javascript' src='/book-examples/VAADIN/widgetsets/com.vaadin.book.widgetset.BookExamplesWidgetSet/com.vaadin.book.widgetset.BookExamplesWidgetSet.nocache.js'></script>

  <!-- Load the style sheet -->
  <link rel="stylesheet"
        type="text/css"
        href="/book-examples/VAADIN/themes/book-examples/styles.css"/>
</head>

<body>
  <!-- GWT requires an invisible history frame is needed for -->
  <!-- page/fragment history in the browser                  -->
  <iframe tabIndex="-1" id="__gwt_historyFrame" style="position:absolute;width:0;height:0;border:0;overflow:hidden;" src="javascript:false"></iframe>

  <h1>Embedding a Vaadin Application</h1>

  <p>This is a static web page that contains an embedded Vaadin
     application. It's here:</p>

  <!-- So here comes the div element in which the Vaadin -->
  <!-- application is embedded.                          -->
  <div id="helloworld" style="border: 2px solid green;"></div>

  <p>Please view the page source to see how embedding works.</p>

  <noscript>You have to enable javascript in your browser to
            use an application built with Vaadin.</noscript>
</body>
</html>
You can style the embedded application with themes, as described in Chapter 8, Themes. The Client-Side Engine loads the theme required by the application. In addition, you can do styling with CSS in the embedding page. In the above example, we added some styling directly to the element.
Embedding a Vaadin application inside an
<iframe> element is even easier than the method
described above, as it does not require definition of any Vaadin specific
definitions. The use of <iframe> makes it
possible to embed multiple web applications or two different views to the
same application on the same page.
You can embed an application with an element such as the following:
<iframe src="/vaadin-examples/Calc"></iframe>
The problem with <iframe> elements is that their
size of is not flexible depending on the content of the frame, but the
content must be flexible to accommodate in the frame. You can set the size
of an <iframe> element with
height and width attributes.
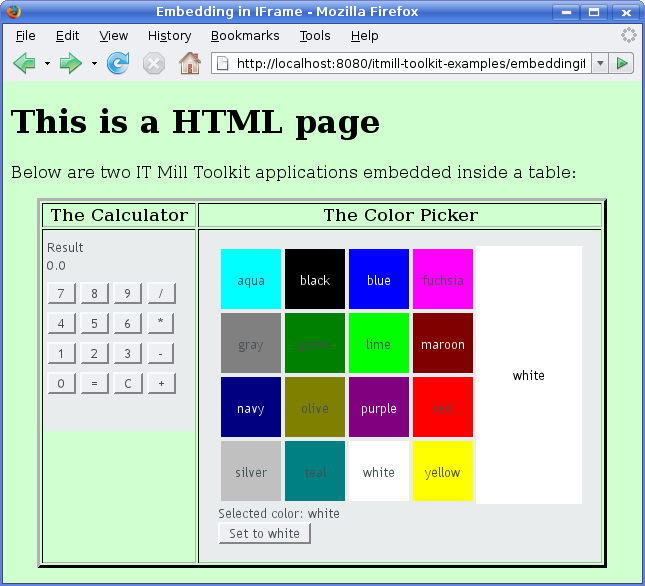
Below is a complete example of using the <iframe>
to embed two applications in a web page.
<!DOCTYPE html PUBLIC "-//W3C//DTD XHTML 1.0 Transitional//EN"
      "http://www.w3.org/TR/xhtml1/DTD/xhtml1-transitional.dtd">
<html xmlns="http://www.w3.org/1999/xhtml" >
  <head>
    <title>Embedding in IFrame</title>
  </head>

  <body style="background: #d0ffd0;">
    <h1>This is a HTML page</h1>
    <p>Below are two Vaadin applications embedded inside
       a table:</p>

    <table align="center" border="3">
      <tr>
        <th>The Calculator</th>
        <th>The Color Picker</th>
      </tr>
      <tr valign="top">
        <td>
          <iframe src="/vaadin-examples/Calc" height="200"
                  width="150" frameborder="0"></iframe>
        </td>
        <td>
          <iframe src="/vaadin-examples/colorpicker"
                  height="330" width="400"
                  frameborder="0"></iframe>
        </td>
      </tr>
    </table>
  </body>
</html>
The page will look as shown in Figure 12.5, “Vaadin Applications Embedded Inside IFrames” below.
You can embed almost anything in an iframe, which essentially acts as a browser window. However, this creates various problems. The iframe must have a fixed size, inheritance of CSS from the embedding page is not possible, and neither is interaction with JavaScript, which makes mashups impossible, and so on. Even bookmarking with URI fragments will not work.
Note also that websites can forbid iframe embedding by specifying an
X-Frame-Options: SAMEORIGIN header in the HTTP
response.
In the previous sections, we described the two basic methods for embedding
Vaadin applications: in a <div> element and in an
<iframe>. One problem with div embedding is that
it does not work between different Internet domains, which is a problem if
you want to have your website running in one server and your Vaadin
application in another. The security model in browsers effectively
prevents such cross-site embedding of Ajax applications by enforcing the
same origin policy for XmlHttpRequest calls, even if
the server is running in the same domain but different port. While iframe
is more permissive, allowing embedding almost anything in anywhere, it has
many disadvantanges, as described earlier.
The Vaadin XS (Cross-Site) add-on works around the limitation in div embedding by using JSONP-style communication instead of the standard XmlHttpRequests.
Embedding is done simply with:
  <script src="http://demo.vaadin.com/xsembed/getEmbedJs"
          type="text/javascript"></script>
This includes an automatically generated embedding script in the page, thereby making embedding effortless.
This assumes that the main layout of the application has undefined height. If the height is 100%, you have to wrap it inside an element with a defined height. For example:
 <div style="height: 500px;">
  <script src="http://demo.vaadin.com/xsembed/getEmbedJs"
          type="text/javascript"></script>
</div>
It is possible to restrict where the application can be embedded by using a whitelist. The add-on also encrypts the client-server communication, which is more important for embedded applications than usual.
You can get the Vaadin XS add-on from Vaadin Directory. It is provided as
a Zip package. Download and extract the installation package to a local
folder. Instructions for installation and further information is given in
the README.html file in the package.
Some restrictions apply. You can have only one embedded application in one page. Also, some third-party libraries may interfere with the communication. Other notes are given in the README.