Creating and Running a Project in Eclipse
- Creating a Maven Project
- Exploring the Project
- Compiling the Theme
- Coding Tips for Eclipse
- Setting Up and Starting the Web Server
- Running and Debugging
- Updating the Vaadin Framework Libraries
|
Tip
| If you are new to Vaadin, we suggest to start with "the tutorial". It also contains instructions how to set up Eclipse based development environment. |
This section gives instructions for creating a new Eclipse project using the Vaadin Plugin. The task will include the following steps:
-
Create a new project
-
Write the source code
-
Configure and start web server
-
Open a web browser to use the web application
We also show how you can debug the application in the debug mode in Eclipse.
This walkthrough assumes that you have already installed the Eclipse IDE, the Vaadin Plugin, and a development server, as instructed in "Installing the Eclipse IDE and Plugin".
Creating a Maven Project
Let us create the first application project with the tools installed in the previous section. First, launch Eclipse and follow the following steps:
-
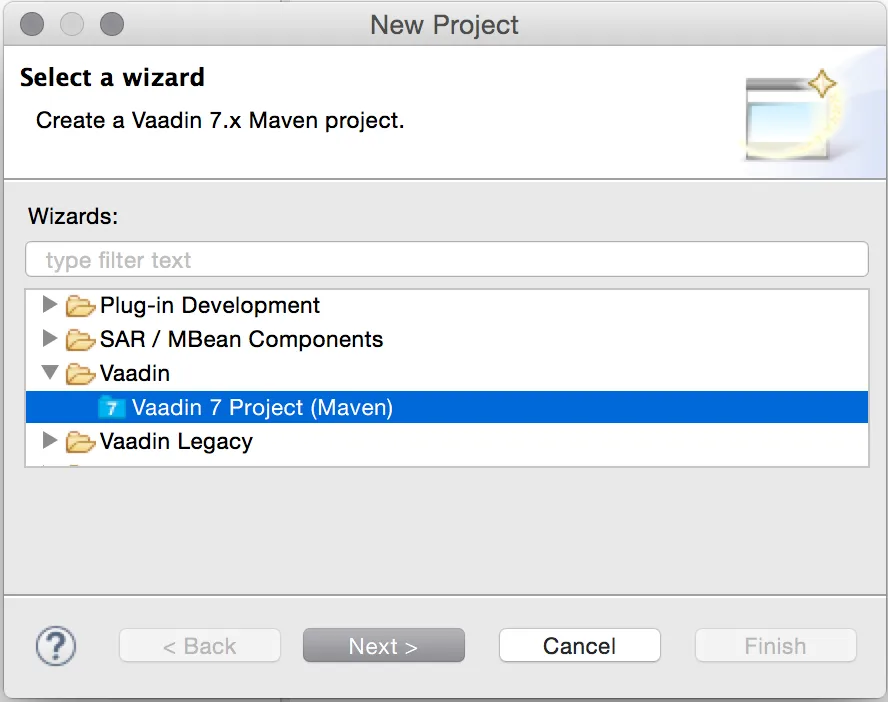
Start creating a new project by selecting from the menu .
-
In the New Project window that opens, select and click .
-
In the Select a Maven archetype step, you need to select the project type. To create a simple test project, select the Single-module Application Project.
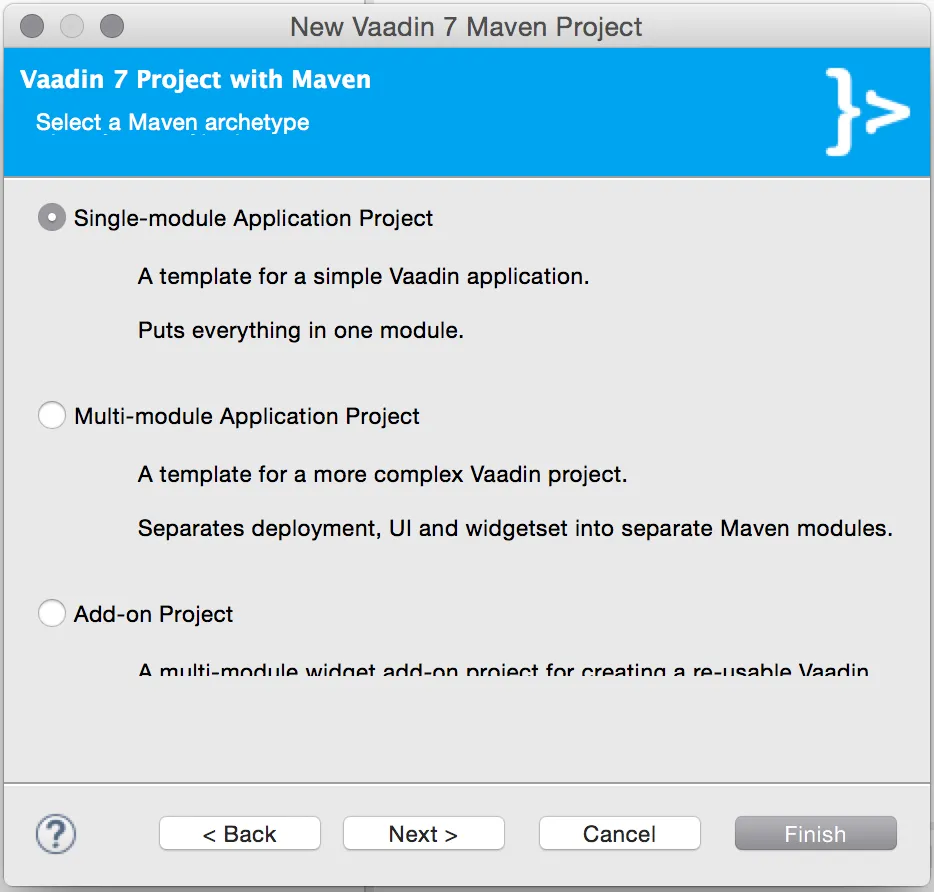
-
In the Specify archetype parameters step, you need to give at least the Group Id and the Artifact Id. The default values should be good for the other settings.
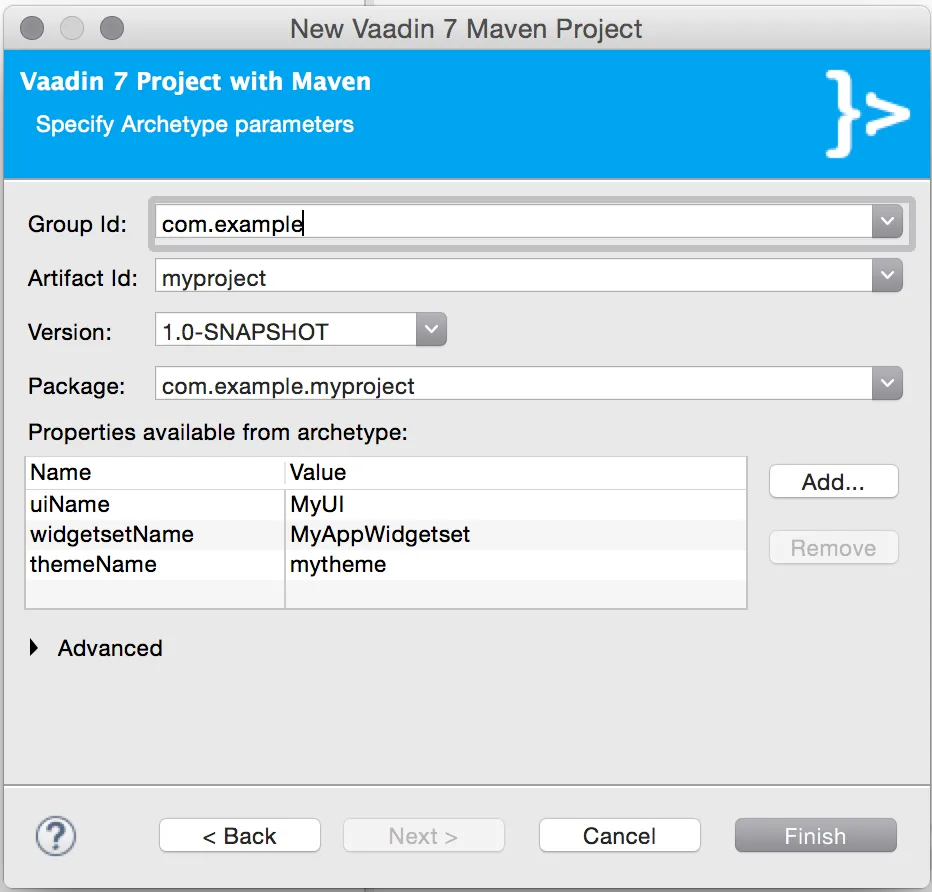
- Group Id
-
Give the project an organization-level identifier, for example, com.example. It is used as a prefix for your Java package names, and hence must be a valid Java package name itself.
- Artifact Id
-
Give the project a name, for example,
myproject. The artifact ID must be a valid Java sub-package name. - Version
-
Give the project a Maven compatible version number, for example,
1.0-SNAPSHOT. The version number should typically start with two or more integers separated with dots, and should not contain spaces. - Package
-
Give the base package name for the project, for example, com.example.myproject. It is by default generated from the group ID and the artifact ID.
- Properties
-
Enter values for archetype-specific properties that control naming of various elements in the created project, such as the UI class name.
You can change the version later in the pom.xml.
Finally, click to create the project.
Exploring the Project
After the New Project wizard exits, it has done all the work for you. A UI class skeleton has been written to the src directory. The project hierarchy shown in the Project Explorer is shown in A new Vaadin project.
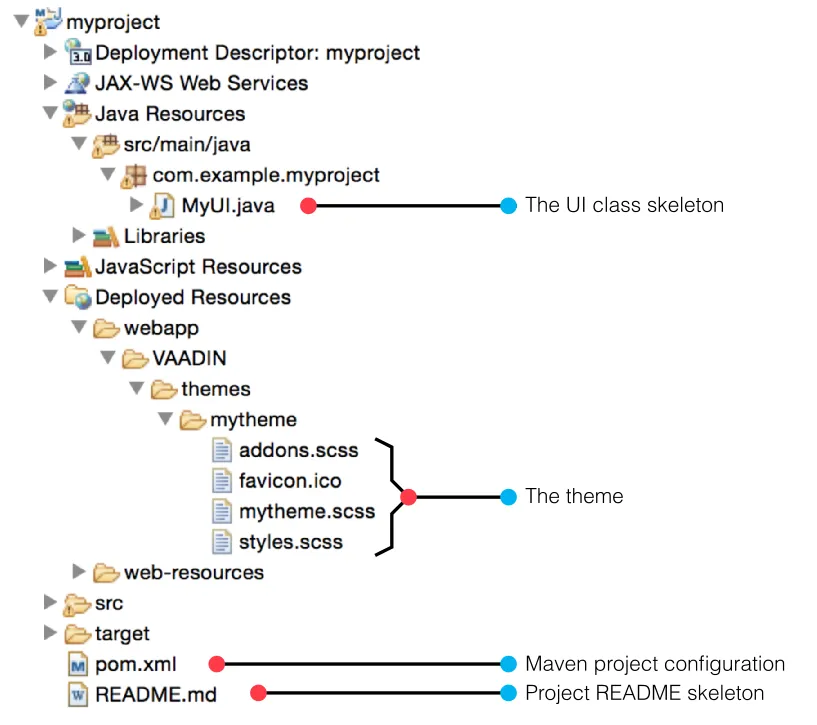
The Vaadin libraries and other dependencies are managed by Maven. Notice that the libraries are not stored under the project folder, even though they are listed in the virtual folder.
The UI Class
The UI class created by the plug-in contains the following code:
Source code
Java
package com.example.myproject;

import com.vaadin.ui.UI;
...

@Theme("mytheme")
public class MyUI extends UI {

    @Override
    protected void init(VaadinRequest vaadinRequest) {
        final VerticalLayout layout = new VerticalLayout();

        final TextField name = new TextField();
        name.setCaption("Type your name here:");

        Button button = new Button("Click Me");
        button.addClickListener(e ->
            layout.addComponent(new Label("Thanks " + name.getValue()
                    + ", it works!")));

        layout.addComponents(name, button);

        setContent(layout);
    }

    @WebServlet(urlPatterns = "/*", name = "MyUIServlet", asyncSupported = true)
    @VaadinServletConfiguration(ui = MyUI.class, productionMode = false)
    public static class MyUIServlet extends VaadinServlet {
    }
}
Compiling the Theme
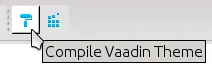
Before running the project for the first time, click the Compile Vaadin Theme button in the toolbar, as shown in Compile Vaadin Theme.
Coding Tips for Eclipse
Code Completion
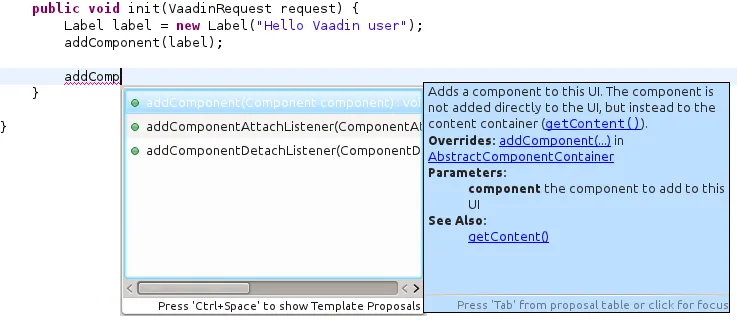
One of the most useful features in Eclipse is code completion. Pressing Ctrl+Space in the editor will display a pop-up list of possible class name and method name completions, as shown in Java Code Completion in Eclipse, depending on the context of the cursor position.
Generating Imports
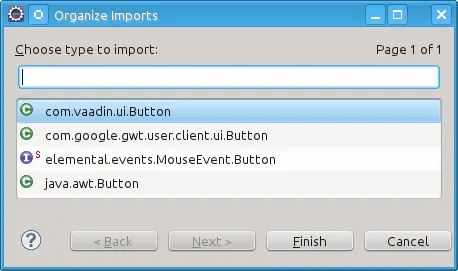
To automatically add an import statement for a class, such as Button, simply press Ctrl+Shift+O or click the red error indicator on the left side of the editor window. If the class is available in multiple packages, a list of the alternatives is displayed, as shown in Importing classes automatically.
For server-side Vaadin development, you should generally use the classes under the com.vaadin.ui or com.vaadin.server packages. You can not use client-side classes (under com.vaadin.client) or GWT classes for server-side development.
Setting Up and Starting the Web Server
Eclipse IDE for Java EE Developers has the Web Standard Tools package installed, which supports control of various web servers and automatic deployment of web content to the server when changes are made to a project.
Make sure that Tomcat was installed with user permissions. Configuration of the web server in Eclipse will fail if the user does not have write permissions to the configuration and deployment directories under the Tomcat installation directory.
Follow the following steps:
-
Switch to the Servers tab in the lower panel in Eclipse. List of servers should be empty after Eclipse is installed. Right-click on the empty area in the panel and select .
-
Select and set Server’s host name as localhost, which should be the default. If you have only one Tomcat installed, Server runtime has only one choice. Click .
-
Add your project to the server by selecting it on the left and clicking to add it to the configured projects on the right. Click .
-
The server and the project are now installed in Eclipse and are shown in the Servers tab. To start the server, right-click on the server and select Debug. To start the server in non-debug mode, select Start.
-
The server starts and the WebContent directory of the project is published to the server on http://localhost:8080/myproject/.
Running and Debugging
Starting your application is as easy as selecting myproject from the Project Explorer and then . Eclipse then opens the application in built-in web browser.
You can insert break points in the Java code by double-clicking on the left margin bar of the source code window. For example, if you insert a breakpoint in the buttonClick() method and click the button, Eclipse will ask to switch to the Debug perspective. Debug perspective will show where the execution stopped at the breakpoint. You can examine and change the state of the application. To continue execution, select Resume from Run menu.
Above, we described how to debug a server-side application. Debugging client-side applications and widgets is described in "Debugging Client-Side Code".
Updating the Vaadin Framework Libraries
Updating the Vaadin plugin does not update Vaadin Framework libraries. The libraries are project specific, as a different version might be required for different projects, so you have to update them separately for each project.
-
Open the pom.xml in an editor in Eclipse.
-
Edit the vaadin.version property to set the Vaadin version.
Updating the libraries can take several minutes. You can see the progress in the Eclipse status bar. You can get more details about the progress by clicking the indicator.
-
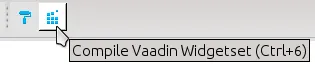
In Vaadin 7.6 and older: if you have compiled the widget set for your project, recompile it by clicking the Compile Vaadin Widgetset button in the Eclipse toolbar.
-
Stop the integrated Tomcat (or other server) in Eclipse, clear its caches by right-clicking the server and selecting Clean as well as Clean Tomcat Work Directory, and restart it.
If you experience problems after updating the libraries, you can try using .