8.4. Creating a Theme in Eclipse
The Eclipse plugin provides a wizard for creating custom themes. Do the following steps to create a new theme.
-
Select → → in the main menu or right-click the Project Explorer and select → . A window will open.
-
In the Select a wizard step, select the → wizard.
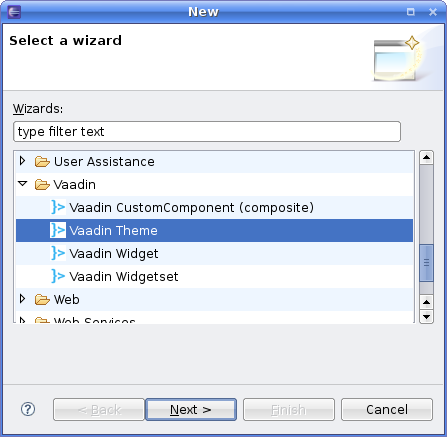
Click to proceed to the next step.
-
In the Create a new Vaadin theme step, you have the following settings:
- Project (mandatory)
-
The project in which the theme should be created.
- Theme name (mandatory)
-
The theme name is used as the name of the theme folder and in a CSS tag (prefixed with "
v-theme-"), so it must be a proper identifier. Only latin alphanumerics, underscore, and minus sign are allowed. - Modify application classes to use theme (optional)
-
The setting allows the wizard to write a code statement that enables the theme in the constructor of the selected application class(es). If you need to control the theme with dynamic logic, you can leave the setting unchecked or change the generated line later.
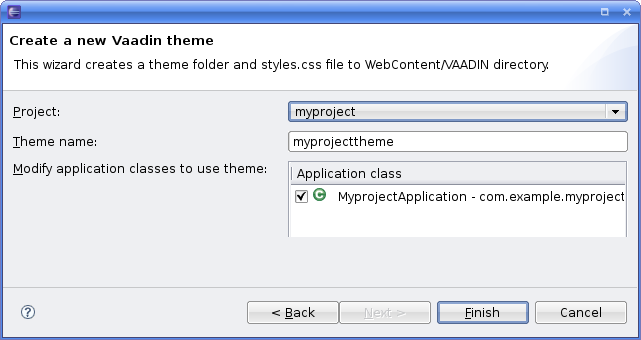
Click to create the theme.
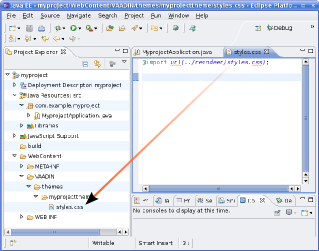
The wizard creates the theme folder under the
WebContent/VAADIN/themes folder and the actual style
sheet as styles.css, as illustrated in Figure 8.8, “Newly Created Theme”.
The created theme inherits a built-in base theme with an
@import statement. See the explanation of theme inheritance
in Section 8.3, “Creating and Using Themes”. Notice that the
reindeer theme is not located in the
widgetsets folder, but in the Vaadin JAR. See Section 8.3.2, “Built-in Themes” for information for serving the built-in
themes.
If you selected an application class or classes in the Modify
application classes to use theme in the theme wizard, the wizard
will add the following line at the end of the init()
method of the application class(es):
setTheme("myprojecttheme");
Notice that renaming a theme by changing the name of the folder will not
change the setTheme() calls in the application
classes or vise versa. You need to change such references to theme names in
the calls manually.